Table of Contents
Advertisement
Quick Links
Advertisement
Table of Contents

Related Manuals for WABECO CC-F1220 hs


Summary of Contents for WABECO CC-F1220 hs
-
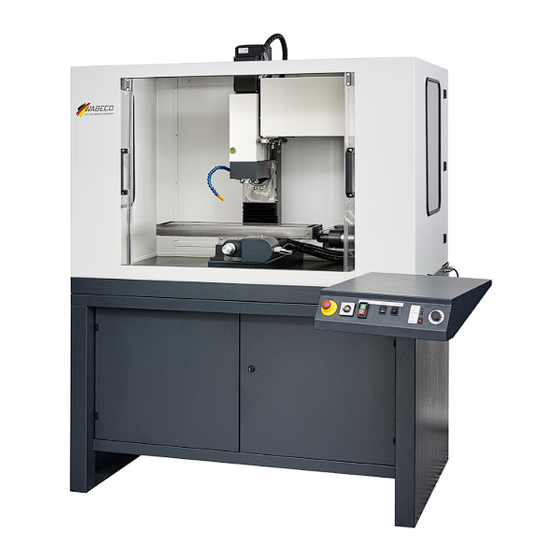
Page 1: Operating Instructions
Operating instructions CNC milling machine with tool changer CC-F1220 hs... - Page 2 Status at 06/2018 Dear Customer! With the purchase of the WABECO machine you have decided in favour of a quality tool. This machine has been manufactured with the greatest of care and subject to precise quality controls. These operating instructions are designed to help your to use your new machine safely and correctly.
-
Page 3: Table Of Contents
Index Declaration of conformity Important safety notes Intended use Improper and incorrect use Modifications to the machine Safety regulations for proper use Safety features Explanations of the symbols Delivery and set up Transporting the machine Installation of the machine Putting into operation Connecting compressed air supply Setting up and connecting the control computer Specifications regarding the machine... -
Page 4: Index
Index Control elements Drawings and legends 15.1 Milling head with pneumatic tension 15.2 Tensioning mechanism 15.3 Z-column with vertical slide 15.4 Spindle Z-axis 15.5 Cross slide support 15.6 Spindle X-axis 15.7 Spindle Y-axis 15.8 Limit switch X-axis 15.9 Limit switch Y-axis 15.10 Limit switch Z-axis 15.11... -
Page 5: Declaration Of Conformity
Werkzeug- und Maschinenfabrik mit Sitz in Remscheid und Neuerburg D-42871 Remscheid Postfach 12 01 61 Telefon: (02191) 597-0 Fax: (02191) 597-42 D-54673 Neuerburg WABECO Str. 1-10 Telefon: (06564) 9697-0 Fax: (06564) 9697-25 that the following named CNC milling machine Type: CC-F1220 hs... -
Page 6: Important Safety Notes
Important safety notes Intended use The milling machines described in these operating instructions are designed for the processing of metal, plastic and timber only. To ensure safe operation of the milling machines, the regulations set out in the chapter: „Safety regula- tions“... - Page 7 Important safety notes Safety regulations for proper use Only specially trained persons may operate the machine. The guarantee and warranty are voided if damages are caused by improper operation. We remind you that no liability will be accepted for damages caused by not observing these ope- rating instructions.
- Page 8 Important safety notes Safety regulations for proper use Remain with the machine until it has come to a standstill. Only have repairs carried out by a qualified specialist! Repair work may only be carried out by persons who are qualified for the relevant repairs and who are familiar with the appropriate health and safety requirements.
-
Page 9: Safety Features
Important safety notes Safety features In order to allow for safe working with our machines, we have provided the following safety installations and thus comply with the relevant European safety requirements ■ Machine safety cabin In CNC mode, the door to the machine safety cabin must be closed in order for the milling machine to work in CNC operation. -
Page 10: Explanations Of The Symbols
Important safety notes Explanations of the symbols With a measured noise level of 80 dB (A) at the workpla- ce the operator should wear Ear Protection. Caution: Always pull the power plug prior to any maintenance work! Read the operating instructions prior to initial operation or maintenance work! Caution: Dangerous electric voltage... -
Page 11: Delivery And Set Up
Delivery and set up The place of set up should be selected in such a way that ■ There is sufficient lighting ■ The electrical power supply with safety socket and earth are installed close enough to the machine that the power cable is not subject to any strain. The machine has to be screwed to the installation surface and/or provided with a safe stand by using level elements. -
Page 12: Installation Of The Machine
Delivery and installation Installation of the machine The appropriate bores for the installation of the machine safety cabin onto a WABECO machine base cabinet are already provided. The machine base cabinet ensures secure positioning of the milling ma- chine and/or machine safety cabin. -
Page 13: Putting Into Operation
Putting into operation ■ Use a dry cloth to remove the corrosion protection that was applied to all exposed parts for transport ■ In the event of marine impregnation of exposed parts, it is recommended you spray them with oil, allow it to work, and then remove the impregnation with a dry cloth. -
Page 14: Specifications Regarding The Machine
Specifications regarding the machine Identification of the model The precise model designation of your machine can be found on the type plate attached to the machine. Declaration of noise levels Declaration of noise levels in accordance with DIN EN ISO 3744 Emission values in idle Emission sound pressure level at the workplace at 50 %... -
Page 15: Technical Data
Specifications regarding the machine Technical data Working range Longitudinal travel X-axis 500 mm Transverse travel Y-axis 150 mm Vertical travel Z-axis 280 mm Distance milling table - tool spindle min. 110 mm - max. 390 mm Outreach tool spindle - Z-column 185 mm Machine precision True running accuracy of the tool spindle... - Page 16 Specifications regarding the machine Technical data Spindles High precision ball screws Stepper motors Maintenance-free Travel speed (rapid traverse) X-and Y-axis 30 - 1200 mm/min Travel speed (rapid traverse) Z-axis 30 – 800 mm/min Power bipolar Step angle 1.8°± 0.09 Resistance 0.3 Ohm High feed and acceleration values Plug...
-
Page 17: Dimensions
Specifications regarding the machine Dimensions... -
Page 18: Revolution Setting
Specifications regarding the machine Revolution setting Depending on the material (e.g. steel, aluminum), a specific cutting speed is required for milling. In order to always be able to select a cutting speed suitable for the material of the workpiece and the milling diameter, the revolutions of the tool spindle can be infinitely adjusted at the potentiometer from 100 to 7500 rpm in the 2.0 kW motor. -
Page 19: Electrical Equipment
Specifications regarding the machine Electrical equipment The frequency-regulated main drive motor is delivered already installed ■ The under-voltage trigger is integrated in the electronics of the motor ■ The ON/OFF switch has to be switched on again also after an interruption of power ■... - Page 20 Achieving optimum results and avoiding incorrect usage It is recommended that: ■ The borer should be fitted and tensioned with the key in such a way that the borer is positioned precisely between the three clamping jaws of the crown gear, quick clamping or collet chuck ■...
-
Page 21: Inserting Tools Into The Main Spindle
Inserting tools into the main spindle ■ The machine is exclusively designed for the application of tool brackets according to DIN 69871 (ISO30) in combination with tensioning bolts according to DIN 69872 (M12). ■ In order to ensure a tight fit of the tensioning bolts, they have to be screwed on with a certain torque. For this purpose, always observe manufacturer‘s instructions. -
Page 22: Loading An Empty Tool Magazine
Inserting tools into the main spindle Loading an empty tool magazine For the initial loading of the tool magazine, please proceed as follows: 1. Ensure that the machine is properly connected to a suitable power supply as well as a suitable compressed air supply. -
Page 23: Tool Exchange
Inserting tools into the main spindle Loading an empty tool magazine 23. Now insert the tool to be managed by the software as „T2“ into the main spindle as indicated and release the green button. 24. You should now once again be able to discern a small tensioning movement of the tool. 25. -
Page 24: Installation And Removal Of Collets
Installation and removal of collets Installation 1. Place the collet on a flat surface 2. Place the tensioning nut on the collet 3. Press the tensioning nut down against the collet until it „clicks“. 4. The collet can now move freely in the central take-up shoulder and does not fall out when the collet is turned upside down. -
Page 25: Adjustment Of The Dovetail Guides
Adjustment of the dovetail guides In order to achieve optimum results when adjusting the dovetail guides, the relevant dovetail guides should be cleaned and lubricated before you start (see „Lubricating the machine“) Further all tensioning devices and loose parts should be removed from the machine table. Pay attention to ensure that the clamping lever of the dovetail guide you wish to adjust is open. -
Page 26: Coolant Unit
Coolant unit Safety regulations for the handling of cooling lubricant 1. Pay particular attention to leaked coolant as this can quickly cause people to slip and caused acci- dents as a result. 2. Secure your coolant unit in such a way that it cannot be switched on by children. Persons who have not been trained may not operate the coolant unit. -
Page 27: Operating The Coolant Unit
Coolant unit Operating the coolant unit (4) Switch for coolant pump Switch position ( 0 ) → Pump switched off Switch position ( I ) → Pump switched on (Caution: Coolant flow is controlled with the coolant shut-off valve) Positioning the segmented coolant hose The flexible segmented hose (shown in blue) is made up of individually adjustable elements and can be shaped by hand or set as required. -
Page 28: Controlling The Flow Of Coolant Using The Coolant Shut-Off Valve
Coolant unit Controlling the flow of coolant using the coolant shut-off valve Coolant shut-off valve in the "open" position → Maximum coolant flow Rotation of the coolant shut-off valve clockwise → Flow is reduced Coolant shut-off valve in the "closed" position →... -
Page 29: Maintenance
Maintenance A long lifetime of the machine will depend on the appropriate care and maintenance. ■ All maintenance and repair works may only be executed with unplugged safety contact plug. ■ The machine must be cleaned after each use. ■ If the machine is set up in a wet room, all exposed parts must be oiled after each use to prevent corrosion. -
Page 30: Lubrication Of The Machine
Lubrication of the machine The lubrication process: ■ Reduces wear and friction ■ Increases the lifetime ■ Protects metal surfaces from corrosion We recommend: ■ A class 2NLGI multi-purpose grease for lubrication ■ A lubrication oil with a viscosity of 100 mm ²/s for oiling The machine is to be lubricated every 8 hours of operation in accordance with the lubrication plan. - Page 31 Lubrication of the machine...
-
Page 32: Maintenance Of Pressure Intensifier
Maintenance of pressure intensifier Following a certain operation period of the tool changer, it is possible that the tensioning mechanism (D) looses performance. This requires the maintenance of the tensioning mechanism. Maintenance is done in just a few steps: ■ Unscrew the four screws (7) of the cover (5) ■... -
Page 33: Operational Faults And The Elimination Of Such
Operational faults and the elimination of such Operational faults Possible cause Remedy Machine cannot be switched 230V voltage is not present Plug is not fitted correctly Check the fuse for the socket Emergency off switch not Unlock the emergency off switch unlocked Main spindle motor no longer Motor controller must be un-... -
Page 34: Control Elements
Operational faults and the elimination of such Operational faults Possible cause Remedy Tool overheated Tool blunt Sharpen tool or use a new tool Increased friction caused by Remove the shavings from the hole shaving build up in the tensio- more frequently (withdraw) ning groove of the tool Use a coated tool Wash the processing area with coo-... - Page 35 Control elements ■ A plug (2) is located at the rear of the control panel, which can be used to power a notebook or computer screen. ■ The control panel contains a storage compartment (1) which can hold the notebook power pack and/ or spare cables.
-
Page 36: Drawings And Legends
Drawings and legends 15.1 Milling head with pneumatic tension... - Page 37 Drawings and legends 15.1 Milling head with pneumatic tension Part no. Items Order no. Description 51500128-0003 Motor 2.0 kW 51004065-00031 Pulley pre-installed 51004025-0024 Pressure washer 16191200006020 Screw 51006650-0003 Flange 16191200008070 Screw 51006831-0037 Spindle housing 16112500008001 Washer 16191200008020 Screw 16191200008090 Screw 51505115 Clamping set 16191200006016...
-
Page 38: Tensioning Mechanism
Drawings and legends 15.2 Tensioning mechanism... - Page 39 Drawings and legends 15.2 Tensioning mechanism Part no. Items Order no. Description 51006605-0005 Pressure intensifier bracket 51004008-0004 Distance sleeve 16020930063035 Disk spring 16191200006030 Screw 51502220 O-ring 51003475-0003 Transmission piston 51502222 O-ring 51006600-0006 Low pressure cylinder 16191200006070 Screw 51504167 Plug-in connection 51006600-0007 Transmission cylinder 51502221...
-
Page 40: Z-Column With Vertical Slide
Drawings and legends 15.3 Z-column with vertical slide... - Page 41 Drawings and legends 15.3 Z-column with vertical slide Part no. Items Order no. Description 51401142-00011 Z-column 51001016-0007 Adjustment bar 51401147-0002 Vertical slide 16079770006060 Index bolt 16112500006001 Washer 16193400006000 16198500006000 16191200008025 Screw 16091300006016 Threaded pin 51507029 Tensioning lever 16063250005022 Push piece 16193400006000 51502520-0001 Bellows, Z-axis...
-
Page 42: Spindle Z-Axis
Drawings and legends 15.4 Spindle Z-axis... - Page 43 Drawings and legends 15.4 Spindle Z-axis Part no. Items Order no. Description 51505210-0003 Spindle with spindle nut 51502404-0001 Bevel gear 16073430004024 Spiral tensioning pin 51502112 Ball bearing 51004070-0001 Spindle flange 16191200006012 Screw 51004025-0025 Setting nut 51401422-0001 Motor holder 51401426-0001 Clamp motor holder 51401501-0001 Cover hood 51500122...
-
Page 44: Cross Slide Support
Drawings and legends 15.5 Cross slide support... - Page 45 Drawings and legends 15.5 Cross slide support Part no. Items Order no. Description 51401240-0001 Cross slide 51401140-0002 Base plate 51401146-00011 Adjustment bar 51001016-0001 Cross slide 51001016-0004 Adjustment bar 51502521 Bellows 16191200005020 Screw 16191200008020 Screw 51401121 Aluminum bracket 16191200004010 Screw 16198500006000 51507029 Clamping lever 16063250005040...
-
Page 46: Spindle X-Axis
Drawings and legends 15.6 Spindle X-axis... - Page 47 Drawings and legends 15.6 Spindle X-axis Part no. Items Order no. Description 51401155-00011 Spindle bearing 51502112 Ball bearing 16112500004000 Washer 16091300006006 Threaded pin 51006550-0005 Cover cap 51505210-0004 Spindle with spindle nut 16091300006010 Threaded pin 16112500006001 Washer 16191200006025 Screw 51500122 Multiphase motor 51004020-0002 Belt disk 16000002214010...
-
Page 48: Spindle Y-Axis
Drawings and legends 15.7 Spindle Y-axis... - Page 49 Drawings and legends 15.7 Spindle Y-axis Part no. Items Order no. Description 51401155-00011 Spindle bearing 51502112 Grooved ball bearing 16112500004000 Washer 16091300006006 Threaded pin 51006550-0005 Cover cap 51505211-0001 Spindle with spindle nut 16091300006010 Threaded pin 16112500006001 Washer 16191200006025 Screw 51500122 Multiphase motor 51004020-0002 Belt disk...
-
Page 50: Limit Switch X-Axis
Drawings and legends 15.8 Limit switch X-axis Part no. Items Order no. Limit switch 51500633-0001 Holding bracket 51401151-0001 Screw 16191200004025 Screw 16191200004010 Fanned washer 16167980004000 16193400004000 Mutter 15.9 Limit switch Y-axis Part no. Items Order no. Description 51500633-0001 Limit switch 16191200004020 Screw 16191200004016... -
Page 51: Limit Switch Z-Axis
Drawings and legends 15.10 Limit switch Z-axis Part no. Items Order no. Description 51500633-0001 Limit switch 16112500004000 Washer 16191200004025 Screw 51401548-0001 Holding bracket 16191200004010 Screw 16167980004000 Fanned washer 16193400004000 Fanned washer... -
Page 52: Tool Changer
Drawings and legends 15.11 Tool changer Part no. Items Order no. Description 51006475-00011 Support arm tool support disk 51402050-00011 Tool support disk 51006475-00021 Support arm gripper 51001075-00021 Gripper... -
Page 53: Tool Support Disk
Drawings and legends 15.12 Tool support disk Part no. Items Order no. Description 51402050-0001 Tool support disk 16143900008000 51507008 Pressure spring 51006540-0003 Tool bracket ISO30 16191200006020 Screw 16112500006001 Washer 16198500012000 16112500013000 Washer... -
Page 54: Support Arm Tool Support Disk
Drawings and legends 15.13 Support arm tool support disk... - Page 55 Drawings and legends 15.13 Support arm tool support disk Part no. Items Order no. Description 51006475-0001 Support arm tool support disk 16112500005000 Washer 16191200005016 Screw 16191200012070 Screw 16073430003014 Clamping pin 51004025-0005 Toothed wheel 51500122 Motor 16147100012003 Circlip 51004065-0002 Toothed wheel 16047100030000 Circlip 51502115...
-
Page 56: Gripper
Drawings and legends 15.14 Gripper... - Page 57 Drawings and legends 15.14 Gripper Part no. Items Order no. Description 51001075-0002 Gripper 51007350-0004 Clamping jaws gripper 51504162 Cylinder 51004014-0009 Activation pin 16196500004008 Countersunk screw 51401221 Jaw guide gripper 16112500004000 Pane 51504157 Plug-in connection 51504157 Spring...
-
Page 58: Support Arm Gripper
Drawings and legends 15.15 Support arm gripper... - Page 59 Drawings and legends 15.15 Support arm gripper Part no. Items Order no. Description 51006475-0002 Support arm 51504154 One-way restrictor 51504158 Reed switch 16112500004000 Pane 16191200004010 Screw 51504173 Switch with hex nut 16191200005030 Screw 51504161 Push-in fitting 51004025-0036 Adjustment nut 16047100030000 Circlip 51502115 Ball bearings...
-
Page 60: Machine Safety Cabin
Drawings and legends 15.16 Machine safety cabin Part no. Items Order no. Description 51401480-0001 Machine safety cabin 51402283 Perspex screen Cover (included in cabin) 51401481-0001 Control box 1152115 OEM control Rear sheet (included in cabin) 51401209-0001 Tool changer panelling 51505313 Clamping profile 51507006 Bow-type handle... -
Page 61: Coolant Unit
Drawings and legends 15.17 Coolant unit Part no. Items Order no. Description Coolant basin (included in cabin) Metal sheet (included in cabin) Metal sheet (included in cabin) Metal sheet (included in cabin) Metal sheet (included in cabin) Metal sheet (included in cabin) 51500119 Coolant submersible pump Metal sheet (included in cabin) -
Page 62: Control Panel
Drawings and legends 15.18 Control panel... - Page 63 Drawings and legends 15.18 Control panel Part no. Items Order no. Description 51401485-0001 Control panel 16191200004025 Screw 51501304 Symbol for mass connection 51500624-0001 Emergency button complete 51500600 Reverser 51500606 Emergency off switch 51500601 Toggle switch LED's with switch (included in control packet) 51500801-0001 Potentiometer 51500772...
-
Page 64: Support Arm Control Panel
Drawings and legends 15.19 Support arm control panel Part no. Items Order no. Description 51002130-00041 Base plate with joint to support arm 51002416-00021 Square pipe with joints 51004020-0024 Guide bush to support arm 51004020-0010 Disk Ø 20 x 8.1 x 3 16198500008000 Groove 16091300008030... -
Page 65: Machine Base Cabinet
Drawings and legends 15.20 Machine base cabinet Part no. Items Order no. Description 1120269 Machine base cabinet Door (included in machine base cabinet) Lock (included in machine base cabinet) Door (included in machine base cabinet) Hinge (included in machine base cabinet) -
Page 66: Circuit Diagram
Circuit diagram 16.1 Overall connection diagram This document shows all fixtures and fittings of the electrical equipment including the connections to the supply network. see legend for circuit diagrams 16.6... -
Page 67: Axis Motor And Limit Switch Connection X-, Y-, Z-Axis
Circuit diagram 16.2 Axis motor and limit switch connection X-, Y-, Z-axis see legend for circuit diagrams 16.6 16.3 NC-rotary table see legend for circuit diagrams 16.6 Direction of rotation - change green with brown... -
Page 68: Axis Motor And Limit Switch Connection V-, W-Axis
Circuit diagram 16.4 Axis motor and limit switch connection V-, W-axis see legend for circuit diagrams 16.6... -
Page 69: Sensors / Relay
Circuit diagram 16.5 Sensors / relay see legend for circuit diagrams 16.6... -
Page 70: Legend For Circuit Diagrams
Circuit diagram 16.6 Legend for circuit diagrams Black Pink Brown Blue Violet Green White Gray Yellow Orange Yellow/Green Socket 230 VAC Machine lamp Noise filter Lifting cylinder, grabber Coolant pump Axis motor 3H8221-624/6A, X-, Y-, Z-axis Axis motor W-axis, carrier disk V-axis, grabber Main spindle motor 2.0 KW, high-speed Axis motor, U-axis, CNC-rotary table... - Page 71 Circuit diagram 16.6 Legend for circuit diagrams Sensor, change position, grabber, V-axis Sensor, grabber, 3.5 degree V-axis Limit switch, grabber axis, V-axis Limit switch, tool caps, W-axis Sensor Reference W-Achse Lock for operator door with query Control valve, grabber, tool changer Control valve, grabber tongs, tool changer Control valve, tongs, tool changer X1-10...
-
Page 72: Pneumatic Diagram Tool Changer
Circuit diagram 16.7 Pneumatic diagram tool changer Code Name Code Name 3/2-directional valve, electromagnet Maintenance unit and compressed air pilot control 5/2-directional valve, electromagnet Cylinder, single-acting and compressed air pilot control 5/2-directional valve, electromagnet Cylinder, single-acting and compressed air pilot control Cylinder, double-acting One-way restrictor Cylinder, double-acting... -
Page 73: Nc-Rotary Table (Optional)
NC-rotary table (optional) The NC-rotary table serves to control the 4. axis in connection with nccad professional. The casing (1) possesses 4 tension notches which allow tensioning of the NC-rotary table in vertical and horizontal position. In order to be able to control the NC-rotary table with the control software, it has to be paramete- rised and activated in nccad professional as specified in the attached parameter sheet. -
Page 74: Setting The Axial Play Of The Nc-Rotary Table
NC-rotary table (optional) 17.3 Setting the axial play of the NC-rotary table The axial play of the rotary table (2) is set using the limiting ring (4). To set, proceed as follows: 7. Undo the four threaded pins (25) in the limiting ring (4) using a 2.5 mm Allen key. 8. -
Page 75: Removing The Nc Drive Unit
NC-rotary table (optional) 17.4 Removing the NC drive unit The following adjustment work on the NC-rotary table can only be carried out with the NC drive unit removed. The following section describes the removal of the NC drive unit. In order to mount the drive unit of the NC-rotary table after successful adjustment, carry out the same instructions in the reverse order. -
Page 76: Setting The Axial Play Of The Worm Shaft
NC-rotary table (optional) 17.5 Setting the axial play of the worm shaft The worm shaft (5) is in the eccentric tappet (7). The axial play of the worm shaft is set using the setting nuts (27). To set the axial play of the worm shaft, proceed as follows: 1. -
Page 77: Drawing And Legend
NC-rotary table (optional) 17.7 Drawing and legend Part no. Items Description Housing body Rotary table Worm wheel Stop ring Worm shaft Retaining ring Excenter Washer Locking screw Screw Feather key Fixing screw worm wheel Fixing screw stop ring Fixing screw retaining ring Adjustment screw retaining ring Adjustment screw stop ring... - Page 78 NC-rotary table (optional) 17.7 Drawing and legend Part no. Items Order no. Description 51007413-0001 Setting nut 16191200004016 Screw 16191200006025 Screw 51006291-0001 Motor plate 51502321 Gear belt 51004040-0009 Gear belt wheel 51401330 Motor cover 51501505 Counter nut 51501533 Cable screw 16193400005000 51500122 Stepping motor 51004010-0021...
Need help?
Do you have a question about the CC-F1220 hs and is the answer not in the manual?
Questions and answers