ResMed AirCurve 10 ST-A Clinical Manual
Hide thumbs
Also See for AirCurve 10 ST-A:
- User manual (21 pages) ,
- User manual (129 pages) ,
- Quick start manual (2 pages)
Table of Contents
Advertisement
Advertisement
Table of Contents
Troubleshooting

Related Manuals for ResMed AirCurve 10 ST-A


Summary of Contents for ResMed AirCurve 10 ST-A
- Page 1 Clinical guide English...
-
Page 2: Table Of Contents
Contents Welcome ........................... 1 Indications for use ........................ 1 AirCurve 10 ST-A ......................1 Contraindications........................1 Adverse effects ........................1 At a glance ..........................2 About your device ........................ 3 About the control panel ......................4 Therapy information......................... 5 CPAP mode.......................... 5 Bilevel modes ........................ - Page 3 Alarm log ........................... 25 Alarm types ........................25 Testing the alarms ......................25 Starting therapy ........................27 Stopping therapy ........................27 Viewing the Sleep Report ....................28 Sleep Report screen parameters ..................28 Cleaning and Maintenance ....................30 Disassembling ........................30 Cleaning ..........................
-
Page 4: Welcome
Indications for use AirCurve 10 ST-A The AirCurve 10 ST-A is indicated to provide non-invasive ventilation for patients weighing more than 30 lb (13 kg) with respiratory insufficiency or obstructive sleep apnea (OSA). The iVAPS mode is indicated for patients weighing more than 66 lb (30 kg). -
Page 5: At A Glance
• • SD card reader • Air10 oximeter adapter • Air10 USB adapter • Power Station II Air10 tubing elbow • Note: Make sure all parts and accessories used with the device are compatible. For compatibility information, refer to www.resmed.com. -
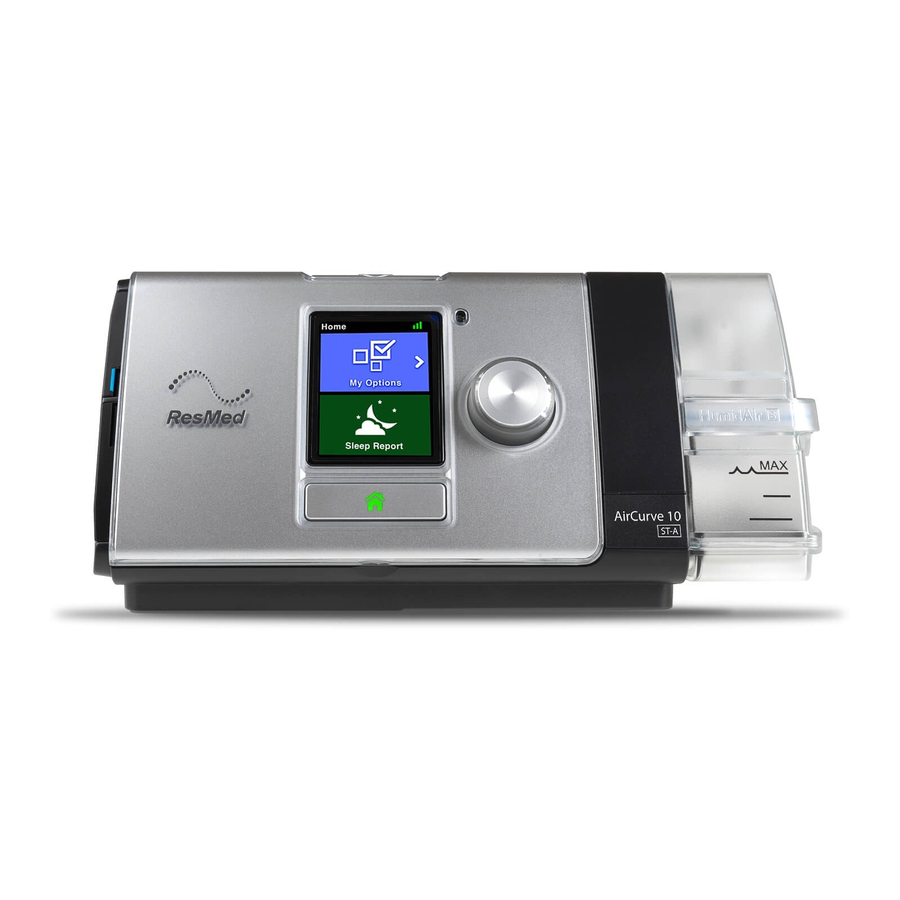
Page 6: About Your Device
About your device Air outlet HumidAir humidifier (water tub) Air filter cover Screen Retention clip Adapter cover Power inlet SD card cover Serial number and device number 10 LED alarm indicator English... -
Page 7: About The Control Panel
About the control panel Press to start/stop therapy. Start/Stop button Press and hold for three seconds to enter power save mode. Turn to navigate the menu and press to select an option. Dial Turn to adjust a selected option and press to save your change. -
Page 8: Therapy Information
Therapy information CPAP mode In CPAP mode, a fixed pressure is delivered. Bilevel modes The AirCurve 10 device assists spontaneous breathing by cycling between two pressures in response to the patient flow or a preset fixed time. The inspiratory positive airway pressure (IPAP, or the sum of EPAP and the pressure support level) assists inspiration. - Page 9 The following diagram illustrates these operating modes.
- Page 10 The common adjustable parameters for different modes in the AirCurve 10 device are shown below. Parameter Mode iVAPS CPAP Set Pressure IPAP EPAP Min PS Max PS Resp. Rate ...
-
Page 11: More About Ivaps
This contributes to iVAPS’ ability to maintain its ventilation target and so stabilise blood gases even during sleep. • iVAPS has ResMed’s robust leak compensation algorithm (Vsync). This promotes synchrony and comfort even during significant leak. -
Page 12: Target Alveolar Ventilation
Target alveolar ventilation iVAPS targets alveolar ventilation. Alveolar ventilation was chosen because gas exchange occurs at the alveoli level. Total ventilation includes the ventilation devoted to the conducting airways, whereas alveolar ventilation best represents the useful portion of ventilation that reaches the alveoli. Alveolar ventilation cannot be measured directly, so iVAPS estimates it using a height approximated value of anatomical deadspace as shown in the graph below. -
Page 13: Triggering And Cycling
Under normal conditions, the device triggers (initiates IPAP) and cycles (terminates IPAP and changes to EPAP) as it senses the change in patient flow. Patient breath detection is enhanced by ResMed's VSync automatic leak management. Note: In PAC mode, only Triggering is available. -
Page 14: Ticontrol - Inspiratory Time Control
TiControl - Inspiratory time control S, ST and iVAPS modes only Unique to ResMed bilevel devices, TiControl ™ allows the clinician to set minimum and maximum limits on the time the device spends in IPAP. The minimum and maximum time limits are set at either side of the patient’s ideal spontaneous inspiratory time, providing a ’window of opportunity’... -
Page 15: Rise Time Adjustment
Ti Min or the patient's normal inspiratory time. Leak management with VSync Using ResMed's VSync algorithm, the AirCurve 10 device monitors and compensates for leak by continuously and automatically adjusting the baseline flow. This enables reliable delivery of therapy pressure while maintaining patient-device synchrony. -
Page 16: Ramp Down
Ramp Down S, ST, T, PAC and iVAPS modes When stopping therapy, Ramp Down gives patients the option to gradually reduce pressure support and EPAP, providing a more comfortable transition to spontaneous breathing. Ramp Down gradually decreases the current pressure over a fixed 15 minute period until Start EPAP is reached. The device remains in CPAP mode at Start EPAP until the Start/Stop button is pressed to turn off therapy. -
Page 17: Climate Control Manual
Climate Control Manual Designed to offer more flexibility and control over settings, Climate Control Manual lets the patient adjust the temperature and humidity to the setting which is most comfortable for them. In Climate Control Manual, the Tube Temperature and the Humidity Level can be set independently however, rainout protection is not guaranteed. -
Page 18: Setup
6. Connect the free end of the air tubing firmly onto the assembled mask. See the mask user guide for detailed information. Recommended masks are available on www.resmed.com. Note: Ensure the device is placed so that the LED alarm indicator is clearly visible. -
Page 19: Supplemental Oxygen
Antibacterial filters increase resistance in the air circuit and may affect accuracy of displayed and delivered pressure, particularly at high flows. ResMed recommends using an antibacterial filter with a low impedance [eg, 2 cm H O (2 hPa) at 60 L/min], such as PALL (BB50T), Air Safety Filter without Luer Port (4222/702) or Air Safety Filter with Side Port 24966 (4222/701). -
Page 20: Adjusting The Clinical Settings
To exit the Clinical Menu: • Press and hold the dial and the Home button for three seconds. Select Exit Clinical Menu from the Home screen. • The device will automatically exit the Clinical Menu after 20 minutes of inactivity. Adjusting the clinical settings 1. -
Page 21: Setting The Date And Time
Setting the date and time Before you set up a new patient and start therapy for the first time, make sure you set the correct local date and time on the device. If you set the date and time after starting therapy, you may lose patient data. - Page 22 Parameter Description Mode Range PAC iVAPS CPAP EPAP Sets the pressure to be 3–[IPAP] cm H O, 0.2 cm H delivered to the patient increments when the device is cycled into expiration. Min PS Sets the minimum 0–20 cm H O (0–20 hPa), ...
-
Page 23: Comfort
Full Face / Nasal / Pillows / Pediatric used by the patient. Refer to Mask Device Compatibility List on www.resmed.com. Comfort Parameter Description Mode Range PAC iVAPS CPAP Ramp Time Set the ramp time. Off / 5–45 mins ... -
Page 24: Accessories
Accessories Parameter Description Range Tube Select the type of air tubing used by the patient. ClimateLineAir air tubing SlimLine / Standard / 3m is automatically detected when connected to the device. AB filter Select Yes if you attach an antibacterial filter. No / Yes Ext. -
Page 25: Options
Options Parameter Description Range Essentials Set the level of access available to the patient. On / Plus Confirm Stop Enable / disable the Confirm Stop feature. When enabled, if you press Off / On Start/Stop during therapy, the Confirm Stop screen will appear. If YES is selected, therapy stops. -
Page 26: Configuring Ivaps
Restore Reset to default settings (except for language, date and time). Yes / No Defaults Erase Data Erase all data stored on the device and the SD card. Settings, date, time Yes / No and device run hours are not affected. About View Run Hours, SN, SW, provider, type, service and signal strength of the device, CX number, humidifier and internal modem. -
Page 27: Entering The Target Values Manually
Entering the target values manually The Target Va can also be determined to adopt a Target Pt Rate using a settable Target Va parameter and patient height. Target Pt Rate should be based on the patients normal breathing rate. To enter target values: 1. -
Page 28: Viewing The Alarms
Viewing the alarms To view the alarm list: 1. From the Monitoring screen, turn the dial clockwise until the last Monitoring screen is displayed. 2. To view the alarm details, highlight the alarm and press the dial. Alarm log When an alarm is activated it is logged on the SD card. Ensure that the SD card is properly inserted into the device. - Page 29 Setup for testing the alarms: • Turn off all adjustable alarms. Set up the device with the air tubing attached, but no mask. • Set Ramp and SmartStart to Off . • To test the Power fail alarm: 1. Press Start/Stop. 2.
-
Page 30: Starting Therapy
4. Partially block the open end of the air tubing with your hand. The alarm activates within 10–20 seconds. WARNING In an environment where multiple devices are in use, the devices may have different alarm settings. Starting therapy 1. Direct the patient to fit their mask. 2. -
Page 31: Viewing The Sleep Report
Viewing the Sleep Report The Sleep Report screen shows sleep quality and mask seal status for the most recent therapy session. Turn the dial to scroll down to view more detailed usage data. The parameters displayed will depend on the therapy mode. Sleep Report screen parameters Parameter Description... - Page 32 Parameter Description Pressure Average inspiratory pressure during the selected period (95 percentile for each day; average of 95 percentile values for periods >1 day). Exp. Pressure Average expiratory pressure during the selected period (95 percentile for each day; average of 95 percentile values for periods >1 day).
-
Page 33: Cleaning And Maintenance
Cleaning and Maintenance It is important that the AirCurve 10 device is cleaned regularly to ensure optimal therapy. The following sections will help with disassembling, cleaning, checking and reassembling the device. WARNING Regularly clean the tubing assembly, water tub and mask for optimal therapy and to prevent the growth of germs that can adversely affect the patient's health. -
Page 34: Checking
Checking You should regularly check the water tub, air tubing and the air filter for any damage. 1. Check the water tub: • Replace it if it is leaking or has become cracked, cloudy or pitted. • Replace it if the seal is cracked or torn. •... -
Page 35: Reprocessing
WARNING • ResMed cannot give any assurance that deviations from the procedures listed in this guide, and their effect on the performance of the product, will be acceptable. • When using detergents, disinfectants or sterilization agents, always follow the manufacturer's instructions. -
Page 36: Reprocessing The Air Tubing
2. Run the detergent solution through the air tubing repeatedly until no contamination is visible. 3. Thoroughly rinse each component according to the detergent manufacturer's instructions. ResMed has tested the following detergents according to the manufacturer’s instructions: Detergent Water temperature... -
Page 37: High Level Chemical Disinfection
High level chemical disinfection Part Validated number of cycles CIDEX ® OPA Ortho-phthalaldehyde 0.55% at room temperature (approx. 68ºF or 20°C) for 12 minutes SlimLine ClimateLineAir Standard 1. Soak the air tubing in the chemical disinfectant specified above. Take care that no air bubbles are trapped inside the air tubing. 2. -
Page 38: Reprocessing The Water Tub And Air Outlet
Reprocessing the water tub and air outlet Disassembling The following instructions provide guidance on how to correctly disassemble the cleanable water tub and the air outlet. 1. Remove the water tub from the device, open it and discard any remaining water. 2. -
Page 39: Decontaminating
1. Clean all components with a soft bristled brush for one minute while soaking in detergent solution (see table below). Pay particular attention to all crevices and cavities. 2. Thoroughly rinse each component according to the detergent manufacturer's instructions. ResMed has tested the following detergents according to the manufacturer’s instructions: Detergent Water temperature... -
Page 40: Inspecting
Inspecting Perform a visual inspection of all components. If any visible deterioration is apparent (cracking, crazing, tears, etc), the water tub should be discarded and replaced. Slight discoloration of the silicone components may occur and is acceptable. Reassembling The following instructions provide guidance on how to correctly reassemble the air outlet and the water tub. -
Page 41: Packaging And Storage
Data management and therapy compliance For therapy management, the AirCurve 10 device stores patient therapy data on the device and has the ability to transfer it remotely to the care provider. Data can then be accessed via ResMed's AirView ™... -
Page 42: Data Storage
To remove the SD card: 1. Open the SD card cover. 2. Push in the SD card to release it. Remove the SD card from the device. Do not remove the SD card from the device when the SD light is flashing. To insert the SD card: 1. -
Page 43: Software Upgrade
Detailed data are stored on the SD card and can be viewed via ResScan or AirView. Examples of detailed data available are shown below. Detailed data Parameter Sampling rate ResScan AirView Apnea, hypopnea or desaturation events aperiodic aperiodic 1/2 Hz (2 sec) 1 min Inspiratory and expiratory pressure (cm H O/hPa) -
Page 44: Traveling
The AirCurve 10 device can be used on a plane as it meets the Federal Aviation Administration (FAA) requirements. Air travel compliance letters can be downloaded and printed from www.resmed.com. When using the device on a plane: •... - Page 45 Water tub may not be assembled correctly. Check for damage and reassemble the water tub correctly. Water tub may be damaged or cracked. Replace the water tub. Sleep report for the humidifier indicates Humidifier fault Contact your local ResMed dealer or ResMed office.
- Page 46 SmartStart is enabled, but the device does not automatically stop when the patient removes their mask Incompatible mask being used. Only use equipment recommended by ResMed. Contact ResMed or see www.resmed.com for more information. If the patient is using a nasal pillows mask with set pressure...
-
Page 47: Alarms Troubleshooting
Alarms troubleshooting The information listed below is based on having the appropriate alarm settings for the patient’s therapy. When an adjustable alarm is activated, re-confirm the alarm settings. Problem/possible cause Solution Display disappears and an alarm is activated Power failure. Remove the patient's mask and turn off supplemental oxygen (if applicale) until power is restored. -
Page 48: General Warnings And Cautions
• If you notice any unexplained changes in the performance of the device, if it is making unusual sounds, if the device or the power supply are dropped or mishandled, or if the enclosure is broken, discontinue use and contact your care provider or your ResMed Service Center. - Page 49 • The AirCurve 10 ST-A device has not been tested or certified for use in the vicinity of X-ray, CT or MRI equipment. Do not bring the AirCurve 10 ST-A device within 13 ft (4 m) of X-ray or CT equipment.
-
Page 50: Technical Specifications
Technical specifications Units are expressed in cm H O and hPa. 1 cm H O is equal to 0.98 hPa. 90W power supply unit AC input range: 100–240V, 50–60Hz 1.0–1.5A, Class II 115V, 400Hz 1.5A, Class II (nominal for aircraft use) DC output: 3.75A Typical power consumption:... - Page 51 Efficiency: >98% for ~7-8 micron dust; >80% for ~0.5 micron dust Aircraft use ResMed confirms that device meets the Federal Aviation Administration (FAA) requirements (RTCA/DO-160, section 21, category M) for all phases of air travel. Wireless module Technology used:...
- Page 52 Pneumatic flow path 1. Flow sensor 2. Blower 3. Pressure sensor 4. Mask 5. Air tubing 6. Water tub 7. Device 8. Inlet filter Design life Device, power supply unit: 5 years Cleanable water tub: 2.5 years Standard water tub, air tubing: 6 months Operator position The device is designed to be operated within arm's length.
- Page 53 Accuracy may be reduced by the presence of leaks, supplemental oxygen, tidal volumes <100 mL or minute ventilation <3 L/min. Measurement accuracy verified as per ISO 10651-6:2004 for Home Care Ventilatory Support Devices (Figure 101 and Table 101) using nominal ResMed mask vent flows. Measurement system uncertainties...
- Page 54 Device without humidification and SlimLine air tubing / Device with humidification and SlimLine air tubing Pressure [cm H O (hPa)] 10 BPM 15 BPM 20 BPM 0.5 / 0.5 0.5 / 0.5 0.8 / 0.8 0.5 / 0.5 0.5 / 0.5 0.8 / 0.8 0.5 / 0.5 0.5 / 0.5...
-
Page 55: Guidance And Manufacturer's Declaration Electromagnetic Emissions And Immunity
EMC information provided in this document. The AirCurve 10 ST-A device has been designed to meet EMC standards. However, should you suspect that the device performance (eg, pressure or flow) is affected by other equipment, move the device away from the possible cause of interference. - Page 56 Immunity test IEC60601-1-2 test Compliance level Electromagnetic environment — guidance level Surge ±1 kV differential ±1 kV differential Mains power quality should be that of a typical IEC 61000-4-5 mode mode commercial or hospital environment. ±2 kV common mode ±2 kV common mode Voltage dips, <5% Ut (>95% dip in 100V...
-
Page 57: Recommended Separation Distances Between Portable And Mobile Rf Communications Equipment And The Device
Recommended separation distances between portable and mobile RF communications equipment and the device The device is intended for use in an environment in which radiated RF disturbances are controlled. The customer or the user of the device can help prevent electromagnetic interference by maintaining a minimum distance between portable and mobile RF communications equipment (transmitters) and the device as recommended below, according to the maximum output power of the communications equipment. -
Page 58: Servicing
• Portable diagnostic/screening devices This warranty is only available to the initial consumer. It is not transferable. If the product fails under conditions of normal use, ResMed will repair or replace, at its option, the defective product or any of its components. - Page 59 ResMed shall not be responsible for any incidental or consequential damages claimed to have resulted from the sale, installation or use of any ResMed product. Some regions or states do not allow the exclusion or limitation of incidental or consequential damages, so the above limitation may not apply to you.
- Page 60 See ResMed.com for other ResMed locations worldwide. Air10, AirCurve, ClimateLine, SlimLine, HumidAir, SmartStart, ResScan, AirView and VPAP are trademarks and/or registered trademarks of the ResMed family of companies. For patent and other intellectual property information, see ResMed.com/ip. Actichlor is a trademark of Ecolab US Inc. Alconox is a trademark of Alconox Inc. Cavicide is a registered trademark of Metrex Research, LLC.
Need help?
Do you have a question about the AirCurve 10 ST-A and is the answer not in the manual?
Questions and answers