Table of Contents
Advertisement
Advertisement
Table of Contents

Related Manuals for ResMed AirSense S10


Summary of Contents for ResMed AirSense S10
- Page 1 Clinical guide English...
-
Page 2: Table Of Contents
Contents Welcome ............................1 Indications for use ........................1 AirSense 10 AutoSet ......................1 AirSense 10 AutoSet for Her .................... 1 AirSense 10 Elite ......................1 AirSense 10 CPAP ......................1 Contraindications ........................2 ... - Page 3 Reprocessing ..........................22 Surface disinfection ....................... 22 Reprocessing the air tubing ....................23 Disconnecting ......................... 23 Decontaminating ......................23 High level thermal disinfection ..................23 Inspecting ........................24 Packaging and storage ....................24 ...
-
Page 4: Welcome
The AirSense 10 AutoSet and AirSense 10 AutoSet for Her are ResMed's premium auto-adjusting pressure devices. The AirSense 10 Elite and AirSense 10 CPAP are ResMed's Continuous Positive Airway Pressure (CPAP) devices. WARNING Read this entire guide before using the device. -
Page 5: Contraindications
Filter: Hypoallergenic filter, standard filter ™ Air10 DC/DC converter SD card reader Air10 oximeter adapter Air10 USB adapter. Note: Make sure all parts and accessories used with the device are compatible. For compatibility information, refer to www.resmed.com. -
Page 6: About The Control Panel
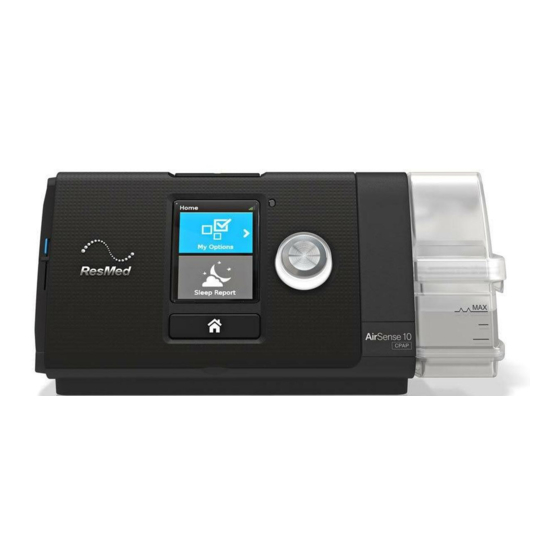
Air outlet Water tub Air filter cover Screen Power inlet Adapter cover Serial number and device number SD card cover About the control panel Press to start/stop therapy. Start/Stop button Press and hold for three seconds to enter power save mode. -
Page 7: Therapy Information
Therapy information The following modes are available on the AirSense 10 device: Device Modes available AutoSet AutoSet for Her CPAP AirSense 10 AutoSet AirSense 10 AutoSet for Her AirSense 10 Elite ... -
Page 8: Flow Limitation
Flow limitation As the upper airway begins to collapse, the shape of the inspiratory flow-time curve changes. The AirSense 10 recognizes and treats traditional as well as less common flow-limited breath wave forms. Snore Snoring is sound generated by vibrations of the walls of the upper airway. It is often preceded by flow limitation or a partial obstruction of the airway. -
Page 9: Autoset For Her Mode
AutoSet for Her mode AutoSet for Her mode is based on key aspects of ResMed’s AutoSet algorithm and delivers therapeutic responses tailored to the characteristics of female OSA patients. The AutoSet for Her is similar to ResMed’s AutoSet algorithm with the following modifications: ... -
Page 10: Cpap Mode
If two apneas occur within a minute, the pressure reached in response to the second apnea will become the new minimum treatment pressure until the next treatment session. Patients who use AutoSet for Her will still get the benefits of ResMed's AutoSet technology including improved sensitivity to flow-limitation and Central Sleep Apnoea Detection with Forced Oscillation Technique. -
Page 11: Cheyne-Stokes Respiration Detection
The device detects both obstructive and central sleep apneas (CSA). CSA detection uses the Forced Oscillation Technique (FOT) to determine the state of the patient’s airway during an apnea. When an apnea has been detected, small oscillations in pressure (1 cm H O peak-to-peak at 4 Hz) are added to the current device pressure. -
Page 12: Respiratory Effort Related Arousals Reporting
RERAs are periods of increasing respiratory effort which are terminated by an arousal. Increasing respiratory effort will be seen as airflow limitation.These flow-based RERA events are logged and stored as summary and/or detailed data and can then be viewed in one of ResMed's patient management systems. -
Page 13: Comfort Features
Comfort features Ramp Designed to make the beginning of treatment more comfortable, ramp is available in all modes. In AutoSet and AutoSet for Her mode, ramp time defines the period during which the pressure gradually increases from a lower more comfortable start pressure to the minimum treatment pressure before the auto-adjusting algorithm commences. -
Page 14: Climate Control
Climate Control Climate Control is an intelligent system that controls the humidifier and the ClimateLineAir heated air tubing to deliver constant, comfortable temperature and humidity levels during therapy. Designed to prevent dryness of the nose and mouth, it maintains the set temperature and relative humidity while you sleep. -
Page 15: Setup
5. Close the water tub and insert it into the side of the device. 6. Connect the free end of the air tubing firmly onto the assembled mask. See the mask user guide for detailed information. Recommended masks are available on www.resmed.com. -
Page 16: Supplemental Oxygen
Antibacterial filters increase resistance in the air circuit and may affect accuracy of displayed and delivered pressure, particularly at high flows. ResMed recommends using an antibacterial filter with a low impedance (eg, 2 cm H O at 60 L/min), such as PALL (BB50T), Air Safety Filter without Luer Port (4222/702) or Air Safety Filter with Side Port 24966 (4222/701). -
Page 17: Accessing And Exiting The Clinical Menu
Accessing and exiting the Clinical Menu You can access, view and set parameters relating to a patient's therapy and device configuration in the Clinical Menu. To access the Clinical Menu: Press and hold the dial and the Home button for three seconds. The Home screen is displayed with an unlock icon in the top right corner of the screen. -
Page 18: Setting The Date And Time
The settings can be changed in different ways depending on the type of screen: Turn the dial to edit live in Turn the dial to change Select from a list of options. the menu. the setting. Setting the date and time Before you set up a new patient and start therapy for the first time, make sure you set the correct local date and time on the device. -
Page 19: Comfort
Mask Select the type of mask used by Full Face / Nasal / Pillows the patient. Refer to Mask Device Compatibility List on www.resmed.com. Comfort Parameter Description Mode Range AutoSet AutoSet CPAP for Her ... -
Page 20: Options
Options Parameter Description Range Essentials Set the level of access available to the patient. On / Plus ™ SmartStart Enable / disable the SmartStart feature. If you enable the SmartStart Off / On feature, the device will start automatically when the patient breathes into the mask and then stop automatically when the patient removes the mask. -
Page 21: Starting Therapy
Starting therapy 1. Direct the patient to fit their mask. 2. Direct the patient to press Start/Stop, or if the SmartStart feature is enabled, direct them to breathe into their mask. Therapy will begin and the Sleep Report screen is displayed. The current treatment pressure is shown in green. -
Page 22: Sleep Report Screen Parameters
Sleep Report screen parameters Parameter Description Usage hours Number of hours the device has been used during the last session. Events (AHI) per hour Apneas and hypopneas measured per hour for one day. An apnea is when the respiratory flow decreases by more than 75% for at least 10 sec. A hypopnea is when the respiratory flow decreases to 50% for at least 10 sec. -
Page 23: Cleaning And Maintenance
Cleaning and Maintenance It is important that the AirSense 10 device is cleaned regularly to ensure optimal therapy. The following sections will help with disassembling, cleaning, checking and reassembling the device. Disassembling 1. Hold the water tub at the top and bottom, press it gently and pull it away from the device. 2. -
Page 24: Reassembling
3. Check the air filter and replace it at least every six months. Replace it more often if there are any holes or blockages by dirt or dust. To replace the air filter: 1. Open the air filter cover and remove the old air filter. The air filter is not washable or reusable. -
Page 25: Reprocessing
WARNING ResMed cannot give any assurance that deviations from the procedures listed in this guide, and their effect on the performance of the product, will be acceptable. When using detergents, disinfectants or sterilization agents, always follow the manufacturer's instructions. -
Page 26: Reprocessing The Air Tubing
2. Run the detergent solution through the air tubing repeatedly until no contamination is visible. 3. Thoroughly rinse each component according to the detergent manufacturer's instructions. ResMed has tested the following detergents according to the manufacturer’s instructions: Detergent Water temperature SlimLine ClimateLineAir Standard ™... -
Page 27: Inspecting
Inspecting Perform a visual inspection of the air tubing. If any visible deterioration is apparent (holes, tears or cracks etc), the air tubing should be discarded and replaced. Slight discoloration may occur and is acceptable. Packaging and storage Store in a dry, dust-free environment away from direct sunlight. Storage temperature: -4°F to 140°F (-20°C to 60°C). -
Page 28: Decontaminating
1. Clean all components with a soft bristled brush for one minute while soaking in detergent solution (see table below). Pay particular attention to all crevices and cavities. 2. Thoroughly rinse each component according to the detergent manufacturer's instructions. ResMed has tested the following detergents according to the manufacturer’s instructions: Detergent Water temperature... -
Page 29: Reassembling
Reassembling The following instructions provide guidance on how to correctly reassemble the air outlet and the water tub. To reassemble the air outlet 1. Hold the air outlet with the seal pointing to the left and the clip pointing forward. 2. - Page 30 To reassemble the water tub lid: 1. Insert one side of the lid into the pivot hole of the base. 2. Slide the other side down the ridge until it clicks into place. Packaging and storage Store in a dry, dust-free environment away from direct sunlight. Storage temperature: -4°F to 140°F (-20°C to 60°C).
-
Page 31: Data Management And Therapy Compliance
Data management and therapy compliance For therapy compliance management, the AirSense 10 device stores patient data on the device and has the ability to transfer it remotely to the care provider. Data can then be accessed via ResMed's ™ AirView compliance management solution. -
Page 32: Data Storage
Data storage The AirSense 10 device stores patient compliance data such as AHI, Total Hours Used and Leak. Detailed Data such as snore and pulse rate, as well as high resolution flow and pressure data, are stored on the SD card. Data can be transmitted to therapy management software either remotely via cellular communication, or via SD card. -
Page 33: Managing Patient Care
Make sure the patient has the appropriate power cord for the region of travel. For information on purchasing, contact your ResMed representative. When using an external battery, turn off the humidifier in order to maximize battery life. Do this by turning the Humidity Level to Off. -
Page 34: Troubleshooting
Troubleshooting If there is a problem, try the following suggestions. If you are not able to fix the problem, contact your local ResMed dealer or ResMed office. Do not open the device. General troubleshooting Problem/possible cause Solution Air is leaking from around the mask Mask may be fitted incorrectly. - Page 35 SmartStart is enabled, but the device does not automatically stop when the patient removes their mask Incompatible mask being used. Only use equipment recommended by ResMed. Contact ResMed or see www.resmed.com for more information. If the patient is using a nasal pillows mask with set pressure...
-
Page 36: Device Messages
All other error messages, for example, System fault, refer to user guide, Error 0XX An unrecoverable error has occurred on the device. Contact your local ResMed dealer or ResMed office. Do not open the device. English... - Page 37 CAUTION Use only ResMed parts and accessories with the device. Non-ResMed parts may reduce the effectiveness of the treatment and/or damage the device. Use only vented masks recommended by ResMed or by the prescribing doctor with this device.
-
Page 38: Technical Specifications
2:2007, for residential, commercial and light industry environments. It is recommended that mobile communication devices are kept at least 1 m away from the device. Information regarding the electromagnetic emissions and immunity of this ResMed device can be found on www.resmed.com, on the Products page under Service and Support. - Page 39 Efficiency: >98% for ~7-8 micron dust; >80% for ~0.5 micron dust Aircraft use ResMed confirms that device meets the Federal Aviation Administration (FAA) requirements (RTCA/DO-160, section 21, category M) for all phases of air travel. Wireless module Technology used:...
- Page 40 Humidifier performance The following settings have been tested at 71.6°F (22°C) ambient temperature: Mask Pressure RH output % Nominal system output AH , BTPS cm H Setting 4 Setting 8 Setting 4 Setting 8 >10 >10 >10 AH - Absolute Humidity in mg/L BTPS - Body Temperature Pressure Saturated Air tubing Air tubing...
-
Page 41: Symbols
Maximum dynamic pressure variation according to ISO 17510-1:2007 Device without humidification and Standard air tubing / Device with humidification and Standard air tubing Pressure (cm H 10 BPM 15 BPM 20 BPM 0.5 / 0.5 0.5 / 0.5 0.8 / 0.8 0.5 / 0.5 0.5 / 0.5 0.8 / 0.8... -
Page 42: Servicing
Portable diagnostic/screening devices This warranty is only available to the initial consumer. It is not transferable. If the product fails under conditions of normal use, ResMed will repair or replace, at its option, the defective product or any of its components. - Page 43 ResMed shall not be responsible for any incidental or consequential damages claimed to have resulted from the sale, installation or use of any ResMed product. Some regions or states do not allow the exclusion or limitation of incidental or consequential damages, so the above limitation may not apply to you.
- Page 44 See www.resmed.com for other ResMed locations worldwide. For patent and other intellectual property information, see www.resmed.com/ip. Air10, AirSense, AirView, AutoSet, ClimateLine, EPR, HumidAir, ResScan, SlimLine and SmartStart are trademarks of ResMed Ltd. AutoSet, ClimateLine, EPR, SlimLine and SmartStart are registered in U.S. Patent and Trademark Office. Actichlor is a trademark of Ecolab US Inc. Alconox is a trademark of Alconox Inc.
Need help?
Do you have a question about the AirSense S10 and is the answer not in the manual?
Questions and answers