Advertisement
Quick Links
16713
STOP!
STOP!
Call Us First!
DO NOT RETURN TO STORE.
For immediate help with assembly or product information
call our toll-free number:
1-800-577-9663
or email:
customerservice@backyardproductsllc.com
Our staff is ready to provide assistance.
April through October M - F 8:00 AM to 7:00 PM EST
Saturday 8:30 AM to 4:30 PM EST
November through March M - F 8:00 AM to 5:00 PM EST
Advertisement

Related Manuals for Heartland PASADENA PAVILION 10x12

Summary of Contents for Heartland PASADENA PAVILION 10x12
- Page 1 16713 STOP! STOP! Call Us First! DO NOT RETURN TO STORE. For immediate help with assembly or product information call our toll-free number: 1-800-577-9663 or email: customerservice@backyardproductsllc.com Our staff is ready to provide assistance. April through October M - F 8:00 AM to 7:00 PM EST Saturday 8:30 AM to 4:30 PM EST November through March M - F 8:00 AM to 5:00 PM EST...
- Page 2 (This page intentionally left blank.)
-
Page 3: Assembly Manual
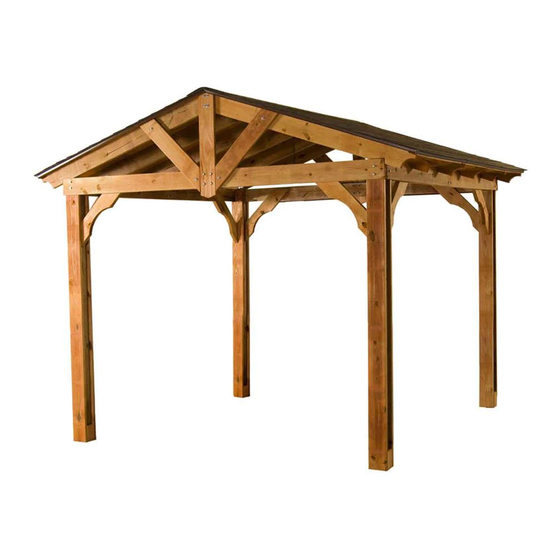
10/18/2011 16713 ASSEMBLY MANUAL A Backyard Products Company PASADENA PAVILION 10' x 12' (304,8 x 365,8 cm) KEEP THIS MANUAL FOR FUTURE REFERENCE I MPO RTA N T ! READ INSTRUCTIONS THOROUGHLY PRIOR TO BEGINNING ASSEMBLY. BEFORE YOU BEGIN • BUILDING RESTRICTIONS AND APPROVALS Be sure to check with local building department and homeowners association for speciÀ... - Page 4 TOOLS Required Optional ❑ Tape Measure ❑ Drill / Driver ❑ Socket/Ratchet ❑ Tool Belt/ ❑ 1/4" Drill Bit ❑ 7/16" Socket Nail Pouch ❑ 1/2" Socket ❑ 5/16" Drill Bit ❑ Hammer ❑ 9/16" Socket ❑ 9/16" Drill Bit ❑...
- Page 5 PARTS IDENTIFICATION AND SIZES PARTS LIST INVENTORY YOUR PARTS before you begin. We suggest sorting parts by the category they are listed in. 3-3/8 x 3-3/8 x 88-7/8" (8,6 x 8,6 x 225,7 cm) 7/8 x 5-3/8 x 83-3/4" (2,2 x 13,7 x 212,7 cm) 7/8 x 3-3/8 x 11-7/8"...
- Page 6 HARDWARE IDENTIFICATION AND SIZES HARDWARE PARTS LIST FASTENERS 3/8" x 4" Hex Bolt (10,2 cm) 3/8" x 3"Hex Bolt (7,6 cm) 3/8" Lock Washer 3/8" Flat Washer 3/8" T-nut 3/8" x 2-1/2"Hex Bolt (6,4 cm) 3/8" x 4-1/2" Lag Bolt (11,4 cm) 5/16"...
-
Page 7: Care And Maintenance
PAVILION DIMENSIONS / ADDITIONAL MATERIALS 83-3/4" (212,7 cm) 105-1/4" (267,3 cm) INSIDE POST 129-1/2" (328,9 cm) INSIDE 139-3/4" 116" POST (355 cm) (294,6 cm) OUTSIDE OUTSIDE POST POST COMPLETING YOUR PAVILION You will need these additional materials: 3-TAB SHINGLES...........6 Bundles DRIP EDGE ............54 Feet (16,32 m) To validate your warranty and prevent water damage to roof panels you must install... - Page 8 LEVELING AND ANCHORING OPTIONS There are multiple ways to anchor your Pavilion. A few methods are shown below. Anchoring materials are not included in this kit. Check anchoring methods with your local building department. 134-5/8" (341,9 cm) MEASUREMENT TO CENTER OF 110-5/8"...
- Page 9 CORNER POSTS PARTS REQUIRED: 2-1/2" (6,4 cm) 3-3/8 x 3-3/8 x 88-7/8" (8,6 x 8,6 x 225,7 cm) 1/8" (0,3 cm) 7/8 x 5-3/8 x 83-3/4" (2,2 x 13,7 x 212,7 cm) Drill Bit BEGIN Position post face on top of post 7/8 x 5-3/8 x 83-3/4"...
- Page 10 SIDE HEADERS PARTS REQUIRED: 3/8" x 3" Hex Bolt (7,6 cm) 1-3/8 x 5-3/8 x 69" (3,5 x 13,7 x 175,3 cm) 3/8" Lock 1-3/8 x 5-3/8 x 92-7/8" (3,5 x 13,7 x 235,9 cm) 3/8" Flat Washer Washer 3/8" T-nut BEGIN Pound T-nuts into back of 1-3/8 x 5-3/8 x 92-7/8"...
- Page 11 SIDE HEADERS PARTS REQUIRED: 2-1/2" (6,4 cm) Ensure entire assembly is flush and straight, and stiffen assembly with eight 2-1/2" screws from Sister Header side as shown. FINISH Repeat steps 1-4 to build second Side Header Assemby. 2-1/2" (6,4 cm) Screws Step 4 Flush...
- Page 12 FRONT / BACK HEADERS PARTS REQUIRED: 7/8 x 5-3/8 x 32-3/4" (2,2 x 13,7 x 83,2 cm) 3/8" x 4" Hex Bolt (7,6 cm) 1-3/8 x 5-3/8 x 58-3/8" (3,5 x 13,7 x 148,3 cm) 3/8" Lock 3/8" Flat Washer Washer 3/8"...
- Page 13 FRONT / BACK HEADERS PARTS REQUIRED: 2-1/2" (6,4 cm) Ensure entire assembly is flush, straight and square, and stiffen assembly with eight 2-1/2" screws from Sister Header side as shown. FINISH Repeat steps 1-4 to build second Header Assembly. 2-1/2" (6,4 cm) Screws Step 4 90º...
- Page 14 SIDE WALL ASSEMBLY PARTS REQUIRED: 3/8" x 4 1/2" Lag Bolt (11,4 cm) 1/4" (0,6 cm) 3/8" Lock Washer Drill Bit 3/8" Flat Washer BEGIN Arrange parts as shown on a level surface. Both post assemblies should be approximately parallel and Á ush at each end. Place Side Header assembly on top of post and Á...
- Page 15 CORNER BRACES PARTS REQUIRED: 3/8" x 4 1/2" Lag Bolt (11,4 cm) 3/8" Lock Washer 1-3/8 x 5-3/8 x 33" 1/4" (0,6 cm) 3/8" Flat Washer (3,5 x 13,7 x 83,8 cm) Drill Bit 2-1/2" (6,4 cm) BEGIN Ensure posts are still square to Header. Spread glue on portion of Corner Brace that will connect to Side Header.
- Page 16 ERECTING SIDE WALLS PARTS REQUIRED: 2-1/2" (6,4 cm) 1-3/8 x 5-3/8 x 71" (3,5 x 13,7 x 180,3 cm) TEMPORARY SUPPORT BEGIN Raise two Side Walls upright on level ground. Help will be needed to position and to hold them in place. Maintain square as Front Headers are attached: For safety, temporarily screw rafters to uprights to secure assembly in vertical position.
- Page 17 FRONT HEADER ATTACHMENT PARTS REQUIRED: 3/8" x 4 1/2" Lag Bolt (11,4 cm) 3/8" Lock Washer 1/4" (0,6 cm) 3/8" Flat Washer Drill Bit Place Front Header between the two Side Header and Post Assemblies. All posts must be vertical, and all corners square. Place Front Header onto top of Post Faces, as shown, so the edges are Á...
- Page 18 CORNER BRACE ATTACHMENT PARTS REQUIRED: 3/8" x 4 1/2" Lag Bolt (11,4 cm) 3/8" Lock Washer 2-1/2" (6,4 cm) 3/8" Flat Washer 1-3/8 x 5-3/8 x 33" (3,5 x 13,7 x 83,8 cm) 1/4" (0,6 cm) Drill Bit BEGIN Check all parts are square and level. Ensure diagonal measurements are equal. Spread glue on portion of Corner Brace that will connect to Headers (Fig.
- Page 19 RIDGE BEAM PARTS REQUIRED: 7/8 x 5-3/8 x 94-3/8" (2,2 x 13,7 x 239,7 cm) 1-5/8" (4,1 cm) 7/8 x 5-3/8 x 46-3/8" (2,2 x 13,7 x 117,8 cm) BEGIN Layout two sets of 94-3/8" and 46-3/8" Ridge Beams as shown. Apply glue to underside and attach beams using two 1-5/8"...
- Page 20 RIDGE BEAM INSTALLATION PARTS REQUIRED: 1/4" Lock Washer 1/4" x 3" Lag Bolt (7,6 cm) 1/4" Flat Washer 2-1/2" (6,4 cm) BEGIN Place Ridge Beam Á ush to Center Braces (Fig. A), and tack in place with temporary 2-1/2" screw from Center Brace into each end of Ridge Beam. Drill 3/16"...
- Page 21 FRONT/ BACK GABLE RAFTERS PARTS REQUIRED: 3" (7,6 cm) 1-1/4" (3,2 cm) 1-3/8 x 5-3/8 x 71" (3,5 x 13,7 x 180,3 cm) Simpson Hanger x4 BEGIN Place Rafter on Front Header Assembly so notch is tight against top of Post Face (Fig.
- Page 22 RAFTERS PARTS REQUIRED: 3" (7,6 cm) 1-1/4" (3,2 cm) 1-3/8 x 5-3/8 x 71" (3,5 x 13,7 x 180,3 cm) Simpson Hanger x10 BEGIN Place Rafter CENTERED on previously marked side headers and ridge beam. Secure to ridge beam using two 3" screws as shown (Fig. A, B). Hold Rafter tight and Á...
- Page 23 GABLE END RAFTER BRACES PARTS REQUIRED: 5/16" x 3" Lag Bolt (7,6 cm) 5/16" Flat Washer 5/16" Lock Washer 7/8 x 5-3/8 x 31-7/8" (2,2 x 13,7 x 81 cm) 3/8" x 2-1/2" Hex Bolt (6,4 cm) 1/4" (0,6 cm) Drill Bit 3/8"...
- Page 24 RAFTER END TRIM PARTS REQUIRED: 1-5/8" (4,1 cm) 7/8 x 3-3/8 x 70-3/8" (2,2 x 8,6 x 178,8 cm) 1/8" (0,3 cm) Drill Bit BEGIN Position 7/8 x 3-3/8 x 70-3/8" Rafter Trim on notches at end of rafter and Á...
- Page 25 ROOF PANELS PARTS REQUIRED: 2" (5,1 cm) 5/8 x 48 x 96" (1,6 x 121,9 x 243,8 cm) Roof panels may cause serious injury until securely fastened. ¸ BEGIN You must square the roof by attaching one panel À rst. You will use the panels’ long edge as a lever to bring your roof into square.
- Page 26 ROOF PANELS PARTS REQUIRED: x176 2" (5,1 cm) 5/8 x 23-7/8 x 96" 5/8 x 23-7/8 x 48" (1,6 x 60,6 x 243,8 cm) (1,6 x 60,6 x 121,9 cm) 5/8 x 47-7/8 x 48" (1,6 x 121,6 x 121,9 cm) Keep spacing between the center of the rafters at the lower edge of the panel and secure with one 2"...
- Page 27 POST SKIRTS PARTS REQUIRED: 2" (5,1 cm) 7/8 x 3-3/8 x 11-7/8" (2,2 x 8,6 x 30,2 cm) ONCE MOUNTING HARDWARE IS INSTALLED, FOLLOW THE STEPS BELOW TO INSTALL POST SKIRT BEGIN When using post mounting hardware, there will be interference from protruding screws or nail heads.
- Page 28 TOUCH-UP AND MAINTENANCE PARTS REQUIRED: Washcloth Micro-Shade MICRO-SHADE KIT NOT INCLUDED Sandpaper Concentrate We have included a bottle of MicroShade concentrate stain and sandpaper for minor touch-up of your pavilion. The included bottle contains a MicroShade stain concentrate. It must be diluted before use. It’s important to follow these instructions carefully to avoid over-applying stain.
- Page 29 DRIP EDGE AND SHINGLES SHINGLES & DRIP EDGE x 1 Box x 2 Boxes RooÀ ng Nails 1" (2,5 cm) RooÀ ng Nails 3/4" (1,9 cm) To validate your warranty and prevent water damage to roof panels you must install Drip Edge as speciÀ...
- Page 30 SHINGLES - NOT INCLUDED - • Follow directions provided by manufacturer and these instructions. Familiarize yourself with a 3-Tab Shingle. Notch Notch SHINGLE NAIL PATTERN 1/2" 1" Sealing Strip (1,3 cm) 1" (2,5 cm) (2,5 cm) Half A Rain Slot Full Rain Slot NAILS NEVER DRIVE FASTENERS INTO OR ABOVE SEALING STRIPS.
- Page 31 SHINGLES continued... Install second row of shingles Á ush at top of À rst row's rain slots. Ensure 1" overhang or Á ush to drip edge at front, stagger each row. FRONT OF BACK OF SHED SHED 1" (2,5 cm) Notch Flush with rain slots.
- Page 32 SHINGLES - RIDGE CAP • You will À nish off the top of the roof with a ridge cap made from shingles. BEGIN Cut shingles into THREE pieces. Hint: Use cut-off pieces À rst. 2" 2" (5,1 cm) (5,1 cm) 2"...
- Page 33 SHINGLES - RIDGE CAP continued... Continue installing ridge cap to back of roof. Make sure there is 4" between the shingle-color and edge of shingles. Trim cap off Á ush to shingles When you have 4" minimum of shingle color cut one piece to cap your roof. Install Á...
- Page 34 WARRANTY Limited Conditional Backyard Storage Solutions, LLC warrants the following: Every product is warranted from defects in workmanship and manufacturing for one year. Warranty * All hardware and metal components are warranted for two years. Trim is warranted for 10 years. Waferboard siding and sheathing is warranted for two years.
Need help?
Do you have a question about the PASADENA PAVILION 10x12 and is the answer not in the manual?
Questions and answers