
Related Manuals for Kauber INCEILING XL


Summary of Contents for Kauber INCEILING XL
- Page 1 IN-CEILING PROJECTION SCREEN INSTALLATION MANUAL INCEILING XL...
- Page 2 KAUBER InCeiling is a premium-class electrical projection screen designed for installation in suspended ceilings. Its versatile aluminium housing has been designed to facilitate installation. In the Tensioned version, the screen is additionally equipped with a special system improving flatness of the projection surface.
-
Page 3: Installation
INSTALLATION 1. Carefully unpack the contents of the box with particular attention for the wooden blodks protecting the contents of the package. Remember that one of them is a template for drilling installation holes – do not dispose of it before completion of the installation works! 2. - Page 4 Figure 2a 4. Hold the template and then pass the marker through the holes in the block and mark the hole drilling points on the fixed (primary) ceiling (Figure 3). Figure 3 5. Using a ø10 drilling bit, drill rawlplug holes in the marked points. Holes shall be drilled in specific sequence, starting from number 1 (as marked on the template block) (Figure 4).
- Page 5 Figure 4 6. Using the rawlpugs and screws included in the package fix the mounting brackets to the primary ceiling (Figure 5). 7. NOTE! The rawlplugs and screws supplied in the installation kit can only be used for structural ceiling materials (concrete, Suporex or other similar materials). Shall the screen be mounted on other types of material, choose appropriate plugs and screws.
- Page 6 8. Cut the threaded rods to the right length (calculated using the formula below): Distance between the primary ceiling and Rod length - 10 cm the bottom edge of the suspended ceiling 9. After cutting the adequate lengths of the rods, screw them into the sockets in the mounting brackets and then counter-lock with the M8 nuts (Figure 6).
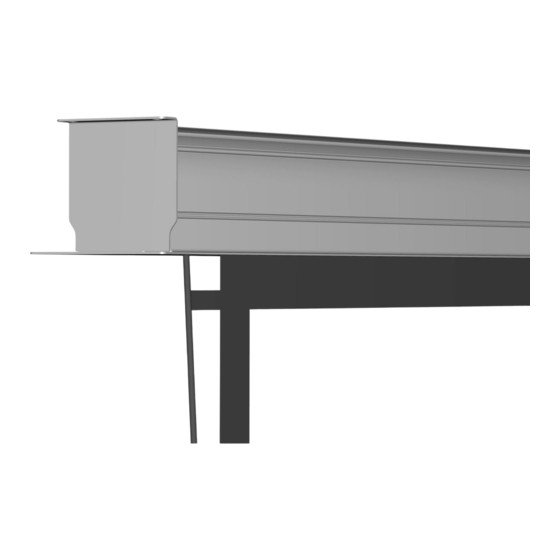
- Page 7 11. After connecting the power supply (see page 11), slide the screen housing on the rods and use the box wrench to tighten each of the M8 nuts. Check for stability of the entire assembly (Figure 8). A correctly installed screen shall be levelled in all planes. Adjust the position by turning the installation nuts in or out on the adequate threaded rods.
- Page 8 12. Upon delivery, the screen is preset to limit positions specified in the order. Shall the screen positions be too low or too high, the end positions can be adjusted using the special key provided in the installation package. NOTE! Only qualified persons may perform the end-position adjustments. All adjustments made shall be the sole responsibility of the user.
- Page 9 14. After installation of the screen, remove the scratch protection foil from the housing (Figure 12, Figure 12a). Figure 12 Figure 12a...
-
Page 10: Electrical Wiring
ELECTRICAL WIRING NOTE! Only certified electricians shall be allowed to make the electrical connections of the screen. Before installing the main housing of the screen, route the power supply cable to the installation point and then connect it to the screen following wiring diagram A (Figure 13A) or wiring diagram B in case of screens with built-in wireless control modules (Figure 13B). - Page 11 Wiring of the control switch panel (provided in the kit) (Control switch panel provided in the screen installation kits without wireless controller) -11-...
- Page 12 Wiring of the switch control panel to the screen Description Color Hot (L) Brown Neutral (N) Blue Earthing Yellow/Green Black Brown -12-...
-
Page 13: Technical Specifications
F = A + 262 mm G = A + 292 mm J = A + 140 mm K = 50 mm INCEILING XL + BLACK FRAME + BLACK STRIPE A- Active screen width B- Active screen height C = A + 100 mm... - Page 14 INCEILNG XL + TENSIONERS A- Active screen width B- Active screen height C = A + 100 mm D = B + 100 mm F = A + 392 mm G = A + 422 mm J = A + 270 mm K = 50 mm INCEILNG XL + TENSIONERS + BLACK STRIP...
- Page 15 Thank you for choosing a KAUBER screen Feel free to purchase other products of the KAUBER brand -15-...
Need help?
Do you have a question about the INCEILING XL and is the answer not in the manual?
Questions and answers