
Related Manuals for ChargePoint Express 200


Summary of Contents for ChargePoint Express 200
- Page 1 ChargePoint Express 200 (CPE200) Charging Station Installation Guide ChargePoint, Inc. 254 E. Hacienda Ave. Campbell, CA 95008-6617 USA US toll free: +1-877-370-3802 Document P/N: 75-001150-01 Rev. 5 www.chargepoint.com...
- Page 2 Warranty information and disclaimer Your use of, or modification to, the ChargePoint® Charging Station in a manner in which the ChargePoint® Charging Station is not intended to be used or modified will void the limited warranty. Other than any such limited warranty, the ChargePoint products are provided “AS IS,”...
-
Page 3: Table Of Contents
Contents Introduction Before you begin ....................1-1 Grounding instructions ..................1-1 Specifications ..................... 1-2 Handle with care ....................1-3 Note on electrical power ................1-4 Planning your installation Charging cable proximity ................2-1 Conduit locations ..................... 2-2 Above ground conduit ................... 2-3 Stand alone charging station ...............2-4 Adjacent walls or obstacles ................ - Page 4 ChargePoint Charging Stations Preparing the Station for Activation on ChargePoint Before You Start ....................4-1 Overview of Steps ....................4-1 Pinpoint the Station ..................4-2 Complete the Post-installation Checklist ..........4-4 Maintaining the CPE200 General exterior maintenance ..............5-1 Maintenance checklist ..................5-1 Snowfall areas ....................5-1 Preparing a concrete pad for the CPE200 Before you start ....................
-
Page 5: Introduction
National Electrical Code, ANSI/NFPA 70 or CEC for Canada. Before you begin • Take the online training course to become a ChargePoint Certified Installer and get a login for ChargePoint. If you do not complete this training, you will be unable to complete the installation process. •... -
Page 6: Specifications
ChargePoint Charging Stations Specifications Electrical Input Input Power 52kW @ 3 phase and 250W @ 1 phase Input Voltage, Charging 480VAC 3 phase Input Voltage, Control & Communication 120VAC 1 phase Input Current 63A @ 480VAC, 2A @ 120VAC Input Frequency... -
Page 7: Handle With Care
Shipping Weight 728 lb (330 kg) NOTE: ChargePoint, Inc. reserves the right to alter product offerings and specifications at any time without notice, and is not responsible for typographical or graphical errors that may appear in this document. Handle with care Always transport and store the CPE200 in its original packaging in a horizontal position. -
Page 8: Note On Electrical Power
ChargePoint Charging Stations Note on electrical power The CPE200 requires both 480 VAC, 3 phase (L1, L2, L3, G) and 120 VAC, single phase (L, N, G). The 120 VAC can be brought from a nearby 208/120V panel or, if allowed by the local AHJ, a low power transformer can be set at the installation site, eliminating the need for a second conduit run and second disconnect switch. -
Page 9: Planning Your Installation
Planning your installation The CPE200 is fastened to a prepared concrete pad using four anchor bolts (not supplied). The pad must be level and flat and be a minimum of 2,500 PSI. The concrete pad must support the size and weight of the CPE200 and comply with all applicable codes. -
Page 10: Conduit Locations
NOTE: For your convenience you can also purchase a prefabricated plywood template directly from ChargePoint (Part Number CPE200T-BT). Locate mounting studs and conduit within .05” tolerance. The 1-1/4” threaded female coupling must be flush with the surface of the pad and precisely located relative to the mounting studs. -
Page 11: Above Ground Conduit
Planning your installation Above ground conduit Above ground conduit is recommended only in locations such as a parking garage where it may be impossible to accommodate service wiring from underground. When service wiring is supplied above the ground or down a wall, it enters the CPE200 through a cutout on the left side of the back fan panel. -
Page 12: Stand Alone Charging Station
ChargePoint Charging Stations Stand alone charging station When installing the CPE200 use the minimum distances shown below. NOTES: CONCRETE PAD FOOTING TO BE 24” BELOW GRADE MINIMUM. CONCRETE TO BE 3000 PSI MINIMUM. TOP OF PAD TO BE 6” ABOVE ASPHALT. -
Page 13: Adjacent Walls Or Obstacles
Planning your installation Adjacent walls or obstacles When installing the CPE200 with its back or side against or near a wall or other obstacle, use the minimum distances shown below. NOTES: CONCRETE PAD FOOTING TO BE 24” BELOW GRADE MINIMUM. CONCRETE TO BE 3000 PSI MINIMUM. -
Page 14: Back-To-Back Charging Stations
ChargePoint Charging Stations Back-to-back charging stations When installing two CPE200’s back-to-back, ensure a minimum distance of 12 inches (300 mm) between them. To ensure this minimum distance, position the concrete pad using the dimensions shown below. -
Page 15: Installing The Cpe200
Installing the CPE200 After the pad is prepared and surveyed by a qualified engineer as described in the previous section, you are ready to begin the installation process. Important: The CPE200 has an IP65 and NEMA Type 3R electronics enclosure rating. However, because the enclosure must be opened during installation, the installation process must be performed during dry calm weather or under cover to prevent ingress of moisture or debris. -
Page 16: Materials You Will Need
Wire 4 AWG & 14 AWG • Service disconnect switches as required Overview of Steps Important: Before installing the CPE200, contact ChargePoint to make arrangements for system commissioning. Unpacking the shipping crate (see page 3-3) Positioning the CPE200 vertically (see page 3-4) -
Page 17: Step 1: Positioning And Unpacking The Shipping Crate
• Check that the crate is in good condition and that the CPE200 is not damaged. If damage is evident, make a formal complaint to the transporter and notify ChargePoint at 1-877-850-4562. Remove the packaging. Unscrew all crate fasteners and remove all panels and loose packaging. -
Page 18: Step 2: Positioning The Cpe200 Vertically
ChargePoint Charging Stations Step 2: Positioning the CPE200 vertically DANGER: Never stand the CPE200 vertically without having it attached to lifting equipment using the lifting straps. The CPE200 must remain attached to lifting equipment until the mounting bolts have been installed (as described on page 3-7). -
Page 19: Step 3: Removing The Fan
Installing the CPE200 Step 3: Removing the fan With the CPE200 in the vertical position, remove the front and rear fan covers by unfastening the two security screws and washers from each fan cover using the supplied 5 mm Pin Hex tool. Store the fasteners in safe place. - Page 20 ChargePoint Charging Stations IMPORTANT: Do not pull on the power connector and cooling hoses. Reach behind the fan and disconnect the fan’s power connector by pressing on the release latch at the front of the connector and pulling down. Release the two cooling hoses located behind the fan by pulling the quick release sleeve. A drop or two of coolant may come out when the connectors are uncoupled.
-
Page 21: Step 4: Removing The Shipping Baseplate
Installing the CPE200 Step 4: Removing the shipping baseplate Unscrew the four bolts to remove the CPE200 from its shipping baseplate. 3 - 7... -
Page 22: Step 5: Securing The Cpe200 To The Prepared Concrete Pad
ChargePoint Charging Stations Step 5: Securing the CPE200 to the prepared concrete pad NOTE: The concrete pad MUST BE level and prepared as described in Appendix A. Ensure the concrete is completely dry before proceeding with this step. Do not use spacers under the CPE200. -
Page 23: Step 6: Removing The Front Panel
Installing the CPE200 Step 6: Removing the front panel Using the 5 mm hex L key (supplied), remove the 6 security screws and washers on the front panel, starting with the bottom screws first. The left side of the front panel is attached with three cables. It is not necessary to disconnect this wiring. -
Page 24: Step 7: Removing The Service Covers
ChargePoint Charging Stations Step 7: Removing the service covers Using an 8 mm (5/16”) nut driver, remove the ten service hatch nuts and remove the hatch to access the service cover. Using the supplied 3mm hex tool, remove the two service cover screws and service cover. -
Page 25: Step 8: Running Conduit And Service Wiring
Installing the CPE200 Step 8: Running conduit and service wiring Running underground service wiring NOTE: For above-ground service wiring instructions, see Running above-ground service wiring: on page 3-12. Assemble the supplied 6” conduit nipple, coupling, and flex adapter using silicone sealant on all threaded connections. - Page 26 ChargePoint Charging Stations Running above-ground service wiring: NOTE: Install above-ground service wiring only when it is impossible to run conduit underground, such as in a parking garage or similar structure. Run the conduit into the cut out area in the back fan panel: Run the 1-1/4”...
-
Page 27: Step 9: Connecting The Wiring
Installing the CPE200 Step 9: Connecting the wiring WARNING! This step must be performed by a qualified electrician. Pull the 480V and 120V wiring through the 1-1/4” conduit and into the service hatch. Place the gray ferrite ring over all wires. Connect the green ground wire to the ground terminal attached to the chassis. -
Page 28: Step 10: Preparing The Cpe200 For Operation
ChargePoint Charging Stations Step 10: Preparing the CPE200 for operation Remove the lifting straps by pulling them from the top of the CPE200. It is not necessary to remove the top cover. Using the supplied 2.5 mm L-wrench, reattach the service cover. - Page 29 Installing the CPE200 Before applying power, verify: All electrical connections are clean and tight. The electrical enclosures are clean and free of wire strands and metal shavings. All cooling lines have been re-connected. The cooling fan power connector has been re-connected. The mounting hardware is tightened to 100 ft lbs.
-
Page 30: Step 11: Verifying Correct Operation
The 2-line display shows start and stop instructions, session information, and potential error information. If the station does not power up as expected, confirm that the wiring has been properly connected. If the station has been properly wired yet does not power up as expected, contact ChargePoint at 1-877-850-4562. 3-16... -
Page 31: Preparing The Station For Activation On Chargepoint
The exact location (to the parking space) where the CPE200 is physically installed. • A smart phone with Internet access. • Installer account information (user name and password) on ChargePoint. This was provided upon completion of training. Overview of Steps Pinpoint the station (see page 4-2). -
Page 32: Pinpoint The Station
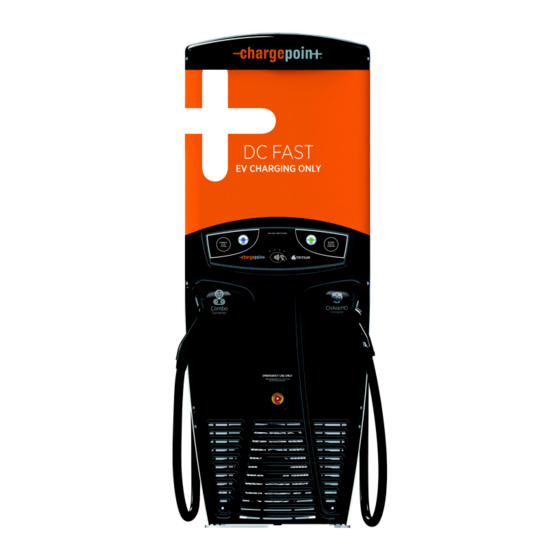
ChargePoint Charging Stations Pinpoint the Station To activate the CPE200 and allow drivers to find the station on the ChargePoint map, you must “pinpoint” the station. Follow these steps Using your smart phone, navigate to http://m.chargepoint.com. Log in with your Installer credentials. - Page 33 Take a picture of the station using your smart phone, then scroll down to Upload a Station Picture and choose the station picture. 10 Add helpful information for drivers, such as ‘Upstairs in parking garage’ or ‘By west mall entrance’. Touch SUBMIT to pinpoint the CPE200 on the ChargePoint map. 4 - 3...
-
Page 34: Complete The Post-Installation Checklist
Station shows cellular signal strength on the display of at least 2 bars. Signal strength ________ Confirm the RFID reader is functional. Tap ChargePoint card provided and verify that RFID responds. No error messages on the station display ... -
Page 35: Maintaining The Cpe200
Maintaining the CPE200 The maintenance listed in this chapter can be performed by the station owners. All other servicing must be performed by ChargePoint’s qualified service personnel. General exterior maintenance Regular cleaning is recommended to avoid accumulation of debris/dust/dirt on or around the unit. Wipe surfaces with a soft cloth dampened with water, or use alcohol based cleaner for harder to remove marks. - Page 36 ChargePoint Charging Stations...
-
Page 37: Preparing A Concrete Pad For The Cpe200
CPE200 can be properly positioned so that the cable can reach the charge ports of any EV parked in the space. You will need NOTE: The materials listed here can be purchased from ChargePoint by ordering a CPE200 Concrete Mount Kit (CPE200T-CCM). • Prefabricated plywood template available from ChargePoint (Part Number CPE200T-BT) Bolt Installation Template (1)—Stapled into the center fold of this document or available for download from... -
Page 38: Overview Of Steps
The concrete pad must be reinforced with rebar and must measure at least 48” wide x 32” long (front to back), and 24” deep (below grade). This is approximately 1 cubic yard of concrete. ChargePoint recommends that the top of the pad be 6” above grade. - Page 39 Add rebar as necessary. Dowel to adjacent concrete if applicable. If you have not purchased a pre-fabricated plywood template from ChargePoint (Part Number CPE200T-BT), fabricate one using template guide 75-001152-01.
-
Page 40: Mounting To An Existing Concrete Surface
ChargePoint Charging Stations Mounting to an existing concrete surface IMPORTANT! When installing on existing concrete: • Review the dimensions of the existing concrete slab. For you to safely mount a CPE200, the concrete must be at least 8” thick. At this thickness, all of the mounting bolts must be positioned at least 18” from the front and rear edges and at least 24”... - Page 41 Preparing a concrete pad for the CPE200 Follow these steps: If you have not purchased a pre-fabricated plywood template from ChargePoint (Part Number CPE200T-BT), fabricate one using template guide 75-001152-01. Download the guide from https://www.chargepoint.com/support-guides/ Make 5/8” diameter holes in the template at the bolt locations. Tolerance is +/- .05”.
- Page 42 ChargePoint Charging Stations...
-
Page 43: B Using A Transformer To Derive 120V
Using a transformer to derive 120V Wiring requirement The CPE200 requires a separate 120V circuit for the communication and control circuitry. A small 480V to 120V step down transformer can be set near the disconnect switch, which will provide these advantages: No separate conduit run is needed for the 120V power. -
Page 44: Wiring Diagram
ChargePoint Charging Stations Wiring diagram... - Page 48 ChargePoint, Inc. 254 E. Hacienda Ave. Campbell, CA 95008-6617 USA US toll free: +1.877.370.3802 Installer Support: +1.877.850.4562 www.chargepoint.com...
Need help?
Do you have a question about the Express 200 and is the answer not in the manual?
Questions and answers