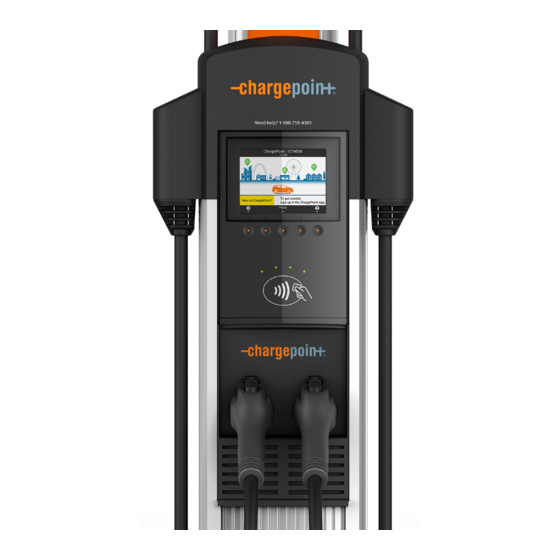
ChargePoint CT4000-HD Replacement Instructions Manual

ChargePoint CT4000-HD Replacement Instructions Manual

Head assembly

Advertisement

CT4000-HD (Head Assembly)
REPLACEMENT INSTRUCTIONS
Ordering Information and Shipping Specifications
Single Output (non-gateway)
Single Output (gateway)
Dual Output (non-gateway)
Dual Output (gateway)
Parts Included
GATEWAY STATIONS ONLY:
The shipping box also includes an envelope
containing a SIM card. When replacing an existing
gateway head assembly, you will need to destroy
and discard its SIM card and use this new one in the
replacement head.
*Depending on your ordering option, the head assembly may have only one charging cable.
You Will Need
Needle Nose Pliers
#2 Phillips screwdriver
A ChargePoint card that has been activated on ChargePoint and set up for using
paid charging stations. Go to www.chargepoint.com to create a driver account and
order a ChargePoint card.
CT4010-HD
CT4010-HD-GW
CT4020-HD
CT4020-HD-GW
Head assembly*
A T25 L-wrench is attached to the side
of the head assembly with a security
tag
Rubber plugs
(4 - two are spares)
Keep the spare activation label. It contains
important information that you must
provide to allow the new head assembly to
be activated on ChargePoint (see page 11).
A duplicate label is attached to the head
assembly.
25 lbs
27" x 20" x 11.75"
25 lbs
27" x 20" x 11.75"
31 lbs
27" x 20" x 11.75"
31 lbs
27" x 20" x 11.75"
SIM card
Instructions
Page 1

Advertisement

Table of Contents
loading

Summary of Contents for ChargePoint CT4000-HD

  • Page 1 Needle Nose Pliers • #2 Phillips screwdriver • A ChargePoint card that has been activated on ChargePoint and set up for using paid charging stations. Go to www.chargepoint.com to create a driver account and order a ChargePoint card. Page 1...
  • Page 2 Push tab and lift cover Step 2: With the station powered on, scan your ChargePoint card, then remove the charging plug(s) from the holster(s). Step 8: Disconnect the blue connector by pressing the side tabs while rocking IMPORTANT!
  • Page 3 Remove the Existing Head Assembly Install the New Head Assembly Step 13: GATEWAY STATIONS ONLY: Remove Step 1: Prepare the head assembly for mounting and destroy the SIM card. a) Re-open the shipping box and stand Lift the rubber fl ap on the right side of the new head assembly upright on the old head assembly and push in the its foam packaging, as shown.
  • Page 4 Install the New Head Assembly Install the New Head Assembly Step 2: Slide head assembly into the body. Step 3: Connect the head assembly. Slide the head assembly into the main body and stop it in its raised position by inserting the a) Remove the yellow strap from the blue connector.
  • Page 5 Step 5: Verify the station operates correctly. c) Use your ChargePoint card to authorize a charging session. Make sure that both plug holsters unlock and that the station displays instructions on how to plug into the IMPORTANT: if the station is not operating as described below, see Troubleshooting on vehicle.
  • Page 6 After completing the checklist on the following page, tear out this page and provide it to the person responsible for activating ChargePoint stations. This person will need to perform a logical head swap to activate the new head assembly on ChargePoint. See Appendix A for instructions on how to perform a logical head swap.
  • Page 7: Complete The Post-Installation Checklist

    When starting a charging session using your ChargePoint card, the station  station. The station stops of vehicle. Call the displays no error codes or warning lights (see page 8), and both holsters delivering power to the vehicle manufacturer.
  • Page 8 D, or if a better ACTIVATED ON specifi ed number of ChargePoint. network signal CHARGEPOINT - GRACE remaining grace sessions. is available on SESSIONS REMAINING When all grace sessions the other type (N).”...
  • Page 9 Possible cause(s) Action(s) 206-FLC Before activation: Floating Line Connection Correct any faulty ChargePoint Support may need to resolve the following station codes that begin with the digit “3”: The voltage of an AC connections. 301-BA Breakaway Fault Call ChargePoint input line has fallen...
  • Page 10: Charging Cable Doesn't Move Freely

    Troubleshooting Troubleshooting Charging Cable Doesn’t Move Freely Step 4: Inspect the rope to ensure it is properly aligned onto the pulley. If the charging cable does not extend or retract fully and smoothly, it is likely that it’s rope has come off the pulley and you must re-position it.
  • Page 11: Appendix A: Logical Head Swap Procedure

    When a station’s head assembly has been replaced, the new head assembly must be activated Step 7: Enter the new head assembly’s MAC Address and Activation Password. This on ChargePoint by following the steps provided in this appendix. information is located on the new head assembly’s spare activation label (see page 11).
  • Page 12 1692 Dell Ave. Campbell, CA 95008-6901 USA US toll free: +1-877-370-3802 www.chargepoint.com...

This manual is also suitable for:

Ct4010-hdCt4010-hd-gwCt4020-hdCt4020-hd-gw

Table of Contents