Table of Contents
Advertisement
Quick Links
Advertisement
Table of Contents

Related Manuals for Lenze SimpleServo 94


Summary of Contents for Lenze SimpleServo 94
- Page 1 MODEL 94 USERS MANUAL IMS94S-mv1...
- Page 2 Lenze AG. The information and technical data in this manual are subject to change without notice. Lenze AG and its Divisions make no warranty of any kind with respect to this material, including, but not limited to, the implied warranties of its merchantability and fitness for a given purpose.
-
Page 3: Table Of Contents
Table of Contents General Information ......... . . 5 1.1 About these Operating Instructions . - Page 4 Programmable Features and Parameters ......31 Parameters storage and EPM operation ......31 6.1.1 Parameter’s storage .
- Page 5 Diagnostic display ..........40 Diagnostic LED’s .
- Page 6 Safety Warnings • The symbol shown at left indicates an important safety consideration. Please read this manual carefully before performing any of the procedures contained herein. Failure to follow these instructions may result in equipment damage, fire, severe injury, or fatality. •...
-
Page 7: General Information
1 General Information The SimpleServo line of advanced general purpose servo drives utilize the latest technology in power semiconductors and packaging. SimpleServo uses Field Oriented control to enable high quality motion. The SimpleServo Model 94 is available in four mains (input power) configurations: 400/480V (nominal) three phase input. -
Page 8: Scope Of Supply
• The specifications, processes and circuitry described in these instructions are for guidance only and must be adapted to your own specific application. Lenze does not take responsibility for the suitability of the process and circuit proposals. -
Page 9: Specifications
2 Specifications 2.1 Electrical Characteristics Single-Phase Models 1~ Mains 1~ Mains Rated Output Peak Output Current Current Type Mains Voltage Current Current (doubler) (Std.) E94S020S1N 1/N/PE 120V or 230V E94S040S1N 16.8 E94S020S2F E94S040S2F 1/N/PE 230V (80 V -0%...264 V +0%) E94S080S2F 15.0 E94S100S2F... -
Page 10: Operating Modes
2.3 Operating Modes Torque Reference 0 to ± 10 VDC 16-bit; scalable Torque Range 100:1 Current-Loop Bandwidth Up to 3 kHz (16-bit feedback resolution) Velocity Reference 0 to ± 10 VDC or 0 to 10 VDC; scalable Accuracy ± 1 RPM Velocity-Loop Bandwidth Up to 300 Hz Speed Range... -
Page 11: Dimensions
3 Dimensions 3.1 Model 94 Dimensions �� ��� � �� �� � � Type A (mm) B (mm) C (mm) Weight (kg) E94S020S1N E94S040S1N E94S020S2F E94S040S2F E94S080S2F E94S100S2F E94S020Y2N E94S040Y2N E94S080Y2N E94S100Y2N E94S020T4N E94S040T4N E94S050T4N IMS94S-mv1... -
Page 12: Clearance For Cooling Air Circulation
3.2 Clearance for Cooling Air Circulation ����� ����� ����� ����� IMS94S-mv1... -
Page 13: Installation
4 Installation 1. Perform minimum system connection. Please refer to section 8.1 for minimum connection requirements. Observe rules and warnings below: WARNING! • Hazard of electrical shock! Circuit potentials are up to 480 VAC above earth ground. Avoid direct contact with the printed circuit board or with circuit elements to prevent the risk of serious injury or fatality. -
Page 14: Shielding And Grounding
(6 mm) around the screw hole of the enclosure. Lenze recommends the use of the special SimpleServo cables provided by Lenze. If you specify cables other than those provided by Lenze, please make sure all cables are shielded and properly grounded. -
Page 15: Line Filtering
4.3 Line filtering In addition to EMI/RFI safeguards inherent in the SimpleServo design, external filtering may be required. High frequency energy can be coupled between the circuits via radiation or conduction. The AC power wiring is one of the most important paths for both types of coupling mechanisms. -
Page 16: Simpleservo Connections
SimpleServo control, and host controller (Figure 8). Prefabricated cable assemblies may be purchased from Lenze to facilitate wiring the control, motor and host computer. Contact your SimpleServo Sales Representative for assistance. 5.1 External Connectors 5.1.1... -
Page 17: P2 - Serial Communications Port
TABLE 3 - P7 PIN ASSIGNMENTS (OUTPUT POWER) Name Function Thermistor (PTC) Input Thermistor (PTC) Input Motor Power Out Motor Power Out Motor Power Out Protective Earth (Chassis Ground) 5.1.2 P2 - Serial Communications Port P2 is a 9-pin D-sub connector that is used to communicate with a host computer via standard RS-232 interface. -
Page 18: P3 - Controller Interface
5.1.3 P3 - Controller Interface P3 is a 25-pin DB connector for interfacing to front-end controllers. It is strongly recommended that you use OEM cables to aid in satisfying CE requirements. Contact your SimpleServo representative for assistance. TABLE 5 - P3 PIN ASSIGNMENTS Name Function Encoder Channel A+ Output... -
Page 19: P4 - Motor Feedback / Second Loop Encoder Input
Inputs have all necessary filtering and line balancing components so no external noise suppression networks are needed. All conductors must be enclosed in one shield and jacket around them. Lenze recommends that each and every pair (for example, EA+ and EA-) be twisted. In order to satisfy CE requirements, use of an OEM cable is recommended. -
Page 20: P5 - 24 Vdc Back-Up Power Input
Using P4 as second encoder input for dual loop operation. P4 can be used as second loop encoder input in situation when motor equipped with resolver as primary feedback. If such motor is used, the drive has to have a resolver feedback option module installed. -
Page 21: Connectors And Wiring Notes
TABLE 8 - P6 PIN ASSIGNMENTS Name Function Positive DC Bus / Brake Resistor Brake Resistor Negative DC Bus 5.1.7 Connectors and Wiring Notes Note 1 An external pulse train signal (for “step”) supplied by an external device, such as a PLC or stepper indexer, can control the speed and position of the servomotor. -
Page 22: P12. Second Encoder Interface (Option Module)
5.1.9 P12. Second encoder interface (option module) SimpleServo drives support second incremental encoder interface to build dual loop systems. Depending on motor primary feedback type - encoder or resolver - second encoder could be connected: • to P12 connector on second encoder interface module if the primary encoder feedback is connected to the P4 connector on the drive •... -
Page 23: Digital Outputs
���� ���� ��������� �������� ���� ��������� �������� Master encoder/step and direction input circuit. You can connect a single ended or differential signal to the inputs. You can also connect sinking or sourcing outputs to these inputs. The function of these inputs “Master Encoder”... -
Page 24: Analog I/O Details
IN1 and IN2 (P3 pin 10,17,18 ). Optically isolated inputs. Inputs IN1 and IN2 are compatible with a 5 -24V voltage source . No additional series resistor is needed for circuit operation. Both inputs share COM terminal IN_COM. Input IN1 is dedicated for “Drive Enable” function while IN2 is programmable. -
Page 25: Rs232 Interface (Standard)
5.4.3) is unavailable even if baud rates are set the same for both interfaces. 5.4.5 CAN bus interface Please refer to Appendix for CAN bus interface support. 5.5 Motor Selection SimpleServo drives are compatible with many servo motors, both Lenze motors IMS94S-mv1... -
Page 26: Motor Connection
and motors from the other manufacturers. We have tested many motors with the SimpleServo and put their parameters in a database for customer convenience. If your motor is in the database, you do not need to provide any motor data to set it up. However, if your motor is not in the database, it can still be used, but some electrical and mechanical data will need to be provided to create a custom motor profile. -
Page 27: Using Custom Motor
Note If drive is ENABLED, a new motor cannot be set. You can only set a new motor when the drive is DISABLED. To View selected motor parameters or make a new motor selection: • Click “CLICK HERE TO CHANGE”. Selection dialog opens. (See figure above). If you are just viewing motor parameters click Cancel on Motor Parameters dialog when done. -
Page 28: Autophasing
Click OK to dismiss Motor Parameters dialog. MotionView will ask if you want to autophase your custom motor. If you answer “No”, the motor data will be loaded immediately to the drive’s memory. If you answer “Yes”, the motor dialog will be dismissed and the drive will start the autophasing sequence. -
Page 29: Custom Motor Data Entry
5.6.3 Custom Motor Data Entry Motor Parameters dialog has three sections (frames) dividing motor parameters on groups: Electrical constants, Mechanical constants, and Feedback. When creating a custom motor you must supply all parameters listed in these sections. All entries are mandatory except inertia (Jm) parameter. - Page 30 Example: Suppose that the maximum continuous phase to phase winding current (Imax) is not given. Instead, we look up and obtain the following: Continuous stall torque T = 3.0 lb-in Motor torque constant Kt = 0.69 lb-in/A Dividing, we obtain: Imax = 3.0 lb-in / 0.69 lb-in/A =4.35 (A) Our entry for Imax would be 4.35.
- Page 31 Halls Order Each hall signal is in phase with one of the three phase-phase voltages from the motor windings. Hall order number defines which hall sensor matches which phase- phase voltage. Motor phases are usually called R-S-T or U-V-W or A-B-C. Phase- Phase voltages are called Vrs, Vst, Vtr.
- Page 32 TABLE 9 HALL ORDER NUMBERS FOR DIFFERENT HALL SEQUENCES Halls Order Hall Sequence 1-2-3 1-3-2 2-1-3 2-3-1 3-1-2 3-2-1 Note Each Hall Voltage will be in phase with one and only one Output Voltage. B leads A for CW. This is encoder phase relationship for CW/CCW shaft rotation. When you obtain the diagram for your motor phasing similar to shown above, it’s assumed by software that motor shaft rotating CW when looking at the mounting face of the motor.
-
Page 33: Parameters Storage And Epm Operation
6 Programmable Features and Parameters All SimpleServo drives are configured through the serial interface. The drives have many programmable and configurable features and parameters. These features and parameters are accessible via a universal software called MotionView. Please Refer to the MotionView User’s Manual for details on how to make a connection to the drive and change parameter values. -
Page 34: Motor Group
6.2 Motor Group Motor group shows currently selected motor. You can click “CLICK HERE TO CHANGE” to view selected motor parameters or select new motor. Please refer to Section 5.5 for details on how to select motor. 6.3 Parameters Group 6.3.1 Drive operating modes The SimpleServo has 3 operating modes: Torque, Velocity and Position. -
Page 35: Peak Current Limit
6.3.4 Peak current limit Peak current sets Motor RMS phase current that is allowed for up to 2 Seconds. After this two second limit, the current limit will be reduced to the value set in the Current Limit parameter. When the motor current drops below nominal current for two seconds, the drive will automatically enable the peak current level again. -
Page 36: Reset Option
6.3.10 Reset Option RESET OPTION selects the type of action you must take to reset the drive after a FAULT signal has been generated by the drive. ON DISABLE clears the fault when the drive is disabled. This is useful if you have a single drive and motor connected in a simple servo system. -
Page 37: Master To System Ratio
6.3.17 Master to system ratio This parameter used to set scale between reference pulse train (when operating in position mode) and system encoder - motor encoder if used in single loop configuration and second encoder if used in dual loop configuration. See sections 8.3 and 8.4 for details. -
Page 38: Analog Input Dead Band
6.5.5 Analog input dead band Allows you to set voltage window (in mV) in such manner that any voltage value in that window will be treated as zero. This is useful if your system zero voltage drifts making drive shaft drift when commanded to zero. 6.5.6 Adjust analog voltage offset This control button is useful to allow the drive to automatically adjust offset. -
Page 39: Enable Input De-Bounce Time
6.6.6 Enable input de-bounce time Sets de-bounce for the enable input to anticipate switch or relay contacts bouncing if they are used to compute input. 6.7 Velocity Limits Group These parameters are active in Velocity Mode Only. • Zero speed (velocity mode only) •... - Page 40 Velocity I-gain (Integral) The output of the I-term portion of the integral gain compensator is proportional to accumulative error over cycle time, with I-term controlling how fast the error accumulates. Integral gain also increases overall loop gain at the lower frequencies, minimizing total error.
-
Page 41: Run Panel
6.10 Faults Group Faults Group loads fault history from the drive. New faults replace oldest faults in a circular manner. In any case fault # 0 is the most recent fault. To clear faults history from the drive’s memory click on “Reset Fault history” button. Each fault has its code and explanation of the fault. -
Page 42: Diagnostic Display
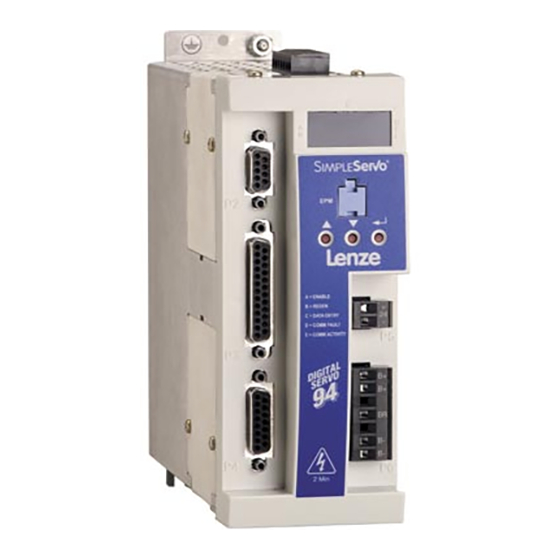
7 Display and Diagnostics 7.1 Diagnostic display SimpleServo drives are equipped with diagnostic LED display and 3 push buttons to select displayed information and edit a limited set of parameter values. Parameters can be scrolled by using “UP” and “DOWN” ( ) buttons. -
Page 43: Diagnostic Led's
7.2 Diagnostic LED’s The SimpleServo has five diagnostic LEDs mounted on the periphery of the front panel display as shown in the drawing below. These LEDs are designed to help you monitor system status and activity as well as troubleshoot any faults. Function Description Enable... -
Page 44: Fault Reset
7.3.2 Fault Reset Fault reset is accomplished by disabling or re-enabling drive depending on settings performed during drive set-up. TABLE 10 FAULT CODES Fault Display Code Fault Code Description Drive bus voltage reached maximum level due Overvoltage F_OU to regen. One or more motor hall sensor is inoperable or F_FB Feedback error... -
Page 45: Operation
Operation 8.1 Minimum Connections In order to operate the drive you must perform minimum connections. At the very least you need to connect your PC serial port to the SimpleServo drive. If you also wish to rotate a motor you must perform minimum system connections. See Section 10 for various system connections examples. - Page 46 To configure drive: Ensure that the control is properly installed and mounted. Refer to Section 4 for installation instructions. Perform wiring to the motor and external equipment suitable for desired operating mode and your system requirements. Refer to system configurations diagram in Section 12 for various system configuration examples.
-
Page 47: Position Mode Operation (Gearing)
8.3 Position mode operation (gearing) In position mode drive will follow to master reference signal at the P3-11-14 inputs. The distance motor shaft traveled per each master pulse established by ratio between master signal pulses and motor encoder (in single loop configuration). Ratio is set by “Master to System ratio”... -
Page 48: Tuning In Velocity Mode
8.6 Tuning in velocity mode Note In this mode the settings for Position compensation have no effect. Make sure that drive is online (connected). Make sure that the drive is disabled. Select <Parameters> folder from the node tree. Click on <Reference> parameter and change it to “INTERNAL”. -
Page 49: Tuning In Position Mode
8.7 Tuning in position mode. Note In this mode the Velocity gains should be set first. Perform velocity loop tuning as per section 8.6. Make sure that drive is online (connected). Make sure that the drive is disabled. Set up your external indexer to perform following move: Move forward N steps, where N = number of steps to perform full motor shaft revolution. -
Page 50: Sample Motor Responses To Gain Settings
9 Sample Motor Responses to Gain Settings 9.1 Motor response to gain settings (Velocity mode) 9.1.1 Low P-gain P-gain =100. I-gain=0 Current didn’t reach maximum possible value. 9.1.2 Correct P-gain P-gain =500. I-gain=0 Current reaches maximum value. IMS94S-mv1... -
Page 51: I-Gain Too High
9.1.3 I-gain too high P-gain =500. I-gain=300 Notice big velocity overshoot. 9.1.4 Correct P-gain and I-gain P-gain =500. I-gain=100 Notice very low velocity overshoot and very close match of the waveforms. IMS94S-mv1... -
Page 52: Motor Response To Gain Settings (Position Mode)
9.2 Motor response to gain settings (Position Mode) 9.2.1 Non-optimal P-gain / D-gain relationship P-gain = 200 D-gain = 300 Problem: Noticeable oscillation (Channel 2). Insufficient D- gain / excess of P-gain for this D-gain setting. Treatment: Decrease P-gain, increase D - gain. Side effects: Decreasing P-gain increases position error, Increasing D-gain lowers bandwidth and increases hi frequency noise. -
Page 53: Optimal P-Gain / D-Gain Relationship
9.2.2 Optimal P-gain / D-gain relationship Note Fixed problem in Section 9.2. Position error is small and only 20 mS long. Position regulation bandwidth of the system is 1/20mS = 50Hz. IMS94S-mv1... -
Page 54: Troubleshooting
10 Troubleshooting WARNING! Hazard of electrical shock! Circuit potentials are up to 480 VAC above earth ground. Avoid direct contact with the printed circuit board or with circuit elements to prevent the risk of serious injury or fatality. Disconnect incoming power and wait 60 seconds before servicing drive. - Page 55 Problem Ready LED is on but motor does not run. Suggested Solution If in torque or velocity mode: Reference voltage input signal is not applied. Reference signal is not connected to the SimpleServo input properly; connections are open. In MotionView program check <Parameters> <Reference> set to <External>...
- Page 56 IMS94S-mv1...
- Page 57 IMS94S-mv1...
- Page 58 IMS94S-mv1...
- Page 59 IMS94S-mv1...
- Page 60 IMS94S-mv1...
- Page 61 IMS94S-mv1...
- Page 62 IMS94S-mv1...
- Page 63 IMS94S-mv1...
- Page 64 IMS94S-mv1...
- Page 65 IMS94S-mv1...
- Page 66 AC Technology Corporation member of the Lenze Group 630 Douglas Street Uxbridge, MA 01569 Telephone: (508) 278-9100 Facsimile: (508) 278-7873...
Need help?
Do you have a question about the SimpleServo 94 and is the answer not in the manual?
Questions and answers