Table of Contents
Advertisement
Quick Links
Advertisement
Table of Contents

Related Manuals for Lenze AC Tech PositionServo 940


Summary of Contents for Lenze AC Tech PositionServo 940
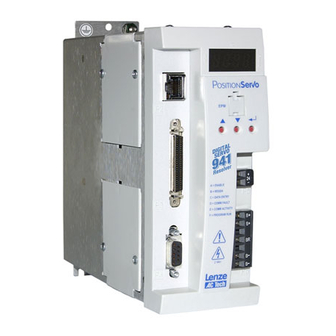
- Page 1 S955 USERS MANUAL S94P01C -e1...
- Page 2 MotionView ® , Positionservo ® , and all related indicia are either registered trademarks or trademarks of Lenze AG in the United States and other countries. This document printed in the United States of America...
-
Page 3: Table Of Contents
Table of Contents General Information ......... . . 5 1.1 About these Operating Instructions . - Page 4 Using a Custom Motor ..........32 5.6.1 Creating Custom Motor Parameters .
- Page 5 Compensation Group ..........50 6.9.1 Velocity P-gain (proportional) .
- Page 6 Safety Information All safety information given in these Operating Instructions have the same layout: Signal Word! (Characteristics the severity of the danger) Note (describes the danger and informs on how to proceed) Signal Words Icon DANGER! Warns of impending danger. Warning of hazardous Consequences if disregarded:...
-
Page 7: General Information
1 General Information The PositionServo line of advanced general purpose servo drives utilizes the latest technology in power semiconductors and packaging. The PositionServo uses Field Oriented control to enable high quality motion. The PositionServo is available in four mains (input power) configurations: 400/480V (nominal) three phase input. -
Page 8: About These Operating Instructions
• The specifications, processes and circuitry described in these instructions are for guidance only and must be adapted to your own specific application. Lenze does not take responsibility for the suitability of the process and circuit proposals. - Page 9 • Warranty conditions: see Sales and Delivery Conditions of Lenze Drive Systems GmbH. • Warranty claims must be made to Lenze immediately after detecting the deficiency or fault. • The warranty is void in all cases where liability claims cannot be made.
-
Page 10: Specifications
2 Specifications 2.1 Electrical Characteristics Single-Phase Models 1~ Mains 1~ Mains Rated Output Peak Output Current Current Type Mains Voltage Current Current (doubler) (Std.) E94_020S1N_X 120V or 240V E94_040S1N_X 16.8 E94_020S2F_X E94_040S2F_X 120 / 240V E94_080S2F_X 15.0 (80 V -0%...264 V +0%) E94_100S2F_X 18.8 10.0... -
Page 11: Power Ratings
2.2 Power Ratings Power Loss at Power Loss at Output Power Rated Output Rated Output Type at Rated Output Leakage Current Current Current Current (8kHz) (8KHz) (16 kHz) Units Watts Watts E94_020S1N_X E94_040S1N_X E94_020S2F_X E94_040S2F_X E94_080S2F_X E94_100S2F_X E94_020Y2N_X Typically >3.5 mA. Consult factory for E94_040Y2N_X applications requiring... -
Page 12: Digital I/O Ratings
2.4 Digital I/O Ratings Scan Input Voltage Linearity Temperature Drift Offset Current Times Impedance Range Units Digital Inputs 0.02 Depend on load 2.2 k 5-24 Digital Outputs 0.052 100 max 30 max Analog Inputs 0.052 ± 0.013 0.1% per °C rise ±... -
Page 13: Dimensions
3 Dimensions 3.1 PositionServo Dimensions S923 Type A (mm) B (mm) C (mm) D (mm) Weight (kg) E94_020S1N_X E94_040S1N_X E94_020S2F_X E94_040S2F_X E94_080S2F_X E94_100S2F_X E94_020Y2N_X E94_040Y2N_X E94_080Y2N_X E94_120Y2N_X E94_180T2N_X E94_020T4N_X E94_040T4N_X E94_050T4N_X E94_060T4N_X E94_090T4N_X The first “_” equals either “P” for the Model 940 encoder based drive OR an “R” for the Model 941 resolver based drive. -
Page 14: Clearance For Cooling Air Circulation
3.2 Clearance for Cooling Air Circulation S924 S94P01C -e1... -
Page 15: Installation
4 Installation Perform the minimum system connection. Please refer to section 8.1 for minimum connection requirements. Observe the rules and warnings below carefully: DANGER! Hazard of electrical shock! Circuit potentials are up to 480 VAC above earth ground. Avoid direct contact with the printed circuit board or with circuit elements to prevent the risk of serious injury or fatality. -
Page 16: Wiring
(6 mm) around the screw hole of the enclosure. Lenze recommends the use of the special PositionServo drive cables provided by Lenze. If you specify cables other than those provided by Lenze, please make certain all cables are shielded and properly grounded. -
Page 17: Emi Protection
EMI will cause control systems to behave in unexpected and sometimes dangerous ways. Therefore, reducing EMI is of primary concern not only for servo control manufacturers such as Lenze, but the user as well. Proper shielding, grounding and installation practices are critical to EMI reduction. -
Page 18: Line Filtering
4.3 Line Filtering In addition to EMI/RFI safeguards inherent in the PositionServo design, external filtering may be required. High frequency energy can be coupled between the circuits via radiation or conduction. The AC power wiring is one of the most important paths for both types of coupling mechanisms. -
Page 19: Positionservo Connections
4.2. The other end should be properly terminated at the motor shield. Feedback cable shields should be terminated in a like manner. Lenze recommends Lenze cables for both the motor power and feedback. These are available with appropriate connectors and in various lengths. -
Page 20: P2 - Ethernet Communications Port
P1 Pin Assignments (Input Power) Standard Models Doubler Models Name Function Name Function Protective Earth (Ground) Protective Earth (Ground) AC Power in AC Power Neutral (120V Doubler only) AC Power in AC Power in AC Power in L2/N AC Power in (3~ models only) (non-doubler operation) P7 Pin Assignments (Output Power) -
Page 21: P3 - Controller Interface
P3 is a 50-pin SCSI connector for interfacing to the front-end of the controllers. It is strongly recommended that you use OEM cables to aid in satisfying CE requirements. Contact your Lenze representative for assistance. P3 Pin Assignments (Controller Interface) -
Page 22: P4 - Motor Feedback / Second Loop Encoder Input
For pin assignments, refer to the table P4B. All conductors must be enclosed in one shield and jacket around them. Lenze recommends that each and every pair (for example, EA+ and EA-) be twisted. In order to satisfy CE requirements, use of an OEM cable is recommended. -
Page 23: P5 - 24 Vdc Back-Up Power Input
P4A Pin Assignments (Encoder Feedback - E94P Drives) Name Function Encoder Channel A+ Input Encoder Channel A- Input Encoder Channel B+ Input Encoder Channel B- Input Encoder Channel Z+ Input Encoder Channel Z- Input Drive Logic Common/Encoder Ground SHLD Shield Encoder supply (+5VDC) Hall Sensor A- Input Hall Sensor A+ Input... -
Page 24: P6 - Braking Resistor And Dc Bus
5.1.6 P6 - Braking Resistor and DC Bus P6 is a 5-pin quick-connect terminal block that can be used with an external braking resistor (the PositionServo has the regen circuitry built-in). The Brake Resistor connects between the Positive DC Bus (either P6.1 or 2) and P6.3. P6 Terminal Assignments (Brake Resistor and DC Bus) Terminal Function... - Page 25 When using the E94ZARSV2, the default resolution is 1024 PPR prequadrature. Depending on the Hardware/Software revision of the E94ZARSV2 module, the available PPRs are different. Refer to the table below for the Dip Switch settings for SW1 and the different resolutions. SW1 DIP Switch Settings Dip Switch SW1 PPR prequadrature...
-
Page 26: P12 - Second Encoder Interface Module (Option Bay 2)
When using a Lenze motor with resolver feedback and a Lenze resolver cable, the pins are already configured for operation. If a non-Lenze motor is used, the resolver connections are made as follows: P11 Pin Assignments (Resolver Feedback) Name Function... -
Page 27: Digital I/O Details
5.2 Digital I/O Details 5.2.1 Step & Direction / Master Encoder Inputs (P3, pins 1-4) You can connect a master encoder with quadrature outputs or a step and direction pair of signals to control position in step / direction operating mode (stepper motor emulation). These inputs are optically isolated from the rest of the drive circuits and from each other. -
Page 28: Buffered Encoder Output (P3, Pins 7-12)
5.2.2 Buffered Encoder Output (P3, pins 7-12) There are many applications where it is desired to close the feedback loop to an external device. This feature is built into the PositionServo drive and is referred to as the “Buffer Encoder Output”. If a motor with encoder feedback is being used, the A+, A-, B+, B-, Z+ and Z- signals are directly passed through the drive through pins 7-12 with no delays, up to a speed of 25MHz. -
Page 29: Digital Inputs
5.2.4 Digital Inputs IN_Ax, IN_Bx, IN_Cx (P3.26-30, P3.31-35, P3.36-40 ). The PositionServo Drive has 12 optically isolated inputs. These inputs are compatible with a 5 - 24V voltage source. No additional series resistors are needed for circuit operation. The 12 inputs are segmented into three groups of 4, Inputs A1 - A4, Inputs B1 - B4, and Inputs C1 - C4. -
Page 30: Analog I/O Details
5.3 Analog I/O Details 5.3.1 Analog Reference Input AIN1+, AIN1- (P3.24 and P3.25) The analog reference input can accept up to a ±10V analog signal across AIN1+ and AIN1-. The maximum limit with respect to analog common (ACOM) on each input is ±18VDC. -
Page 31: Analog Output
5.3.2 Analog Output AO (P3.23) The analog output is a single-ended signal (with reference to Analog Common (ACOM) which can represent the following motor data: • Not Assigned • Phase U Current • Iq current • RMS Phase Current • Phase V Current •... -
Page 32: Rs485 Communication Setup
5.4.3 RS485 Communication Setup When establishing communication between MotionView and a PositionServo drive, a communication method must be selected. The connection choice can be either “UPP over RS485/RS232” or “Ethernet”. The “UPP over RS485/RS232” selection establishes a RS485 connection between MotionView and the first drive on the network. -
Page 33: Motor Over-Temperature Protection
5.5.2 Motor Over-temperature Protection If using a motor equipped with an encoder and PTC thermal sensor, the encoder feedback cable will have flying leads exiting the P4 connector to be wired to the P7.1 (T1) and P7.2 (T2) terminals. If using a motor equipped with a Resolver and a PTC sensor, the thermal feedback is pased directly to the drive via the resolver 9-pin D shell connector. -
Page 34: Using A Custom Motor
To View selected motor parameters or to make a new motor selection: • Click “Click here to change the motor” from the Parameter View Window (see figure above). If you are just viewing motor parameters click Cancel on Motor Parameters dialog when done to dismiss the dialog box. -
Page 35: Autophasing
Note Saving the file is necessary even if the autophasing feature will be used and some of the final parameters are not known. After autophasing is completed the corrected motor file can be updated before loading it to memory. Click OK to exit from the Motor Parameters dialog. MotionView will ask if you want to autophase your custom motor. -
Page 36: Custom Motor Data Entry
Note If there was a problem with the motor connection, hall sensor connection or resolver connection, MotionView will respond with an error message. Common problems are with power, shield and ground terminations or an improper cable is being used. Correct the wiring problem(s) and repeat steps 1 - 6. If the error message repeats, exchange motor phases U and V (R and S) and repeat. - Page 37 Nominal phase current (RMS Amps) Nominal continuous phase current rating (In) in Amps RMS. Do not use the peak current rating. Note Sometimes the phase current rating will not be given. The equation below may be used to obtain the nominal continuous phase-to-phase winding current from other variables.
- Page 38 5.6.3.2 For motors equipped with incremental encoders only: Encoder Line Count The Encoders for servomotors normally have Line Counts of 1000, 1024, 2000, 2048, 4000, or 4096. The Encoder Line Count must be a positive integer and must be pre- quadrature.
- Page 39 Otherwise (if B leads A ) check B leads A for CW box. Note Lenze convention references the shaft direction of rotation from the front (shaft end) of the motor. Some manufacturers’ timing diagrams are CW when viewed from the “rear” of the motor.
-
Page 40: Programmable Features And Parameters
6 Programmable Features and Parameters All PositionServo drives are configured through one of the following interfaces: RS485 or Ethernet. The drives have many programmable and configurable features and parameters. These features and parameters are accessible via a universal software called MotionView. Please refer to the MotionView Manual for details on how to make a connection to the drive and change parameter values. -
Page 41: Epm Fault
STOP! If the EPM contains any data from an inverter drive, that data will be overwritten during this procedure. 6.1.3 EPM Fault If the EPM fails during operation or the EPM is removed from the EPM Port, the drive will generate a fault and will be disabled (if enabled). The fault is logged to the drives fault history. -
Page 42: Drive Pwm Frequency
6.3.1.3 Position Mode In this mode the drive reference is a pulse-train applied to P3.1-4 terminals, if the parameter “Reference” is set to “External”. Otherwise the reference is taken from the drive’s internal variable. (Refer to the PositionServo Programming Manual for details). -
Page 43: Analog Input Scale (Velocity Scale)
6.3.6 Analog Input Scale (velocity scale) This parameter sets the analog input sensitivity for the velocity reference used when the drive operates in velocity mode. Units for this parameter are RPM/Volt. To calculate this value use the following formula: Vscale = VELOCITYmax / Vin max VELOCITYmax maximum desired velocity in RPM Vin max... -
Page 44: Motor Ptc Cut-Off Resistance
6.3.12 Motor PTC Cut-off Resistance This parameter sets the cut-off resistance of the PTC which defines when the motor reaches the maximum allowable temperature. See section 5.5.2 for details how to connect motor’s PTC. 6.3.13 Second Encoder Disables or enables second encoder. Effectively selects single-loop or double-loop configuration in position mode. -
Page 45: Encoder Repeat Source
6.3.15 Encoder Repeat Source This parameter sets the feedback source signal for the buffered encoder outputs (P3.7 -P3.12). The source can be the drive’s feedback input (P4) or an optional feedback module (resolver, second encoder etc.) 6.3.16 System to Master Ratio This parameter is used to set the scale between the reference pulse train (when operating in position mode) and the system feedback device. -
Page 46: Resolver Track
6.3.22 Resolver Track The Resolver Track parameter is used in conjunction with the resolver motors and Buffered Encoder Outputs, (Ref Section 5.2.2). If a motor with resolver feedback is being used a simulated encoder feedback is transmitted out the Buffered Encoder Outputs, P3.7 to P3.12. - Page 47 If using the default PC Ethernet port on your computer for internal use (email, web browsing, etc,) AC Tech recommends that you add an additional Ethernet port to your PC. The most common and cost effective way to do this is by using a USB / Ethernet dongle or a PCMCIA Ethernet card.
- Page 48 6.4.1.2 Automatically Obtain the PositionServo’s IP Address To use this mode set dHCP = 1 via the diagnostic display LED (refer to section 7.1 for details). After setting this parameter, cycle the input power to the PositionServo drive so that the setting can take effect. The LED display will be “----“...
- Page 49 To view the connection properties click the [Properties] button. Select [Internet Protocol (TCP/IP)] and click the [Properties] button. Select “Use the following IP address” and enter [192.168.124.1] for the IP address. Now enter the subnet mask [255.255.255.0], and then click the [OK] button.
-
Page 50: Rs-485 Configuration
Analog Input Offset Parameter Allows you to adjust the offset voltage at AIN1+ and AIN1- (P3.24 and P3.25). This function is equivalent to the balance trim potentiometer found in analog drives. Lenze recommends that this adjustment be made automatically using the “Adjust analog voltage offset”... -
Page 51: Adjust Analog Voltage Offset
6.5.6 Adjust Analog Voltage Offset This control button is useful to allow the drive to automatically adjust the analog input voltage offset. To use it, command the external reference source input at AIN1+ and AIN1- (P3.24 and 25) to zero volts and then click this button. Any offset voltage at the analog input will be adjusted out and the adjustment value will be stored in the “Analog input offset”... -
Page 52: At Speed
6.7.3 At Speed Specifies the speed window center used with the “In speed window” output. These last two parameters specify speed limits. If motor shaft speed is within these limits then the condition AT SPEED is set to TRUE in the internal controller logic. The AT SPEED condition can also trigger a programmable digital output, if selected. -
Page 53: Position P-Gain (Proportional)
Note The following four position gain settings are only active if the drive is operating in Position mode. They have no effect in Velocity or Torque modes. 6.9.3 Position P-gain (proportional) Position P-gain adjusts the system’s overall response to position error. Position error is the difference between the commanded position of the motor shaft and the actual shaft position. -
Page 54: Tools Group
6.10 Tools Group 6.10.1 Oscilloscope Tool The oscilloscope tool gives real time representation of different signals inside the PositionServo drive and is helpful when debugging and tuning drives. Operation of the oscilloscope tool is described in more detail in the MotionView Software User’s Manual. - Page 55 Display Description StAt current drive status - to view: run - drive running diS - drive disabled F XX - drive fault. Where XX is the fault code (section 7.3.2) Hx.xx Hardware revision (e.g. H2.00) Firmware revision (e.g. F2.06) Fx.xx bAUd RS232/RS485(normal mode) baud rate - to set...
-
Page 56: Diagnostic Leds
7.2 Diagnostic LEDs The PositionServo has five diagnostic LEDs mounted on the periphery of the front panel display as shown in the drawing below. These LEDs are designed to help monitor system status and activity as well as troubleshoot any faults. S913 Function Description... -
Page 57: Fault Event
7.3.2 Fault Event When drive encounters any fault, the following events occur: • Drive is disabled • Internal status is set to “Fault” • Fault number is logged in the drive’s internal memory for later interrogation • Digital output(s), if configured for “Run Time Fault”, are asserted •... -
Page 58: Configuration Of The Positionservo
8.2 Configuration of the PositionServo Regardless of the mode in which you wish to operate, you must first configure the PositionServo for your particular motor, mode of operation, and additional features if used. Drive configuration consists of following steps: • Motor Selection •... -
Page 59: Position Mode Operation (Gearing)
15. Expand the folder “Parameters” and choose the operating mode for the drive. Refer to Section 6.3.1 for details on operating modes. 16. Click on the “Current limit” parameter, refer to Section 6.3.3 and enter current limit (in Amp RMS per phase) appropriate for the motor. 17. -
Page 60: Enabling The Positionservo
When operating in this mode the second encoder input is applied to integral portion of the position compensator. Therefore it is important that the Position I-gain and Position I-limit parameters are set to non 0 values. Always start from very small values of Position I-limit values. - Page 61 4. Make sure that “Enable Accel/Decel limits” is set to “Disable”. 5. From the node tree, select “Indexer program”. The drives current program will appear in the View Window. Click anywhere in the View Window to activate the tool bar. From the MotionView menu select <Indexer>, <Import program from file>.
-
Page 62: Tuning In Position Mode
Stop increasing the gain once you see oscillation appearing on either the current waveform or velocity waveform flat portion. Then lower the P-gain until the oscillation disappears S951 13. Slowly increase the “Velocity I-gain” and watch for an overshoot on the motor velocity waveform. - Page 63 On the Scope tool select: • Channel 1: “Position Error” • Scale: 100 pulses/div • Channel 2: “Target Position” • Scale: 0.1 Unit/div • Timebase: 50mS • Trigger: Channel 2, Rising • Trigger level: Select “Compensation” from node tree. Set “Position P-gain” to 100 and “Position D-gain”...
-
Page 64: Sample Motor Responses To Gain Settings
15. Observe that current, Iq, waveform. Check to make sure that there isn’t any significant oscillation at the flat portion of the waveform. If so then decrease the P-gain to a level where the oscillation either disappears or is very small. (See pictures in section 9.2). -
Page 65: P-Gain
9.1.1 P-gain Velocity P-gain = 5000 Velocity I-gain = 20 Current didn’t reach maximum possible value. (10A) S935 Velocity P-gain = 32767 (max value) Velocity I-gain = 20 Gain Scaling = -2 The P-gain is set to its maximum value, per the (-2) in the Gain Scaling window. The current value is very close to the maximum but since the P-gain is maxed out we can’t determine if we have achieved optimum settings. - Page 66 To increase the P-gain setting we need to set “Gain Scaling” one notch higher. This is done by changing the “Gain Scaling” setting from (-2) to (-1). After changing the “Gain Scaling” setting, set the P-gain to 16000 (approximately the middle of the scale) and restart the drive. Then slowly increase the P-gain again. (Reference the next section).
-
Page 67: I-Gain
9.1.2 I-gain Velocity P-gain = 18000 Velocity I-gain = 2396 Gain Scaling = -1 I-gain is increased to allow small velocity overshoot, (~10%), as a step response. This setting is very application dependent. If a high and flat response is expected in the application, then leave this value so that the overshoot is no more than 10%. -
Page 68: Abnormal Gains (Velocity Mode)
9.1.3 Abnormal Gains (velocity mode) Velocity I-Gain is too high Velocity P-gain = 18000 Velocity I-gain = 12000 Gain Scaling = -1 Notice below that there is a large overshoot and a noticeable oscillation in the flat portion of the Motor Velocity waveform. The current waveform also has a small trace of instabilities at the flat portion of the waveform. -
Page 69: P-Gain Selection
9.2 Motor Response to Gain Settings (position mode) 9.2.1 P-gain selection Position P-gain 2500 Position D-gain Position I-gain Position I-limit Problem: Insufficient P-gain can cause large position error as motor changing position rapidly Treatment: Increase P-gain. Side effects: Increasing the P-gain might cause oscillations and might require an increase of the D-gain as well to overcome this problem. -
Page 70: Optimal P-Gain / D-Gain Settings
S943 9.2.2 Optimal P-gain / D-gain Settings Position P-gain 8700 Position D-gain 16000 Position I-gain Position I-limit Positive effect: Position error decreased. Oscillation eliminated by D-gain. Side effects: Possible high noise produced by high P and D gains at 0 velocity. This problem arises since encoder has finite resolution. - Page 71 P and D gains setting check (problem). Position P-gain = 12673 Position D-gain = 16000 Position I-gain = Position I-limit = Problem: Noticeable oscillation (Channel 1) on Iq current waveform. Treatment: Decrease the P-gain setting until oscillation disappears. S945 P and D gains setting check (corrected) Position P-gain = 12673 Position D-gain =...
-
Page 72: Troubleshooting
10 Troubleshooting DANGER! Hazard of electrical shock! Circuit potentials are up to 480 VAC above earth ground. Avoid direct contact with the printed circuit board or with circuit elements to prevent the risk of serious injury or fatality. Disconnect incoming power and wait at least 60 seconds before servicing drive. - Page 73 NOTES S94P01C -e1...
- Page 74 NOTES S94P01C -e1...
- Page 75 AC Technology Corporation member of the Lenze Group 630 Douglas Street Uxbridge, MA 01569 Telephone: (508) 278-9100 Facsimile: (508) 278-7873 Document: S94P01C S94P01C -e1...
Need help?
Do you have a question about the AC Tech PositionServo 940 and is the answer not in the manual?
Questions and answers