
Related Manuals for RAK 7244


Summary of Contents for RAK 7244
- Page 1 Getting Started Guide for LoRaWAN Developer Gateway RAK7244 Version V1.0 | December 2019 www.RAKwireless.com Visit our website for more document.
-
Page 2: Table Of Contents
7244 V4.1.0R Table of Contents 1. Overview..........................3 2. Burning the SD card......................4 3. Connecting to the Gateway....................4 3.1. Wi-Fi AP mode........................ 4 3.2. Ethernet cable......................... 4 4. Logging into the Gateway through SSH................5 4.1. Windows...........................5 4.2. Mac OS..........................7 4.3. -
Page 3: Overview
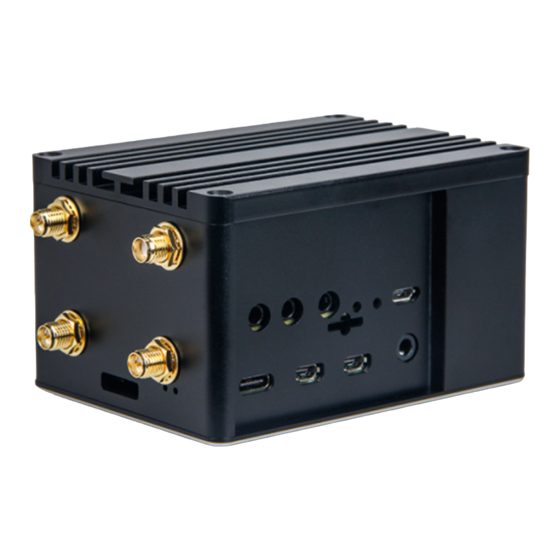
7244 V4.1.0R 1.Overview This document complements the RAK7244 with LTE. More document information please visit our official site, the document hub, the RAKwireless online store, and/or the forums: https://www.rakwireless.com/en-int/ https://doc.rakwireless.com/ https://store.rakwireless.com http://forum.rakwireless.com/ What do you need to prepare? RAK7244 with LTE https://store.rakwireless.com/... -
Page 4: Burning The Sd Card
7244 V4.1.0R 2.Burning the SD card You can refer to this document for instructions on burning an image onto an SD: http://docs.rakwireless.com/en/LoRa/RAK2245-Pi-HAT/Tool/How_to_write_LoRa _Gateway_Image_to_Micro_SD.pdf When you complete it, insert the SD card into your LoRaWAN Gateway, and power it on. 3.Connecting to the Gateway There are two ways to connect your PC with the LoRaWAN Gateway: 3.1.Wi-Fi AP mode... -
Page 5: Logging Into The Gateway Through Ssh
7244 V4.1.0R 4.Logging into the Gateway through SSH There are 3 possible cases depending on the OS you are using: 4.1.Windows Open the SSH tool on your PC (in this document, we assume you are using Putty) and connect with the LoRaWAN Gateway through Wi-Fi AP mode which means the IP address is 192.168.230.1, as the following picture... - Page 6 7244 V4.1.0R If there is a message to let you enter “yes” or “no”, choose “yes”. OK, now, you have logged into the LoRaWAN Gateway through SSH successfully:...
-
Page 7: Mac Os
7244 V4.1.0R 4.2.Mac OS Open the terminal of Mac OS. Launch the Terminal application, which is found in /Applications/Utilities/ directory but you can also launch it from Spotlight by hitting Command + Spacebar and typing “Terminal” and then return: If you are not in root mode, please enter “sudo -i”:... -
Page 8: Linux
7244 V4.1.0R Enter the password, and you will be in root mode: Enter “ssh pi@192.168.230.1” to logged into the LoRa Gateway, the default password is “raspberry”: Note: If you connect your PC with the LoRa Gateway through Ethernet cable, you should enter “ssh pi@192.168.10.10” in this step. -
Page 9: Configuring The Gateway
7244 V4.1.0R 5.Configuring the Gateway You should now be logged into the Gateway’s Raspbian OS. Enter the following command to start the configuration wizard: sudo gateway-config Item 1 Set a new password for the Gateway; Item 2 Configure the Regional Frequency which the Gateway will work on, and the LoRa Server which the Gateway will work with;... - Page 10 7244 V4.1.0R Note: The Gateway ID (EUI) squared in red in the image above is an important parameter that you will need in order to register the device with a LoRa Server. You can also get the Gateway EUI by entering the following command:...
-
Page 11: Set A New Password For The Gateway
7244 V4.1.0R 5.1.Set a new password for the Gateway The default password is “raspberry”, which is the same for all Raspberry Pi devices, so it is considered a good practice to change it. So, choose “1 Set pi password” as in the picture below: After pressing “Yes”... -
Page 12: Configure The Regional Frequency And The Lora Server
7244 V4.1.0R 5.2.Configure the Regional Frequency and the LoRa Server As the image below shows, choose “Setup RAK Gateway LoRa concentrator”: You can choose one of two supported LoRa Servers here: TTN or ChirpStack. 5.2.1. Server is TTN If you choose TTN as the LoRa server, you will see the page below where you need to select your Regional Frequency Band. -
Page 13: Server Is Chirpstack
7244 V4.1.0R 5.2.2. Server is ChirpStack If you choose ChirpStack as the LoRa server, you will see the following page: Choose Option 1 to select your Regional Frequency Band. Next, you need to set an IP address of the ChirpStack which you want your LoRaWAN Gateway to work with: The default IP address is “127.0.0.1”... - Page 14 7244 V4.1.0R If you have instead selected Option 2 you can enable/disable the Adaptive Data Rate (ADR) functionality:...
-
Page 15: Connect The Lorawan Gateway To A Router
7244 V4.1.0R 5.3.Connect the LoRaWAN Gateway to a router If you want to use TTN or an independent LoRa Server which may be deployed in a local area network or in a remote one, you need to connect your LoRaWAN Gateway to a router. - Page 16 7244 V4.1.0R Choose Item 2 to enable Wi-Fi Client Mode, then choose Item 4 to configure the Wi-Fi SSID and password. Fill those in accordance with your router’s Wi-Fi network credentials. Remember that in order to enable Wi-Fi Client Mode, you have to first...
-
Page 17: Connect To A Router Via The Ethernet Interface
7244 V4.1.0R Once you are done with all of the steps above, you can reboot the Gateway. Once booted the system will automatically connect to the router using the Wi-Fi network. 5.3.2. Connect to a Router via the Ethernet interface In the main configuration menu choose “8 Configure LAN”. - Page 18 7244 V4.1.0R Next, configure the Router’s IP address. This is going to act as the Internet Gateway address for the LoRaWAN Gateway. You should get a message as the one below, is all went without errors. Now, just reboot the Gateway and it will connect to the Router through...
-
Page 19: Connect To An Lte Network
7244 V4.1.0R 5.4.Connect to an LTE network First, insert a SIM card of the appropriate type and size into the SIM card slot. Power on the Gateway. Second, log into the Gateway through SSH, and enter the command “sudo gateway-config”. - Page 20 7244 V4.1.0R This will start the minicom tool: Try to enter the command “at”, if it returns “OK”, it means you have opened the serial port successfully: Note: If you cannot see the “at”, which you just entered, try to hold “CTRL+A”, then press “Z”, then press “E”.
- Page 21 7244 V4.1.0R Next, execute the AT command “at+cops=1,0,XXX,YYY” to set the information of the LTE network operator that you want to use. “XXX” is the operator identifier, for example, “CHINA MOBILE”, “CHN-UNICOM”, or “CHN-CT” in the above picture (“Vivacom BG”, “Telenor BG”, or “Mtel” for the EU example).
- Page 22 7244 V4.1.0R You will be sent to the following screen: You can leave it as it is by default, just remember that if you choose to modify it you should use a real and valid APN name. Lastly, set the baud rate, the default value is 115200: This finishes the LTE network configuration portion.
- Page 23 7244 V4.1.0R Do not forget to re-enable the automatic LTE connection on start-up. On, now we are able to connect via one of the 3 interfaces (Wi-Fi, Ethernet, Cellular), so let us proceed to some example on how to get some application...
-
Page 24: Connecting The Gateway To Ttn
7244 V4.1.0R 6.Connecting the Gateway to TTN 6.1.Configuring the Gateway Make sure your Gateway is connected either via LTE, Wi-Fi or Ethernet, as per the instructions in the previous chapter. You should also be able to access it via SSH. - Page 25 7244 V4.1.0R Click on register gateway”: Fill in the requested fields: Gateway ID: This is a unique identifier of your Gateway. This should have the same values as the one shown in the Gateway Configuration Wizard (see image below). Make sure to select the “I’m using the legacy packet forwarder”...
- Page 26 7244 V4.1.0R Router: This will be automatically populated once you select the Frequency Plan. The rest of the fields (Location and Antenna Placement are optional). You should end up with something like the configuration in the following image: Finalize by clicking on the “Register Gateway” button. If the process was successful you will be redirected to the overview page where you should be able to see your Gateway status as “connected”.
-
Page 27: Connecting The Gateway To Chirpstack
ChirpStack is an open source LoRa Server stack. RAKwireless Developer Gateways have 2 methods for using ChirpStack. 7.1.Built-in ChirpStack There is a built-in ChirpStack in every RAK Developer Gateway that comes with the Official RAKwireless Firmware. By default, after burning the firmware and accessing the Gateway for the first time it is configured to use the Built-in ChirpStack as its LoRa Server. -
Page 28: Remote Chirpstack
Gateway: use RAK’s cloud testing ChirpStack or setup a remote ChirpStack instance by yourself (Cloud service hosted or your own Hardware). If you want to use RAK’s cloud testing ChirpStack, you can contact the RAKwireless team on the forums for support. -
Page 29: Is There Source Code
7244 V4.1.0R 8.Is there source code? RAKwireless Developer Gateway firmware is a fully open project. It can be downloaded from the GitHub repository. Please contact us if you need technical support or want to know more about our products using the links below: Support center: https://forum.rakwireless.com/... -
Page 30: Revision History
7244 V4.1.0R 9.Revision History Revision Description Date Initial version 2019-12-11 10. Document Summary Prepared by Checked by Approved by Todor Vladislav About RAKwireless: RAKwireless is a pioneer in providing innovative and diverse Cellular and LoRaWAN connectivity solutions for both Edge and Gateway IoT devices. We believe that through easy to use and modular designs we can accelerate the time to market for various IoT Applications in order to optimize system deployment in both Developer and Commercial settings.
Need help?
Do you have a question about the 7244 and is the answer not in the manual?
Questions and answers