Table of Contents
Advertisement
Available languages
Available languages
Quick Links
Advertisement
Table of Contents

Related Manuals for Axis T92E Series


Summary of Contents for Axis T92E Series
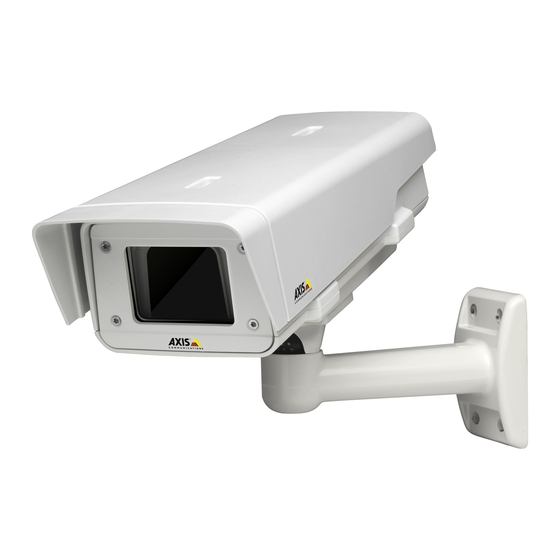
- Page 1 AXIS T92E Housing Series AXIS T92E05 AXIS T92E20 Installation Guide...
- Page 2 Every care has been taken in the preparation of this radiate radio frequency energy and, if not installed and document. Please inform your local Axis office of any used in accordance with the instructions, may cause inaccuracies or omissions. Axis Communications AB cannot harmful interference to radio communications.
- Page 3 • find answers to resolved problems in the FAQ database. Search by product, category, or phrase • report problems to Axis support staff by logging in to your private support area • chat with Axis support staff •...
-
Page 5: Hazard Levels
AXIS T92E Housing Series Safety Information Read through this Installation Guide carefully before installing the product. Keep the Installation Guide for future reference. Hazard Levels DANGER Indicates a hazardous situation which, if not avoided, will result in death or serious injury. -
Page 6: Safety Instructions
Axis or a third party. • Use only spare parts provided by or recommended by Axis. • Do not attempt to repair the product yourself. Contact Axis support or your Axis reseller for service matters. Transportation... -
Page 7: Installation Steps
AXIS T92E Housing Series Installation Guide This Installation Guide provides instructions for installing AXIS T92E05 Protective Housing and AXIS T92E20 Outdoor Housing. To install the camera on the network, please see the Installation Guide provided with the camera. For other details about the camera, see the User Manual available on www.axis.com Installation Steps 1. -
Page 8: Hardware Overview
AXIS T92E Housing Series Hardware Overview Housing AXIS T92E20 Protective Housing Sunshield... -
Page 9: Wall Mount
AXIS T92E Housing Series Sunshield adjustment screw (2x) Holder Holder screws (2x) and washer flanges (2x) Stabilizing screw Camera screw and washer Alarm output Network cable Cable hole 10 Safety wire tab 11 Cable holes (2x) 12 Bottom cover 13 Network connector (PoE IN) -
Page 10: Led Indicators
Green Flashing green Single flash: Heater error Double flash: Fan error Triple flash: General error Alarm events will be triggered through the camera’s input port. Contact your Axis reseller for information about spare parts and troubleshooting. Specifications Item Specification Function/group... -
Page 11: Install The Hardware
• Be careful not to scratch, damage or leave fingerprints on the window because this could decrease image quality. The Axis product can be installed with the cables routed through or along the wall. Read all the instructions before installing the product: 1. -
Page 12: Attach The Housing To The Wall Mount
AXIS T92E Housing Series 1. Prepare the wall for installation of the wall mount. Use the wall bracket as a template and mark the holes before drilling the holes. 2. Route the network cable and, if required, the power cable through the wall bracket. - Page 13 AXIS T92E Housing Series 5. Fasten the shoe ring mounted grounding wire and washer with the grounding screw. 1. Route the network cable through the cap. 2. Slide the network cable through the slit on the gasket to attach the gasket to the network cable.
-
Page 14: Install The Camera In The Housing
AXIS T92E Housing Series NO TICE TICE TICE Mount the power connector after the power cable is pushed through the cable gasket. 5. If connecting an auxiliary device, for example an I/O, audio, or external power device, to the camera, repeat the steps above as applicable to the specific device. - Page 15 AXIS T92E Housing Series Off (I) Off (I) 3. If connecting external/input devices, audio devices, or external power to the camera, connect them according to the instructions in the camera’s Installation Guide. 4. If applicable, connect the internal network cable and I/O cable, which are pre-installed in the outdoor housing, to the camera.
-
Page 16: Cold Startup Delay Switch
Make sure not to pinch any cables when closing the housing. Cold Startup Delay Switch AXIS T92E20 features Arctic Temperature Control, which is enabled by setting the Cold Startup Delay switch to I (ON). When enabled, this function controls when the camera restarts after a power cut, when temperatures are below 0 °C (32 °F);... -
Page 17: Further Information
3. To prevent water stains, dry thoroughly with a chamois or a cellulose sponge. Further Information For the latest version of this document, see www.axis.com Visit Axis learning center www.axis.com/academy for useful trainings, webinars, tutorials and guides. Warranty Information For information about Axis’ product warranty and thereto related information, see... -
Page 19: Niveaux De Risques
AXIS T92E Housing Series Informations sur la sécurité Lisez attentivement ce guide d'installation avant d'installer l'appareil. Conservez le guide d'installation pour toute référence ultérieure. Niveaux de risques DANGER Indique une situation dangereuse qui, si elle n'est pas évitée, entraînera le décès ou des blessures graves. - Page 20 AXIS T92E Housing Series Consignes de sécurité A A A VIS • Le produit Axis doit être utilisé conformément aux lois et règlementations locales en vigueur. • Conserver ce produit Axis dans un environnement sec et ventilé. • Ne pas exposer ce produit Axis aux chocs ou aux fortes pressions.
- Page 21 AXIS T92E Housing Series Guide d’installation Ce guide d’installation explique comment installer le boîtier de protection AXIS T92E05 et le boîtier d’extérieur AXIS T92E20. Pour installer la caméra sur le réseau, consultez le guide d’installation fourni avec la caméra. Pour obtenir de plus amples détails relatifs à...
-
Page 22: Aperçu Du Matériel
AXIS T92E Housing Series Aperçu du matériel Boîtier Boîtier de protection AXIS T92E20 Pare-soleil... -
Page 23: Fixation Murale
AXIS T92E Housing Series Vis de réglage du pare-soleil (x2) Support Vis du support (2x) et rondelles (2x) Vis de stabilisation Vis et rondelle de la caméra Sortie d’alarme Câble réseau Trou de câble 10 Patte de fil de sécurité... -
Page 24: Caractéristiques Techniques
IP66 et NEMA 4X Conditions d’utilisation AXIS T92E05 : -20 °C à 55 °C (-4 °F à 131 °F) Humidité 15 - 100 % (condensation) AXIS T92E20 : -40 °C à 50 °C (-40 °F à... -
Page 25: Installation Du Matériel
• Veillez à ne pas rayer, endommager ou laisser d’empreintes sur la fenêtre, car cela pourrait altérer la qualité d’image. Le produit Axis peut être installé avec des câbles acheminés à travers ou le long du mur. Lisez toutes les instructions avant l'installation de l'appareil : 1. -
Page 26: Placement Du Boîtier Sur La Fixation Murale
Pour plus d’informations sur les joints de câble et les presse-étoupes adaptés à d’autres zones de câble, consultez www.axis.com • Si vous utilisez plus d’un câble, chaque câble doit être acheminé au travers d’un joint de câble distinct. - Page 27 AXIS T92E Housing Series 3. Retirez le capuchon, le bouchon et le joint du presse-étoupe à utiliser. 4. Retirez la vis de mise à la terre, la rondelle et l’anneau de la cosse de mise à la terre. 5. Fixez le câble de mise à la terre monté sur l’anneau de la cosse et la rondelle à l’aide de la vise de mise à...
-
Page 28: Installation De La Caméra Dans Le Boîtier
AXIS T92E Housing Series Capuchon Joint Presse-étoupe Bouchon (rebut) 4. Enfoncez le joint dans le presse-étoupe et vissez le capuchon fermement. A A A VIS Si vous utilisez un câble autre que celui fourni, il est nécessaire de préparer un câble réseau blindé... - Page 29 AXIS T92E Housing Series Modèle de caméra AXIS T92E20 AXIS T92E05/AXIS T92E20 Position du support et des Report de démarrage Câble d’E/S éléments de fixation à froid Éteint (0) Éteint (0) Désactivé (1) Désactivé (1)
- Page 30 11. Desserrez la vis de réglage du support afin d’orienter la caméra dans la direction voulue. Pour plus d’informations sur la visualisation du flux de données vidéo, reportez-vous au guide d’installation de la caméra ou consultez www.axis.com/techsup. 12. Fixez le câble de sécurité du couvercle supérieur à la patte du couvercle inférieur.
-
Page 31: Commutateur De Report De Démarrage À Froid
Commutateur de report de démarrage à froid L’AXIS T92E20 est doté d’un contrôle de température froide, qui est activé en réglant le commutateur de report de démarrage à froid sur I (ON). Lorsqu’elle est activée, cette fonction contrôle le moment du redémarrage de la caméra après une coupure ou lors de la baisse des températures en dessous... -
Page 32: Pour Obtenir Plus De Renseignements
Visitez le centre d’apprentissage en ligne Axis sur le site www.axis.com/academy pour en savoir plus sur les formations, les webinaires, les tutoriels et les guides. Informations sur la garantie Pour obtenir de plus amples informations sur la garantie du produit AXIS et des renseignements connexes, allez sur le site www.axis.com/warranty/... -
Page 33: Weitere Nachrichtenstufen
AXIS T92E Housing Series Sicherheitsinformation Lesen Sie das Installationshandbuch sorgfältig durch bevor sie das Produkt installieren. Bewahren Sie das Installationshandbuch für zukünftige Zwecke auf. Gefährdungsstufen GEFAHR Weist auf eine gefährliche Situation hin, welche, falls nicht verhindert, zu Tod oder schweren Verletzungen führt. - Page 34 Bestimmungen erfolgen. • Lagern Sie das Axis Produkt in einer trockenen und belüfteten Umgebung. • Achten Sie darauf, dass das Axis Produkt weder Stößen noch starkem Druck ausgesetzt ist. • Installieren Sie das Produkt nicht an instabilen Halterungen, Oberflächen oder Wänden.
-
Page 35: Empfohlene Werkzeuge
AXIS T92E Housing Series Installationsanleitung In dieser Anleitung wird die Installation des AXIS T92E05-Schutzgehäuses und des AXIS T92E20-Außengehäuses beschrieben. Anweisungen zur Installation der Kamera im Netzwerk finden Sie in der Installationsanleitung der Kamera. Weitere Informationen zur Kamera finden Sie im Benutzerhandbuch unter www.axis.com. -
Page 36: Übersicht Über Die Hardware
AXIS T92E Housing Series Übersicht über die Hardware Gehäuse AXIS T92E20-Schutzgehäuse Sonnenblende... - Page 37 AXIS T92E Housing Series Einstellschrauben für Sonnenblende (2x) Halter Halterungsschrauben (2x) und Unterlegscheiben (2x) Stabilisierungsschraube Schraube und Unterlegscheibe für Kamera Alarmausgang Netzwerkkabel Kabeldurchführung 10 Sicherheitsdrahtlasche 11 Kabeldurchführungen (2x) 12 Untere Abdeckung 13 Netzwerkanschluss (PoE IN) 14 Status-LED 15 Schalter für Kaltstart...
-
Page 38: Technische Daten
Doppeltes Blinken: Probleme mit dem Lüfter Dreifaches Blinken: Allgemeiner Fehler Alarmereignisse werden durch den Eingangsport der Kamera ausgelöst. Wenden Sie sich an Ihren Axis Händler, wenn Sie weitere Informationen zu Ersatzteilen und zur Problemlösung benötigen. Technische Daten Artikel Technische Daten... -
Page 39: Installieren Der Hardware
• Vermeiden Sie Kratzer, Beschädigungen oder Fingerabdrücke am Fenster, da dies die Bildqualität beeinträchtigen kann. Bei der Installation des Axis Produkts können die Kabel durch die Wand oder an der Wand entlang geführt werden. Lesen Sie die Anweisungen, bevor Sie das Produkt installieren: 1. -
Page 40: Befestigen Des Gehäuses An Der Wandhalterung
HINWEIS • Wenn eine andere Kabeldichtung als die mitgelieferte verwendet wird, kann Wasser eindringen und das Produkt beschädigen. Unter www.axis.com finden Sie Informationen zu Kabeldichtungen und Kabelverschraubungen für andere Kabelbereiche. • Wird mehr als ein Kabel verwendet, muss jedes Kabel durch eine separate Kabeldichtung geführt werden. - Page 41 AXIS T92E Housing Series 3. Entfernen Sie die Kappe, den Stopfen und die Dichtung aus der Kabelverschraubung, die verwendet werden soll. 4. Entfernen Sie die Masseschraube, die Unterlegscheibe und den Ringkabelschuh. 5. Befestigen Sie den Ringkabelschuh des Erdungskabels mithilfe einer Unterlegscheibe und der Masseschraube.
-
Page 42: Einbauen Der Kamera In Das Gehäuse
AXIS T92E Housing Series Kappe Dichtung Kabelverschraubung Stopfen (entsorgen) 4. Drücken Sie die Dichtung in die Kabelverschraubung und schrauben Sie die Kappe fest. HINWEIS HINWEIS HINWEIS Falls ein anderes Kabel als das mitgelieferte verwendet wird, müssen Sie ein abgeschirmtes Netzwerkkabel mit einer Dichtung vorbereiten. Führen Sie das Kabel vorsichtig durch die mitgelieferte Dichtung und bringen Sie einen Netzwerkstecker am Kabel an. - Page 43 AXIS T92E Housing Series Kameramodell AXIS T92E20 AXIS T92E05/AXIS T92E20 Halterposition und Kaltstartverzögerung E/A-Kabel Befestigungsmittel Aus (0) Aus (0) Aus (I) Aus (I)
- Page 44 11. Lösen Sie die Einstellschraube der Halterung, und richten Sie die Kamera auf das gewünschte Ziel aus. Informationen zum Anzeigen des Videostreams finden Sie in der Installationsanleitung der Kamera oder unter www.axis.com/techsup. 12. Befestigen Sie den Sicherheitsdraht der oberen Abdeckung an der Lasche an der unteren Abdeckung.
-
Page 45: Schalter Für Kaltstartverzögerung
Stellen Sie sicher, dass beim Schließen des Gehäuses keine Kabel eingeklemmt werden. Schalter für Kaltstartverzögerung AXIS T92E20 ist mit der Funktion „Arctic Temperature Control“ (Steuerung bei arktischen Temperaturen) ausgestattet, die durch das Einstellen des Kaltstartverzögerungsschalters auf „I (EIN)“ aktiviert wird. Wenn diese Funktion aktiviert ist und die Kamera nach einer Stromunterbrechung bei Temperaturen unter 0 °C neu gestartet werden muss, wird die Kamera zunächst auf etwa... -
Page 46: Weitere Informationen
Wasserflecken zu vermeiden. Weitere Informationen Unter www.axis.com finden Sie die neuste Version dieses Dokuments. Besuchen Sie das Axis-Schulungszentrum www.axis.com/academy für anregende Schulungen, Webinare, Lernprogramme und Anleitungen. Gewährleistungsinformationen Informationen zur Gewährleistung der Axis Produkte und andere, hierzu relevante Informationen, finden Sie unter www.axis.com/warranty/... -
Page 47: Livelli Di Pericolo
AXIS T92E Housing Series Informazioni di sicurezza Leggere con attenzione questa guida all'installazione prima di installare il dispositivo. Conservare questo documento per usi futuri. Livelli di pericolo PERICOLO Indica una situazione pericolosa che, se non evitata, provoca morte o lesioni gravi. - Page 48 VVISO VVISO • Il dispositivo Axis deve essere utilizzato in conformità alle leggi e alle disposizioni locali. • Conservare il dispositivo Axis in un ambiente asciutto e ventilato. • Evitare di esporre il dispositivo Axis a urti o pressioni eccessive.
- Page 49 AXIS T92E Housing Series Guida all'installazione Questa guida di installazione consente di installare l'alloggiamento di protezione AXIS T92E05 e la custodia per esterni AXIS T92E20. Per installare la telecamera in rete, consultare la guida all'installazione in dotazione al dispositivo. Per altre informazioni sull'utilizzo della telecamera, consultare la guida per l'utente sul sito www.axis.com...
-
Page 50: Panoramica Dell'hardware
AXIS T92E Housing Series Panoramica dell'hardware Custodia Custodia protettiva AXIS T92E20 Parasole... -
Page 51: Montaggio A Parete
AXIS T92E Housing Series Vite di regolazione e rondella (2x) Supporto Viti del supporto (2x) e flange della rondella (2x) Vite di stabilizzazione Vite della telecamera e rondella Uscita allarme Cavo di rete Foro per il cavo 10 Linguetta per il cavo di sicurezza... -
Page 52: Indicatori Led
Lampeggio singolo: Errore riscaldatore Lampeggio doppio: Errore ventola Lampeggio triplo: Errore generale Gli eventi di allarme vengono attivati attraverso la porta di input della telecamera. Contattare il rivenditore Axis per informazioni su pezzi di ricambio e risoluzione dei problemi. Dati tecnici Elemento Specifica... -
Page 53: Installazione Dell'hardware
• Non graffiare, danneggiare o lasciare impronte digitali sulla finestra per preservare la qualità dell'immagine. È possibile installare il dispositivo Axis instradando i cavi attraverso o lungo la parete. Leggere tutte le istruzioni prima di installare il prodotto: 1. Installazione del supporto per il montaggio a parete. Consultare Installazione del supporto per il montaggio a parete alla pagina 53. - Page 54 • L'utilizzo di una guarnizione per cavi diversa da quella in dotazione può causare infiltrazioni d'acqua e danni al prodotto. Per informazioni sulle guarnizioni per cavi e i pressacavi adatti per altre aree dei cavi, visitare il sito Web www.axis.com. • Utilizzando più di un cavo, instradare ciascun cavo attraverso una guarnizione separata.
- Page 55 AXIS T92E Housing Series 4. Rimuovere la vite della messa a terra, la rondella e l'anello di capocorda di messa a terra. 5. Fissare la rondella e il cavo di messa a terra dell'anello di capocorda con la vite della messa a terra.
- Page 56 AXIS T92E Housing Series A A A VVISO VVISO VVISO Montare la morsettiera di alimentazione dopo aver spinto il cavo attraverso la guarnizione del cavo. 5. In caso di connessione di un dispositivo (es. di I/O, audio o alimentazione esterna) alla telecamera, ripetere i passaggi precedenti (se consentito per il dispositivo in questione).
- Page 57 AXIS T92E Housing Series Sì Off (I) Sì Off (I) 3. In caso di connessione di un dispositivo (es. di input o esterno, audio o alimentazione esterna) alla telecamera, rispettare le istruzioni indicate nella guida all'installazione della telecamera. 4. Se applicabile, connettere alla telecamera il cavo di rete interno e il cavo di I/O, preinstallati nell'alloggiamento per esterni.
-
Page 58: Istruzioni Per La Pulizia
Verificare che i cavi non restino incastrati durante la chiusura della custodia. Interruttore di ritardo per l'avvio a freddo Il modello AXIS T92E20 è dotato di Arctic Temperature Control, che viene abilitato impostando su I (ON) l'interruttore di ritardo per l'avvio a freddo. Quando è abilitata, questa funzione controlla il riavvio della telecamera dopo una mancanza di corrente, quando le temperature sono inferiori a 0 °C;... -
Page 59: Ulteriori Informazioni
3. Per evitare le macchie d'acqua, asciugare accuratamente con un panno di camoscio o una spugna di cellulosa. Ulteriori Informazioni Per la versione più recente di questo documento, visitare il sito all'indirizzo www.axis.com Visitare il centro di apprendimento Axis alla pagina www.axis.com/academy per servizi di formazione utili, webinar, tutorial e guide. -
Page 61: Niveles De Peligro
AXIS T92E Housing Series Información de seguridad Lea esta Guía de instalación con atención antes de instalar el producto. Guarde la Guía de instalación para poder consultarla en otro momento. Niveles de peligro PELIGRO Indica una situación peligrosa que, si no se evita, provocará lesiones graves o la muerte. - Page 62 VISO VISO • El producto de Axis debe utilizarse de acuerdo con las leyes y normativas locales. • Almacene el producto de Axis en un entorno seco y ventilado. • Evite la exposición del producto de Axis a choques o a una fuerte presión.
-
Page 63: Accesorios Opcionales
AXIS T92E Housing Series Guía de instalación Esta Guía de instalación ofrece instrucciones para la instalación de la carcasa de protección AXIS T92E05 y la carcasa para exteriores AXIS T92E20. Para instalar la cámara en la red, consulte la Guía de instalación proporcionada con la cámara. -
Page 64: Información General Del Hardware
AXIS T92E Housing Series Información general del hardware Carcasa Carcasa de protección AXIS T92E20 Parasol... -
Page 65: Montaje En Pared
AXIS T92E Housing Series Tornillo de ajuste del parasol (2) Soporte Tornillos de soporte (2) y pestañas de arandelas (2) Tornillo de estabilización Tornillo de cámara y arandela Salida de alarma Cable de red Orificio para cable 10 Lengüeta para cable de seguridad... -
Page 66: Indicadores Led
Doble parpadeo: error del ventilador Triple parpadeo: error general Los eventos de alarma se activarán a través del puerto de entrada de la cámara. Póngase en contacto con su distribuidor de Axis para obtener información sobre repuestos y solución de problemas. Especificaciones Elemento Especificaciones Función/grupo... -
Page 67: Instalación Del Hardware
• Preste atención para no arañar, dañar ni dejar huellas en la ventana de la carcasa, ya que esto podría reducir la calidad de imagen. El producto de Axis puede instalarse guiando los cables a través de la pared o sobre esta. Lea todas las instrucciones antes de instalar el producto: 1. -
Page 68: Fijación De La Carcasa Al Montaje En Pared
Para obtener más información acerca de las juntas de cable y de los prensaestopas permitidos para otras áreas de cableado, visite www.axis.com. • Si se utiliza más de un cable, deberá pasarse cada cable a través de una junta distinta. - Page 69 AXIS T92E Housing Series 3. Extraiga la tapa, el tapón y la junta del prensaestopas que vaya a utilizar. 4. Retire el tornillo de toma de tierra, la arandela y la zapata para cable de tierra. 5. Fije la zapata montada en el cable de tierra y la arandela con el tornillo de toma de tierra.
-
Page 70: Instalación De La Cámara En La Carcasa
AXIS T92E Housing Series Tapa Junta Prensaestopas Tapón (desechable) 4. Presione la junta en el prensaestopas y atornille la tapa con firmeza. A A A VISO VISO VISO Si se utiliza un cable distinto al que se proporciona, es necesario preparar un cable de red blindado con una junta. - Page 71 AXIS T92E Housing Series Modelo de cámara AXIS T92E20 AXIS T92E05/AXIS T92E20 Posición y fijadores del soporte Cable de Arranque retardado en frío Apagado (0) Sí Apagado (0) Sí Apagado (I) Sí Apagado (I)
- Page 72 11. Afloje el tornillo de ajuste de la escuadra para orientar la cámara hacia el punto de interés. Para obtener información sobre cómo ver la transmisión de vídeo, consulte la Guía de instalación de la cámara o visite www.axis.com/techsup. 12. Conecte el cable de seguridad de la cubierta superior a la lengüeta de la cubierta inferior.
-
Page 73: Instrucciones De Limpieza
Asegúrese de no pillar ningún cable al cerrar la carcasa. Conmutador de arranque retardado en frío La AXIS T92E20 incorpora la función de control de temperatura Arctic, que se activa colocando el conmutador de arranque retardado en frío en la posición I (Activado). Cuando está activada, esta función controla el reinicio de la cámara después de un corte de alimentación en caso de que la... -
Page 74: Más Información
Visite el centro de aprendizaje de www.axis.com/academy para consultar guías, tutoriales, seminarios web y cursos que pueden resultarle útiles. Información de garantía Para obtener más detalles sobre la garantía del producto Axis y la información relacionada con ella, consulte www.axis.com/warranty/... - Page 75 AXIS T92E Housing Series 安 安 安 全 全 全 情 情 情 報 報 報 本製品を設置する前に、このインストールガイドをよくお読みください。 インス トールガイドは、後で参照できるように保管しておいてください。 危 危 危 険 険 険 レ レ レ ベ ベ ベ ル ル ル 危 危 危 険 険 険...
- Page 76 AXIS T92E Housing Series 安 安 安 全 全 全 ⼿ ⼿ ⼿ 順 順 順 注 注 注 記 記 記 • 本製品は、お使いになる地域の法律や規制に準拠して使⽤してください。 • 本製品は乾燥した換気のよい環境に保管してください。 • 本製品に衝撃または強い圧⼒を加えないでください。 • 本製品を不安定なブラケット、表⾯、または壁に設置しないでください。 • 本製品を設置する際には、適切な⼯具のみを使⽤してください。 電動⼯具を 使⽤して過剰な⼒をかけると、製品が損傷することがあります。 • 化学薬品、腐⾷剤、噴霧式クリーナーは使⽤しないでください。 • 清掃には、きれいな⽔に浸した清潔な布を使⽤してください。 • 製品の技術仕様に準拠したアクセサリーのみを使⽤してください。 これらの...
- Page 77 AXIS T92E Housing Series イ イ イ ン ン ン ス ス ス ト ト ト ー ー ー ル ル ル ガ ガ ガ イ イ イ ド ド ド このインストールガイドでは、AXIS T92E05プロテクティブハウジングおよびAXIS T92E20アウトドアハウジングを設置する⼿順について説明します。 カメラをネットワークにインストールする⼿順については、カメラに付属するインス トールガイドを参照してください。 カメラのその他の情報については、Axisのホーム www.axis.com ページ ( ) でユーザーズマニュアルを参照してください。...
- Page 78 AXIS T92E Housing Series ハ ハ ハ ー ー ー ド ド ド ウ ウ ウ ェ ェ ェ ア ア ア の の の 概 概 概 要 要 要 ハ ハ ハ ウ ウ ウ ジ ジ ジ ン ン ン グ グ グ...
- Page 79 AXIS T92E Housing Series サンシールド調節ネジ (×2) ホルダー ホルダーネジ (×2) とワッシャフランジ (×2) 安定⽤ねじ カメラ⽤ねじとワッシャー アラーム出⼒ ネットワークケーブル ケーブル孔 10 安全ワイヤータブ 11 ケーブル孔 (×2) 12 裏蓋 13 ネットワークコネクター (PoE⼊⼒) 14 ステータスLED 15 コールドスタートスイッチ 16 ブラケットアダプター 壁 壁 壁 ⾯ ⾯ ⾯ 取 取 取 付 付 付 ブ ブ ブ ラ ラ ラ ケ ケ ケ ッ ッ ッ ト ト ト...
- Page 80 湿度: 15〜100% (結露可) AXIS T92E20: -40°C〜50°C 湿度: 15〜100% (結露可) AXIS T92E05: IEC 60068-2-6、 認 認 認 証 証 証 規 規 規 格 格 格 IEC 60068-2-27 AXIS T92E20: EN 55022 Class B、EN 61000-3-2、 EN 61000-3-3、EN 55024、EN 61000-6-1、EN 61000-6-2、 EN 60950-22、IEC 60068-2-6、...
- Page 81 AXIS T92E Housing Series B ITE、C-tick AS/NZS CISPR 22、 ICES-003、Class B、KCC Class B 120 x 161 x 404 mm ⼨ ⼨ ⼨ 法 法 法 ( ( ( ⾼ ⾼ ⾼ さ さ さ × × × 幅 幅 幅 × × × 奥 奥 奥 ⾏ ⾏ ⾏ き き き ) ) ) 重...
- Page 82 AXIS T92E Housing Series 注意 • または、壁⾯取付ブラケットに同梱のインストールガイド、およ www.axis.com び を参照してください。 www.axis.com • コネクタの技術仕様については、Axisのホームページ ( ) でカメ ラのユーザーズマニュアルを参照してください 1. 壁⾯取付ブラケットを取り付ける壁⾯の準備を⾏います。 壁⾯ブラケット を壁に合わせ、⽳を開ける位置に印を付けます。 2. ネットワークケーブル (必要に応じて電源ケーブル) を壁⾯ブラケットに通 します。 カメラとの接続⽤に30 cmほどケーブルを残します。 3. カメラのハウジングにアース端⼦ケーブルがある場合、アースケーブル を壁⾯ブラケットに通します。 ハウジングとの接続⽤に15 cmほどケーブ ルを残します。 4. I/O、⾳声、外部電源デバイスなどの補助デバイスをカメラに接続する場 合、それぞれのデバイスについて同じ⼿順を繰り返します。 5. ネジを締め、壁⾯ブラケットを壁⾯に固定します。 ハ ハ ハ ウ ウ ウ ジ ジ ジ ン ン ン グ グ グ の の の 壁 壁 壁 ⾯ ⾯ ⾯ 取 取 取 付 付 付 ブ ブ ブ ラ ラ ラ ケ ケ ケ ッ ッ ッ ト ト ト へ へ へ の の の 取 取 取 り り り 付 付 付 け け け...
- Page 83 AXIS T92E Housing Series 3. 使⽤するケーブルグランドからキャップ、プラグ、ガスケットを取り外 します。 4. アース端⼦ネジ、ワッシャ、アースシューリングを取り外します。 5. シューリングを取り付けたアース線およびワッシャをアース端⼦ネジに固 定します。 1. ネットワークケーブルをキャップに通します。 2. ネットワークケーブルをガスケットの溝に沿ってスライドさせ、ネット ワークケーブルにガスケットを取り付けます。 3. ネットワークケーブルをケーブルグランドに通します。...
- Page 84 AXIS T92E Housing Series キャップ ガスケット ケーブルグランド プラグ (破棄) 4. ガスケットをケーブルグランドの中まで押し込み、キャップをしっかりと 締めます。 注 注 注 記 記 記 付属のケーブル以外のケーブルを使⽤する場合は、シールドネットワーク ケーブルにガスケットを装着する必要があります。 ケーブルを付属のガス ケットに通し、ネットワークコネクタを取り付けます。 ガスケットに、付属 のドライバーを使⽤して⽳をあける必要がある場合があります。 注 注 注 記 記 記 電源ケーブルをケーブルガスケットに通した後に電源コネクタを取り付 けます。 5. I/O、⾳声、外部電源デバイスなどの補助デバイスをカメラに接続する場 合、それぞれのデバイスについて同じ⼿順を繰り返します。 6. 裏蓋を壁⾯取付ブラケットに取り付け、ネジを締めます (トルク2 Nm)。 カ カ カ メ メ メ ラ ラ ラ の の の ハ ハ ハ ウ ウ ウ ジ ジ ジ ン ン ン グ グ グ へ へ へ の の の 収 収 収 納 納 納...
- Page 85 AXIS T92E Housing Series AXIS T92E05/AXIS T92E20 AXIS T92E20 カメラのモデル I/Oケー コールドスタート ホルダーの位置とファスナー ブル アップ遅延 なし オフ (0) あり オフ (0) あり オフ (I) あり オフ (I)
- Page 86 AXIS T92E Housing Series 3. 外部/⼊⼒デバイス、⾳声デバイス、外部電源をカメラに接続する場合は、 カメラのインストールガイドに記載された⼿順に従って接続してください。 4. 該当する場合は、屋外⽤ハウジングに設置済みの内部ネットワークケーブ ルとI/Oケーブルをカメラに接続します。 5. 裏蓋にホルダーを取り付けます。 ホルダーの位置を慎重に調整し、ワッ シャを含むホルダーネジを締めます (トルク0.5 Nm)。 カメラのレンズとプ ラスチック製の内部ハウジングの前⽅の端の間に約5‒10mmの距離をおき、 ウィンドウがレンズを擦らずにトップカバーを装着できるようにします。 6. SDカードをローカルストレージとして使⽤する場合は、カメラのSDカード スロットにSDカードを挿⼊します。 7. 外部ネットワークケーブルをPoE⼊⼒に接続します。 8. 該当する場合は、Cold Startup Delay (コールド起動の遅延) スイッチを正し 84ページ 87ページの、コールドスタートアップ い位置に設定します。 と 遅延スイッチ ページの表を参照してください。. 9. 該当する場合は、ハウジングのステータスLEDが正しい状態を⽰している 80ページの、LEDインジケーター ことを確認してください。...
- Page 87 コ コ コ ー ー ー ル ル ル ド ド ド ス ス ス タ タ タ ー ー ー ト ト ト ア ア ア ッ ッ ッ プ プ プ 遅 遅 遅 延 延 延 ス ス ス イ イ イ ッ ッ ッ チ チ チ AXIS T92E20はArctic Temperature Control (極寒コントロール) 機能を搭載。Cold Startup Delay (コールド起動の遅延) スイッチを...
- Page 88 AXIS T92E Housing Series 関 関 関 連 連 連 情 情 情 報 報 報 www.axis.com 本書の最新バージョンについては、 にアクセスしてください。 www.axis.com/academy Axisラーニングセンター ( ) にアクセスしてください。役に⽴ つトレーニング、ウェブセミナー、チュートリアル、ガイドをご⽤意しています。 保 保 保 証 証 証 情 情 情 報 報 報 www.axis.com/warranty/ Axisの製品保証と関連情報については、 をご覧ください...
- Page 89 AXIS T92E Housing Series 安 安 安 全 全 全 信 信 信 息 息 息 安装该产品前请仔细通读该安装指南。请保管好安装指南以供以后查阅。 危 危 危 险 险 险 等 等 等 级 级 级 危 危 危 险 险 险 表示有危险的情形,如果不能避免,将导致死亡或严重的个人伤害。 警 警 警 告 告 告...
- Page 90 AXIS T92E Housing Series 安 安 安 全 全 全 说 说 说 明 明 明 注 注 注 意 意 意 • 使用该安讯士产品必须符合当地法律法规要求。 • 安讯士产品应存放在干燥通风的环境中。 • 应避免对安讯士产品造成冲撞或重压。 • 不得将本产品安装于不稳固的支架、表面或墙面上。 • 安装安讯士产品时,请使用适用工具。使用电动工具时过度用力可能对产品 造成损坏。 • 请勿使用化学制剂、腐蚀性制剂或气雾性清洁剂。 • 使用浸有净水的干净抹布进行清洁。 • 所用附件必须符合该产品的技术规格要求。可由安讯士或第三方供应商提供。 • 必须使用安讯士提供或推荐的零件。...
- Page 91 推 推 推 荐 荐 荐 的 的 的 工 工 工 具 具 具 钻子 – 如果使用硬天花板安装 • 刀 – 如果使用吊顶安装 • Torx 螺丝刀 T30 – 如果使用 AXIS T91A 安装附件中的兼容支架 • 可 可 可 选 选 选 附 附 附 件 件 件 www.axis.com 如欲了解该产品的所有可用附件,请访问...
- Page 92 AXIS T92E Housing Series 硬 硬 硬 件 件 件 概 概 概 览 览 览 护 护 护 罩 罩 罩 AXIS T92E20 防护罩 遮阳罩...
- Page 93 AXIS T92E Housing Series 遮阳罩调节螺丝 (2x) 夹具 夹具螺丝 (2x) 和垫圈法兰 (2x) 稳定螺丝 摄像机螺丝和垫圈 报警输出 网线 线缆孔 10 保险丝垫片 11 线缆孔 (2x) 12 底盖 13 网络接口(PoE 输入) 14 LED 状态指示灯 15 冷启动开关 16 支架适配器 壁 壁 壁 式 式 式 支 支 支 架 架 架...
- Page 94 AXIS T92E Housing Series LED 指 指 指 示 示 示 灯 灯 灯 备注 下表所提到的护罩 LED 指示灯位于护罩中。 护 护 护 罩 罩 罩 LED LED 指 指 指 示 示 示 灯 灯 灯 指 指 指 示 示 示...
- Page 95 AXIS T92E Housing Series 尺 尺 尺 寸 寸 寸 ( ( ( 高 高 高 x x x 宽 宽 宽 x x x 深 深 深 ) ) ) 120 x 161 x 404 毫米(4.7 x 6.4 x 15.9 英寸)...
- Page 96 AXIS T92E Housing Series 4. 如果将辅助设备(如 I/O、音频或外部电源设备)连接至摄像机,请重复上 述适用于特定设备的步骤。 5. 拧紧螺丝,将壁式支架紧固在墙壁上。 将 将 将 护 护 护 罩 罩 罩 安 安 安 装 装 装 至 至 至 壁 壁 壁 式 式 式 支 支 支 架 架 架...
- Page 97 AXIS T92E Housing Series 1. 将网线穿过密封帽。 2. 将网线穿过密封垫孔隙,以便将密封垫附着在网线上。 3. 将网线穿过线缆密封套。 密封帽 垫圈 线缆密封套 密封塞(丢弃) 4. 将密封垫用力塞入线缆密封套,并将密封盖拧紧。 注 注 注 意 意 意 如果不使用随附的网线而使用其它网线,您需要准备一根带有垫圈的屏蔽网 线。轻轻地将网线穿过随附的垫圈并装上一个网络接头。可能需要用一个 随附的螺丝刀在垫圈上戳一个洞。 注 注 注 意 意 意 在电源线穿过线缆垫圈后,安装电源接口。...
- Page 98 AXIS T92E Housing Series 5. 如果将辅助设备(如 I/O、音频或外部电源设备)连接至摄像机,请重复上 述适用于特定设备的步骤。 6. 将底盖置于壁式支架上,并拧紧螺丝(扭矩 2 纳米)。 将 将 将 摄 摄 摄 像 像 像 机 机 机 安 安 安 装 装 装 在 在 在 护 护 护 罩 罩 罩 中 中 中...
- Page 99 AXIS T92E Housing Series 是 关 (I) 是 关 (I) 3. 若需要,请按照摄像机安装指南的说明,将外部/输入设备、音频设备或外部 电源连接至摄像机。 4. 若适用,连接内部网线和 I/O 线缆(预安装在室外护罩中)至摄像机。 5. 将夹具安装于底盖。小心调整夹具的位置,并拧紧夹具螺丝,包括垫圈(扭 矩 0.5 纳米)。在摄像机镜头和塑料内护罩前端之间预留足够距离(约 5–10 毫米(0.2–0.4 英寸)用于容纳顶盖,以免窗口划破镜头。 6. 如果将 SD 卡用于本地存储,请将该卡插入摄像机的 SD 卡插槽。 7. 将外部网线连接至 PoE 输入。 第98页 冷启动 8. 若适用,将冷启动延迟开关设置为正确位置,请参见第 页表和...
- Page 100 注 注 注 意 意 意 合上护罩时,请确保不要夹住任何线缆。 冷 冷 冷 启 启 启 动 动 动 延 延 延 迟 迟 迟 开 开 开 关 关 关 AXIS T92E20 具有极地低温控制功能,可通过将冷启动延迟开关设置为 I (ON) 而启用。 一旦启用,该功能将控制电源切断后何时重启,当温度低于 0 °C (32 °F);摄像机在启 动前首先被加热至近 0 °C (32 °F)。这样可以防止损坏含有移动部件的摄像机型号。...
- Page 101 AXIS T92E Housing Series 3. 为防止出现水渍,使用羚羊皮或人造海绵完全擦干。 更 更 更 多 多 多 信 信 信 息 息 息 www.axis.com 有关本文档的最新版本,请访问 www.axis.com/academy 访问安讯士学习中心 ,获取有用培训、网络研讨会、教程 及指南。 保 保 保 修 修 修 信 信 信 息 息 息 www.axis.com/warranty/ 有关安讯士产品保修的信息及与之相关的信息,请访问...
- Page 102 Installation Guide Ver. M1.2 AXIS T92E Housing Series Date: December 2015 © Axis Communications AB, 2015 Part No. 1525209...
Need help?
Do you have a question about the T92E Series and is the answer not in the manual?
Questions and answers