Table of Contents
Advertisement
Available languages
Available languages
Quick Links
Advertisement
Chapters
Table of Contents

Subscribe to Our Youtube Channel
Related Manuals for Axis T92A00


Summary of Contents for Axis T92A00
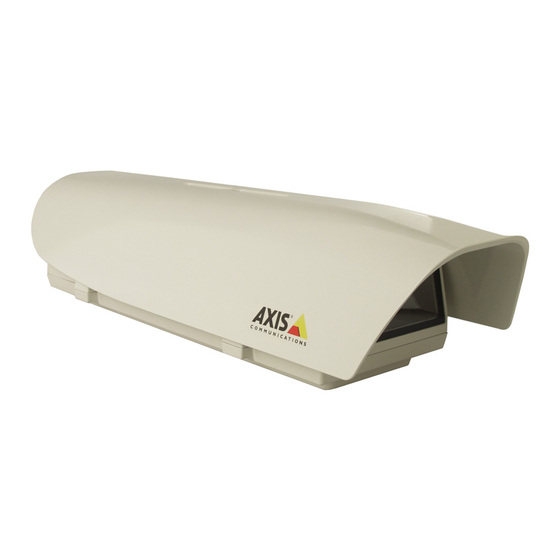
- Page 1 INSTALLATION GUIDE AXIS T92A00 Protective Housing...
-
Page 3: Table Of Contents
• AXIS 221 • AXIS 223M Note: Before you begin, make sure that the AXIS T92A00 package contents, power supply, and the required cables, tools, and documentation are available. See “Package contents” on page 4. -
Page 4: Axis T92A00 Installation Guide
Tools (not included) Phillips screw driver flathead screw driver small (2mm) flathead screw driver RJ45 crimp tool See note on RJ 45 connector above * Sold separately or included in kit, see Accessories product list at www.axis.com for details... -
Page 5: Install The Bracket
Page 5 Install the bracket Install the mount for AXIS T92A00 on a wall ceiling or pole and make sure that the screws and plugs are appropriate for the material (e.g. wood, metal, sheet rock, stone). Check if the wall bracket an internal cable channel or if the cabling is external. -
Page 6: Install The Camera In The Housing
AXIS T92A00 Installation Guide Install the camera in the housing AXIS T92A00 comes with a pre-installed power supply. 1. The housing is shipped with 3 black plastic spacers. Use one, two or three spacers between the camera and holder and make sure that the camera lens is positioned more than 2mm above the heater and that the cables are not in contact with the heater: •... -
Page 7: Connect The Power Cable To The Camera
3. Connect the wires to the green terminal connector on the Axis network camera (fig.4). 4. Proceed to “Route the cables to the housing” on page 8. Note: The camera models have different terminal connectors. -
Page 8: Route The Cables To The Housing
4. If applicable, connect the I/O cables to the connectors as described in the installation guide supplied with the camera. 5. Proceed to “Connect the power cable to the housing 100-240V AC power cable to AXIS T92A00” on page 9. -
Page 9: Connect The Power Cable To The Housing 100-240V Ac Power Cable To Axis T92A00
4. Once the installation is complete and the camera focus has been set, close the lid and tighten the screws to lock the housing using the supplied hexagonal key. 5. The installation is now complete. Note: The Axis network camera installation guide is shipped with the camera or available from the Axis web site at www.axis.com... - Page 10 Page 10 AXIS T92A00 Installation Guide Additional information on replacing the power supply Note: The power supply is pre-installed in the AXIS T92A00 housing. power supply Power supply Connector brackets yellow/green cables and holders 1. Remove the screws holding the yellow/green cables.
-
Page 11: Axis P1311
AXIS T92A00 Guide d'installation Page 11 Boîtier du dôme AXIS T92A00 Suivez ces instructions pour mener à bien l'installation de l’Boîtier du dôme AXIS T92A00 et de la caméra réseau Axis : 1. « Contenu de l'emballage » à la page 12 2. -
Page 12: Axis P1311
1 alimentation AXIS T92A00 - référence 0217-241 1 câble (rouge/noir) Caméra réseau Axis* AXIS P1311, AXIS Q1755, AXIS 223M, AXIS 221, AXIS 211/211A/211M/211W, AXIS 210/210A guide d'installation papier Instructions pour l'installation de la caméra sur le réseau Support, câbles et connecteur (non inclus) 1 support mural* Consultez le site www.axis.com pour obtenir la liste des... - Page 13 AXIS T92A00 Guide d'installation Page 13 Outils (non inclus) 1 tournevis à pointe cruciforme 1 tournevis à pointe plate 1 petit tournevis à pointe plate (2 mm) 1 outil de sertissage RJ45 Reportez-vous à la remarque ci-dessus concernant le connecteur RJ45.
- Page 14 Installation du support Installez le support du boîtier AXIS T92A00 sur un mur, au plafond ou sur un poteau. Vérifiez que les vis et les chevilles sont adaptées au matériau (ex : bois, métal, plaque de plâtre, pierre). Vérifiez que le support mural possède...
-
Page 15: Installation De La Caméra Dans Le Boîtier » À La
Vérifiez que l'objectif de la caméra se trouve à plus de 2 mm au- dessus du réchauffeur et que les câbles ne sont pas en contact avec ce dernier : • AXIS P1311 - 1 cale d'espacement • AXIS Q1755 - 1 cale d'espacement •... -
Page 16: Connectez L'alimentation À La Caméra. » À La
3. Branchez les fils sur le connecteur pour terminaux vert de la caméra réseau Axis (fig. 4). Note: Les connecteurs pour terminaux diffèrent selon le modèle de caméra. Suivez bien la description correspondant à la caméra installée. -
Page 17: Acheminement Des Câbles Vers Le Boîtier » À La
AXIS T92A00 Guide d'installation Page 17 Câble d'alimentation rouge/noir + / Mise à la terre (GND) Panneau du connecteur Caméra Rouge Alimentation CC (+) Alimentation caméra CC Mise à la terre (GND) Noir Mise à la terre (GND) Caméra (mise à la terre) Acheminement des câbles vers le boîtier... -
Page 18: Connectez Le Câble D'alimentation Ca 100-240V Au Boîtier. » À La
à l'aide de la clé hexagonale fournie pour fermer le boîtier. 5. L'installation est terminée. Note: Le guide d'installation de la caméra réseau Axis est livré avec la caméra ou est disponible sur le site Web d'Axis (www.axis.com). - Page 19 AXIS T92A00 Guide d'installation Page 19 Installation de l'alimentation électrique dans le boîtier Alimentation électrique Connecteur Connecteur supports Câbles jaunes/verts et supports 1. Retirez les vis maintenant les câbles jaunes/verts. 2. Fixez les supports de l'alimentation sans serrer, à l'aide des vis fournies.
-
Page 21: Axis P1311
• AXIS 221 • AXIS 223M Note: Stellen Sie vor der Installation sicher, dass der Lieferumfang des AXIS T92A00-Gehäuses vollstän- dig ist und das Netzteil sowie die notwendigen Kabel, Werkzeuge und Dokumentationen verfüg- bar sind. Siehe “Lieferumfang” auf Seite 22. -
Page 22: Axis T92A00 Installationsanleitung
Unterlegscheibe kleine schwarze Unterlegscheiben Flachkopfschrauben (3 verschiedene Längen) AXIS T92A00-Netzteil* AXIS T92A00-Netzteil Artikelnummer: 0217-241 Kabel (rot/schwarz) Axis-Netzwerkkamera* AXIS P1311, AXIS Q1755, AXIS 210/210A, AXIS 211/211A/211M/211W, AXIS 221, AXIS 223M gedruckte Anweisungen zur Installation der Kamera in einem Netzwerk Installationsanleitung... - Page 23 RJ45-Anschluss erst angebracht, wenn das Kabel durch die Kabelmuffe gezogen wurde. Werkzeuge (nicht enthalten) Kreuzschlitzschraubendreher Flachkopfschraubendreher kleiner Flachkopfschraubendreher (2 mm) RJ45-Crimpzange Siehe obigen Hinweis zum RJ45-Anschluss * Wird einzeln oder im Set verkauft (siehe Zubehörliste unter www.axis.com)
-
Page 24: Halterung Montieren" Auf
AXIS T92A00 Installationsanleitung Halterung montieren Montieren Sie die Halterung für das AXIS T92A00-Gehäuse an einer Wand, einer Decke oder einem Mast. Stellen Sie sicher, dass Sie für das Material (z. B. Holz, Metall, Gipskarton, Stein) die geeigneten Schrauben und Dübel verwenden. Überprüfen Sie, ob die Wandhalterung... -
Page 25: Kamera Im Gehäuse Montieren" Auf
Sie einen, zwei oder drei Abstandshalter zwischen Kamera und Halterung ein. Stellen Sie außerdem sicher, dass sich die Kameralinse mehr als 2 mm über dem Heizelement befindet und die Kabel das Heizelement nicht berühren. • AXIS P1311 - 1 Abstandshalter • AXIS Q1755 - 1 Abstandshalter •... -
Page 26: Stromkabel An Die Kamera Anschließen" Auf
Seite 26 AXIS T92A00 Installationsanleitung Stromkabel an die Kamera anschließen 1. Lösen Sie mit dem kleinen Flachkopfschraubendreher die Flachkopfschrauben am Stromanschluss der Kamera auf der Anschlussplatine (Abb. 4). 2. Setzen Sie die roten (+) und Abb. 3 schwarzen (Masse) Drähte in den... -
Page 27: Kabel Zum Gehäuse Verlegen" Auf
AXIS T92A00 Installationsanleitung Seite 27 Rotes/schwarzes Stromkabel + / Masse Draht Anschlussplatine Kamera Gleichspannung (+) Kamera-Gleichspannung (+) Masse Schwarz Masse Kamera (Masse) Kabel zum Gehäuse verlegen Die folgenden Anweisungen beschreiben die Montage des Gehäuses auf einer Halterung mit einem internen Kabelschacht (Alternative A) oder mit einem externen Kabel (Alternative B). Prüfen Sie, über welche Halterung Sie verfügen, und wählen Sie die passende Beschreibung aus. -
Page 28: 100-240 V-Wechselstromkabel Am Gehäuse Anbringen" Auf
Gehäuseklappe und ziehen Sie die Schrauben an der Klappe mit dem mitgelieferten Inbusschlüssel fest. 5. Die Installation ist damit abgeschlossen. Note: Die Installationsanleitung der Axis-Netzwerkkamera wird zusammen mit der Kamera geliefert. Sie ist aber auch auf der Website von Axis unter www.axis.com erhältlich. - Page 29 AXIS T92A00 Installationsanleitung Seite 29 Netzteil im Gehäuse befestigen Netzteil Netzteil- Anschluss halterungen Gelb-grüne Kabel und Halterungen 1. Entfernen Sie die Schrauben, die die gelb-grünen Kabel festhalten. 2. Befestigen Sie mit den mitgelieferten Schrauben die Halterungen des Netzteils nur leicht.
-
Page 31: Axis P1311
Guida all'installazione AXIS T92A00 Pagina 31 Allogiamento AXIS T92A00 Per completare l'installazione della videocamera di rete Axis e dell'alloggiamento AXIS T92A00, seguire i passaggi riportati di seguito: 1. “Contenuto della confezione” a pagina 32 2. “Installazione del supporto” a pagina 34 3. -
Page 32: Guida All'installazione Axis T92A00
Alimentatore AXIS N. parte 0217-241 T92A00 cavo (rosso e nero) Videocamera di rete Axis* AXIS P1311, AXIS Q1755, AXIS 210/210A, AXIS 211/211A/211M/211W, AXIS 221, AXIS 223M guida all'installazione Istruzioni per l'installazione della videocamera in rete Supporti, cavi e connettori (non inclusi) - Page 33 Guida all'installazione AXIS T92A00 Pagina 33 Contenuto della confezione AXIS T92A00 Sacchetto n. 1: cavo di alimentazione cavo di alimentazione CA 100-240 V principale cavo di rete Si consiglia l'utilizzo di un cavo STP (Shielded Twisted Pair). Se si utilizza un supporto con canalizzazione esterna, è...
-
Page 34: Installazione Del Supporto" A
Guida all'installazione AXIS T92A00 Installazione del supporto Installare il supporto per l'alloggiamento AXIS T92A00 per il montaggio a parete, a soffitto o su palo ed accertarsi che le viti e i tasselli siano adeguati al materiale (ad esempio legno, metallo, cartongesso, pietra). -
Page 35: Installazione Della Videocamera Nell'alloggiamento" A
Guida all'installazione AXIS T92A00 Pagina 35 Installazione della videocamera nell'alloggiamento 1. L'alloggiamento è dotato di 3 distanziatori in plastica nera. Adoperare uno, due o tre distanziatori tra la videocamera e il supporto e accertarsi che l'obiettivo della videocamera sia collocato almeno 2 mm al di sopra del riscaldatore e che i cavi non vi entrino in contatto: •... -
Page 36: Connessione Dell'alimentazione Alla Videocamera" A
Pagina 36 Guida all'installazione AXIS T92A00 Connessione dell'alimentazione alla videocamera 1. Con il cacciavite piano piccolo, allentare le viti nel connettore di alimentazione della videocamera sulla piastra di collegamento (fig. 3). 2. Inserire i cavi rosso (+) e FIG. 3... - Page 37 Guida all'installazione AXIS T92A00 Pagina 37 Cavo di alimentazione rosso e nero + / GND Cavo Piastra di collegamento Videocamera Rosso Alimentazione CC (+) Alimentazione CC videocamera (+) GND (Terra) Nero GND (Terra) Videocamera (GND) Inserimento dei cavi nell'alloggiamento Le seguenti istruzioni descrivono l'installazione dell'alloggiamento su un supporto dotato di canalina interna (tipologia A) oppure con cablaggio esterno (tipologia B).
- Page 38 4. Al termine dell'installazione e della messa a fuoco della videocamera, chiudere i coperchi e serrare le viti per bloccare l'alloggiamento adoperando la chiave esagonale fornita. 5. L'installazione è stata completata. Note: La guida all'installazione della videocamera di rete Axis è fornita con la videocamera ed è dis- ponibile sul sito Web www.axis.com.
- Page 39 Guida all'installazione AXIS T92A00 Pagina 39 Installazione dell'alimentatore nell'alloggiamento Alimentatore Connettore Supporti per l’alimentatore Cavi giallo e verde e supporti 1. Rimuovere le viti di fissaggio dei cavi giallo e verde. 2. Collegare i supporti dell'alimentatore, utilizzando le viti fornite, senza serrarle.
-
Page 41: Axis P1311
AXIS T92A00 Guía de instalación Página 41 Carcasa AXIS T92A00 Siga estas instrucciones para completar la instalación de la Carcasa AXIS T92A00 y la cámara de red Axis: 1. “Contenido del paquete” en la página 42 2. “Instalación del soporte” en la página 44 3. -
Page 42: Axis P1311
Nº de ref. 0217-241 T92A00 cable (rojo/negro) Cámara de red Axis* AXIS P1311, AXIS Q1755, AXIS 210/210A, AXIS 211/211A/211M/211W, AXIS 221, AXIS 223M guía de instalación impresa Instrucciones sobre cómo instalar la cámara en la red Soporte, cables y conector (no incluidos) soporte de pared* Visite www.axis.com para obtener más información sobre... - Page 43 AXIS T92A00 Guía de instalación Página 43 Contenido del paquete AXIS T92A00 Bolsa 1: cable de alimentación de la cable de alimentación de CA 100-240V red de suministro cable de red Se recomienda el uso de cables de par trenzado blindado (STP).
- Page 44 AXIS T92A00 Guía de instalación Instalación del soporte Instale el soporte para la carcasa AXIS T92A00 en una pared, techo o poste y asegúrese de que los tornillos y los tapones son adecuados para el material (p. ej., madera, metal, tablarroca, piedra).
- Page 45 AXIS T92A00 Guía de instalación Página 45 Instalación de la cámara en la carcasa 1. La carcasa se envía con tres espaciadores negros de plástico. Utilice uno, dos o tres espaciadores entre la cámara y el soporte, y asegúrese de que la lente de la cámara está ubicada a más de 2 mm por encima del calentador y que los cables no están en contacto con el...
-
Page 46: Axis P1311
3. Conecte los cables en el conector de terminal verde en la cámara de red de Axis (fig. 4). Note: Los modelos de cámara tienen diferentes conectores de terminal. Asegúrese de seguir la descripción correcta para la cámara instalada. - Page 47 AXIS T92A00 Guía de instalación Página 47 Cable de alimentación rojo/negro + / GND Cable Tablero del conector Cámara Rojo Alimentación de CC (+) Alimentación de CC (+) de la cámara Negro Cámara (GND) Pasar los cables a la carcasa Las siguientes instrucciones describen la instalación de la carcasa en el soporte con un canal de...
- Page 48 5. La instalación ha finalizado. Note: La guía de instalación de la cámara de red de Axis se envía con la cámara o está disponible en el sitio Web de Axis en www.axis.com...
- Page 49 AXIS T92A00 Guía de instalación Página 49 Instalación de la fuente de alimentación en la carcasa Fuente de alimentación Fuente de alimentación Conector soportes Cables amarillo/verde y soportes 1. Retire los tornillos que sugetan los cables verde/amarillo. 2. Utilizando los tornillos proporcionados, conecte los soportes de la fuente de alimentación dejándolos un poco flojos.
- Page 51 Installation Guide Ver.2.00 AXIS T92A00 Printed: March 2009 © Part No. 34834 Axis Communications AB, 2008-2009...
Need help?
Do you have a question about the T92A00 and is the answer not in the manual?
Questions and answers