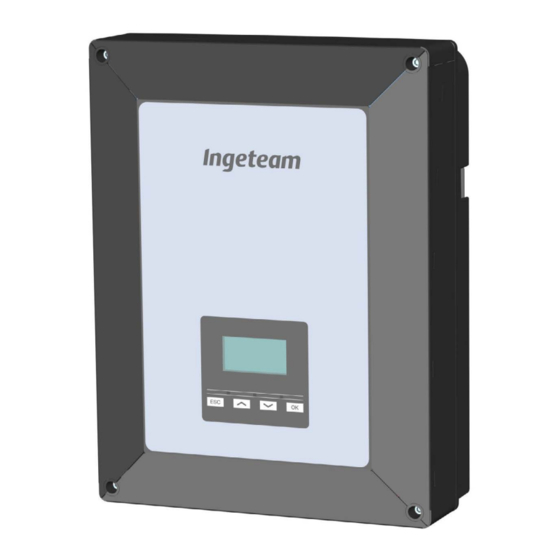
Ingeteam INGECON SUN 1Play TL M U Series Installation And Operation Manual
Hide thumbs
Also See for INGECON SUN 1Play TL M U Series:
- Installation and operation manual (312 pages) ,
- Installation and operation manual (260 pages) ,
- Installation and usage manual (248 pages)

Related Manuals for Ingeteam INGECON SUN 1Play TL M U Series


Summary of Contents for Ingeteam INGECON SUN 1Play TL M U Series
- Page 1 INGECON SUN 1Play TL M U Installation and Operation Manual Manual de instalación y uso...
- Page 2 Tel.: +1 (414) 934 4100 Fax.: +1 (414) 342 0736 e-mail: solar.us@ingeteam.com Service Call Center: +1 (414) 934 4158 Ingeteam Power Technology, S.A. - Energy Avda. Ciudad de la Innovación, 13 31621 SARRIGUREN (Navarra) - Spain Tel.: +34 948 28 80 00 Fax.: +34 948 28 80 01...
- Page 3 Ingeteam English Español...
- Page 4 Ingeteam The copy, distribution or use of this document or of its content requires written authorisation. Any breach thereof will be reported for damages. All rights reserved including those of patent rights or design registration. The conformity of the document content with the hardware described has been checked. However, discrepancies may exist. Liability will not be assumed for total concordance.
-
Page 5: Important Safety Instructions
Category III - 1000-Volt measuring instruments must be used for checking for the absence of voltage. Ingeteam accepts no liability for any damages caused by improper use of the equipment. You must propose in advance to Ingeteam any work carried out on any equipment which implies a modification of the original electrical arrangements. -
Page 6: Personal Protective Equipment (Ppe)
Do not disconnect or connect any terminal while the unit is operating. Disconnect and check for absence of voltage first. Personal Protective Equipment (PPE) When working on the unit, use the following safety equipment recommended by Ingeteam as a minimum. Name Explanation Safety footwear In compliance with standard ANSI Z41.1-1991... -
Page 7: Symbols On The Inverters
Important Safety Instructions Ingeteam Symbols on the inverters WARNING POWER FED FROM MORE THAN ONE SOURCE USE COPPER CONDUCTORS ONLY ABE2013IQM01_ - Installation and Operation Manual... -
Page 8: Table Of Contents
Ingeteam Contents Contents Important Safety Instructions ........................5 Safety conditions ........................... 5 Personal Protective Equipment (PPE) ...................... 6 Symbols on the inverters ........................7 Contents ..............................8 1. About this manual ..........................10 1.1. Scope and nomenclature ......................10 1.2. Recipients ........................... 10 1.3. - Page 9 Contents Ingeteam 10.1. Equipment inspection ........................ 29 10.1.1. Inspection ......................... 29 10.1.2. Hermetic sealing of the unit ....................29 10.2. Power-up ........................... 29 11. Display control ........................... 30 11.1. Keypad and LEDs ........................30 11.2. Display ............................. 31 11.3. Menu structure .......................... 32 11.4.
-
Page 10: About This Manual
Ingeteam About this manual 1. About this manual This manual describes the INGECON SUN 1Play TL U M units and provides information for their correct reception, installation, start-up, maintenance and operation. 1.1. Scope and nomenclature This manual is applicable to the following units:... -
Page 11: Unit Description
These inverters are compatible with all the self-consumption options offered by Ingeteam. Combiner box Ingeteam has a combiner box, which is recommended for these inverters. Additionally, it is possible to use a combiner box from an external manufacturer. In the event of using a combiner box from an another manufacturer, the installer is responsible for ensure that it complies with all the applicable legislation, and, particularly, necessary requirements for operation together with a PV inverter in accordance with UL1741. -
Page 12: Acoustic Contamination
Ingeteam Unit description 2.4. Acoustic contamination The unit produces a slight buzz when in operation. Do not place it in an occupied room, or on light supports which might amplify this buzz. The mounting surface must be firm and appropriate for the weight of the unit. -
Page 13: Specifications Tables
Unit description Ingeteam 2.7. Specifications tables 2.8TL U M 3.3TL U M 5TL U M 6TL U M DC inputs Recommended power range of PV array 2.8 ~ 3.3 kWp 3.4 ~ 4.3 kWp 5.1 ~ 6.5 kWp 6.1 ~ 7.8 kWp Maximum input voltage 850 V 850 V 850 V 850 V Voltage range MPP1 125 ~ 750 V 125 ~ 750 V 125 ~ 750 V 125 ~ 750 V Voltage range MPP2 90 ~ 750 V 90 ~ 750 V... -
Page 14: Configuration Parameters
Ingeteam Unit description 2.8. Configuration parameters 2.8TL U M 3.3TL U M 5TL U M 6TL U M DC inputs Range of operating input voltage (PV array 1 / PV 125 ~ 825 V / 90 ~ 850 V 125 ~ 825 V / 90 ~ 850 V 125 ~ 825 V / 90 ~ 850 V 125 ~ 825 V / 90 ~ 850 V array 2) Maximum input voltage 850 V Maximum input current 11 A / 11 A... -
Page 15: Residual Current Device
Unit description Ingeteam 2.9. Residual current device These units include a residual current device as standard, in order to isolate the unit in the event of an instantaneous differential current of 30 mA or an accumulated current of 300 mA. 2.10. Description of cable inlets DC supply access. -
Page 16: Receipt Of The Unit And Storage
Failure to follow the instructions in this section may lead to damage to the unit. Ingeteam accepts no liability for damage resulting from the failure to follow these instructions. If the unit is not installed immediately after reception, take into account the following points in order to avoid damage: •... -
Page 17: Transporting The Equipment
You must protect the unit, during transport, from mechanical knocks, vibrations, water splashes (rain) and any other product or situation which may damage it or alter its behavior. Failure to observe these instructions may lead to loss of warranty on the product, for which Ingeteam is not responsible. 4.1. Transport... -
Page 18: Preparation For Installing The Unit
Ingeteam Preparation for installing the unit 5. Preparation for installing the unit When deciding the location of the unit and planning your installation, you must follow a set of guidelines based on the specifications of the unit. These guidelines are summarized in this chapter. -
Page 19: Supporting Surface And Fastening
Preparation for installing the unit Ingeteam The surrounding atmosphere must be clean and at temperatures above 104 ºF (40 ºC), the relative humidity must be between 4% and 50%. Higher percentages of relative humidity up to 95% are tolerated at temperatures below 86 ºF (30 ºC). -
Page 20: Cable Length
Ingeteam Preparation for installing the unit This protection does not detect residual currents produced upstream of the inverter. If, for other reasons, it is necessary to install a residual current device upstream of the inverter, this must be assigned to trip at a residual current of at least 30 mA. -
Page 21: Installing The Unit
Installing the unit Ingeteam 6. Installing the unit Before installing the unit, you must remove the packaging, taking special care not to damage the housing. Check that there is no condensation inside the packaging. If there are signs of condensation, the unit must not be installed until you are sure it is completely dry. - Page 22 Ingeteam Installing the unit Fix the plate using fastening elements that are appropriate for the wall onto which it is to be installed. The diameter of the holes of the plate is 0.30 in (7.5 mm). Suspend the unit from the plate by fitting the slats in the openings on the back of the unit.
-
Page 23: Opening And Closing The Housing
Installing the unit Ingeteam 6.3. Opening and closing the housing To access the inside of the unit open the cover of the housing by removing the four front screws. After making the different connections explained in the sections below, close the unit before starting it. To close the housing, tighten the aforementioned screws, applying a torque of 53.1 lb.in (6 Nm). -
Page 24: Connection Of Accessories
Do not switch on the power to the unit until you have successfully made the rest of the connections and the unit is closed. Ingeteam accepts no liability for any damages caused by incorrect connection. Use the personal protective equipment specified in the section “Personal Protective Equipment (PPE)”. -
Page 25: Optional Accessories
Connection of accessories Ingeteam 7.2. Optional accessories Depending on the type of accessory to install you must use the connector INGECON Connect or those marked as INGECON Comm of the inverter power card. If the accessory must be connected in the INGECON Connect, you must install the two vertical guides shown in the figure above on the electronic circuit board, and use them to insert the card of the accessory. -
Page 26: Connecting The Digital Input
Ingeteam Connection of accessories 7.4. Connecting the digital input These inverters have a digital input. J105 The digital input can be used with a potential-free contact or with a power supply, both outside the unit. External potential-free contact External power supply The truth table for said input is as follows. -
Page 27: Ac Connection
Do not switch on the power to the unit until you have successfully made the rest of the connections and the unit is closed. Ingeteam accepts no liability for any damages caused by incorrect connection. Use the personal protective equipment specified in the section “Personal Protective Equipment (PPE)”. -
Page 28: Dc Connection
Do not switch on the power to the unit until you have successfully made the rest of the connections and the unit is closed. Ingeteam accepts no liability for any damages caused by incorrect connection. Use the personal protective equipment specified in the section “Personal Protective Equipment (PPE)”. -
Page 29: Start-Up
Start-up Ingeteam 10. Start-up This chapter details the process for the starting up the unit. 10.1. Equipment inspection You must check the correct condition of the installation before start-up. Each installation is different, depending on its characteristics, the country in which it is located or other special conditions which may apply. -
Page 30: Display Control
Ingeteam Display control 11. Display control These units incorporate a display and keypad unit to interface with the installer and the user. This interface allows the display of the main internal parameters and the configuration of the entire system during installation. -
Page 31: Display
Display control Ingeteam 11.2. Display The main display shows different inverter data: 4/30/2015 4/30/2015 10:17 AM 10:17 AM Current date, YYYY-MM-DD. Power reduction percentage and reason for this reduction*. Current time, hh:mm. Voltage and power of the PV array. Both pieces of data are displayed alternately. -
Page 32: Menu Structure
Ingeteam Display control 11.3. Menu structure Energy graph for the last 24 Daily power graph Start screen days Main menu Monitoring Pac, Qac, Sac, PhiCos Vac, Iac, Fac Pdc, Pdc1, Pdc2, Riso Vdc1, Vdc2, Idc1, Idc2 Total: Energy, Time, Connections... -
Page 33: Daily Power Graph
Display control Ingeteam 11.4. Daily power graph 4/30/2015 4/30/2015 10:17 AM 10:17 AM In this screen you can consult the daily power graph. The daily energy values (Ed), from the first connection of the day to the time of the query, the total accumulated energy (Et) and the power (P) are also listed. -
Page 34: Monitoring
Selection of the language for the text on the inverter display. Modbus ID Assignation of a number that identifies the inverter. In photovoltaic installations with more than one inverter, each one must be assigned a different number. Ingeteam recommends using correlative numbering. Partial deletion Deletes the partial meters. -
Page 35: Advanced Settings
The settings included within this menu can only be modified by a qualified installer. Ingeteam accepts no liability for incorrect use of the installer password nor the consequences that may arise from incorrect configuration of the unit by the user and / or the installer. -
Page 36: Firmware Update
See the firmware loading manual for details of the update process. To download the manual, go to the Ingeteam website (www.ingeteam.com) and enter the download zone in the inverter model section. You will find a zipped file containing the manual and the latest firmware version. -
Page 37: Communication Via Usb
13. Communication via USB These units can communicate locally with a PC via USB using the plant management software INGECON SUN Manager, available on the Ingeteam website (www.ingeteam.com). 13.1. Wiring process Remove the cover from the USB Type B connector. Connect the cable to the inverter (cable not supplied by Ingeteam). -
Page 38: Shutting Down The Unit
Ingeteam Shutting down the unit 14. Shutting down the unit This section describes the procedure to shut down the unit. If you wish to work inside the unit, you must carry out these instructions in the order shown here to remove the power. -
Page 39: Preventive Maintenance
Ingeteam accepts no liability for any damages caused by improper use of the equipment. You must propose in advance to Ingeteam any work carried out on any equipment which implies a modification of the original electrical arrangements. -
Page 40: Troubleshooting
Ingeteam Troubleshooting 16. Troubleshooting This section provides a guide for troubleshooting problems that may arise in the installation and operation of the inverter. Troubleshooting for the inverter must be performed by qualified personnel in compliance with the general safety instructions in this manual. - Page 41 Troubleshooting Ingeteam Alarm Description Solution Lighting* Grid consumption power out of the Grid consumption Orange, 1 permitted range This may be due to a low irradiance level. Otherwise, The generated power in the PV check the PV array. Low pow. PV conn.
-
Page 42: Waste Handling
At the end of the unit's life, the waste must be correctly processed by an authorized hazardous waste management company. Ingeteam, in accordance with its policy of respect for the environment, will inform the authorized manager, via this Section, of the location of components to be decontaminated. -
Page 43: Condiciones Importantes De Seguridad
Es obligatorio para comprobar ausencia de tensión utilizar elementos de medida de categoría III-1000 Voltios. Ingeteam no se responsabiliza de los daños que pudieran causarse por una utilización inadecuada de los equipos. Toda intervención que se realice sobre cualquiera de estos equipos que suponga un cambio en las disposiciones eléctricas respecto a las originales deberán ser previamente propuestas a... -
Page 44: Equipo De Protección Individual (Epi)
Las herramientas y/o equipos empleados en trabajos en tensión deben poseer, al menos, aislamiento de categoría III-1000 Voltios. En caso de que normativas propias del lugar exijan otro tipo de equipo de protección individual, el equipo recomendado por Ingeteam se deberá completar adecuadamente. ABE2013IQM01_ - Manual de instalación y uso... -
Page 45: Simbología En Los Inversores
Condiciones importantes de seguridad Ingeteam Simbología en los inversores WARNING POWER FED FROM MORE THAN ONE SOURCE USE COPPER CONDUCTORS ONLY ABE2013IQM01_ - Manual de instalación y uso... -
Page 46: Contenidos
Ingeteam Contenidos Contenidos Condiciones importantes de seguridad ......................43 Condiciones de seguridad ........................43 Equipo de Protección Individual (EPI) ....................44 Simbología en los inversores ......................... 45 Contenidos .............................. 46 1. Información sobre este manual ......................48 1.1. Campo de aplicación y nomenclatura ..................... 48 1.2. - Page 47 Contenidos Ingeteam 10.1. Revisión del equipo ........................67 10.1.1. Inspección ........................67 10.1.2. Cierre hermético del equipo ....................67 10.2. Puesta en marcha ........................67 11. Manejo del display ..........................68 11.1. Teclado y LED ........................... 68 11.2. Display ............................. 69 11.3.
-
Page 48: Información Sobre Este Manual
Ingeteam Información sobre este manual 1. Información sobre este manual El propósito de este manual es describir los equipos INGECON SUN 1Play TL U M y dar la información adecuada para su correcta recepción, instalación, puesta en marcha, mantenimiento y operación. 1.1. Campo de aplicación y nomenclatura Este manual es válido para los siguientes equipos:... -
Page 49: Descripción Del Equipo
Estos inversores son compatibles con todas las opciones de autoconsumo ofrecidas por Ingeteam. Caja de conexiones Ingeteam dispone de una caja de conexiones, la cual está recomendada para estos inversores. Asimismo es posible utilizar una caja de conexiones de un fabricante externo. -
Page 50: Contaminación Acústica
Ingeteam Descripción del equipo 2.4. Contaminación acústica El funcionamiento de este equipo genera un ligero zumbido. No ubicarlos en una estancia habitada, o sobre soportes ligeros que puedan amplificar ese zumbido. La superficie de montaje debe ser firme y adecuada al peso del equipo. -
Page 51: Tablas De Características
Descripción del equipo Ingeteam 2.7. Tablas de características 2.8TL U M 3.3TL U M 5TL U M 6TL U M Entrada DC Rango de potencia campo FV 2.8 ~ 3.3 kWp 3.4 ~ 4.3 kWp 5.1 ~ 6.5 kWp 6.1 ~ 7.8 kWp recomendado Tensión máxima de entrada 850 V 850 V 850 V 850 V Rango de tensión MPP1 125 ~ 750 V 125 ~ 750 V 125 ~ 750 V 125 ~ 750 V Rango de tensión MPP2... -
Page 52: Parámetros De Configuración
Ingeteam Descripción del equipo 2.8. Parámetros de configuración 2.8TL U M 3.3TL U M 5TL U M 6TL U M Entrada DC Rango de tensión de funcionamiento de entrada 125 ~ 825 V / 90 ~ 850 V 125 ~ 825 V / 90 ~ 850 V 125 ~ 825 V / 90 ~ 850 V 125 ~ 825 V / 90 ~ 850 V (Campo FV 1 / Campo FV 2) Tensión máxima de entrada... -
Page 53: Protección Diferencial
Descripción del equipo Ingeteam 2.9. Protección diferencial Estos equipos incorporan de serie una protección diferencial, cuya finalidad es desconectar al equipo ante una corriente diferencial instantánea de 30 mA o una acumulada de 300 mA. 2.10. Descripción de accesos de cableado Acceso acometida DC. Orificios para racor de Acceso comunicaciones. -
Page 54: Recepción Del Equipo Y Almacenamiento
Mantener el embalaje colocado hasta inmediatamente antes de su instalación. 3.2. Identificación del equipo El número de serie del equipo lo identifica de forma inequívoca. En cualquier comunicación con Ingeteam se debe hacer referencia a este número. El número de serie del equipo viene reflejado en la placa de características. -
Page 55: Transporte Del Equipo
Se deberá proteger el equipo durante su transporte de golpes mecánicos, vibraciones, proyecciones de agua (lluvia) y cualquier otro producto o situación que pueda dañar o alterar su comportamiento. La no observancia de estas instrucciones puede causar la pérdida de la garantía en el producto, de la cual Ingeteam no es responsable. 4.1. Transporte Transporte mediante transpaleta Se deberán observar al menos las siguientes prescripciones:... -
Page 56: Preparación Para La Instalación Del Equipo
Ingeteam Preparación para la instalación del equipo 5. Preparación para la instalación del equipo A la hora de decidir la ubicación del equipo y planificar su instalación, se deberán seguir una serie de pautas derivadas de las características del mismo. En este capítulo se resumen estas pautas. -
Page 57: Superficie De Apoyo Y Anclaje
Preparación para la instalación del equipo Ingeteam El aire del entorno debe estar limpio y la humedad relativa, a más de 104 ºF (40 ºC), debe estar en el rango entre el 4% y el 50%. Mayores porcentajes de humedad relativa hasta el 95% son tolerables a temperaturas por debajo de 86 ºF (30 ºC). -
Page 58: Longitud Del Cableado
Ingeteam Preparación para la instalación del equipo 5.5. Longitud del cableado El inversor mide la tensión en sus bornes de conexión, por esta razón el instalador deberá emplear un cable AC con una impedancia suficientemente baja para que el aumento de tensión en el cable (entre el transformador de distribución y el equipo) no provoque la desconexión del equipo por tensión alta. -
Page 59: Instalación Del Equipo
Instalación del equipo Ingeteam 6. Instalación del equipo Antes de proceder a la instalación del equipo, deberá retirarse el embalaje teniendo especial cuidado de que no se dañe la envolvente. Deberá cerciorarse de la inexistencia de condensación en el interior del embalaje. Si existieran signos de condensación, no se deberá... - Page 60 Ingeteam Instalación del equipo Fijar la pletina mediante elementos de sujeción apropiados para la pared sobre la que se instale. Los orificios de la pletina tienen un diámetro de 0.30 in (7.5 mm). Colgar el equipo de la pletina encajando las pestañas de ésta en las aberturas destinadas a tal fin de la parte trasera del equipo.
-
Page 61: Apertura Y Cierre De La Envolvente
Instalación del equipo Ingeteam 6.3. Apertura y cierre de la envolvente Para acceder al interior del equipo abrir la tapa de la envolvente retirando los cuatro tornillos frontales. Tras realizar las diferentes conexiones explicadas en los siguientes apartados se deberá cerrar el equipo antes de proceder a la puesta en marcha. -
Page 62: Conexión De Accesorios
No alimentar el equipo hasta que se hayan completado con éxito el resto de conexiones y se haya cerrado el equipo. Ingeteam no se responsabiliza de los daños derivados de una conexión incorrecta. Utilizar el Equipo de Protección Individual especificado en el apartado “Equipo de Protección Individual (EPI)”. -
Page 63: Accesorios Opcionales
Conexión de accesorios Ingeteam 7.2. Accesorios opcionales En función del tipo de accesorio a instalar se deberá usar el conector INGECON Connect o los marcados como INGECON Comm de la tarjeta de potencia del inversor. En caso de que el accesorio se deba conectar en el conector INGECON Connect, se deberán instalar las dos guías verticales mostradas en la figura anterior en la tarjeta de electrónica, introduciendo la tarjeta del accesorio a través... -
Page 64: Conexión De La Entrada Digital
Ingeteam Conexión de accesorios 7.4. Conexión de la entrada digital Estos inversores disponen de una entrada digital. J105 La entrada digital se puede utilizar con un contacto de libre potencial o con una fuente de tensión, ambos externos al equipo. -
Page 65: Conexión De Ac
No alimentar el equipo hasta que se hayan completado con éxito el resto de conexiones y se haya cerrado el equipo. Ingeteam no se responsabiliza de los daños derivados de una conexión incorrecta. Utilizar el Equipo de Protección Individual especificado en el apartado “Equipo de Protección Individual (EPI)”. -
Page 66: Conexión De Dc
No alimentar el equipo hasta que se hayan completado con éxito el resto de conexiones y se haya cerrado el equipo. Ingeteam no se responsabiliza de los daños derivados de una conexión incorrecta. Utilizar el Equipo de Protección Individual especificado en el apartado “Equipo de Protección Individual (EPI)”. -
Page 67: Puesta En Servicio
Puesta en servicio Ingeteam 10. Puesta en servicio A lo largo de este capítulo se detalla el proceso a seguir para la puesta en servicio del equipo. 10.1. Revisión del equipo Es necesario revisar el correcto estado de la instalación antes de la puesta en marcha. -
Page 68: Manejo Del Display
Ingeteam Manejo del display 11. Manejo del display Estos equipos incorporan un conjunto de pantalla y teclado para la comunicación con el instalador o usuario. Esta interfaz permite la visualización de los principales parámetros internos, y el ajuste del sistema completo durante la instalación. -
Page 69: Display
Manejo del display Ingeteam 11.2. Display En la pantalla principal se muestran distintos datos del inversor: 2015-04-30 2015-04-30 10:17 10:17 Fecha actual, AAAA-MM-DD. Porcentaje de reducción de potencia y motivo de dicha reducción*. Hora actual, hh:mm. Tensión y potencia del campo fotovoltaico. Ambos datos se visualizan de forma alterna. -
Page 70: Organización De Menús
Ingeteam Manejo del display 11.3. Organización de menús Gráfica potencia diaria Pantalla de inicio Gráfica energías últimos 24 días Menú principal Monitorización Pac, Qac, Sac, CosPhi Vac, Iac, Fac Pdc, Pdc1, Pdc2, Riso Vdc1, Vdc2, Idc1, Idc2 Total: Energía, Tiempo, Conexiones Parcial: Energía, Tiempo, Conexiones... -
Page 71: Gráfica Potencia Diaria
Manejo del display Ingeteam 11.4. Gráfica potencia diaria 2015-04-30 2015-04-30 10:17 10:17 En esta pantalla se puede consultar la gráfica de potencia diaria. Asimismo aparecen listados los valores de la energía diaria (Ed), desde la primera conexión del día hasta la hora de consulta, la energía total (Et) y la potencia (P). -
Page 72: Monitorización
Modbus ID Asignación de un número que identifique al inversor. En instalaciones fotovoltaicas en las que exista más de un inversor cada uno deberá tener asignado un número diferente. Ingeteam recomienda utilizar numeración correlativa. Borrado parcial Borra los contadores parciales. -
Page 73: Ajustes Avanzados
Los ajustes incluidos dentro de este menú sólo podrán ser realizados por un instalador cualificado. Ingeteam no se hace responsable del mal uso de la contraseña de instalador ni de las consecuencias de una incorrecta configuración del equipo por parte del usuario y/o instalador. -
Page 74: Actualización De Firmware
Consultar el manual de carga de firmware donde se detalla el proceso de actualización. Para descargar el manual acceder a la web de Ingeteam (www.ingeteam.com) y en la sección del modelo de inversor entrar a la zona de descargas. Aquí se aloja un archivo comprimido con el manual y la versión de firmware más actualizada. -
Page 75: Comunicación Vía Usb
13. Comunicación vía USB Estos equipos pueden comunicarse localmente con un PC vía USB mediante el software de gestión de plantas INGECON SUN Manager, disponible en la web de Ingeteam (www.ingeteam.com). 13.1. Proceso de conexión Retirar la tapa protectora del conector USB tipo B. Conectar el cable al inversor (cable no suministrado por Ingeteam). -
Page 76: Desconexión Del Equipo
Ingeteam Desconexión del equipo 14. Desconexión del equipo A lo largo de este apartado se detalla el procedimiento para desconectar el equipo. En caso de querer operar en el interior del equipo es obligatorio seguir estas instrucciones en el mismo orden en el que aquí aparecen para quitar tensión. -
Page 77: Mantenimiento Preventivo
éste solamente puede ser realizado por personal cualificado y siguiendo las condiciones de seguridad establecidas en este documento. Ingeteam no se responsabiliza de los daños que pudieran causarse por una utilización inadecuada de los equipos. Toda intervención que se realice sobre cualquiera de estos equipos que suponga un cambio en las disposiciones eléctricas respecto a las originales deberán ser previamente propuestas a... -
Page 78: Solución De Problemas
Ingeteam Solución de problemas 16. Solución de problemas En este apartado se detallan los problemas que pudieran darse en la instalación y funcionamiento del inversor. La solución de problemas del inversor debe ser realizada por personal cualificado atendiendo a las condiciones generales de seguridad dadas en este manual. - Page 79 Solución de problemas Ingeteam Iluminación Alarma Descripción Solución LED* Potencia consumida de la red Consumo de red Naranja, 1 fuera del rango permitido Puede deberse a un nivel de irradiancia bajo. En La potencia generada en el campo caso contrario, revisar el campo solar.
-
Page 80: Tratamiento De Residuos
Concluida la vida útil del equipo, el residuo debe ser puesto en manos de un gestor autorizado de residuos peligrosos para su correcto procesado. Ingeteam siguiendo una política respetuosa con el medio ambiente, a través de este apartado, informa al gestor autorizado respecto a la localización de los componentes a descontaminar. - Page 81 Notes - Notas...
- Page 82 Notes - Notas...
- Page 83 Fax: +86 21 65 07 76 38 email: solar.energy@ingeteam.com email: solar.us@ingeteam.com email: shanghai@ingeteam.com Ingeteam GmbH Ingeteam INC. Ingeteam Power Technology India Pvt. Ltd. Herzog-Heinrich-Str. 10 3550 W. Canal St. 2nd floor, 431 80336 MÜNCHEN - Germany Milwaukee, WI 53208 - USA...
- Page 84 ABE2013IQM01_ 04/2015 Ingeteam Power Technology, S.A. www.ingeteam.com...
Need help?
Do you have a question about the INGECON SUN 1Play TL M U Series and is the answer not in the manual?
Questions and answers