Table of Contents
Advertisement
Quick Links
Operation and Maintenance Manual
SEM Model 1400 and DS1400 Series
POP-0117 – Rev 4. | Created 9-16-19 | ECN: 00434
For sales, service, parts, and customer support, contact us:
SECURITY ENGINEERED MACHINERY
5 Walkup Drive • Westborough, MA 01581
info@semshred.com
1-508-366-1488 • Toll Free US 1-800-225-9293
www.semshred.com
Advertisement
Table of Contents
Troubleshooting

Related Manuals for SEM 1400 Series


Summary of Contents for SEM 1400 Series
- Page 1 Operation and Maintenance Manual SEM Model 1400 and DS1400 Series POP-0117 – Rev 4. | Created 9-16-19 | ECN: 00434 For sales, service, parts, and customer support, contact us: SECURITY ENGINEERED MACHINERY 5 Walkup Drive • Westborough, MA 01581 info@semshred.com 1-508-366-1488 •...
-
Page 2: Table Of Contents
Contents 1. Disintegrator Safety Rules ........................4 2. Introduction & Installation ........................5 2.1 About Your Disintegrator ......................... 5 2.2 Disintegrator Installation and Location .................... 5 2.3 Waste Removal System Installation and Location ................6 2.4 Dust Filter Assembly Location ......................6 2.5 Waste Containers Set Up ........................ - Page 3 8.1 Belt Adjustments ..........................16 8.2 Belt Removal ..........................16 8.3 Lubrication ............................. 16 8.4 Dust Filter ............................16 8.5 Open Cutting Chamber Doors ......................17 8.6 Changing and Setting Knives ......................17 9. Cutting Chamber Diagram ........................20 10. Disintegrator Detail ..........................20 11.
-
Page 4: Disintegrator Safety Rules
NEVER modify the machine configuration or any individual component. SEM has long recognized the importance of safety and has designed and manufactured our equipment with operator safety as a prime consideration. We expect users will abide by the foregoing recommendations in order to maintain operator safety. -
Page 5: Introduction & Installation
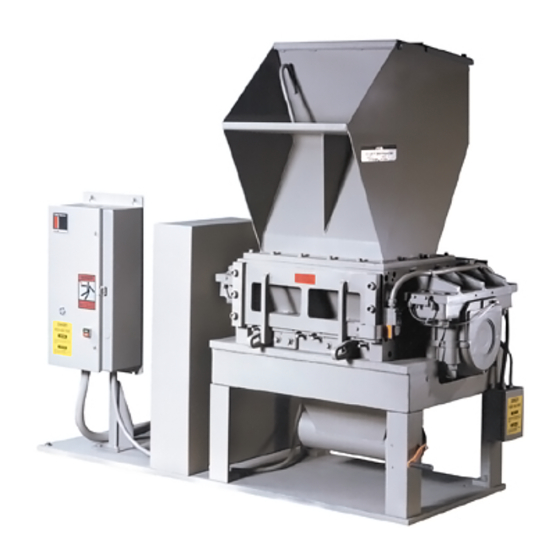
2. Introduction & Installation 2.1 About Your Disintegrator The SEM Model 1400 series is comprised of two basic units; (1) a mechanical cutting machine and (2) a waste evacuation/air system. The security disintegrator machine destroys paper by dry slicing and cutting process that produces waste particles to user specified size. -
Page 6: Waste Removal System Installation And Location
Using a briquettor will reduce the size of this significantly. SEM recommends that the waste containers be sized in accordance with anticipated usage requirements (never less than 6 cubic yards for a Model 1424 and 10 cubic yards for a Model 1454). With high volume requirements,... -
Page 7: Briquettor Installation
(sealed type) or a standard type for use with the free-fall/gravity from a rotary air lock valve. SEM recommends using a briquettor system for a “green” approach to waste. See below. -
Page 8: Electrical Installation
28.0 14.0 11.0 @ 15HP 48.0 42.0 21.0 17.0 @ 20HP 62.0 54.0 27.0 22.0 Electrical Schematics: Contact SEM customer care for a copy of your site’s specific electrical schematic. Each schematic is unique to the system. 508.366.1488 | www.semshred.com... -
Page 9: Security Screen
4. Security Screen The security screen is a sheet of metal with holes set to the desired final particle size, which prevents any pieces from going through the fan system and waste collection that hasn’t yet been reduced to the required size. The screen chamber can easily be opened for changing screens, visual inspection and clearing a jam. -
Page 10: Changing Screen In 1454
7. Check for tight fit. Pull on belts to turn rotor, listening carefully for any metal obstruction. If there is an obstruction, lower screen cradle and check that screen to see if it has been inserted properly. 8. Replace the screen cradle nuts and tighten securely. 9. -
Page 11: Start Up Tip Sheet
5. Start Up Tip Sheet 5.1 Before Operation: 1. Ensure proper size security screen(s) is in place. 2. Ensure the waste container is not full and is in its proper position. 3. Shake the dust filter bag with the fan motor off. 5.2 Normal Operation: 1. -
Page 12: Operation
6. Operation Note: Prior to start-up, see practical destruction feed rate. Please read this section carefully. Most problems can be eliminated by a careful review of this section. 1. Start fan cyclone before disintegrator. If optional air lock valve is used, it must be started first. 2. -
Page 13: Troubleshooting
7. Troubleshooting Warning: De-energize the unit using proper LOTO procedures for your site before maintaining, cleaning, lubricating, or otherwise removing guards from this device. 7.1 Eliminating Jams Preshredder: Upon jamming, the preshredder will automatically reverse and attempt to re-shred the material five times, after which it will stop and shut down. -
Page 14: Common Troubleshooting Questions
Machine is overloaded. Reduce amount of feedstock put into the machine per unit of time. c. Bearings have exceeded their rated life. Consult with SEM customer service for replacement instructions. d. Bearings are not properly installed or tightened. Consult with SEM customer service for installation instructions. 508.366.1488 | www.semshred.com... - Page 15 6. Belts slip or squeal: a. Belts are too loose and/or machine is jammed. Tighten per maintenance instructions. b. Machine is overloaded. Reduce amount of feedstock put into the machine per unit of time. c. Machine has thrown belts. Inspect, and if acceptable for use, re-install and tighten per maintenance instructions.
-
Page 16: Maintenance
8. Maintenance Tool Kit: SEM carries a tool kit containing all of the tools necessary for maintaining this disintegrator. Contact SEM customer care for details. 8.1 Belt Adjustments The motor is mounted on an adjustable slide assembly. Loosen the bolts holding the motor down, then use the adjusting bolt on the motor plate. -
Page 17: Open Cutting Chamber Doors
8.5 Open Cutting Chamber Doors Reminder: Disconnect the unit using proper LOTO procedures before beginning Caution: Use care while working on or cleaning cutting chamber. With front and back cutting chamber doors open, clean and inspect bed knives and rotor knives. When cutting chamber doors are open, safety limit switches for front and rear doors will de-energize the motor starter to prevent accidental starting. - Page 18 Replacing Knives: 1. Replace back bed knife, cutting tip pointing down, and front bed knife, cutting tip pointing up. 2. Place respective bed knife clamp bars on bed knives. 3. Install all bed knife bolts and tighten only enough to keep bed knife and clamp bar snug. 4.
- Page 19 Minimum Knife Sharpening Specs: After grinding a number of times, the knives must be checked to be sure that there will be adjustment left in the bed knives. The general rule is to place a rotor knife and bed knife back to back, as shown below, and measure the total distance dimension “B”.
-
Page 20: Cutting Chamber Diagram
9. Cutting Chamber Diagram 10. Disintegrator Detail 508.366.1488 | www.semshred.com... -
Page 21: Disintegrator Dimensions -1436
11. Disintegrator Dimensions –1436 508.366.1488 | www.semshred.com... -
Page 22: Disintegrator Dimensions - Ds1436
12. Disintegrator Dimensions – DS1436 508.366.1488 | www.semshred.com... -
Page 23: Disintegrator Dimensions - 1424
13. Disintegrator Dimensions – 1424 508.366.1488 | www.semshred.com... -
Page 24: Typical Briquettor Setup
14. Typical Briquettor Setup 508.366.1488 | www.semshred.com... - Page 25 For service, parts, and customer support, contact us: SECURITY ENGINEERED MACHINERY 5 Walkup Drive • Westborough, MA 01581 service@semshred.com 1-508-366-1488 www.semshred.com Follow us on social media: Facebook: https://www.facebook.com/semshred Twitter: https://twitter.com/semsecure Linkedin: https://www.linkedin.com/company/security-engineered-machinery Youtube: https://www.youtube.com/user/datadestruction 508.366.1488 | www.semshred.com...
Need help?
Do you have a question about the 1400 Series and is the answer not in the manual?
Questions and answers