
Subscribe to Our Youtube Channel
Related Manuals for Barbeques Galore Downunder G4DLK


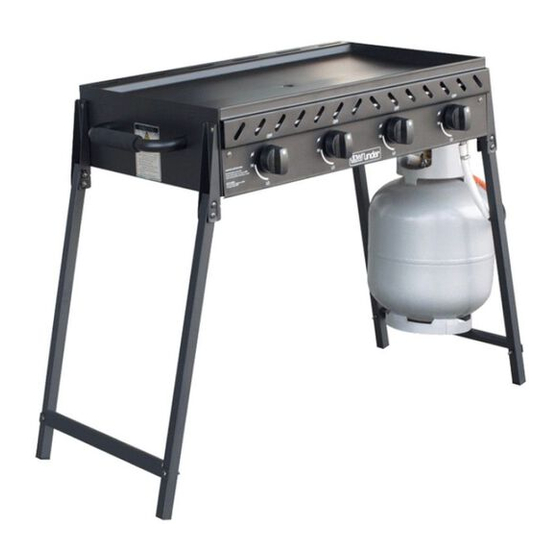
Summary of Contents for Barbeques Galore Downunder G4DLK
- Page 1 INSTRUCTIONS For safe use and enjoyment of your new barbeque 4 Burner Solid Hotplate Barbeque With Folding Legs G4DLK (BGW4NH007S)
- Page 2 1. IMPORTANT HEALTH & SAFETY INFORMATION ( I ). WARNING: FOR OUTDOOR USE ONLY ! DO NOT USE INDOORS • Please read these instructions carefully prior to assembly and use. • Failure to follow these instructions could lead to serious injury and/or significant damage to property. • Do not start the barbeque if there is any doubt over the correct assembly, ignition, gas control or cooking of the unit. • These instructions should be retained for future reference. • For use with Propane gas cylinder only. • The barbeque must have a minimum side clearance from any combustible material of at least 250mm. Additionally there must be a clearance of at least 1500mm above the cooking surface of the barbeque. • Flammable materials and liquids must be stored well away from the barbeque. • Aerosols must not be used near the barbeque. • The barbeque should not be moved when lit or hot. •...
- Page 3 ( IV ). PRECAUTIONS: BEFORE FIRST TIME OPERATION AND AFTER EACH GAS CYLINDER EXCHANGE/REFILL ALL CONNECTIONS SHOULD BE CHECKED FOR GAS LEAKS • Connections can be checked for leaks by using a soapy water solution as described in section 3 part ( IV ) Precautionary Leak Test. • Naked flames (matches or other open flames) must not be used to check for leaks, this is a dangerous practice to be avoided. • Flammable liquids of any description, including petrol, lighter fluid, oils, etc must not be stored close to the barbeque. • Spare or extra gas cylinders must NOT be stored within close proximity of this barbeque or any other gas or electric appliance. •...
- Page 4 2. ASSEMBLY INSTRUCTIONS ( I ) PARTS LIST ITEM DESCIRPTION QUANITITY PICTURE FIRE-BOX ASSEMBLY LEG SUPPORT BRACKET LEG CROSS BRACE GAS CYLINDER HOOK HEAT INSULATION PANEL HANDLE GREASE CUP...
- Page 5 2. ASSEMBLY INSTRUCTIONS (continued) ( II ) FASTENERS LIST ITEM DESCIRPTION QUANITITY PICTURE M6 X 12mm SHORT PHILLIPS HEAD SCREW M6 STEEL WASHERS M6 NUTS M6 WING NUTS M6 X 40mm LONG PHILLIPS HEAD SCREW M6 X 16mm MEDIUM PHILLIPS HEAD SCREW...
- Page 6 2. ASSEMBLY INSTRUCTIONS ( III ) ASSEMBLY STEPS Note: Steps 1 to 4 are best done with the barbeque carefully resting on its back as shown in Step 1 Attach the leg support brackets to the firebox using short screw (A). Step 1 Eight of the nuts (closest to the hot plate) are pre installed for your convenience. SHORT SCREWS 8PCS Attach the legs to the leg support bracket using long screws (E), washers (B), Step 2 nuts (C) and wingnuts (D). Then attach the leg cross brace using (E), (B) and (C). WASHERS 8PCS 8PCS NUTS WING NUTS 4PCS LONG SCREWS 12PCS...
- Page 7 Attach the handles from underneath using medium screws (F) and washer (B). Step 3 WASHERS 4PCS 4PCS MEDIUM SCREWS Step 4 Attach the gas cylinder hook (5) and heat insulation panel (6) at the same time using short screws (A),four of the nuts (closest to the heat insulation panel) are pre-installed for your convenience. SHORT SCREWS 4PCS...
- Page 8 Hang the grease cup onto its hook underneath the to middle burners. Step 5 Full assembly.
-
Page 9: Setting Up The Barbeque
3. SETTING UP THE BARBEQUE THIS APPLIANCE SHALL ONLY BE USED IN AN ABOVE GROUND OPEN AIR SITUATION WITH NATURAL VENTILATION, WITHOUT STAGNANT AREAS, WHERE GAS LEAKAGE AND PRODUCTS OF COMBUSTION ARE RAPIDLY DISPERSED BY WIND AND NATURAL CONVECTION ( I ) POSITIONING • Please make sure that the barbeque is NOT positioned underneath any combustible material or surface. - Page 10 ( II ) PRECAUTIONS DO NOT OBSTRUCT ANY AIRFLOW PATH OR VENTILATION PATHS OF THE BARBEQUE • Do not obstruct any ventilation ports on the body of the hood of the barbeque. • The gas cylinder must be securely placed on the gas cylinder hook as supplied. • It is important that the gas culinder is not positioned under the barbeque when in operation. • The gas cylinder must be kept out of direct sunlight and away from any heat sources. • During a gas cylinder swap or re-fill ensure that all control knobs are in the ‘OFF’ position and there are no naked flames on close proximity. • Gas hoses must NOT be twisted kinked or under any form of tension, the gas hoses should hang freely with no bends, folds, or kinks. • No part of the flexible hose should come into contact with any part of the barbeque that will become hot during operation. • A regular inspection of the hose should be made to ensure that it is no cracking, breaking cutting or deteriorating in any other way. • Any damage to the hose requires an immediate replacement from your local agent or gas expert. ( III ) GAS CYLINDER CONNECTION DO NOT ATTEMPT TO CONNECT THE GAS CYLINDER TO THE BARBEQUE BEFORE CHECKING AS DESCRIBED BELOW •...
- Page 11 4, OPERATING YOUR BARBEQUE ( I ) WARNINGS: • B efore using the barbeque please ensure you have read and understood the entire instruction manual. ( II ) PRIOR TO COOKING: • First Time Use - Curing The Hotplate During manufacturing, the cooking surfaces were coated with a food safe paint. This paint will come off completely over time. Its purpose is purely to help protect your barbeque during transport and storage. Coat the top of the hotplate with canola oil or some other edible oil. Light the barbeque as described earlier. Leave the barbeque with all burners on LO for about 20 minutes. Some coating may come off at this time. Now clean the surface with water and a wire brush. Be careful of steam coming off the steel surface while doing this. Once the hotplate has cooled, dry it thoroughly and apply an even, light coating of vegetable based oil. Canola oil is great for this. Light the bbq again, set all burners on LO for around 10 minutes. The hotplate is now cured and ready for use. For ongoing protection of the cooking surface, follow the procedures in the Cleaning, Storage and Maintenance sections. • When you are lighting your barbeque for the first time, first read section 3: SETTING UP THE BARBEQUE. Turn the burners to the LO position and leave them running for 15 minutes. Your barbeque is now seasoned and ready for first use. • Check that the grease cup is empty before every barbeque. Never handle the grease cup until it had completely cooled. ( III ) STARTING THE BARBEQUE:THE BARBEQUE SHOULD EVER BE OSED, ALWAYS OPEN • Ensure that a leak test has been conducted.
- Page 12 5. CARE & MAINTENANCE BEFORE ANY CARE AND MAINTENANCE IS ATTEMPTED PLEASE ENSURE THAT THE BARBEQUE CONTROLS ARE IN THE ‘OFF’ POSITION AND THAT ALL SURFACES HAVE BEEN GIVEN SUFFICIENT TIME TO COOL DOWN. Please note the following when maintaining and caring for your barbeque: • Cleaning your barbeque regularly will help to keep a pristine look. • Throwing cold water over any hot surface of the barbeque is NOT recommended and is dangerous. • Avoid handling and touching hot parts of the barbeque. • As a good practice, your barbeque should be covered when left unused for long periods especially during the long winter breaks.
-
Page 13: Troubleshooting Guide
6. TROUBLESHOOTING GUIDE Problem Potential Cause Corrective Action Cannot light burners Gas cylinder is empty Check and refill/exchange gas cylinder Regulator is faulty Check and replace if required Blocked burner Check and clean all burner holes Blocked gas jets Check and clean gas jets Blocked gas hose Check and clean gas hose Burners have a low Gas cylinder maybe too small Change to a larger cylinder flame or flashback Blocked burner Check and clean all burner holes Blocked gas jets Check and clean gas jets Blocked gas hose Check and clean gas hose High winds Move barbeque to a sheltered position 7. SPARE PART LIST NO GLG Codes Description Barcode Qty in BBQ 1 G4DLK-S020100 FIREBOX ASSEMBLY 9311715241505 2 G4DLK-A0208... -
Page 14: Technical Specifications
Please ensure all these locations are not obstructed by anything (3/8” SAE) Inlet thread 5/8”-18UNF Need more information or assistance in anyway? You can call your nearest Barbeques Galore 1800 978 555 store where barbeque experts will be happy to help you. Just phone for your nearest store.
Need help?
Do you have a question about the Downunder G4DLK and is the answer not in the manual?
Questions and answers