Table of Contents
Advertisement
Advertisement
Table of Contents

Related Manuals for Barbeques Galore MALIBU


Summary of Contents for Barbeques Galore MALIBU
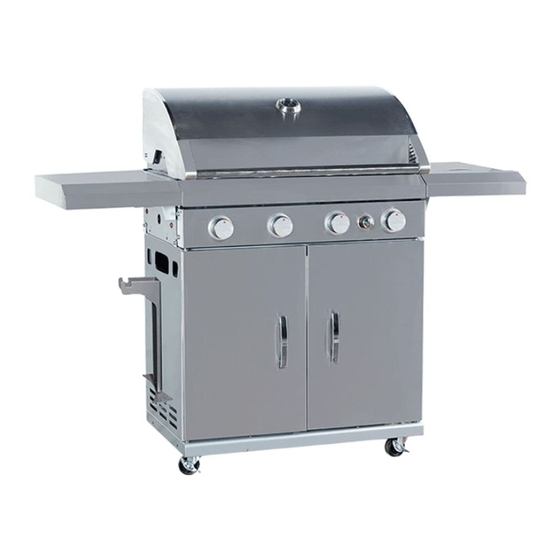
- Page 1 MALIBU INSTRUCTIONS 4 Buner on Side Burner Cart with Hotplate and Grill For safe use and enjoyment of your new barbeque MALIBU (G4MALL) 4 Burner Hooded Barbeque Model Number: BG1411H4 Tool Required: 1 Phillips Head Screwdriver (provided) 1 Adjustable Spanner...
- Page 2 Safety, Assembly & Instruction Manual IMPORTANT HEALTH & SAFETY INFORMATION 1. WARNING FOR OUTDOOR USE ONLY ! DO NOT USE INDOORS • Please read these instructions carefully prior to assembly and use. • Failure to follow these instructions could lead to serious injury and/or significant damage to property.
- Page 3 Safety, Assembly & Instruction Manual • Ensure that local area is well ventilated to remove any excess gas. • If the gas smell continues the barbeque should not be operated under any circumstances and it is important to immediately turn off gas cylinder valve and contact the after sales support provider. 4.
-
Page 4: Setting Up The Barbeque
Safety, Assembly & Instruction Manual 5. SETTING UP THE BARBEQUE THIS APPLIANCE SHALL ONLY BE USED IN AN ABOVE GROUND OPEN AIR SITUATION WITH NATURAL VENTILATION, WITHOUT STAGNANT AREAS, WHERE GAS LEAKAGE AND PRODUCTS OF COMBUSTION ARE RAPIDLY DISPERSED BY WIND AND NATURAL CONVECTION A. -
Page 5: Gas Cylinder Connection
Safety, Assembly & Instruction Manual B. PRECAUTIONS DO NOT OBSTRUCT ANY AIRFLOW PATH OR VENTILATION PATHS OF THE BARBEQUE • Do not obstruct any ventilation ports on the body or the hood of the barbeque. • The gas cylinder must be securely placed on the gas cylinder hook as supplied. • The gas cylinder must be kept out of direct sunlight and away from any heat sources. - Page 6 Safety, Assembly & Instruction Manual E. PRECAUTIONARY LEAK TEST LEAK TESTS MUST BE CARRIED OUT IN A WELL VENTILATED AREA • Confirm all control knobs are in the ‘OFF’ position. • Open the gas control valve on the gas cylinder. • To check for gas leaks a solution of soapy water is required (50% water and 50% soap) NEVER USE AN OPEN FLAME TO CARRY OUT A GAS LEAK TEST • The gas piping system MUST be checked for leaks by brushing the soapy water solution across...
- Page 7 Safety, Assembly & Instruction Manual 6. PART LIST Before assembly, check that youhave all the parts. Only dispose of the packaging materials after the barbeque is fully assembled Part Description Part Description Part Description Body Assembly Gas Cylinder Hook Door Handle 2Pcs Warming Rack Grease Cup...
-
Page 8: Hardware List
Safety, Assembly & Instruction Manual 7. HARDWARE LIST LL:2PCS... - Page 9 Safety, Assembly & Instruction Manual 8. ASSEMBLY INSTRUCTIONS Step 1 a) Attach four Swivel Castors (U) onto the Cabinet Base Panel (V) with four screws (AA) each as shown. b) Ensure all screws are tightened securely. Step 2 a) Turn the Base Assembly upright. b) Attach two Magnet Panels (R) to the Base Assembly with two screws (BB) each as shown.
- Page 10 Safety, Assembly & Instruction Manual Step 3 a) Attach Left Cabinet Side Panel (M) and Right Cabinet Side Panel (N) onto the Base Assembly and secure them with six screws (AA) as shown. Step 4 a) Secure the Cabinet Back Panel (Q) between the two side panels with four screws (BB) on each side as shown.
- Page 11 Safety, Assembly & Instruction Manual Step 5 a) Thread two screws (CC) through Door Hinge Left Top (L) and Left Cabinet Side Panel into Upper Front Beam (P) and tighten screws. b) Repeat Step 5, a) for right side as shown using Door Hinge Right Top (O). Step 6 a) Align the two holes on the Gas Cylinder Hook (J) with the two holes on the Left Cabinet Side Panel, then insert one bolt (AA) into each pre-drilled hole.
- Page 12 Safety, Assembly & Instruction Manual Step 7 a) Attach the Left Door (T) by inserting the bottom fixed door pin into the pre-drilled hole found in the Cabinet Base Panel as shown. b) Next press the top spring door pin in while sliding it into the Door Hinge Top Left (L). c) Repeat Step 7.
- Page 13 Safety, Assembly & Instruction Manual Step 9 a) Start on the right side, attach the Right Side Shelf (G) onto the side of the firebox with six screws (AA) as shown in figure 1. b) Repeat Step 9, a) for the Left Side Shelf (F) as shown. c) Further secure both side shelves from inside the firebox, each shelf with two screws (AA) and two flat washers (DD) as shown in figure 2.
- Page 14 Safety, Assembly & Instruction Manual Step 10 a) Attach the side burner valve onto the side valve support bracket located on the Right Side Shelf (G) as in figure 3. Use the locking nut pre-assembled to the side burner valve nozzle to do this. Tighten the locking nut with an adjustable spanner to secure the valve nozzle firmly onto the bracket.
- Page 15 Safety, Assembly & Instruction Manual Step 11 a) Attach the Grease Cup (K) onto the Grease Tray (I) as shown below. b) Slide this Grease Tray Assembly underneath the firebox from the back into the side support rails as shown. Step 12 a) Open the barbeque hood and place the two Flame Tamers (E) over the top of the right most two burners.
- Page 16 Safety, Assembly & Instruction Manual Step 13 a) Hang the gas cylinder onto the hook on the left side of the barbeque. b) Connect the regulator to the gas cylinder by tightening in an anti-clockwise direction. Read ALL this instruction manual, check for leaks and understand safe operation before lighting the barbeque Conduct a leak test as detailed on Page 5 section E BEFORE attempting to first light the barbaque...
- Page 17 Safety, Assembly & Instruction Manual 9. OPERATING YOUR BARBEQUE DO NOT EXCEED 250°C AS INDICATED ON THE TEMPERATURE GAUGE A. WARNING: • Before using the barbeque please ensure that you have read and understood the SAFETY INFORMATION section of this manual. UNDER NO CIRCUMSTANCES SHOULD YOU ALLOW YOUR BARBEQUE TO OVERHEAT.
-
Page 18: Lighting The Side Burner
Safety, Assembly & Instruction Manual WARNING: THE SIDE BURNER LID MUST ALWAYS BE LEFT OPEN DURING COOKING AND MUST NOT BE USED TO EXTINGUISH THE BURNER. D. LIGHTING THE SIDE BURNER: • The lid must be opened prior to ignition of the burner. • Turn control knob to “OFF”... -
Page 19: At The End Of Cooking
Safety, Assembly & Instruction Manual WARNING: DO NOT ALLOW YOUR BARBEQUE TO OVERHEAT H. AT THE END OF COOKING: • Once cooking is finished a burn off process should be followed as follows: • Remove all excess burnt food with a scraper. • Each burner should be set to the “HI”... - Page 20 Safety, Assembly & Instruction Manual 10. CARE & MAINTENANCE BEFORE ANY CARE AND MAINTENANCE IS ATTEMPTED PLEASE ENSURE THAT THE BARBEQUE CONTROLS AND GAS CYLINDER ARE IN THE ‘OFF’ POSITION AND THAT ALL SURFACES HAVE BEEN GIVEN SUFFICIENT TIME TO COOL DOWN. Please note the following when maintaining and caring for your barbeque: • Cleaning your barbeque regularly will help to keep a pristine appearance.
-
Page 21: The Drip Tray
Safety, Assembly & Instruction Manual • Before cleaning the inside of the body it is advisable to remove the cooking surfaces. Be careful not to get water into the burner holes. • Care must be taken not to immerse the gas controls (manifold and injectors) in water. • When re-assembling the barbeque after cleaning it is important to check that the barbeque functions correctly. - Page 22 • If there are any signs of wear or cracking in the barbeque hose, you will need to replace it immediately. Ensure you replace it with a hose and regulator purchased from Barbeques Galore to ensure proper gas connection compatibility. Connect the nut of the hose to the gas inlet on the right side of the barbeque. You MUST use a spanner to tighten it properly. Do not use sealing tape.
-
Page 23: Cooking Hints
Safety, Assembly & Instruction Manual COOKING HINTS Controlling Flare Up Flare-ups are caused by juices and oils from the food igniting in sudden bursts of flame that come up over the grill. A little bit of flare up as well as the resulting smoke is a good thing. It’s what gives the barbequed food that unique outdoor flavour. -
Page 24: Covered Cooking
Using the roasting hood traps heat, moisture and flavour that is normally lost on an open barbeque. The Malibu is designed with enough power to heat up quickly with the hood open or closed. With the hood closed and the barbeque pre-heated, its important to note that don’t exceed 250°C. - Page 25 Best results are achieved by placing your roast in a rack and that rack in a drip pan (these optional accessories are available from your local Barbeques Galore store. The roast is elevated to allow heat to circulate all the way around, and water, wine, juices, herbs can be added to the drip pan to help flavour the roast and make a baste or gravy.
-
Page 26: Cooking Times
Safety, Assembly & Instruction Manual INTERNAL MEAT TEMPERATURES Meat Probe Temperature Type of Meat Rare Medium Well Done Beef 140ºF/60ºC 150ºF/66ºC 170ºF/77ºC Lamb 140ºF/60ºC 150ºF/65ºC 165ºF/75ºC Veal Not Advised 150ºF/70ºC 165ºF/75ºC Pork Not Advised 150ºF/65ºC 160ºF/70ºC Poultry Not Advised 170-175ºF/75-80ºC 175ºF/80ºC To obtain correct temperature use an instant-read meat thermometer in the thickest part of the flesh, careful not to touch any bone. - Page 27 Safety, Assembly & Instruction Manual BEEF Cut of Meat Weight or Thickness BBQ Method Approx Cook Time Roasts 2 kg Indirect 50 min per kg (rare) Steaks (T-bone, New York, 2.5 cm Direct 5-6 min per side Porterhouse, Round, Sirloion) (rare) Rump Steak 3.5 cm...
-
Page 28: Troubleshooting
Safety, Assembly & Instruction Manual 11. TROUBLESHOOTING Problem Possible Cause Prevention/Cure Burner will not light using knobs or Wires and/or electrode covered Clean wire and/or electrode with rubbing igniter. with cooking residue. alcohol. Electrode and burners are wet. Wipe dry with cloth. Electrode cracked or broken - Replace electrode. -
Page 29: Spare Parts
Safety, Assembly & Instruction Manual 12. SPARE PARTS Qty per Qty per Qty per Qty per No. Spare Part Codes Description Spare Part Codes Description Part Pack Part Pack 1 HH1411H40213 Cooking Grill 1pcs 17 HHW6YA036A Side Burner Bezel 2 HH1411H4LID Hood 18 HH1411H4FASCIA *Mainfold &... -
Page 30: Technical Specifications
Please ensure all these locations are not blocked by anything. Need more information or assistance in anyway? You can call your nearest Barbeques Galore 1800 978 555 store where barbeque experts will be happy to help you.
Need help?
Do you have a question about the MALIBU and is the answer not in the manual?
Questions and answers