Table of Contents
Advertisement
Quick Links
Download this manual
See also:
Instruction Manual
Suite Instruction Guide
Important Safety Information
Always read this manual first before attempting to install or use this
fireplace. For your safety, always comply with all warnings and safety
Instructions contained in this manual to prevent personal injury or property
damage.
Please Note: This product is for well insulated spaces or
occasional use.
Esuites-190108
English
1
Advertisement
Table of Contents

Related Manuals for Evonicfires SIGMA


Summary of Contents for Evonicfires SIGMA
- Page 1 Suite Instruction Guide Important Safety Information Always read this manual first before attempting to install or use this fireplace. For your safety, always comply with all warnings and safety Instructions contained in this manual to prevent personal injury or property damage.
-
Page 2: Table Of Contents
11. Warranty welcome to evonicfires evonicfires is an award-winning brand of CK Fires Ltd, situated just outside Stratford- upon-Avon, we manufacture a range of British built electric fires and are considered as one of the most technically advanced manufacturers in the world, with optional... -
Page 3: Electrical Safety
ELECTRICAL SAFETY: When using electrical appliances, basic precautions should always be followed to reduce the risk of fire, electric shock, and injury to persons, including the following: ① Read all instructions before using this electric fireplace. ② This fireplace is hot when in use. To avoid burns, do not let bare skin touch hot surfaces. - Page 4 ⑬ Do not insert or allow foreign objects to enter any ventilation or exhaust opening as this may cause an electric shock or fire, or damage to the heater. ⑭ To prevent a possible fire, do not block air intakes or exhaust in any manner.
-
Page 5: Important Instructions
IMPORTANT INSTRUCTIONS: Please read these instructions before installation or use and keep this booklet handy for future reference. All Evonic fires products meet the requirements of the EC Directives. These directives have been met by compliance with the following standards: EU 2011-65/EU 2015/863 - Restriction of Hazardous Substances EN 55014-1:2006 + A2:2011 Electromagnetic compatibility. - Page 6 Never use aerosols or steam cleaners near this product. Never route the electric cable near the heater outlet. Never route the electric cable under carpets or floor coverings. Never install this product close to curtains or combustible materials. Never Use the heater to dry clothes or other objects. Never remove the fireplace surrounding without isolating the electric supply.
-
Page 7: Installation Method
Installation Method: This product has been designed to be installed onto a plaster board, drywalled, or existing masonry chimney breast. Please seek advice from a professional, with reference to the structural integrity of the installation site. PLEASE NOTE: The screws and wall plugs provided are only suitable for a solid wall fixing / when installing onto a hollow-stud wall it is recommended that heavy duty wall anchors or equivalent are used. - Page 8 Once the Wall mount Bracket is securely in position, Lift and hook the product onto the wall bracket, slotting the wall bracket into the x3 slots in the rear of the product (See Fig:4) ensuring to keep the product level. Once the product is secured to the wall, Connect the power supply to the product—...
-
Page 9: E-Touch & App Interface
E-Touch & App Interface: The Appliance is operated using the E-Touch App Control. The App Control can be used on either OS or Android operating systems. To obtain the App please visit either the OS App Store Or Google Play and follow the on screen instructions. Screen shot taken from Apple App Store. -
Page 10: Product Operation
Product Operation: The appliance is operated by the e-touch App. The main standby power switch to the suite product is located to the right of the heater outlet, and is marked with a light bulb image (Fig 1). To activate the product, this switch must be switch to the “ON”... - Page 11 Heater unit cut-out) (This is a safety feature, to safe guard against further damage to the product). If the airflow is restricted the heater will automatically turn off. This is can occur due to incorrect installation or obstruction. To reset the heater function: •isolate from the mains power supply.
-
Page 12: Glass Removal
Glass Removal: 1. Remove 2 screws located in the bottom glass retaining bar. 2. Remove the bottom glass retaining bar. - Page 13 3. Remove the glass by pulling the second retaining bar away from the body of the fire. Ensure that the glass is supported at all times. A suction cup has been provided to aid with this step. Please note: The suction cup is provided for support only, not to hold the full weight of the glass.
-
Page 14: Log Set Guidance
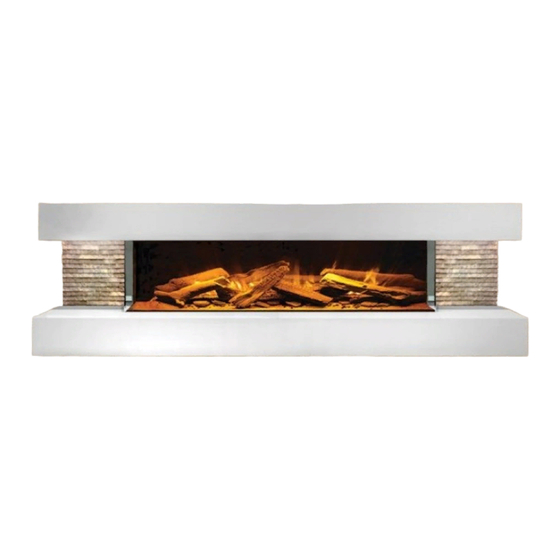
Log-Set Guidance: Log Set LENGTH 260MM 370MM 230MM 190MM 390MM Compton 2 suggested log layout Compton 1000 suggested log layout Please Note: The images shown are suggested Log layouts, the log sets can be arranged to personal preference. -
Page 15: Technical Specification
Technical Specification MODEL WIDTH HEIGHT DEPTH SIGMA 1156MM 1705MM 473MM OMEGA 1500MM 900MM 380MM HELIOS 1370MM 640MM 380MM NIMBUS 1280MM 520MM 255MM QUBE 1055MM 620MM 275MM GALILEO 1175MM 945MM 255MM ALTAIR 1087MM 1135MM 255MM COMPTON1000 1500MM 520MM 365MM COMPTON2 1120MM... -
Page 16: Problem Solving Chart
Troubleshooting Flow Chart: Problem Possible Cause Solution Ribbons are statically connected to Spray some anti-static spray beneath glass. the tray. Check the correct aperture has been Installation airflow restricted. adhered to when installing— Recommended clearance is 100mm. Flames not working correctly Blower clogged. - Page 17 Problem Possible Cause Solution Fan unbalanced. Adjust fan to stop catching on the case. If problem persists replacement fan unit maybe required. Adjust fan to stop catching on the case Fan catching on housing. Noisy Heater Fan clogged. Fan requires cleaning out. If problem persists a replacement fan may be required.
- Page 18 Problem Possible Cause Solution Double check switches are turned to Rocker switch has not been turned to the ‘ON’ position. the ‘ON’ position. Remote needs pairing. See separate Remote/App not paired. pairing instructions for guide. Fire not turning on. Replace fuse. Fuse blown.
- Page 19 Problem Possible Cause Solution Timer has been accidentally set. Double check timer settings. Heater coming on randomly Thermostat faulty. Replace PCB. LED dropped down. LED needs to be re-stuck into place. LED streaking Log positioning. Change log positioning to hide any direct view of LED strip.
-
Page 20: Warranty
This warranty is in addition to and does not affect the purchasers statutory rights of consumers. Registering product: To register a product please visit: www.evonicfires.co.uk and complete the fields required under the Register a Product Section. By registering your appliance, an extra 12...
Need help?
Do you have a question about the SIGMA and is the answer not in the manual?
Questions and answers