Table of Contents
Advertisement
Quick Links
INSETS
INSETS
INSTRUCTION MANUAL
INSTRUCTION MANUAL
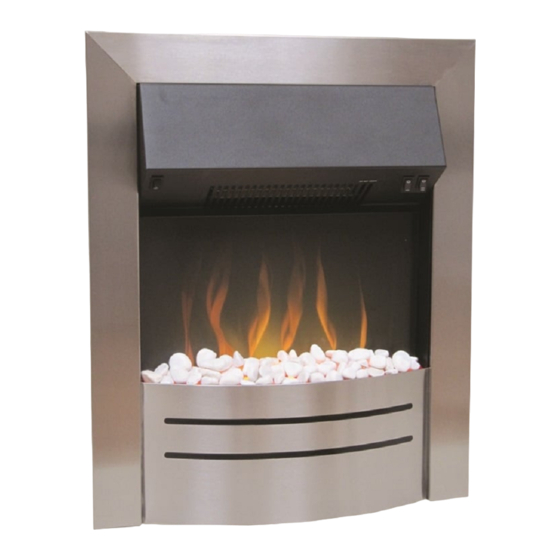
Amathus
Amathus
Brooklyn
Brooklyn
Colorado
Colorado
Detroit
Detroit
Ev4i
Ev4i
Ev4i4
Ev4i4
EVONIC - 104 INSTRUCTION MANUAL ISS. 3
EVONIC - 104 INSTRUCTION MANUAL ISS. 3
Ev6i
Ev6i
Ev6i4
Ev6i4
Iowa
Iowa
Kansas
Kansas
Kepler 22
Kepler 22
Memphis
Memphis
English
English
Nebraska
Nebraska
Phantom
Phantom
Staton
Staton
Topaz
Topaz
1
Advertisement
Table of Contents

Related Manuals for Evonicfires Amathus


Summary of Contents for Evonicfires Amathus
- Page 1 English English INSETS INSETS INSTRUCTION MANUAL INSTRUCTION MANUAL Amathus Amathus Ev6i Ev6i Nebraska Nebraska Brooklyn Brooklyn Ev6i4 Ev6i4 Phantom Phantom Colorado Colorado Iowa Iowa Staton Staton Detroit Detroit Kansas Kansas Topaz Topaz Ev4i Ev4i Kepler 22 Kepler 22 Ev4i4 Ev4i4...
-
Page 2: Table Of Contents
Model Dimensions..................14 Installation Process..................16 Installation (Slide in Models)............... 17 Applies to: Amathus / Brooklyn / Colorado / Detroit / Ev4i / Ev4i4 / Ev6i / Ev6i4 / Iowa / Kepler 22 / Nebraska / Phantom / Staton / Topaz Installation (Tie Back Models).............. -
Page 3: Eu Directives And Ukca Standards
EU DIRECTIVES All Evonic Fires products meet the requirements of the EC Directives. All Evonic Fires products meet the requirements of the EC Directives. These directives have been met by compliance with the following standards: These directives have been met by compliance with the following standards: EU 2011-65/EU 2015/863 Restriction of Hazardous Substances. -
Page 4: Important Information And Health & Safety
IMPORTANT INFORMATION AND HEALTH & SAFETY • Read all of the instructions carefully before using the appliance, only use this appliance as described in this manual. Any other use not recommended by the manufacturer may Any other use not recommended by the manufacturer may cause injury to persons, or damage to the appliance. -
Page 5: Components For Insets
EVONIC - 104 INSTRUCTION MANUAL ISS. 3 EVONIC - 104 INSTRUCTION MANUAL ISS. 3... -
Page 6: Operating Instructions
OPERATING INSTRUCTIONS OPERATING INSTRUCTIONS E-Touch App E-Touch App Manual Manual Remote Control Remote Control EVONIC - 104 INSTRUCTION MANUAL ISS. 3 EVONIC - 104 INSTRUCTION MANUAL ISS. 3... -
Page 7: E-Touch App Instructions
E-TOUCH APP INSTRUCTIONS The E-Touch app is a Bluetooth app that can be used with both smart phones and tablet The E-Touch app is a Bluetooth app that can be used with both smart phones and tablet devices, and is available on both the Apple App Store and Google Play Store. Please note devices, and is available on both the Apple App Store and Google Play Store. - Page 8 NAMING YOUR FIRE Single press on the Gear Symbol in Single press on the Gear Symbol in Single press on the Modify Name Single press on the Modify Name the top right of the Home Page. the top right of the Home Page. option.
- Page 9 CHANGING LANGUAGE & UNITS Single press the Go Back button in Single press the Go Back button in Single press on the Setting button. Single press on the Setting button. the top left of the Home Page. the top left of the Home Page. You can now choose from English, You can now choose from English, To return to the Fire Connection...
- Page 10 PROGRAMMING THE TIMER Single press the Time Set button Single press the Time Set button There are two types of timer you There are two types of timer you on the Home Page to begin on the Home Page to begin can programme.
- Page 11 Scroll down the page to select either Heat Scroll down the page to select either Heat The Week/Common Mode Page will now The Week/Common Mode Page will now Low, or Heat High. Low, or Heat High. display your chosen settings. display your chosen settings.
-
Page 12: Manual Operation And Remote Control
MANUAL OPERATION You can operate your appliance using the manual rocker switches located on the right hand side. Please note there is no manual dimmer control. - To turn on the appliance and activate the flame effect, press the top rocker switch to the I/On position. - To activate the heater at Low Heat, press the middle rocker switch to the I position. -
Page 13: Installation
INSTALLATION INSTALLATION EVONIC - 104 INSTRUCTION MANUAL ISS. 3 EVONIC - 104 INSTRUCTION MANUAL ISS. 3... -
Page 14: Model Dimensions
MODEL DIMENSIONS The model shown in these drawings is a Colorado for illustrative purposes, please refer to the table for your specific models size. EVONIC - 104 INSTRUCTION MANUAL ISS. 3 EVONIC - 104 INSTRUCTION MANUAL ISS. 3... - Page 15 MODEL DIMENSIONS Width Height Depth Model Overall Insert Overall Insert Overall Insert Frame Amathus 506mm 382mm 602mm 550mm 105mm 75mm 30mm Brooklyn 490mm 382mm 605mm 550mm 130mm 60mm 70mm Colorado 460mm 382mm 605mm 550mm 130mm 75mm 55mm Detroit 460mm 382mm...
-
Page 16: Installation Process
INSTALLATION PROCESS Amathus, Brooklyn, Amathus, Brooklyn, Colorado, Detroit, Colorado, Detroit, Amathus, Brooklyn, Amathus, Brooklyn, Ev4i4, Ev4i4, Ev4i, Ev4i4, Ev6i, Ev4i, Ev4i4, Ev6i, Colorado, Detroit, Colorado, Detroit, Ev6i4, Ev6i4, Ev6i4, Iowa, Ev6i4, Iowa, Iowa, Kepler 22, Iowa, Kepler 22, Topaz Topaz... -
Page 17: Installation (Slide In Models)
INSTALLATION INSTALLATION Slide in Slide in Amathus Amathus Ev4i4 Ev4i4 Nebraska Nebraska Brooklyn Brooklyn Ev6i Ev6i Phantom Phantom Colorado Colorado Ev6i4 Ev6i4 Staton Staton Detroit Detroit Iowa Iowa Topaz Topaz Ev4i Ev4i Kepler 22 Kepler 22 EVONIC - 104 INSTRUCTION MANUAL ISS. 3... - Page 18 INSTALLATION All our inset models are designed to be fitted into a standard 16” wide x 22” high opening. Before starting the installation check the dimensions of both the appliance and your opening to ensure that they align well. Please note, if you are installing into an existing chimney breast it is imperative that the flue is adequately blocked off.
-
Page 19: Installation Tie Back Models
INSTALLATION INSTALLATION Tie Back Models Tie Back Models Kansas Kansas Memphis Memphis EVONIC - 104 INSTRUCTION MANUAL ISS. 3 EVONIC - 104 INSTRUCTION MANUAL ISS. 3... - Page 20 INSTALLATION All our inset models are designed to be fitted into a standard 16” wide x 22” high opening. Before starting the installation check the dimensions of both the appliance and your opening to ensure that they align well. Please note, if you are installing into an existing chimney breast it is imperative that the flue is adequately blocked off.
-
Page 21: Installation With Spacer
INSTALLATION INSTALLATION With Spacer With Spacer Amathus Amathus Detroit Detroit Phantom Phantom Brooklyn Brooklyn Iowa Iowa Staton Staton Colorado Colorado Kepler 22 Kepler 22 EVONIC - 104 INSTRUCTION MANUAL ISS. 3 EVONIC - 104 INSTRUCTION MANUAL ISS. 3... - Page 22 INSTALLATION To convert your appliance to a free-standing unit you can fit an optional spacer. Before securing the spacer, attach the electrical lead to the inlet at the back bottom corner of the appliance. Once the spacer is fitted it will be more difficult to attach this. Position the spacer at the back of the appliance and line up the three screw holes on both appliance and spacer.
-
Page 23: Installation Wall Mounted
INSTALLATION INSTALLATION Wall Mounted Wall Mounted Ev4i4 Ev4i4 Ev6i4 Ev6i4 Topaz Topaz EVONIC - 104 INSTRUCTION MANUAL ISS. 3 EVONIC - 104 INSTRUCTION MANUAL ISS. 3... - Page 24 INSTALLATION All our inset models are designed to be fitted into a standard 16” wide x 22” high opening. Before starting the installation check the dimensions of both the appliance and your opening to ensure that they align well. Once the measurements are confirmed, plug in the appliance and slide it into the prepared opening.
-
Page 25: Removing The Glass
REMOVING THE GLASS REMOVING THE GLASS Colorado Colorado Ev4i4 Ev4i4 Kepler 22 Kepler 22 Detroit Detroit Ev6i Ev6i Memphis Memphis Ev4i Ev4i Ev6i4 Ev6i4 Nebraska Nebraska EVONIC - 104 INSTRUCTION MANUAL ISS. 3 EVONIC - 104 INSTRUCTION MANUAL ISS. 3... - Page 26 Unscrew the two screws, and remove the bottom glass retainer from the appliance. The glass can now be removed from the appliance. To replace the glass, follow the steps in reverse. EVONIC - 104 INSTRUCTION MANUAL ISS. 3 EVONIC - 104 INSTRUCTION MANUAL ISS. 3...
-
Page 27: Fuel Sets
FUEL SETS Once your appliance is installed and any front glass is removed you can lay out your fuel set as you wish. Then replace any glass panel by reversing the glass removal steps. Logs White or Beach Pebbles Logs & Beach Pebbles Coals EVONIC - 104 INSTRUCTION MANUAL ISS. - Page 28 FITTING THE FASCIA FITTING THE FASCIA EVONIC - 104 INSTRUCTION MANUAL ISS. 3 EVONIC - 104 INSTRUCTION MANUAL ISS. 3...
- Page 29 FITTING THE FASCIA MAGNETS The following models have a fascia attached with magnets; • Amathus • Ev4i4 • Kepler 22 • Topaz • Brooklyn • Ev6i • Nebraska • Colorado • Ev6i4 • Phantom • Ev4i • Iowa • Staton...
- Page 30 SLOTTED The Detroit and Memphis cast fascia is secured to the front of the appliance with two top mounted clips and a mounting bracket. Line up the two clips with the top of the mounting bracket and slot them down into the bracket. The cast frame can now be screwed to the appliance using the 2x screws supplied.
-
Page 31: Troubleshooting
TROUBLESHOOTING Applies to; Amathus / Brooklyn / Phantom Blower Access & Clean Scan the QR code to be taken to a video in our maintenance series. Applies to; Amathus / Brooklyn / Phantom Heater Access Scan the QR code to be taken to a video in our maintenance series. - Page 32 CK Fires Ltd / Evonic Fires 1, Evonic House, Clifford Park, Clifford Lane, Stratford-on-Avon, CV37 8HW Tel: +44 (0)1789 263868 Fax: +44 (0)1789 293080 Email: sales@evonicfires.co.uk Follow us on: Instagram | Facebook | Twitter | LinkedIn @evonicfires EVONIC - 104 INSTRUCTION MANUAL ISS. 3...
Need help?
Do you have a question about the Amathus and is the answer not in the manual?
Questions and answers