Stryker CUB FL19H Operation Manual
Pediatric crib
Hide thumbs
Also See for CUB FL19H:
- Maintenance manual (284 pages) ,
- Maintenance manual (152 pages) ,
- Manual (196 pages)

Related Manuals for Stryker CUB FL19H


Summary of Contents for Stryker CUB FL19H
- Page 1 C C U U B B ® ® P P e e d d i i a a t t r r i i c c C C r r i i b b O O p p e e r r a a t t i i o o n n s s M M a a n n u u a a l l FL19H (1900) 1900-109-001 REV C.0 2019/08...
- Page 3 S S y y m m b b o o l l s s General Warning Caution Operating instructions/Consult instructions for use Type BF applied part Protection from liquid splash I I P P X X 4 4 Direct Current Medical Equipment approved by the Canadian Standards Association with Respect to Electric Shock, Fire, Mechanical and Other Specified Hazards In accordance with European Directive 2012/19/EU on Waste Electrical and Electronic Equipment (WEEE)
- Page 5 T T a a b b l l e e o o f f C C o o n n t t e e n n t t s s Warning/Caution/Note Definition ..........................3 Summary of safety precautions ..........................4 Introduction ................................6 Product description ..............................6 Indications for use..............................6 Expected service life ...............................6...
- Page 6 Disinfecting ................................36 1900-109-001 REV C.0...
- Page 7 W W a a r r n n i i n n g g / / C C a a u u t t i i o o n n / / N N o o t t e e D D e e f f i i n n i i t t i i o o n n The words W W A A R R N N I I N N G G , C C A A U U T T I I O O N N , and N N O O T T E E carry special meanings and should be carefully reviewed.
- Page 8 S S u u m m m m a a r r y y o o f f s s a a f f e e t t y y p p r r e e c c a a u u t t i i o o n n s s Always read and strictly follow the warnings and cautions listed on this page.
- Page 9 • Always clean V V e e l l c c r r o o ® ® after each use. Saturate V V e e l l c c r r o o with disinfectant and allow disinfectant to evaporate. Appropriate disinfectant for nylon V V e e l l c c r r o o should be determined by the hospital.
-
Page 10: Expected Service Life
I I n n d d i i c c a a t t i i o o n n s s f f o o r r u u s s e e The Stryker Model FL19H C C U U B B pediatric crib is intended to provide a pediatric patient support surface for medical purposes and to provide a method of transporting pediatric patients within a healthcare facility. -
Page 11: Specifications
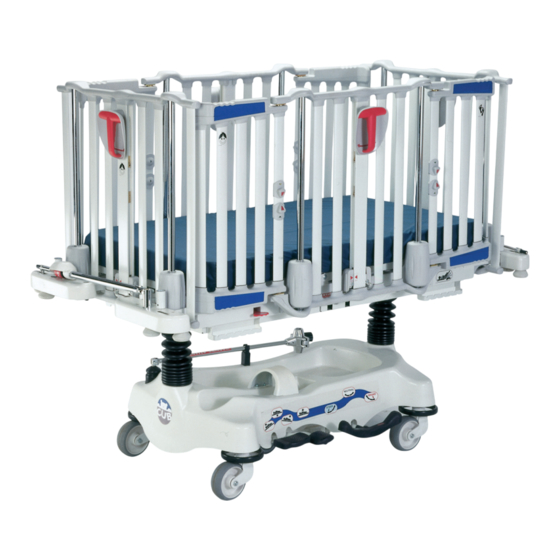
Specifications listed are approximate and may vary slightly from product to product or by power supply fluctuations. Stryker reserves the right to change specifications without notice. S S t t a a n n d d a a r r d d s s a a p p p p l l i i e e d d CAN/CSA C22.2 No. - Page 12 P P r r o o d d u u c c t t i i l l l l u u s s t t r r a a t t i i o o n n F F i i g g u u r r e e 1 1 – – P P r r o o d d u u c c t t i i l l l l u u s s t t r r a a t t i i o o n n Scale module (option) Fowler Siderail...
- Page 13 Portage, MI 49002 To view your operations or maintenance manual online, see https://techweb.stryker.com/. Have the serial number (A) of your Stryker product available when calling Stryker Customer Service or Technical Support. Include the serial number in all written communication. S S e e r r i i a a l l n n u u m m b b e e r r l l o o c c a a t t i i o o n n You can find the serial number (A) on the right foot end of the litter frame (Figure 2).
-
Page 14: Setup
S S e e t t u u p p To unpack your product, see the unpacking instructions that are attached to the product inside of the shipping crate. W W A A R R N N I I N N G G •... - Page 15 O O p p e e r r a a t t i i o o n n B B a a s s e e c c o o n n t t r r o o l l s s RIGHT HEAD END LEFT...
-
Page 16: Base Controls
A A p p p p l l y y i i n n g g a a n n d d r r e e l l e e a a s s i i n n g g t t h h e e b b r r a a k k e e s s W W A A R R N N I I N N G G - - Always apply the brakes when a patient is getting on the product or off the product or when the product is not moving. -
Page 17: Raising The Litter
P P o o s s i i t t i i o o n n i i n n g g t t h h e e p p r r o o d d u u c c t t i i n n T T r r e e n n d d e e l l e e n n b b u u r r g g W W A A R R N N I I N N G G •... - Page 18 R R a a i i s s i i n n g g o o r r l l o o w w e e r r i i n n g g t t h h e e m m a a n n u u a a l l F F o o w w l l e e r r b b a a c c k k r r e e s s t t W W A A R R N N I I N N G G •...
-
Page 19: Lowering The Siderail
F F i i g g u u r r e e 4 4 – – S S i i d d e e r r a a i i l l a a r r r r o o w w p p o o i i n n t t e e r r s s L L o o w w e e r r i i n n g g t t h h e e s s i i d d e e r r a a i i l l W W A A R R N N I I N N G G •... - Page 20 O O p p e e n n i i n n g g t t h h e e a a c c c c e e s s s s d d o o o o r r s s ( ( o o p p t t i i o o n n ) ) To open the access doors: 1.
-
Page 21: Scale Control Panel (Option)
Display Displays patient weight or error messages lb / kg Changes the unit of measurement Sets the scale to zero and erases the previous memory Zero Change equipment Add or remove equipment without affecting patient weight Weigh/on Activates the scale Memory Store the most recent patient weighing or display the stored weight W W e e i i g g h h i i n n g g a a p p a a t t i i e e n n t t... -
Page 22: Zeroing The Scale
S S e e t t t t i i n n g g t t h h e e s s c c a a l l e e m m e e m m o o r r y y To set the scale memory: 1. - Page 23 T T o o o o l l s s r r e e q q u u i i r r e e d d : : • #2 Phillips screwdriver To change the scale batteries: 1. Use a #2 Phillips screwdriver to remove the 2 screws (A) that secure the battery cover (B) to the enclosure (Figure 8). F F i i g g u u r r e e 8 8 –...
-
Page 24: Accessories
A A c c c c e e s s s s o o r r i i e e s s These accessories may be available for use with your product. Confirm availability for your configuration or region. Call Stryker Customer Service: 1-800-327-0770. N N a a m m e e... - Page 25 P P r r e e m m i i u u m m a a c c c c e e s s s s o o r r y y b b r r a a c c k k e e t t ( ( o o p p t t i i o o n n ) ) C C A A U U T T I I O O N N - - Always make sure external equipment is removed from product litter when zeroing the scale or weighing the patient.
- Page 26 F F i i g g u u r r e e 9 9 – – O O x x y y g g e e n n b b o o t t t t l l e e r r e e t t a a i i n n i i n n g g c c o o l l l l a a r r A A t t t t a a c c h h i i n n g g t t h h e e u u p p r r i i g g h h t t o o x x y y g g e e n n b b o o t t t t l l e e h h o o l l d d e e r r C C A A U U T T I I O O N N - - Always make sure external equipment is removed from product litter when zeroing the scale or weighing the patient.
- Page 27 F F i i g g u u r r e e 1 1 0 0 – – U U p p r r i i g g h h t t o o x x y y g g e e n n b b o o t t t t l l e e h h o o l l d d e e r r A A t t t t a a c c h h i i n n g g t t h h e e d d e e f f i i b b r r i i l l l l a a t t o o r r t t r r a a y y W W A A R R N N I I N N G G - - Do not place items that weigh more than 30 lb (14 kg) on the defibrillator tray.
- Page 28 8. Turn the knob (A) clockwise to tighten the knob. 9. Reverse steps to disconnect the IV caddy from the product. To store the IV caddy, place the IV caddy in the storage tray or secure the caddy in the storage clip. F F i i g g u u r r e e 1 1 1 1 –...
- Page 29 F F i i g g u u r r e e 1 1 2 2 – – P P o o s s i i t t i i o o n n i i n n g g t t h h e e 2 2 s s t t a a g g e e p p e e r r m m a a n n e e n n t t l l y y a a t t t t a a c c h h e e d d I I V V p p o o l l e e P P o o s s i i t t i i o o n n i i n n g g t t h h e e t t h h r r e e e e - - s s t t a a g g e e p p e e r r m m a a n n e e n n t t l l y y a a t t t t a a c c h h e e d d I I V V p p o o l l e e ( ( o o p p t t i i o o n n ) ) W W A A R R N N I I N N G G •...
- Page 30 F F i i g g u u r r e e 1 1 3 3 – – P P o o s s i i t t i i o o n n i i n n g g t t h h e e t t h h r r e e e e - - s s t t a a g g e e p p e e r r m m a a n n e e n n t t l l y y a a t t t t a a c c h h e e d d I I V V p p o o l l e e A A t t t t a a c c h h i i n n g g a a n n d d p p o o s s i i t t i i o o n n i i n n g g t t h h e e r r e e m m o o v v a a b b l l e e I I V V p p o o l l e e ( ( F F A A 6 6 4 4 1 1 3 3 5 5 ) ) For use with the premium accessory bracket, not compatible with the standard accessory bracket.
- Page 31 F F i i g g u u r r e e 1 1 4 4 – – R R e e m m o o v v a a b b l l e e I I V V p p o o l l e e A A t t t t a a c c h h i i n n g g a a n n d d p p o o s s i i t t i i o o n n i i n n g g t t h h e e r r e e m m o o v v a a b b l l e e I I V V p p o o l l e e ( ( F F D D T T S S H H ) ) W W A A R R N N I I N N G G •...
- Page 32 F F i i g g u u r r e e 1 1 5 5 – – C C h h a a r r t t h h o o l l d d e e r r / / m m o o n n i i t t o o r r h h o o l l d d e e r r I I n n s s t t a a l l l l i i n n g g t t h h e e r r e e t t r r a a c c t t i i n n g g p p r r o o t t e e c c t t i i v v e e t t o o p p W W A A R R N N I I N N G G •...
- Page 33 F F i i g g u u r r e e 1 1 6 6 – – R R e e t t r r a a c c t t i i n n g g p p r r o o t t e e c c t t i i v v e e t t o o p p P P o o s s i i t t i i o o n n i i n n g g t t h h e e r r e e t t r r a a c c t t i i n n g g p p r r o o t t e e c c t t i i v v e e t t o o p p W W A A R R N N I I N N G G •...
- Page 34 • On a product with scale, make sure that the scale is turned off before installing a protective top. • Make sure that the protective top is secure and functions before returning the product to service. T T o o o o l l s s R R e e q q u u i i r r e e d d : : •...
- Page 35 To position the retracting protective top: 1. To partially open the protective top, squeeze the two release knobs (E) and lift the lower rail (F) until the anchors points are passed (G) (Figure 17). Release the knobs and lower the rail until it rests on the anchor points. N N o o t t e e - - Make sure that the lower rail ends are secure in the anchor points by trying to lower the rail without squeezing the release knobs.
-
Page 36: Preventive Maintenance
Remove product from service before you perform the preventive maintenance inspection. Check all items listed during annual preventive maintenance for all Stryker Medical products. You may need to perform preventive maintenance checks more often based on your level of product usage. Service only by qualified personnel. - Page 37 Product serial number: Completed by: Date: 1900-109-001 REV C.0...
- Page 38 For United States only. Confirm availability for your configuration or region. Call Stryker Customer Service: 1-800-327- 0770. Stryker’s preferred wipes (2060-000-001 6'' x 10'' or 2060-000-002 9'' x 12'') include the following active ingredients: • n-Alkyl (60% C14, 30% C16, 5% C12, 5% C18) dimethyl benzyl ammonium chloride - 0.154% •...
-
Page 39: Cleaning
C C l l e e a a n n i i n n g g C C A A U U T T I I O O N N • Do not clean, disinfect, service, or perform maintenance while the product is in use. •... - Page 40 D D i i s s i i n n f f e e c c t t i i n n g g C C A A U U T T I I O O N N • Do not clean, disinfect, service, or perform maintenance while the product is in use. •...
- Page 42 M M a a n n u u f f a a c c t t u u r r e e d d B B y y : : Stryker Medical 3800 E. Centre Avenue Portage, MI 49002 1900-109-001 REV C.0 2019/08 WCR: AB.3...
Need help?
Do you have a question about the CUB FL19H and is the answer not in the manual?
Questions and answers