
Related Manuals for Stryker cub


Summary of Contents for Stryker cub
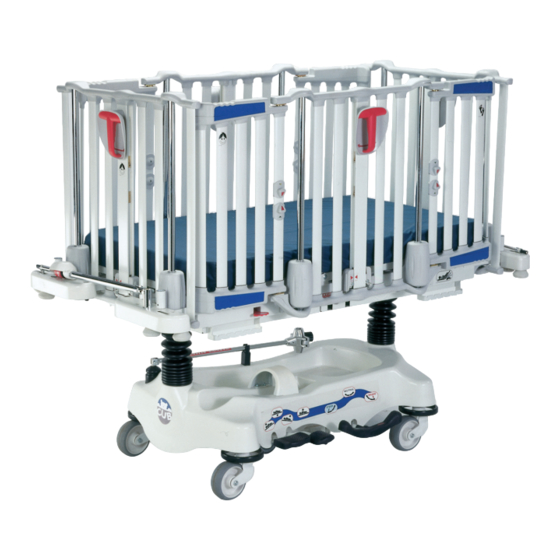
- Page 1 ® Pediatric Crib FL19F/H (190) Operations Manual 2014/10 B.0 1900-009-001 REV B www.stryker.com...
-
Page 3: Symbols
Symbols Warning/Caution, consult accompanying documentation Safe Working Load Symbol Type BF device Battery-powered device with internal electrical source. IPX4 Protection from liquid splash Direct Current In accordance with European Directive 2002/96/EC on Waste Electrical and Electronic Equipment, this symbol indicates that the product must not be disposed of as unsorted municipal waste, but should be collected separately. -
Page 5: Table Of Contents
Retracting Protective Top Cleaning ............1-29 www.stryker.com 1900-009-001 REV B... - Page 6 CUB Crib Quick Reference Guide ........
-
Page 7: Warning / Caution / Note Definition
Note This provides special information to make maintenance easier or important instructions clearer. Return To Table of Contents www.stryker.com 1900-009-001 REV B... -
Page 8: Introduction
INTENDED PATIENT POPULATION: The safe working load indicates the sum of the patient, the mattress, and accessory weight. The safe working load for Cub is 100lb (45 kg). This crib is not intended for use for any patient measuring greater than 35 inches. -
Page 9: Specifications
Battery operated - 4 x “C” Type, Alkaline, 1.5VDC System Electrical 6 VDC, 0.15 A Rating Stryker provides special attention to product improvement and reserves the right to change specifications without notice. Compliant with the following standards: CSA C22.2, No. 60601.1; UL2601-1; IEC/EN 60601-1. Note: The Cub ®... -
Page 10: Environmental Conditions
* Operating environment recommended to ensure scale precision. Environmental Conditions Operation * Storage and Transportation (29.1 Ambient Temperature (15.5 (-30 Relative Humidity (Non-Condensing) 1060 hPa 1060 hPa Atmospheric Pressure 700 hPa 500 hPa Return To Table of Contents 1900-009-001 REV B www.stryker.com... -
Page 11: Product Illustration
SIDERAIL ACTIVATION HANDLE LITTER LIFT PEDAL OXYGEN BOTTLE RETAINING COLLAR OPTIONAL OPTIONAL GROUND CHAIN IV CADDY ARM OPTIONAL PNEUMATIC HEAD SECTION LOWER PEDAL ACTIVATION LEVER OPTIONAL Figure 1 - Bed illustration Return To Table of Contents www.stryker.com 1900-009-001 REV B... -
Page 12: Contact Information
Introduction CONTACT INFORMATION Contact Stryker Customer Service or Technical Support at 1-800-327-0770. Stryker Medical 3800 E. Centre Avenue Portage, Michigan 49002 Return To Table of Contents 1-10 1900-009-001 REV B www.stryker.com... -
Page 13: Summary Of Safety Precautions
• Do not use the stretcher if any components are missing or broken. Contact your dealer or Stryker for replacement parts. Use only replacement parts provided by Stryker. - Page 14 • Do not use the protective top as a push/pull device. Note • Throughout the manual, the words “right” and “left” refer to the right and left sides of a patient lying face up on the stretcher. Return To Table of Contents 1-12 1900-009-001 REV B www.stryker.com...
-
Page 15: Setup
± 0.5 lb (0.2 kg) at 50 lb (22 kg) or less and within ± 1.0 lb (0.4 kg) at ≥ 50 lb (22 kg) when flat. Return To Table of Contents www.stryker.com 1900-009-001 REV B 1-13... -
Page 16: Base Control Verification
1-24) secured to hood. Optional chart holder (see page 1-27) located under the mattress support secured to frame. If any problems are found during bed setup, contact the Technical Service department at 1-800-327-0770. Return To Table of Contents 1-14 1900-009-001 REV B www.stryker.com... -
Page 17: Operation
Depress the side of pedal (B) closest to the stretcher foot end to lower the foot end. Brake and Steer functions (left side) Steer. Steer and Brake functions (right side). Return To Table of Contents www.stryker.com 1900-009-001 REV B 1-15... -
Page 18: Applying Or Releasing The Brakes
• To disengage the steer mode at either side of the stretcher, move pedal to neutral position. Positioning the pedal in neutral enables the stretcher to be moved in any directions, including sideways. Return To Table of Contents 1-16 1900-009-001 REV B www.stryker.com... -
Page 19: Raising Or Lowering The Litter (Optional) - Fl19H Only
1-15) closest to the stretcher foot end. NOTE The higher the litter is before a Trendelenburg positioning, the greater the Trendelenburg angle will be. (Maximum Trendelenburg angles: +9.5° to -9.5°). Return To Table of Contents www.stryker.com 1900-009-001 REV B 1-17... -
Page 20: Operating The Fowler / Foot Sections
Figure 5). Lower the foot section and release the support so that it engages in the support brackets of the next position or lower to flat, releasing the support only at the end. Return To Table of Contents 1-18 1900-009-001 REV B www.stryker.com... -
Page 21: Operating The Siderails
(B) will show green. If one Figure 7 - Access Door of them remains yellow, it means that the door is not completely closed; open and close the door again (see Figure 7). Return To Table of Contents www.stryker.com 1900-009-001 REV B 1-19... -
Page 22: Operating The Scale (Optional)
Some other error messages may be displayed while operating the scale. Refer to the Error Code List in the Maintenance Manual to understand their signification and what action to take when they appear. Return To Table of Contents 1-20 1900-009-001 REV B www.stryker.com... - Page 23 • Press the Weigh/On button to activate the scale. Do not wait for the weight to be displayed, proceed immediately with the next step. • Simultaneously press and hold the Memory and Zero buttons for at least two seconds and release. The screen will display 0.0 lb/kg. Return To Table of Contents www.stryker.com 1900-009-001 REV B 1-21...
-
Page 24: Battery Replacement
• Use only 1.5 VDC alkaline batteries. The use of batteries other than the one recommended may damage the scale electronic components. • Remove the batteries if the scale module or the stretcher is not used for long periods. Return To Table of Contents 1-22 1900-009-001 REV B www.stryker.com... -
Page 25: Accessories
PROTECTIVE TOP MOUNTING SOCKETS MUST BE REMOVED BEFORE STORAGE SOCKET STORAGE SOCKET INSTALLING THE BALKAN FRAME PERMANENT IV POLE PERMANENT IV POLE SOCKET SOCKET " STRYKER ACCESSORY SOCKETS STRYKER IV POLE " STRYKER IV POLE SOCKET SOCKET Figure 11 - Premium Accessory Bracket Return To Table of Contents www.stryker.com... -
Page 26: Oxygen Bottle Clamp Usage (Optional)
Pivot the knob away from the clamp (B), open the clamp and remove the IV pole from the IV Caddy. Store the IV Caddy. CAUTION Always store the IV Caddy when not in use to avoid damaging it when the stretcher is moved. Figure 13 - IV Caddy Return To Table of Contents 1-24 1900-009-001 REV B www.stryker.com... -
Page 27: Operating The Two-Stage Fixed Iv Pole (Optional)
• The weight of the IV bags should not exceed 40 lb (18 kg). • Do not install a two or three-stage fixed IV pole at the foot end of a stretcher equipped with the scale. Return To Table of Contents www.stryker.com 1900-009-001 REV B 1-25... -
Page 28: Operating The Three-Stage Iv Pole (Optional)
• The weight of the IV bags should not exceed 40 lb (18 kg). • Do not install a two or three-stage fixed IV pole at the foot end of a stretcher equipped with the scale. Return To Table of Contents 1-26 1900-009-001 REV B www.stryker.com... -
Page 29: Chart Holder / Monitor Holder Usage (Optional)
Figure 16 - Chart Holder / Monitor Holder Return To Table of Contents www.stryker.com 1900-009-001 REV B 1-27... -
Page 30: Retracting Protective Top Installation (Fa64074-Bil)
It is very important for the patient’s safety that the whole assembly is thoroughly inspected before use to ensure it is properly and securely mounted. Protective top Lower rail Plastic structure Release knobs Post Accessory bracket Figure 17 Return To Table of Contents 1-28 1900-009-001 REV B www.stryker.com... -
Page 31: Retracting Protective Top Operations (Fa64074-Bil)
Do not use the protective top as a push/pull device. RETRACTING PROTECTIVE TOP CLEANING The plastic membrane of the protective top may be clean daily with mild soaps or low concentrated ammonia based cleaners like window cleaners. Return To Table of Contents www.stryker.com 1900-009-001 REV B 1-29... -
Page 32: Protective Top With Supports Installation (Fa64183-Bil)
PLASTIC STRUCTURE patient’s safety that whole assembly is thoroughly LASTIC TRUCTURE POST inspected before use to ensure POST it is properly and securely mounted. PINS ACCESSORY BRACKETS PINS Figure 19 Return To Table of Contents 1-30 1900-009-001 REV B www.stryker.com... -
Page 33: Protective Top With Supports Operations (Fa64183-Bil)
Do not use the protective top as a push/pull device. PROTECTIVE TOP WITH SUPPORTS CLEANING The plastic membrane of the protective top may be clean daily with mild soaps or low concentrated ammonia based cleaners like window cleaners. Return To Table of Contents www.stryker.com 1900-009-001 REV B 1-31... -
Page 34: Cleaning
Quaternary Cleaners: identified by ingredients containing the phrase “…yl ammonium chloride” Quat/Isopropyl Cleaners: identified by a quaternary ingredient above plus isopropyl alcohol Phenolic Cleaners: identified by ingredients containing the suffix “-phenol” Chlorine Bleach: known generically as “Sodium Hypochlorite Return To Table of Contents 1-32 1900-009-001 REV B www.stryker.com... -
Page 35: Special Instructions
Rinse surfaces which have been exposed to the solution with clear water before returning mattress to service. NOTE Failure to follow the above directions when using these types of cleaners may void this product’s warranty. Return To Table of Contents www.stryker.com 1900-009-001 REV B 1-33... -
Page 36: Preventive Maintenance
Remove product from service before you perform the preventive maintenance inspection. At a minimum, check all items listed during annual preventive maintenance for all Stryker Medical products. You may need to perform preventive maintenance checks more frequently based on your level of product usage. Service only by qualified personnel. -
Page 37: Recycling Passport
Recycling passport Assembly Part Number: OL190186 (Reference Only) Item Recycling/Material Code Important Information (QDF19-0888) Circuit Board (QDF7909) C Battery Return To Table of Contents www.stryker.com 1900-009-001 REV B 1-35... -
Page 38: Limited Warranty
Stryker’s obligation under this warranty is expressly limited to supplying replacement parts and labor for, or replacing, at its option, any product which is, in the sole discretion of Stryker, found to be defective. If requested by Stryker, products or parts for which a warranty claim is made shall be returned prepaid to the factory. Any improper use or any alteration or repair by others in such manner as in Stryker’s judgment affects the product materially and adversely... - Page 40 CUB Crib - Model FL19 Scale Operation The scale system allows the reading of a patient’s weight in pounds (lb) or kilograms (kg) within ± 0.5 lb (0.2 kg) at 50 lb (22 kg) or less and within ± 1.0 lb (0.4 kg) at ≥ 50 lb (22 kg) when flat. The reading can be stored in memory. The system also allows to add or remove a device or accessory from the stretcher without removing the patient.
- Page 41 CUB Crib - Model FL19 Scale Operation (Continued) SCALE OPERATION (CONTINUED) A. PREPARING (ZEROING) THE SCALE FOR A NEW PATIENT • Prepare the stretcher for the new patient (sheets, pillows, equipment, etc.). • Press and release the Weigh/On button to activate the scale. A weight reading will appear on the display four to ten seconds later during which a three-hyphen line will flash.
-
Page 42: Base Controls
CUB Crib - Model FL19 Features Overview BASE CONTROLS Two types of base models are available: the Fixed Height RIGHT and Variable Height (hydraulic). Pump to raise litter. Depress the center of pedal (B) to lower both HEAD END ends of the stretcher together. -
Page 43: Warnings And Cautions
The information presented in this Quick Reference Guide is intended to demonstrate a Stryker product. Always refer to the package insert, product label and/or Operations manual before using any Stryker product. Products may not be available in all markets. Some features indicated in this Quick Reference Guide are options and may not be configured on all products. - Page 44 Civière pédiatrique ® FL19F/H (190) Manuel d’utilisation 2014/10 B.0 1900-009-001 REV B www.stryker.com...
- Page 46 Symboles Avertissement/Mise en garde, consulter la documentation d’accompagnement Charge maximale admissible Appareil du type BF Appareil à source électrique interne alimenté par batteries IPX4 Protection contre les projections de liquides Courant direct Conformément à la directive européenne 2002/96/EC sur les rebuts d’équipements électriques et électroniques, ce symbole indique que le produit ne doit pas être disposé...
- Page 48 ÉLIMINATION DES TACHES D’IODE ............2-31 www.stryker.com 1900-009-001 REV B...
- Page 49 Guide de référence du lit CUB Crib ........
-
Page 50: Www.stryker.com 1900-009-001 Rev B
à prendre afin d’assurer l’utilisation sécuritaire et efficace du matériel et d’éviter les dommages qui pourraient découler de l’utilisation ou d’une utilisation inappropriée du matériel. Remarque Il s’agit de renseignements spécifiques destinés à faciliter l’entretien ou à clarifier des instructions importantes. Retour à la table des matières www.stryker.com 1900-009-001 REV B... -
Page 51: Introduction
POPULATION DE PATIENTS PRÉVUE: La charge maximale admissible fait référence au poids total du patient, du matelas et des accessoires. La charge maximale admissible pour le lit pédiatrique Stryker Cub est de 45 kg. Ce lit n’est pas conçu pour une utilisation avec un patient dont la taille est supérieure à 89 cm. -
Page 52: Renseignements Techniques
Caractéristiques 6 Vcc, 0,15 A Électriques Stryker porte un soin particulier à l’amélioration de ses produits et se réserve le droit d’en changer les spécifications sans préavis. Conforme aux normes suivantes : CSA C22.2, No. 60601.1; UL2601-1; IEC/EN 60601-1. Remarque: La Cub ® est approuvé CE seulement sans l’option balance. -
Page 53: Conditions D'environnement
(122 °F) Température ambiante 15,5 °C -30 °C (60 °F) (-22 °F) 95 % 95 % Humidité relative (sans condensation) 1060 hPa 1060 hPa Pression atmosphérique 700 hPa 500 hPa Retour à la table des matières 1900-009-001 REV B www.stryker.com... -
Page 54: Illustration Du Produit
TIGE À SOLUTÉ MOBILE (EN OPTION) PNEUMATIC HEAD SECTION LEVIER D’ACTIVATION DE LA LOWER PEDAL PÉDALE DE DESCENTE (EN SECTION DE TÊTE ASSISTÉE ACTIVATION LEVER OPTION) OPTIONAL Figure 1 - Illustration du lit Retour à la table des matières www.stryker.com 1900-009-001 REV B... - Page 55 Introduction Contacter le service clientèle ou le support technique de Stryker au +1-800-327-0770. Stryker Medical 3800 E. Centre Avenue Portage, Michigan 49002 États-Unis Retour à la table des matières 1900-009-001 REV B www.stryker.com...
-
Page 56: Résumé Des Mesures De Sécurité
Résumé des mesures de sécurité Il est important de lire et de maîtriser le contenu du présent manuel avant d’utiliser la civière pédiatrique Cub . Lire attentivement et ® respecter à la lettre les directives de sécurité indiquées sur la présente page. Les directives de sécurité sont répétées tout au long du guide, lorsqu’il y a lieu. - Page 57 • N’utilisez pas la civière si des pièces y manquent ou sont brisées. Adressez-vous à votre vendeur autorisé ou à Stryker pour obtenir des pièces de rechange. N’utilisez que des pièces de rechange d’origine fournies par Stryker. • Capacité de charge statique maximale = 181,4 kg.
-
Page 58: Vérification Des Côtés (S'applique Aux Côtes Mobiles)
Pressez et maintenez enfoncée pendant deux secondes la touche Memory (Mémoire). Dès que le mot « Memory » (Mémoire) apparaît à l’écran, relâchez la touche. Le poids de la masse précédemment pesée par la balance doit maintenant être enregistré en mémoire. Retour à la table des matières www.stryker.com 1900-009-001 REV B 2-11... -
Page 59: Vérification Des Commandes De La Base
Le support à dossier (en option, voir la page 25) sous le sommier est bien fixé au châssis. Si des problèmes surviennent pendant l’installation du lit, contactez le service technique au 1-800-327-0770. Retour à la table des matières 2-12 1900-009-001 REV B www.stryker.com... -
Page 60: Fonctionnement
FREIN DIRECTION NEUTRE Fonctions Brake (Frein) et Steer (Direction) (côté gauche). FREIN DIRECTION NEUTRE Fonctions Steer (Direction) et Brake (Frein) (côté droit). Retour à la table des matières www.stryker.com 1900-009-001 REV B 2-13... -
Page 61: Fonctionnement Des Freins
Pour enlever le mode directionnel des deux côtés de la civière, ramenez l’une ou l’autre pédale au neutre. En ramenant la pédale au neutre, la civière peut être déplacée dans toutes les directions, y compris de côté. Retour à la table des matières 2-14 1900-009-001 REV B www.stryker.com... -
Page 62: Élévation / Descente Du Sommier (En Option) - Fl19H Seulement
Pour la position Trendelenburg inversé page 13 de la civière. REMARQUE Plus le sommier est élevé avant le positionnement Trendelenburg, plus prononcé sera l’angle Trendelenburg. (Angles maximaux Trendelenburg : +9,5° à -9,5°.) Retour à la table des matières www.stryker.com 1900-009-001 REV B 2-15... -
Page 63: Positionner Les Sections De Tête Et De Pied
(voir la Figure 5). Baissez la section de pied et relâchez le support pour qu’il s’engage dans les arrêts de la nouvelle position ou maintenez le support soulevé pour baisser complètement la section de pied. Retour à la table des matières 2-16 1900-009-001 REV B www.stryker.com... -
Page 64: Fonctionnement Des Côtés De Sûreté
Si l’un d’eux demeure jaune, cela Figure 7 - Porte d’accès signifie que la porte n’est pas complètement fermée; rouvrez et refermez la porte (voir la Figure 7). Retour à la table des matières www.stryker.com 1900-009-001 REV B 2-17... -
Page 65: Fonctionnement De La Balance (En Option)
D’autres messages d’erreur sont susceptibles d’apparaître à l’écran lors de l’utilisation de la balance. Référez-vous à la Liste des codes d’erreur du Manuel d’entretien afin de comprendre leur signification et les mesures à prendre lorsqu’ils apparaissent. Retour à la table des matières 2-18 1900-009-001 REV B www.stryker.com... - Page 66 • Pressez et maintenez enfoncée la touche Zero (Remise à zéro) pendant au moins deux secondes. Relâchez la touche de 4 à 10 secondes plus tard, le poids affiché et celui mis en mémoire seront ramenés à zéro. Retour à la table des matières www.stryker.com 1900-009-001 REV B 2-19...
-
Page 67: Remplacement Des Batteries
N’utilisez que des batteries alcalines 1,5 V. L’utilisation de batteries autres que celles spécifiées risque d’endommager les composants électroniques de la balance. • Retirez les batteries de leur emplacement lorsque la balance ou la civière ne sont pas utilisés pendant de longues périodes. Retour à la table des matières 2-20 1900-009-001 REV B www.stryker.com... -
Page 68: Accessoires
DOUILLES POUR ACCESSOIRES STRYKER " STRYKER IV POLE DOUILLE POUR TIGE À À SOLUTÉ 1,3 CM DE SOCKET SOLUTÉ 1,3 CM DE STRYKER STRYKER SOCKET Figure 11 - Support d’accessoires de luxe Retour à la table des matières www.stryker.com 1900-009-001 REV B... -
Page 69: Utilisation Du Collet Pour Bouteille D'oxygène (En Option)
Pivotez le bouton hors du collier de serrage (B), ouvrez le collier et retirez la tige à soluté du bras d’attache. Rangez le bras d’attache. MISE EN GARDE Rangez toujours un bras d’attache non utilisé afin d’éviter de l’endommager lorsque la civière est déplacée. Figure 13 - Bras d’attache Retour à la table des matières 2-22 1900-009-001 REV B www.stryker.com... -
Page 70: Fonctionnement De La Tige À Soluté Fixe À Deux Étages (En Option)
Le poids des sacs de soluté ne doit pas dépasser 18 kg. • N’utilisez pas de tige à soluté fixe à deux ou trois étages au pied d’une civière munie de la balance. Retour à la table des matières www.stryker.com 1900-009-001 REV B 2-23... -
Page 71: Fonctionnement De La Tige À Soluté À Trois Étages (En Option)
Le poids des sacs à soluté ne doit pas dépasser 18 kg. • N’utilisez pas de tige à soluté fixe à deux ou trois étages au pied d’une civière munie de la balance. Retour à la table des matières 2-24 1900-009-001 REV B www.stryker.com... -
Page 72: Utilisation Du Support À Dossier / Porte-Moniteur (En Option)
à droite ou des deux côtés de la civière, permettent de faire suivre le dossier du patient lorsqu’il est transféré d’unité de soins ou d’installer un moniteur sur la civière. Figure 16 - Support à dossier / porte-moniteur Retour à la table des matières www.stryker.com 1900-009-001 REV B 2-25... -
Page 73: Toit De Protection D'installation (Fa64074-Bil)
Avant d’utiliser le toit de protection, il est très important pour la sécurité du patient de s’assurer, par un examen minutieux, que le toit a été correctement installé sur la civière. Toit de protection Traverse inférieure Structure de plastique Boutons de déverrouillage Poteau Support d'accessoires Goupille Figure 17 Retour à la table des matières 2-26 1900-009-001 REV B www.stryker.com... - Page 74 La membrane de plastique du toit de protection peut être nettoyée quotidiennement à l’aide de savons doux ou de nettoyants à base d’ammoniaque en faible concentration tels les nettoyants à vitre. Retour à la table des matières www.stryker.com 1900-009-001 REV B 2-27...
-
Page 75: Toit De Protection Avec Supports D'installation (Fa64183-Bil)
Il est très important pour la sécurité du patient que l’ensemble est soigneusement inspecté avant son utilisation afin de s’assurer qu’elle est correctement et solidement fixés. GOUPILLES SUPPORTS D ACCESSOIRES PINS Figure 19 Retour à la table des matières 2-28 1900-009-001 REV B www.stryker.com... - Page 76 La membrane de plastique du toit de protection peut être nettoyée quotidiennement à l’aide de savon doux ou de net- toyants à base d’ammoniaque en faible concentration tels les nettoyants à vitre. Retour à la table des matières www.stryker.com 1900-009-001 REV B 2-29...
-
Page 77: Nettoyage
Nettoyants phénoliques : identifiés par les ingrédients contenant le suffixe « -phénol » Eau de Javel : connu génériquement sous le nom de « hypochlorure de sodium » Retour à la table des matières 2-30 1900-009-001 REV B www.stryker.com... -
Page 78: Directives Particulières
Rincez à l’eau claire les surfaces qui ont été en contact avec la solution avant de remettre le matelas en service. REMARQUE L’inobservation des recommandations ci-dessus lorsque ces produits sont utilisés peut entraîner l’annulation de la garantie du produit. Retour à la table des matières www.stryker.com 1900-009-001 REV B 2-31... -
Page 79: Entretien Préventif
____ Le bras d’attache (en option) pour tige à soluté mobile est solidement fixé et fonctionne bien. ____ Les supports d’accessoires réguliers ou de luxe (en option) sont solidement fixés. Numéro de série de la civière : Vérification réalisée par : _____________________________________ Date : ___________________ Retour à la table des matières 2-32 1900-009-001 REV B www.stryker.com... -
Page 80: Recyclabilité
Numéro de pièce : OL190186 (à titre de référence uniquement) Article Code de recyclage du matériel Informations Importantes Qté. (QDF19-0888) Carte de circuits imprimés (QDF7909) Batterie de type C Retour à la table des matières www.stryker.com 1900-009-001 REV B 2-33... -
Page 81: Garantie
Le montant des réclamations sera limité au coût de remplacement réel. Si cette information n’est pas reçue par Stryker dans les quinze (15) jours suivant la livraison du produit, ou si les dommages ne sont pas signalés sur le bordereau de livraison au moment de la réception, le client restera redevable du paiement intégral de la facture d’origine dans un délai de trente (30) jours à... -
Page 82: Clause De Garantie Internationale
CLAUSE DE GARANTIE INTERNATIONALE La présente garantie reflète les dispositions en vigueur aux États-Unis. Hors des États-Unis, la garantie peut différer selon le pays. Contacter le représentant Stryker Medical local pour obtenir plus d’informations. Retour à la table des matières www.stryker.com... - Page 84 CUB Crib - FL19 Utilisation de la balance La balance permet d’obtenir une lecture du poids du patient en livres (lb) ou en kilogrammes (kg) avec une précision de ± 0,5 lb (0,2 kg) à 50 lbs (22 kg) ou moins et ± 1,0 lbs (0,4 kg) à ≥ 50 lbs (22 kg) quand plat. Cette lecture peut être conservée en mémoire.
- Page 85 Les informations présentées dans ce guide de référence rapide est destiné à démontrer un produit Stryker. Toujours se référer à la notice, étiquette du produit et / ou manuel des opérations avant d’utiliser tout produit Stryker. Les produits peuvent ne pas être disponibles dans tous les marchés.
-
Page 86: Commandes De La Base
CUB Crib - FL19 Aperçu des Caractéristiques COMMANDES DE LA BASE Deux types de modèle de base sont offerts : à hauteur fixe RIGHT DROITE et à hauteur variable (hydraulique). Pompez pour lever le sommier. Appuyez au centre de la pédale (B) pour abaisser HEAD END CÔTÉ... - Page 87 • N’utilisez pas la civière si des pièces y manquent ou sont brisées. Adressez-vous à votre vendeur autorisé ou à Stryker pour obtenir des pièces de rechange. N’utilisez que des pièces de rechange d’origine fournies par Stryker.
- Page 89 Stryker Medical 3800 E. Centre Avenue Portage, MI 49002 2014/10 1900-009-001 REV B www.stryker.com...
Need help?
Do you have a question about the cub and is the answer not in the manual?
Questions and answers