Table of Contents
Advertisement
Quick Links
See also:
User Manual
Advertisement
Table of Contents
Troubleshooting

Subscribe to Our Youtube Channel
Related Manuals for SATO TH2 Series


Summary of Contents for SATO TH2 Series
- Page 1 Operator Manual For printer model: TH2 Series Read this Operator Manual before using this product. Keep this document available for future reference.
- Page 2 SATO Corporation reserves the right to make changes and/or improvements in this product and document without notice at any time. Trademarks SATO is a registered trademark of SATO Corporation and/or its subsidiaries in Japan, the U.S and other countries. Version: GBS-TH2-01rA-12-04-10OM ©...
- Page 3 Doing so could from the outlet, and contact fire or electric shock. result in fire or electric shock. your SATO reseller or Contact your SATO reseller or technical support center. technical support center to Using the printer in this conduct internal inspections, condition could cause a fire or adjustments, and repairs.
- Page 4 • Apply insulation treatment for power cord with wet hands. the used battery by sealing the Doing so could result in contact with tape or the like electric shock. and dispose it according to the local safety regulatory. Page ii TH2 Series Operator Manual...
- Page 5 Precautions for Installation and Handling Printer operation can be affected by the printer environment. Refer to the following instructions for installation and handling of the TH2 Series printer. Select a Safe Location Do not place the printer in a location subject to water or oil.
-
Page 6: Table Of Contents
3.6.10 About SOURCETYPE menu selection................3 - 31 3.6.11 To edit the pre-loaded table ..................... 3 - 36 3.6.12 To edit the F1 menu......................3 - 38 3.6.13 To set the PRINT menu appearance ................3 - 39 Page iv TH2 Series Operator Manual... - Page 7 7.3.2 Basic Specifications of Wireless LAN .................. 7 - 4 7.3.3 Software Specifications......................7 - 5 7.3.4 TCP/IP Specifications ......................7 - 5 7.3.5 Setting/Displayed Items ....................... 7 - 6 7.3.6 Wireless LAN Setting ......................7 - 6 TH2 Series Operator Manual Page v...
- Page 8 8.5.5 Pitch adjustment (Pitch) ..................... 8 - 17 8.5.6 Offset adjustment (Offset)....................8 - 17 License Agreements ....................9 - 1 Sato Group of Companies ..................10 - 1 Sato Group of Companies ....................10 - 2 Page vi TH2 Series Operator Manual...
-
Page 9: Introduction
Section 1: Introduction INTRODUCTION Thank you for your investment in this SATO printer product. This Operator Manual contains the basic information about the installation, setup, configuration, operation and maintenance of the printer. A total of eight topics are covered in this section, and they are organized as follows:... -
Page 10: Features Of The Printer
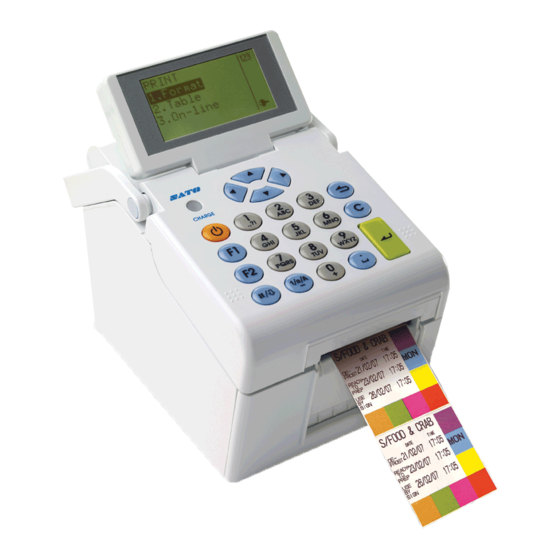
Section 1: Introduction 1.1 FEATURES OF THE PRINTER The SATO TH2 Series printer is a compact, portable Direct Thermal printer, designed with a built-in alpha- numeric keypad, designed specifically for point-of-usage labelling applications. It can be used as a stand alone printer with predefined formats, or it can be connected to a PC for variable labelling applications. -
Page 11: Parts Identification
Press and hold for three seconds to turn off the and right side of top cover until click sound is power. heard. Make sure top cover is closed properly to ensure proper feeding and printing of labels. TH2 Series Operator Manual Page 1-3... - Page 12 Battery pack compartment CN10 terminal Insert the optional battery pack into the To connect printer to the testing jig. This is only compartment with the terminal side facing for used by SATO authorised technical inward. personnel. VR1 (I-Mark) potentiometer SD card slot Adjust for I-Mark sensor level calibration.
- Page 13 USB interface. DC input power connector Supplies power to the printer by inserting the * The availability of the interface connector power cable of the AC adapter. depends on the type of printer you purchased. TH2 Series Operator Manual Page 1-5...
- Page 14 Pressure bracket To hold the dispensing roller for label liner Media guide (backing paper) movement. A guide for the media to feed properly. Make sure the media guides are adjusted to Page 1-6 TH2 Series Operator Manual...
-
Page 15: Installation
This section helps you load the consumable media in the printer, and provides adjustment instructions and instructions to install other optional attachment units. The following information is provided: • 2.1 Site Location • 2.2 Media Selection • 2.3 Loading Media • 2.4 Connections TH2 Series Operator Manual Page 2-1... -
Page 16: Site Location
For optimal print performance and durability, please use SATO-certified label supplies on this printer. Using supplies not tested and approved for use by SATO can result in unnecessary wear and damage to vital parts of the printer, and may void the warranty. -
Page 17: Loading Media
When using linerless label, you need to insert the supplied label core spindle onto the roll label core and then place the label with the spindle hook on the media holder. Core spindle Linerless label TH2 Series Operator Manual Page 2-3... - Page 18 When replacing media, bear in mind that the print head and its surrounding area remain hot. Keep your fingers away from these areas to prevent injury. • Avoid touching even the edge of the print head with your bare hands. Page 2-4 TH2 Series Operator Manual...
-
Page 19: To Route The Label When Using The Dispenser
If the paper is not taut, roll the paper on the media holder so that the paper is taut. Next, tightly close the pressure bracket with the liner (backing paper) passing through it. TH2 Series Operator Manual Page 2-5... - Page 20 Keep your fingers away from these areas to prevent injury. • Avoid touching even the edge of the print head with your bare hands. 2.3.3 Overview of the Roll media loading path Label path Backing liner path for use with dispenser Page 2-6 TH2 Series Operator Manual...
-
Page 21: Connections
This section explains the power cable and interface cable connection procedures. 2.4.1 Standard interface connection TH2 Series printers have three types of Main PCBs, and each type of PCB is equipped with a different type of interface to perform data communication with the host. These are described as follows. -
Page 22: Connecting The Power Cable
You must use a 3-pin power outlet. The plug will not work with a 2-pin power outlet. Note: The shape of the power plug may vary depending on the location where the printer was purchased. Page 2-8 TH2 Series Operator Manual... -
Page 23: Turning On The Power
No battery pack is necessary when the AC adapter is used. When the battery pack and AC adapter are used simultaneously, the printer begins to charge the battery, if the battery is not fully charged. TH2 Series Operator Manual Page 2-9... -
Page 24: Charging The Optional Battery Pack With The Optional Battery Charger
When the CHARGE lamp is not lit, check that the battery pack is installed securely. The battery may not be charged when not securely installed. • When a charged battery pack is installed, the CHARGE lamp first lights red, then lights green. Page 2-10 TH2 Series Operator Manual... -
Page 25: Charging The Optional Battery Pack With The Printer
2.4.8 Installing and removing the optional battery pack Open the battery cover. Insert the battery pack, then close the battery cover. Insert the battery pack with the connector side toward the printer. Terminal side Battery pack TH2 Series Operator Manual Page 2-11... -
Page 26: Connecting Optional Scanner
2.4.9 Connecting optional scanner The optional scanner can be connected to the TH2 series printer with the PS/2 connector on the right side of the printer. Open the smaller cover on the right of the printer. -
Page 27: Operation And Configuration
Note: When receiving the printer, an application might have been pre-installed by SATO or a partner of SATO. Thus the actual operation of the printer might be different from what is described in this manual. The section about the printer setup should still apply but the actual printer setting parameters might have been set differently from what is described as default values in this manual. -
Page 28: Operator Panel
Scroll within a column by pressing the arrow buttons. Jump mode: Press twice during input mode, icon will be displayed. Jump between columns in a table by pressing arrow buttons. Page 3-2 TH2 Series Operator Manual... - Page 29 Lower case input mode: Select J K L Λ 5 Upper case input mode: Select j k l λ 5 (In Lower or Upper case input mode, press the button for two seconds to get 5) TH2 Series Operator Manual Page 3-3...
- Page 30 Displayed when printer is powered up by AC power via the supplied AC adapter. The power cord is connected; the printer is powered from a 110 - 240 V AC outlet and the battery is being charged. Page 3-4 TH2 Series Operator Manual...
-
Page 31: To Navigate And Select Item Within The Menu
When using numeric buttons Press the associated numeric buttons to select the desired item. The selected sub-menu will be displayed directly. Notes: Press page up or arrow button to return to the previous menu. TH2 Series Operator Manual Page 3-5... -
Page 32: To Input The Field Of The Menu
The printer will do a search according to the input character. 3. Press the arrow button to choose Red Onion or narrow down the search with more characters entered. 4. Press the enter button to confirm the selection. Page 3-6 TH2 Series Operator Manual... - Page 33 [ ] on the screen. The instructions for keying in the alphabetic or numeric characters to the input field is the same as those for the search function. TH2 Series Operator Manual Page 3-7...
-
Page 34: Operating Modes
--> • 2.Sound --> • 3.Auto Off --> • 4.Test I------> • 5.Regional --> • 1.Lamguage --> • 2.Time --> • 3.Date --> • 4.Unit I------> • 6.Network --> • 1.LAN --> • 2.WLAN Page 3-8 TH2 Series Operator Manual... - Page 35 MAIN menu Select 1. Print Select 2. Settings Key in the password SETTINGS menu While pressing press until a long Key in the beep is heard. password ADV SETUP menu TH2 Series Operator Manual Page 3-9...
-
Page 36: Print Menu
Displays search field. Enables selection of format to print by entering characters in search field or by using the arrow buttons and enter button. *The contents of the display vary depending on the pre-loaded formats. Page 3-10 TH2 Series Operator Manual... - Page 37 Displays number of printed labels and the total number of labels to print. Help menu if F1 is pressed. This is the printout when selecting product ID as Mountain, Marked by: as David, WAS Price as 49.90 and Mark Down % as 25. TH2 Series Operator Manual Page 3-11...
-
Page 38: To Make Print-Out From A Pre-Loaded Table
Displays list of pre-defined items and enables alphabetic search by input of character(s) in ID field or select from the list by using the arrow buttons enter button. *The contents of the display vary depending on the pre-loaded formats. Page 3-12 TH2 Series Operator Manual... -
Page 39: To Set The Printer To On-Line Mode
From the PRINT menu, the user can set the printer to On-line mode. In On-line mode, formats can be printed directly from the connected host PC. Press 3 button or use the arrow buttons and enter button to select On- line. TH2 Series Operator Manual Page 3-13... -
Page 40: Main Menu
From the MAIN menu, you may go to PRINT menu or SETTINGS menu. 3.5 SETTINGS MENU TH2 Series printer has two selections of settings. Application setting allows user to add new, edit or delete the loaded formats while Printer setting allows the user to configure the printer. Please note that all the changes done in Application Setting menu are temporary saved in the printer. -
Page 41: Application Menu
Enables selection of Format, Table or F1 from EDIT menu. FORMAT, TABLE or F1 menu will be displayed, depending on the selection done on the EDIT menu. The details of each selection are explained in the following pages. TH2 Series Operator Manual Page 3-15... -
Page 42: To Edit The Pre-Loaded Format
Press Select 2.New only. Select desired When no formats loaded, selecting function, Modify, Modify or Delete will displayed New or Delete. “Not existing!”. Proceed to the FIELD menu flow procedure Page 3-16 TH2 Series Operator Manual... - Page 43 If 1.Cancel is selected, the format will not be deleted. The format list will be dis- played. Select 2.Yes to delete. A rotating hourglass icon is visible in the upper right corner while printer is busy deleting your format. TH2 Series Operator Manual Page 3-17...
-
Page 44: To Edit The Field Menu
Enables selection of field(s) to modify or delete by scrolling with the arrow buttons and enter button or input the respective number directly. *The contents of the display vary depending on the pre-loaded formats. Page 3-18 TH2 Series Operator Manual... - Page 45 For an example, change the field name to Header. *The contents of the display vary depending on the pre-loaded formats. Enables selection of suitable FIELDTYPE for the new field. Text, Barcode, Line, Box, Image or Text Box can be selected. TH2 Series Operator Manual Page 3-19...
-
Page 46: When Text Is Selected In The Fieldtype Menu
Select anchor Set the point horizontal magnification value Select the source. Please refer to the flow of individual selection. Menu Description FONTTYPE menu. Enables selection of true type font or bitmap font from FONTTYPE menu. Page 3-20 TH2 Series Operator Manual... - Page 47 Select the font according to your preference. Displays input range and input field. Enables input of text field horizontal magnification. Note: If the value is outside the allowed range, Invalid will be displayed. TH2 Series Operator Manual Page 3-21...
-
Page 48: When Barcode Is Selected In The Fieldtype Menu
Set the barcode narrow width of individual selection. position Only applicable for: EAN-8, EAN-13, UPC-A, UPC-E, Code 39, Codabar, Bookland, Interleaved 2 of 5, GS1-128, Code 128 Select anchor Set the human point readable barcode info. Page 3-22 TH2 Series Operator Manual... - Page 49 EAN-8, GS1-128 Composite CC-A/B, GS1-128 Composite CC-C, GS1-128 Interleaved 2 of 5, UPC-A, UPC-E, Bookland, Codabar, Code 128, Code 39, EAN-13 Enables selection of correction level. Default selection is 2.Standard Only applicable for: Micro QR Code, QR Code TH2 Series Operator Manual Page 3-23...
- Page 50 Default cell size of Micro QR Code and QR Code is 4 and the range is 1 - 32 Default cell size of Data Matrix is 2 and the range is 1 - 16 Enables selection from encoding menu. Default selection is 5.Auto Only applicable for: Micro QR Code, QR Code Page 3-24 TH2 Series Operator Manual...
-
Page 51: When Line Is Selected In The Fieldtype Menu
If the value is outside the allowed range, Invalid will be displayed. Displays input range and input field with default value. Enables input of line thickness. Note: If the value is outside the allowed range, Invalid will be displayed. TH2 Series Operator Manual Page 3-25... -
Page 52: When Box Is Selected In The Fieldtype Menu
If the value is outside the allowed range, Invalid will be displayed. Displays input range and input field with default value. Enables input of box height. Note: If the value is outside the allowed range, Invalid will be displayed. Page 3-26 TH2 Series Operator Manual... -
Page 53: When Image Is Selected In The Fieldtype Menu
If 1.FIX is Set the horizontal selected magnification value Select loaded Set the vertical image magnification value Proceed to the FIELD search screen or new field NAME input screen depending on the previous operation. TH2 Series Operator Manual Page 3-27... - Page 54 Enables selection of images using input in search field or scrolling with the arrow buttons and enter button. Existing images are pre-loaded and can be used in formats. The ones listed are for demo formats. New images can be loaded from a host or AEP Works. Page 3-28 TH2 Series Operator Manual...
-
Page 55: When Textbox Is Selected In The Fieldtype Menu
Enables input of new number of rows. Notes: • When “0” is set, the textbox will resize to as many rows needed depending on its data. • If the value is outside the allowed range, Invalid will be displayed. TH2 Series Operator Manual Page 3-29... - Page 56 If 1.ON is selected, the FONTTYPE menu will not be displayed. You will step directly to true type FONT menu. FONTTYPE menu. Enables selection of true type font or bitmap font from FONTTYPE menu. Page 3-30 TH2 Series Operator Manual...
-
Page 57: About Sourcetype Menu Selection
Set the max number Set the max number Set the price of input character of input character The details of the screen may vary depending on the loaded scripts. Set the number of decimal TH2 Series Operator Manual Page 3-31... - Page 58 This list contains functions that can be called from the script. Functions often have arguments for input values. These arguments can either be fix values like 12.34 or a variable that holds the price like the piped value variable Value. Page 3-32 TH2 Series Operator Manual...
- Page 59 Argument #3, data. Input the formatted value Data. Trunc is a function that truncates a number to n decimals. Argument #1, n. Input number of decimals. Argument #2, number. Input price or reference to price. TH2 Series Operator Manual Page 3-33...
- Page 60 Argument #2, h. Input hours. Argument #3, m. Input minutes. Argument #4, value is time in seconds. This value is normally calculated when sourcetype time is used. The refer- ence to it is the variable Value Page 3-34 TH2 Series Operator Manual...
- Page 61 For example, %D will print the date as month/day/year. The different format attributes are describes under “formatter” in XML specification STB00102. Please contact SATO representative for more details. Input: source data for the field is coming from input data from the key- board of the printer, an external PS/2 keyboard or a scanner.
-
Page 62: To Edit The Pre-Loaded Table
New input for Set new row Selected row Edit the 2nd column to copy to was deleted row field New input for Selected row 3rd column was copied and so on.. Page 3-36 TH2 Series Operator Manual... - Page 63 In this example, the printer enables input of Preset No. for the new copied row. *The contents of the display vary depending on the pre-loaded tables. In this example, Bacon is now copied. *The contents of the display vary depending on the pre-loaded tables. TH2 Series Operator Manual Page 3-37...
-
Page 64: To Edit The F1 Menu
Toggle your selection(s) by pressing associated numbered button(s), or select by using the arrow buttons and toggle with enter button. Notes: All selections can be set at the same time. 6.Setup/ can only be selected if one or more sub-menus are selected. Page 3-38 TH2 Series Operator Manual... -
Page 65: To Set The Print Menu Appearance
Notes: All selections can be set at the same time and are selected as default. If nothing else is selected, 1.Format is automatically selected. MODE setting The appearance of PRINT menu based on the MODE settings. TH2 Series Operator Manual Page 3-39... -
Page 66: Printer Setup Menu
Press Select Select Select Press Menu Description Printer SETUP menu. Enables the selection of 1.Profile, 2.Media, 3.Print Ctrl, System, Regional or 6.Network Note: 6.Network will only appear if LAN/WLAN board is installed. Page 3-40 TH2 Series Operator Manual... - Page 67 *The contents of the display vary depending on the profiles saved. Delete confirmation screen is displayed. Select Yes to delete. The selected profile to be deleted will disappear from the user profile list. TH2 Series Operator Manual Page 3-41...
- Page 68 Note: If no user profiles are saved, the actual printer set up will be printed. Prints out a label with printer settings for the selected profile. The name of the selected profile is printed at the top of the label. During printing no buttons are valid. Page 3-42 TH2 Series Operator Manual...
-
Page 69: When Media Is Selected In The Setup Menu
Printer will feed a few VR1 and VR2 and labels for auto calibration. press press Press Press Select YES to save setting or NO to unsave the setting and then press to return to CALIBRATE screen. TH2 Series Operator Manual Page 3-43... - Page 70 When selecting 4.Fix, the label length will be equal to the media set up length +2 mm even if the format is shorter. Note: The view of the sensor type menu is depended of the Media Handling selection. Page 3-44 TH2 Series Operator Manual...
- Page 71 5. If calibration was not successful, you will be recommended to re-adjust VR1 or VR2 manually. 6. Press pause/feed button to check if new sensor level is OK. This procedure may need to be repeated to obtain successful calibration result. TH2 Series Operator Manual Page 3-45...
- Page 72 Setting range is between 128 and 1880, and the default value is 1872 dot. Note: If the value is outside the allowed range, Invalid will be displayed. If the value is acceptable, Saved will be displayed when enter button is pressed. Page 3-46 TH2 Series Operator Manual...
-
Page 73: When Print Ctrl Is Selected In The Setup Menu
Select 5.Adjustment Select Select Select 1.Pos Adjust 2.Pitch 3.Offset Set position Set pitch and Set offset and and press press press To be continued on the next page... Press to return to ADJUSTMENT menu. TH2 Series Operator Manual Page 3-47... - Page 74 Enables the selection of 1.Profile, 2.Media, 3.Print Ctrl, 4.System, 5.Regional or 6.Network Select 3.Print Ctrl for printer settings. PRINT CONTROL menu. Enables the selection of 1.Speed, 2.Darkness, 3.Media Handl., 4.Backfeed Mode, 5.Adjustment, 6.Image, 7.Head check or 8.Auto Feed. Page 3-48 TH2 Series Operator Manual...
- Page 75 LL Tear Off (Linerless label Tear Off) Same behavior as Tear Off but with Peel Sensor enabled. Each label will start with a backfeed. LL Cutter (Linerless label Cutter) Will cut just in front of I-Mark. TH2 Series Operator Manual Page 3-49...
- Page 76 Setting range is between -200 and 200, and the default value is 0 dot. Note: If the value is outside the allowed range, Invalid will be displayed. If the value is acceptable, Saved will be displayed when enter button is pressed. Page 3-50 TH2 Series Operator Manual...
- Page 77 IMAGE handles the formats positioning and appearance on the media. Enables the selection of 1.Offset, 2.Rotation or 3.Mirror. OFFSET menu. OFFSET enables fine tuning of formats.on the media. Enables the selection of 1.Vertica or 2.Horizontal. TH2 Series Operator Manual Page 3-51...
- Page 78 “pressed radio button” indicates the current selection until the new selec- tion is chosen and enter button is pressed. When enter button is pressed, the new selection is saved and the related “radio button” is shown as pressed. Page 3-52 TH2 Series Operator Manual...
- Page 79 “pressed radio button” indicates the current selection until the new selec- tion is chosen and enter button is pressed. When enter button is pressed, the new selection is saved and the related “radio button” is shown as pressed. TH2 Series Operator Manual Page 3-53...
-
Page 80: When System Is Selected In The Setup Menu
Select 2.Battery Set the duration Set the duration and press and press Select label content. Print the selected TEST Label and Press return to LABELS menu after Press to return completion. to AUTO OFF menu. Page 3-54 TH2 Series Operator Manual... - Page 81 “pressed radio button” indicates the current selection until the new selec- tion is chosen and enter button is pressed. When enter button is pressed, the new selection is saved and the related “radio button” is shown as pressed. TH2 Series Operator Manual Page 3-55...
- Page 82 When TEST INFO is selected, the printer displays a series of printer information and status. INFO LAN/WLAN is displayed only if LAN/WLAN is installed. All buttons except Page up and Power will display next info screen. After the last info screen the TEST menu is displayed. Page 3-56 TH2 Series Operator Manual...
- Page 83 Some of the test labels have very high density resulting in a temporary low bat- tery. When printing test labels on battery power, the “Battery low” message will not be displayed. TEST LABELS - Grey TEST LABELS - Checkered TEST LABELS - Setup TH2 Series Operator Manual Page 3-57...
- Page 84 Section 3: Configuration and Operation 3.7 PRINTER SETUP MENU (Cont’d) TEST LABELS - Locale TEST LABELS - Barcodes TEST LABELS - Pattern TEST LABELS - Factory Page 3-58 TH2 Series Operator Manual...
-
Page 85: When Regional Is Selected In The Setup Menu
Press to return then press then press to REGIONAL menu. Menu Description Printer SETUP menu. Enables the selection of 1.Profile, 2.Media, 3.Print Ctrl, 4.System, 5.Regional or 6.Network Select 5.Regional for regional standard settings. TH2 Series Operator Manual Page 3-59... - Page 86 When enter button is pressed, the new selection is saved and the related “radio button” is shown as pressed. Press Menu/page-up button to leave the menu. Page 3-60 TH2 Series Operator Manual...
- Page 87 When enter button is pressed, the new selection is saved and the related “radio button” is shown as pressed. Note: If UNIT selection is 3.dot, SPEED will be displayed in ips. (inches pr second) TH2 Series Operator Manual Page 3-61...
-
Page 88: When Network Is Selected In The Setup Menu (Lan)
Displays input field with existing IP address and enables input of the new IP address. Displays input field with existing GATEWAY address and enables input of the new GATEWAY address. Displays input field with existing NETMASK address and enables input of the new NETMASK address. Page 3-62 TH2 Series Operator Manual... -
Page 89: When Network Is Selected In The Setup Menu (Wireless Lan)
Select 1.Infra Select 2.Ad hoc Press to return to WLAN menu. Refer to Infrastructure Refer to Ad Hoc Mode Mode flowchart for more flowchart for more details on the settings. details on the settings. TH2 Series Operator Manual Page 3-63... - Page 90 SSID, (Service Set IDentifier), is a name that identifies a particular 802.11 wire- less LAN. Displays input field with existing SSID and enables input of the new SSID. The default SSID is SATO. Allowed input: 0 to 32 character string. Input of more than 32 characters is not possible.
-
Page 91: Setting Of Wireless Lan Infrastructure Mode
Select Select Select 3.EAP 1.Username 2.Password Type Select Username EAP type Password and press and press and press Press to return to WEP menu. Press to return to previous menu, EAP or DYNAMIC WEP. TH2 Series Operator Manual Page 3-65... - Page 92 Enables the selection of 1.PSK or 2.EAP. PSK (Pre-Shared Key) menu. Displays input field and enables input of PSK. Allowed input: 8 to 63 character string. Note: If the value is outside the allowed limits, Invalid will be displayed. Page 3-66 TH2 Series Operator Manual...
- Page 93 “pressed radio button” indicates the current selection until the new selec- tion is chosen and enter button is pressed. When enter button is pressed, the new selection is saved and the related “radio button” is shown as pressed. TH2 Series Operator Manual Page 3-67...
-
Page 94: Setting Of Wireless Lan Ad Hoc Mode
Select 3.Key 1 ~ 1.Mode 2.Index 6.Key 4 Select Select WEP mode Index and and press press Set WEP key and Press to return press to WEP menu. Press to return to WEP menu. Page 3-68 TH2 Series Operator Manual... - Page 95 If the value is outside the allowed range, Invalid will be displayed. If the value is acceptable, Saved will be displayed when enter button is pressed. SECURITY menu. Enables the selection of 1.None or 2.WEP. TH2 Series Operator Manual Page 3-69...
-
Page 96: Advanced Setup Menu
Number type and Press to confirm press When resetting the input and return to SD card, ADV SETUP menu. The printer may Formatting card reboot if RESET is is displayed performed before instead. selection. Page 3-70 TH2 Series Operator Manual... - Page 97 When 2.To File is selected, the hex dump is saved to the temporary RAM file system of the printer. The file path is /tmp/dump.bin. Dump.bin is the binary file name. CHANGE PW menu. Enables the selection of 1.admin or 2.manager. TH2 Series Operator Manual Page 3-71...
- Page 98 This is the mode used only by application developers when developing applica- tions. In this mode standard Lua commands and SATO's developed Lua API commands can be sent to the printer via USB, LAN or WLAN forming an appli- cation.
- Page 99 When selecting 9.Continue from ADV SETUP menu, the printer will exit the Advanced Setup menu and continue start up and proceed to PRINT menu. If RESET is performed before selecting and confirming Continue, the printer will reboot. TH2 Series Operator Manual Page 3-73...
-
Page 100: F1 Shortcuts Menu
Note: When the printer is not in input field mode, Invalid will be displayed at the bot- tom of the screen if 2.Symbols is selected. Page 3-74 TH2 Series Operator Manual... - Page 101 The detailed description for each sub-menu were explained on Section 3.7.2 When Media is selected in the SETUP menu, Section 3.7.5 When Regional is selected in the SETUP menu and Section 3.8 Advanced Setup Menu. TH2 Series Operator Manual Page 3-75...
- Page 102 1 file will be present on the SD card. In order to preserve all files, make the name distinction within the first 8 charac- ters. OK will be displayed when backup is successfully performed. Page 3-76 TH2 Series Operator Manual...
-
Page 103: Cleaning And Maintenance
Section 4: Cleaning and Maintenance CLEANING AND MAINTENANCE This section provides information on user maintenance for the TH2 Series printer. The following information is covered here: • 4.1 Cleaning The Print Head and Platen Roller • 4.2 How To Clean The Printer (Cleaning Kit) •... -
Page 104: Cleaning The Print Head And Platen Roller
Furthermore, dirt can accumulated along the label path, affecting parts like sensors and guides, and reducing their performance. Therefore, it is important to clean these important components periodically. The printer cleaning kit and cleaning sheets can be purchased from your authorised SATO representative. When to clean with a cleaning kit ♦... -
Page 105: How To Clean The Printer (Cleaning Sheet)
Use the cleaning pen from the cleaning kit or use a cotton swab moistened with head cleaner to gently remove any remaining dirt from the print head. TH2 Series Operator Manual Page 4-3... -
Page 106: Easy Replacement Of Parts
4.4.1 Releasing and Replacing the Print Head The print head on the printer is a user-replaceable item. If it becomes damaged for any reason, it can be easily removed and replaced. Contact your local SATO representative for information on obtaining a new print head. -
Page 107: Releasing/ Replacing The Platen Roller
If it does not have sufficient time to cool, the bar will be smeared on the trailing edge. The adjustment can be made via the PRINTER SETTING menu. For more information, please refer to Section 3.7.3 When Print Ctrl is selected in the SETUP menu. TH2 Series Operator Manual Page 4-5... - Page 108 Section 4: Cleaning and Maintenance This page is intentionally left blank Page 4-6 TH2 Series Operator Manual...
-
Page 109: Troubleshooting
Section 5: Troubleshooting TROUBLESHOOTING If you are unable to produce printouts on the TH2 series printer, use this section to make sure the basics have been checked, before deciding you are unable to proceed any further. The section is divided into four parts: •... -
Page 110: Error Signal Troubleshooting
Before resuming, feed one blank label to adjust media position. When cover has been closed, the printer goes into Pause mode. Page 5-2 TH2 Series Operator Manual... - Page 111 2) The cutter blade is jammed due to res- 2) Clean the cutter idues of media and media adhesive. 3) The cutter is worn out. 3) Replace the cutter. To clear error: Perform corrective action and press enter o continue. TH2 Series Operator Manual Page 5-3...
- Page 112 To clear error: Perform corrective action and press enter o continue. Note: After “Battery low” warning is displayed, the printer can still be used for a short time. However, full functionality and proper behav- ior can not be guaranteed. Page 5-4 TH2 Series Operator Manual...
-
Page 113: Troubleshooting Table
Power off the printer and ensure a proper connection. Defective print head. Replace print head as required. Defective main circuit board. Have SATO authorised service personnel replace main board. IMAGE VOIDS Dirty print head. Clean print head. Defective print head. - Page 114 Defective print head. Replace print head as required. SMEARED PRINT IMAGES Poor media quality Use higher quality media. Use only SATO-certified media. Foreign material on print head and platen roller Clean print head and platen roller. Foreign material on labels Use higher quality media.
-
Page 115: Interface Troubleshooting
Ensure the wireless LAN unit is properly configured. Ensure field strength icon on printer is showing a good reception. If not obtaining an IP address, check the SSID or encryption and ensure those were properly entered. TH2 Series Operator Manual Page 5-7... -
Page 116: Test Print Troubleshooting
From the SYSTEM SETUP menu, selecting TEST and then Labels will open the menu with different pre- defined test labels for selection. Refer to Section 3.7.4 When System is selected in the SETUP menu for more details to perform this activity. Page 5-8 TH2 Series Operator Manual... -
Page 117: Basic Specifications
156 mm (6.1 “) Print darkness Darkness level: 1 to 5 Standard: Continuous mode, Dispenser mode, Tear-off mode, Sensor off mode Label issuing mode Option: Cutter mode, Linerless mode (with cutter), Linerless mode (without cutter) TH2 Series Operator Manual Page 6-1... - Page 118 Section 6: Basic Specifications 6.1 PRINTER BASIC SPECIFICATIONS (Cont’d) MEDIA (Be sure to use media manufactured or certified by SATO) Die cut label Continuous Width: 25 to 60 mm (0.9” to 2.3”) Width including liner: 28 to 63 mm (1.1” to 2.4”) Pitch: 16 to 156 mm (0.6”...
- Page 119 SDRAM 8 Megabytes APPLICATION SCRIPTING LANGUAGE Lua version 5.1 is loaded Standard Lua Standard API (SATO proprietary) version 1.0 INTERFACES 1) USB Interface, USB and LAN Interface or Wireless LAN Interface Standard Interface 2) Scanner connector (Supported PS/2) 3) SD Card slot (FAT file system)
- Page 120 Ten keypad: 0 to 9 (for alphanumeric characters and symbols input) Operation keys 1/a/A/- Function key: ,F1, F2, , C, Arrow key: Indicators CHARGE: Red LED Built-in buzzer Buzzer • No volume control function is available Page 6-4 TH2 Series Operator Manual...
- Page 121 • Cadmium and cadmium compounds ........less than 0.01% • Polybrominated Biphenyl (PBB)...........less than 0.1% • Polybrominated Diphenyl Ether (PBDE) ......less than 0.1% Antibacterial finishing for external cover and operative parts. Antibacterial finishing Tested according to JIS Z 2801 standard TH2 Series Operator Manual Page 6-5...
-
Page 122: Optional Accessories Specifications
1.7” (W) X 0.8” (D) X 4.3” (H) Weight Approximately 170 g (0.37 lbs) Charge cycle Approximately 300 times Approximately 6 hours (Fully charges with the printer unit) Charging time Approximately 1.5 hours ( Charged by dedicated charger) Page 6-6 TH2 Series Operator Manual... - Page 123 Media Detection No detection of label or label end 135 mm (W) X 115 mm (D) X 128 mm (H) Dimensions 5.3” (W) X 4.5” (D) X 5” (H) Weight 0.7 kg (1.5 lbs) TH2 Series Operator Manual Page 6-7...
- Page 124 Section 6: Basic Specifications This page is intentionally left blank Page 6-8 TH2 Series Operator Manual...
-
Page 125: Interface Specifications
7.3 Local Area Network (LAN) Ethernet and Wireless LAN 7.1 INTERFACE TYPES The TH2 Series has three types of Main PCBs. Each type of PCB is equipped with different interface types in order to perform data communication with the host. These are described as follows. -
Page 126: Universal Serial Bus (Usb) Interface
Be sure to use the instruction manual of your PC, or consult with the PC (host) manufacturer. • Recommended length for USB cable is 1m. • Connect USB type B plug (square form factor) to the printer. • Device name of USB port should be TH2 USB Serial (COMxx). Page 7-2 TH2 Series Operator Manual... -
Page 127: Local Area Network (Lan) Ethernet And Wireless Lan
Maintenance function [Initializing LAN configuration information] LAN configuration information will be initialized through Service Mode or Advanced setup. For more details, refer to the authorised SATO service personnel. Communication The following settings can be configured via the Printer network setup. -
Page 128: Basic Specifications Of Wireless Lan
IEEE802.11 (authentication between W-LAN devices) WPA (PSK (Pre-Shared Key) or IEEE 802.1x authentication) WPA2 (PSK (Pre-Shared Key) or IEEE 802.1x authentication) IEEE 802.1x (EAP-LEAP, EAP-TLS, EAP-PEAP, or EAP-TTLS) (Herein after called “EAP”) Encryption method None WEP key TKIP Page 7-4 TH2 Series Operator Manual... -
Page 129: Software Specifications
In socket connection, the printing operation and the status are monitored. In this case, multiple connections cannot be established at the same time. IP address and variables can be set using the Printer setup, or in application. TH2 Series Operator Manual Page 7-5... -
Page 130: Setting/Displayed Items
WEP Key Index 1 ~ 4 0: PSK WPA Authentication 1: EAP(IEEE802.1X) Configure WPA (Set this item when using 0: TKIP WPA PSK Mode WPA/WPA2) 1: AES WPA PSK “”(NULL) 8 ~ 63 characters(*4) Page 7-6 TH2 Series Operator Manual... - Page 131 •CA root certificate: X.509 (cer, DER, PEM) •Client certificate: PKCS#12 (pfx, p12), X.509 (cer, DER, PEM) •Secret key: Key * When the client certificate file is in PKCS#12 format, leave [secret key file name] blank. TH2 Series Operator Manual Page 7-7...
- Page 132 “Data encryption: AES / TKIP” of [WPA Setting] with data encryption setting of access point. You cannot establish the connection to the access point if data encryption setting is set to “AUTO”(TKIP / AES Auto- detect). Page 7-8 TH2 Series Operator Manual...
- Page 133 1) Do not connect and disconnect the LAN cable while starting up the printer. Restart the printer with which you are having a communication error due to connection or disconnection of the LAN cable. TH2 Series Operator Manual Page 7-9...
- Page 134 Section 7: Interface Specifications This page is intentionally left blank Page 7-10 TH2 Series Operator Manual...
-
Page 135: Appendix
Section 8: Appendix APPENDIX The following information is provided: • 8.1 About Optional Cutter • 8.2 Positions of sensors and options • 8.3 Operation Mode Selection • 8.4 Base Reference Point • 8.5 Adjustments TH2 Series Operator Manual Page 8-1... -
Page 136: About Optional Cutter
Section 8: Appendix 8.1 ABOUT OPTIONAL CUTTER The cutter should only be installed by SATO qualified servicing personnel. 8.1.1 To route the media when the cutter is installed Loading of the media for cutter unit is similar to the usual procedure as explained in Section 2.3 Loading Media. -
Page 137: Cutter Replacement
Over time, the cutter loses its cutting ability and begins to show signs of wear. Replace the cutter unit when the blade becomes blunt and cut edges are rough. (Please contact an authorised SATO 12 3 — representative for replacement.) —456... -
Page 138: Operation Mode Selection
Before printing, label number 1 is in the printing start position. When all n labels are printed, label number n+1 is in the printing start position. Print head Feed direction Before printing After printing n labels Page 8-4 TH2 Series Operator Manual... -
Page 139: Tear Off Mode
B. Media fed back to printing start position C. Printer is waiting for more print jobs D. No more jobs received. Media is fed forward so label 1 and 2 can be torn off. TH2 Series Operator Manual Page 8-5... -
Page 140: Dispensing Mode
Print head Dispensing pin A. Before printing Feed direction B. Label 1 is printed. C. When label 1 is removed the media is fed back. D. Label 1 is stopped just before the dispensing pin. Page 8-6 TH2 Series Operator Manual... - Page 141 When label 1 is removed the printer is ready to start printing label 2. Print head Dispensing pin A. Before printing Feed direction B. Media fed back to printing start position C. Label 1 is printed D. Label 1 is stopped just before the dispensing pin. TH2 Series Operator Manual Page 8-7...
-
Page 142: Cutter Mode
When the label is removed, the media is fed back so that the next label is in the start position (C. in the figure below). Print head Cutter Feed direction A. Before printing B. Label 1 is printed and cut C. Media fed back to printing start position Page 8-8 TH2 Series Operator Manual... - Page 143 Label 1 is printed and the media is fed forward so label 1 can be cut off. (C. in the figure below). Print head Cutter A. Before printing Feed direction B. Media fed back to printing start position C. Label 1 is printed and cut TH2 Series Operator Manual Page 8-9...
-
Page 144: Linerless Cutter Mode
A new print job cannot be started until the previous label is removed. Print head Cutter Cutter sensor A. Before printing Feed direction B. Media fed back to printing start position C. Label 1 is printed and cut Page 8-10 TH2 Series Operator Manual... -
Page 145: Journal Mode
The size of the labels in the figure above differs. This is to indicate that normally in Journal mode, the size depends on the data printed. It is possible to set a fixed label length in Journal mode. In this case, the media will be fed according to this length. TH2 Series Operator Manual Page 8-11... -
Page 146: Tear Off Journal Mode
C. Label 1 and 2 are printed. Printer is waiting for more print jobs D. No more jobs received. Media is fed forward so label 1 and 2 can be torn off. Page 8-12 TH2 Series Operator Manual... -
Page 147: Cutter Journal Mode
When the label is removed, the media is fed back so that the next label is in the start position (C. in the figure below). Print head Cutter Feed direction A. Before printing B. Label 1 is printed and cut C. Media fed back to printing start position TH2 Series Operator Manual Page 8-13... - Page 148 Label 1 is printed and the media is fed forward so label 1 can be cut off. (C. in the figure below). Print head Cutter A. Before printing Feed direction B. Media fed back to printing start position C. Label 1 is printed and cut Page 8-14 TH2 Series Operator Manual...
-
Page 149: Linerless Cutter Journal Mode
A new print job cannot be started until the previous label is removed. Print head Cutter Cutter sensor A. Before printing Feed direction B. Media fed back to printing start position C. Label 1 is printed and cut TH2 Series Operator Manual Page 8-15... -
Page 150: Base Reference Point
First detected part of label First detected part of label Dispenser/ Peel off End of label - 4mm Center - 4mm Dispenser/ Tear off linerless Not Applicable Center - 1mm Cutter Center Center Cutter Linerless Not Applicable Center Page 8-16 TH2 Series Operator Manual... -
Page 151: Adjustments
Disp adj./ Cutter adj. setting. It is reset by “Reset all”. This parameter can be useful if the customer has some odd label material that stops at the wrong position, or if the customer builds a special tear off plate. TH2 Series Operator Manual Page 8-17... - Page 152 Section 8: Appendix This page is intentionally left blank Page 8-18 TH2 Series Operator Manual...
-
Page 153: License Agreements
Section 9: License Agreements LICENSE AGREEMENTS TH2 Series Operator Manual Page 9-1... - Page 154 4. Indemnification You shall indemnify and hold harmless SATO for any damages and loss for any breach of this Agreement by you, and for use of the Software by you. You further understand and agree that money damages may not be sufficient remedy for any breach of this Agreement by you and that SATO shall be entitled to seek specific performance and injunctive or other equitable relief as a remedy for any such breach or threatened breach.
- Page 155 The fonts SatoSans, SatoSerif, SatoSans Bold, SatoSerif Bold have a generous copyright, allowing derivative works (as long as "Sato" or the above font names are not included in the new fonts and font names), and full redistribution (so long as they are not *sold* by themselves). They can be be bundled, redistributed and sold with any software and any number of Sato printers.
- Page 156 IN NO EVENT SHALL THE AUTHORS OR COPYRIGHT HOLDERS BE LIABLE FOR ANY CLAIM, DAMAGES OR OTHER LIABILITY, WHETHER IN AN ACTION OF CONTRACT, TORT OR OTHERWISE, ARISING FROM, OUT OF OR IN CONNECTION WITH THE SOFTWARE OR THE USE OR OTHER DEALINGS IN THE SOFTWARE. Page 9-4 TH2 Series Operator Manual...
- Page 157 HOWEVER CAUSED AND ON ANY THEORY OF LIABILITY, WHETHER IN CONTRACT, STRICT LIABILITY, OR TORT (INCLUDING NEGLIGENCE OR OTHERWISE) ARISING IN ANY WAY OUT OF THE USE OF THIS SOFTWARE, EVEN IF ADVISED OF THE POSSIBILITY OF SUCH DAMAGE. TH2 Series Operator Manual Page 9-5...
- Page 158 Section 8: License Agreements This page is intentionally left blank Page 9-6 TH2 Series Operator Manual...
-
Page 159: Sato Group Of Companies
Section 10: Sato Group of Companies SATO GROUP OF COMPANIES TH2 Series Operator Manual Page 10-1... - Page 160 20090 Cusago, Milano, Italy Bund Garden Road, Pune. 411001, India Tel.: +39-02-903-944-64 Tel: +91-20-4014-7747 Fax: +39-02-903-940-35 Fax: +91-20-4014-7576 Email: info@it.satoeurope.com Email: technical@satoasiapacific.com www.satoeurope.com www.satoasiapacific.com • Latest contact information of worldwide SATO operations can be found on the Internet at www.satoworldwide.com...
Need help?
Do you have a question about the TH2 Series and is the answer not in the manual?
Questions and answers