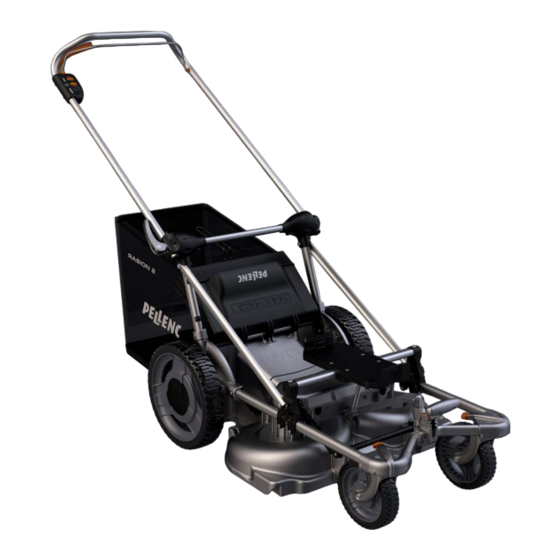
pellenc RASION 2 EASY User Manual
Hide thumbs
Also See for RASION 2 EASY:
- Operating instructions manual (48 pages) ,
- Operating instructions manual (48 pages)

Related Manuals for pellenc RASION 2 EASY


Summary of Contents for pellenc RASION 2 EASY
- Page 1 Translation of the original user guide LAWN MOWER RASION 2 EASY 59_141654-A USER GUIDE 04/2019 READ THE USER GUIDE CAREFULLY BEFORE USE...
-
Page 3: Table Of Contents
LAWN MOWER RASION 2 EASY 59_141654-A TABLE OF CONTENTS INTRODUCTION .......................... 5 SAFETY ............................5 GENERAL SAFETY WARNINGS ......................TRAINING ..............................PREPARATION ............................OPERATION ............................... MAINTENANCE AND STORAGE ......................... SAFETY MEASURES ASSOCIATED WITH CHARGER AND BATTERY USE ........PERSONAL PROTECTION EQUIPMENT .................... - Page 4 LAWN MOWER RASION 2 EASY 59_141654-A MOWING METHOD ........................... CUTTING HEIGHT ............................ SLOPES ..............................DAMP GROUND ............................MOWING WITH GRASS COLLECTION ...................... MOWING WITHOUT GRASS COLLECTION ....................MOWING WASTE ............................MAINTENANCE ......................... 32 MAINTENANCE FREQUENCY ......................USEFUL ADVICE FOR RISK FREE MAINTENANCE .................
-
Page 5: Introduction
59_141654-A 1. INTRODUCTION Dear Customer, Thank you for purchasing your Lawn mower RASION 2 EASY. Correctly used and maintained, this tool will give a satisfactory performance for many years. Warning Your device contains numerous recoverable or recyclable materials. Return it to your deal- er or, failing this, to an approved servicing centre to be treated. -
Page 6: Training
• The Lawn mower RASION 2 EASY is a professional tool whose use is reserved exclusively for cleaning of green areas (grass, dense grasses, woody weeds and brambles). -
Page 7: Maintenance And Storage
Replace worn or damaged parts so that the machine remains safe. Only use certified spare parts and accessories. 2.2. SAFETY MEASURES ASSOCIATED WITH CHARGER AND BATTERY USE Important Please refer to the tool battery instructions.PELLENC 2.3. PERSONAL PROTECTION EQUIPMENT Equipment... -
Page 8: Safety Signage
LAWN MOWER RASION 2 EASY 59_141654-A 2.4. SAFETY SIGNAGE Use the lawn mower with caution. Pictograms on the ejection flap of the machine indicate the main precautions to be respected to avoid injury: Read the user manual Read the instructions carefully and follow the safety precautions. -
Page 9: Description And Features
22. ULIB 400/700/1100 support + battery tray (not includ- 10. Mower power cable 11. 750/1200/1500 battery support kit 23. PELLENC ULIB 400/700/1100 battery (not included) 12. PELLENC 750/1200/1500 battery (not included) 24. ULIB 400/700/1100 battery adapter cable (not includ- 13. CB5030HV battery charger (not included) 25. -
Page 10: Technical Features
LAWN MOWER RASION 2 EASY 59_141654-A 3.1. TECHNICAL FEATURES Model RASION 2 EASY Dimensions when folded (l x w x h) 887 x 620 x 613 mm Dimensions when unfolded (l x w x h) 1650 x 620 x 884 mm... -
Page 11: Commissioning
LAWN MOWER RASION 2 EASY 59_141654-A The noise generated by the mower and the battery life both depend directly on the turning speed of the cutting blades: The faster the blades are turning, the greater the noise and the lower the battery life. When the AUTO mode is enabled, the noise generated will increase as the rotational speed of the blades increases. -
Page 12: Collecting Bin Capacity
LAWN MOWER RASION 2 EASY 59_141654-A With one hand, hold the cutting height adjustment handle (15) whilst simultaneously pressing on the two buttons to re- lease its position. Hold the buttons down and pull the handle backwards. With your other hand, release the handlebar (1) and reposi- tion the handle in the notch in which it was held. -
Page 13: Installation Of A Battery Tray
LAWN MOWER RASION 2 EASY 59_141654-A Overloading the bag may damage it. Before attaching the collecting bin to the lawn mower, always check it for holes, tears or damage. Lift the ejection flap (9) and slide the collecting bin (20) into the notches located at the rear of the mower. -
Page 14: 750/1200/1500 Battery: Installation And Connection
LAWN MOWER RASION 2 EASY 59_141654-A 4.4. 750/1200/1500 BATTERY: INSTALLATION AND CONNECTION Check battery autonomy (12) before use. If necessary, recharge the battery using the charger (13) supplied with the battery. Slide the battery (12) from the rear into the upper hook of the battery tray (11). -
Page 15: Ulib 400/700/1100 Battery (Red Connector): Installation And Connection
LAWN MOWER RASION 2 EASY 59_141654-A Connect the power cable (10) of the mower to the battery 59N_18_042 connector. Screw up tight and check that the cable is properly connect- Caution To prolong the life of the connectors, it is advisable to protect them when they are disconnected. -
Page 16: Alpha 520 Battery: Installation And Connection
LAWN MOWER RASION 2 EASY 59_141654-A Check that the battery switch is turned to off (position '0'). 59N_18_043 Connect the power cord (10) of the mower to the adapter cable (24) (not included). Then connect the end of the adapter cable to the battery (23) 59N_18_044 taking care to align the polarizers. -
Page 17: Usage
LAWN MOWER RASION 2 EASY 59_141654-A Move the battery (27) along the guide until the locking clip holds it in place. Check that the battery is completely locked on the tray with the battery safety lock. Then connect the end of the mower cable to the battery sup- port (26) taking care to align the polarizers. -
Page 18: Turn On / Off The Battery
LAWN MOWER RASION 2 EASY 59_141654-A 5.1. TURN ON / OFF THE BATTERY 750/1200/1500 battery: Turn on the battery by pressing the push button (battery power icon present). ULIB 400/700/1100 battery: Turn on the battery by pressing the switch ('I' position). -
Page 19: Settings
LAWN MOWER RASION 2 EASY 59_141654-A 5.2. SETTINGS 5.2.1. ADJUSTING THE TRAVEL SPEED This is a self-propelled mower. When the forward switch is activated, the engines drive the rear wheels and the mower moves forward on its own, leaving you to guide it. The revolutionary self-propelling motor provides significant help for effortless mowing of garden slopes or embankments. - Page 20 LAWN MOWER RASION 2 EASY 59_141654-A Note When speed 4 is reached, a further press on the button (6) resets the blade rotation speed to speed 1. 5.2.2.2. AUTOMATIC ROTATION SPEED (OPTIONAL) The density sensor (16) located at the front of the mower...
-
Page 21: Adjust The Cutting Height
LAWN MOWER RASION 2 EASY 59_141654-A Caution When the optical sensor is covered with dirt, it can no longer analyze the density and the height of the grass to be cut. The mower stops the cutting blades rotating and a flashing error code is displayed on the control box. -
Page 22: Controls
LAWN MOWER RASION 2 EASY 59_141654-A 5.3. CONTROLS 5.3.1. DRIVING FORWARD. Press the forward trigger (3) and hold it to drive the mower. 59N_18_021 Note The acceleration of the mower is proportional to the pressure exerted on the forward trigger (3). It various between 2km/hr and the selected speed. -
Page 23: Driving To One Side
LAWN MOWER RASION 2 EASY 59_141654-A 5.3.3. DRIVING TO ONE SIDE This is a manual action. Steer the mower to right or left to turn in the desired direction. 59N_18_023 5.3.4. USE THE BOOST FUNCTION The boost function lets the mower accelerate to its max speed of 5 km/hr. -
Page 24: Stop The Rotation Of The Cutting Blades
LAWN MOWER RASION 2 EASY 59_141654-A Caution To avoid accidents, always keep all four wheels of the mower on the ground. Do not run when you are pushing the lawn mower. Be even more careful when mowing on bumpy and uneven ground and when the collecting bin is full. -
Page 25: Lock / Unlock The Front Wheels Direction
LAWN MOWER RASION 2 EASY 59_141654-A 5.3.8. LOCK / UNLOCK THE FRONT WHEELS DIRECTION To lock the rotation of the front wheels, turn the 2 pins in front of each wheel to the horizontal. In this position, the front wheels stay straight and the mower moves only in a straight line. -
Page 26: Immobilizer System
LAWN MOWER RASION 2 EASY 59_141654-A Caution Always check the blades and wheels have stopped before putting on the brake. When the brake is on, do not operate wheels or blades. 5.4. IMMOBILIZER SYSTEM 5.4.1. SECURITY KEY Note This lawn mower is fitted with a key immobilizer system that prevents the motor from starting if the key is not in its socket. -
Page 27: Advice For Use
LAWN MOWER RASION 2 EASY 59_141654-A For your safety, it is impossible to start the blades when the mower is in a vertical position: • for cleaning • for unclogging • to change worn parts If the battery is operating, an intermittent beep shows that the mower is in a dangerous position with the battery enabled. -
Page 28: Mowing Method
LAWN MOWER RASION 2 EASY 59_141654-A 5.5.1. MOWING METHOD Clear the edges of the area, if possible using the mower, otherwise using a brush cutter. Mow by going forwards and backwards, first lengthwise. Then change direction and mow crosswise. 59N_18_058 Note Try to overlap slightly on the previous line to attenuate the mowing lines and obtain a uniform lawn. -
Page 29: Slopes
LAWN MOWER RASION 2 EASY 59_141654-A 5.5.3. SLOPES Although they are increasingly safe, lawn mowers are still dangerous machines, this is why it is better to mow across sloping ground rather than up and down to avoid any risk of tipping. -
Page 30: Mowing Without Grass Collection
LAWN MOWER RASION 2 EASY 59_141654-A Note Mowing with collection allows you to obtain a neat and clean lawn. The risk of lawn diseases is reduced as the waste does not decompose directly on the ground. 5.5.6. MOWING WITHOUT GRASS COLLECTION This type of mowing is suited for meadows or high and un- even grass. - Page 31 LAWN MOWER RASION 2 EASY 59_141654-A 5.5.7.3. USE CUTTINGS AS MULCH Grass cuttings can also be used as mulch. For this, spread them at a thickness of 2 to 3 cm around your vegetable patches (tomatoes, aubergines, beans, etc.), on bare ground around your plants, or at the foot of trees and shrubs.
-
Page 32: Maintenance
LAWN MOWER RASION 2 EASY 59_141654-A 6. MAINTENANCE 6.1. MAINTENANCE FREQUENCY Frequency Elements Operations Difficulty Notes Prior to After Every 50 When nec- concerned each use each use hours essary Visual in- General ap- spection pearance Cleaning Handles / Operation... -
Page 33: Cutting Blades
LAWN MOWER RASION 2 EASY 59_141654-A 6.2.1. CUTTING BLADES The cutting blades ensure the grass is cut cleanly. A high quality mower blade cuts the grass cleanly without ripping or shredding. Any bent, worn or perforated blades must be changed. -
Page 34: Cutter Housing
LAWN MOWER RASION 2 EASY 59_141654-A 6.2.2. CUTTER HOUSING Clean the inside and the outside of the housing after each mowing session: • Tip the lawn mower upright. • Use a wooden or plastic tool to scrape grass from inside the housing, taking care not to scratch the housing. -
Page 35: Incidents And Troubleshooting
LAWN MOWER RASION 2 EASY 59_141654-A Empty the collecting bin regularly when mowing to ensure that the breathable fabric is clean. The collecting bin is properly filled by the air flow created by the blades, which sends the cuttings into the collecting bin and then escapes through the vents. - Page 36 LAWN MOWER RASION 2 EASY 59_141654-A Problem Check Probable cause Possible action The LEDs are on with Mower safety shut Move the mower to a a flashing error code down (immobilizer) slope or tilt of less than 20° The lawn mower tries...
- Page 37 LAWN MOWER RASION 2 EASY 59_141654-A Problem Check Probable cause Possible action Density sensor • Switch to manual clogged mode or • Switch off the bat- tery / Clean the optical sensor with water and a wet cloth / Turn the bat-...
-
Page 38: Storage And Transport
LAWN MOWER RASION 2 EASY 59_141654-A 8. STORAGE AND TRANSPORT 8.1. FOLD THE MOWER INTO THE TRANSPORT POSITION • Remove and safely store the security key. • Check that the battery (20) is off, power switch to '0' (ULIB 400/700/1100 battery) or battery power icon is off (750/1200/1500 battery). -
Page 39: Accessories And Consumables
LAWN MOWER RASION 2 EASY 59_141654-A • Check that the battery (20) is off, power switch to '0' (ULIB 400/700/1100 battery) or battery power icon is off (750/1200/1500 battery). • Disconnect the battery from the mower. • Remove the battery from its tray. -
Page 40: General Warranties
The warranty is fully integral to the product sold by PELLENC. 10.2.1.2. SPARE PARTS The commercial warranty also covers original PELLENCspare parts, excluding labour and to the exclusion of certain... -
Page 41: Duration Of The Warranty
PELLENC Products are guaranteed under the commercial warranty as from delivery to the customer for a period of two (2) years for products connected to a PELLENC battery, and for a period of one (1) year for other PELLENC products. -
Page 42: Wear Parts And Consumables
Paid after-sales service also covers original PELLENC spare parts, excluding labour and outside the legal and com- mercial warranty period. In case of replacement of original PELLENC spare parts in the context of after-sales service, said latter are covered by a warranty of one year as from the installation date. -
Page 43: Ec" Declaration Of Conformity: Rasion 2
LAWN MOWER RASION 2 EASY 59_141654-A 11. "EC" DECLARATION OF CONFORMITY: RASION 2 MANUFACTURER PELLENC ADDRESS Quartier Notre-Dame - 84120 Pertuis (France) ENTITY AUTHORIZED TO COMPILE THE TECHNICAL FILE PELLENC ADDRESS Quartier Notre-Dame - 84120 Pertuis (France) We hereby declare that the machine referred to below as:... - Page 44 LAWN MOWER RASION 2 EASY 59_141654-A...
- Page 45 PELLENC Quartier Notre Dame - 84120 Pertuis (France)
Need help?
Do you have a question about the RASION 2 EASY and is the answer not in the manual?
Questions and answers