Table of Contents
Advertisement
Quick Links
BRAVO 10 - 48/230
User Manual V1.2
BEYOND THE INVERTER
THE NEW GENERATION OF POWER CONVERTERS
•
DUAL INPUT INVERTER
Commercial Power as default source
•
AC BACKUP IN A DC ENVIRONMENT
Leverage your existing DC infrastructure
•
ONE STOP SHOP
Wide output power range
•
HARSHEST AC INPUT CONDITIONS
Without compromising the quality of the AC output
Copyright © 2013. Construction electroniques & telecommunications S.A.
All rights reserved. The contents in document are subject to change without notice.
The products presented are protected by several international patents and trademarks.
Address: CE+T S.a, Rue du Charbonnage 12, B 4020 Wandre, Belgium
www.cet-power.com - info@cet-power.com
Belgium, China, India, Luxembourg, Malaysia, Russia, Turkey, United Kingdom, United States, Australia & Germany
www.cet-power.com
Advertisement
Table of Contents

Subscribe to Our Youtube Channel
Related Manuals for CE+T Power Bravo 10 - 48/230


Summary of Contents for CE+T Power Bravo 10 - 48/230
- Page 1 BRAVO 10 - 48/230 User Manual V1.2 BEYOND THE INVERTER THE NEW GENERATION OF POWER CONVERTERS • DUAL INPUT INVERTER Commercial Power as default source • AC BACKUP IN A DC ENVIRONMENT Leverage your existing DC infrastructure • ONE STOP SHOP Wide output power range •...
-
Page 2: Table Of Contents
Cable Routing and Fixation ..................... 7.2.4 Grounding ........................7.2.5 DC ..........................7.2.6 AC Input ......................... 7.2.7 AC Output ........................7.2.8 Inview S with Bravo 10 System - Connections ..............7.2.9 Signalling ........................- Bravo 10 - 48/230 - User manual - v1.2... - Page 3 13.1 Trouble Shooting ......................... 13.2 Defective modules ........................14. Maintenance ............................14.1 Access Inview with Laptop ......................14.2 Manual check ..........................14.3 Optional ............................14.4 Manual By-Pass ......................... 15. Service ..............................- Bravo 10 - 48/230 - User manual - v1.2...
- Page 4 Modified page number Modifications (DD/MM/YYYY) 03/12/2018 First release of the Manual 19/08/2019 Added Inview S Slot information 25/11/2019 25 to 29, 34 & 35 Updated inview S and MBP section - Bravo 10 - 48/230 - User manual - v1.2...
-
Page 5: Ce+T Power At A Glance
CE+T Power at a glance 1. CE+T Power at a glance CE+T Power designs, manufactures and markets a range of products for industrial operators with mission critical applications, who are not satisfied with existing AC backup systems performances, and related maintenance costs. -
Page 6: Abbreviations
Universal Serial Bus Local Access Network Ethernet SNMP Simple Network Management Protocol HTTP HyperText Transfer Protocol HTTPS Secure HyperText Transfer Protocol Network Time Protocol Management Information Base DHCP Dynamic Host Configuration Protocol - Bravo 10 - 48/230 - User manual - v1.2... -
Page 7: Warranty And Safety Conditions
• When handling the system/units pay attention to sharp edges. * These instructions are valid for most CE+T Products/Systems. Some points might however not be valid for the product described in this manual - Bravo 10 - 48/230 - User manual - v1.2... -
Page 8: Installation
Earthing must be carried out prior to energizing the system. Earthing shall be made according to local regulations. 3.3.3 Other • Isolation test (Hi-Pot) must not be performed without instructions from the manufacturer. - Bravo 10 - 48/230 - User manual - v1.2... -
Page 9: Maintenance
To download the latest documentation and software, please visit our website at www.cet-power.com - Bravo 10 - 48/230 - User manual - v1.2... -
Page 10: Eci Technology
1 Information and data given in this chapter is intended to serve as an overview of the ECI Technology. Detailed features and parameters for each individual module type in the range may differ and should be referred to in the dedicated data sheet. - Bravo 10 - 48/230 - User manual - v1.2... -
Page 11: On-Line Mode
Start, control and exit are fully automatic. A specific example of Mix-mode is the Walk-in mode where the transfer from DC source to AC source is ramped up within a fixed and adjustable period of time. - Bravo 10 - 48/230 - User manual - v1.2... -
Page 12: Building Blocks
-40°C to 70°C / Max RH 95% for 96 hours per year Material (casing) Zinc coated steel AC Input Data Nominal voltage (AC) 230 V Voltage range (AC) 150 - 265 V - Bravo 10 - 48/230 - User manual - v1.2... - Page 13 61000-4-5 / EN 61000-4-6 / EN 61000-4-8 ETSI EN 300386 v1.9.1 * Permanent 1000 W / derating apply based on internal heatsink T°. ** Operation within lower voltage networks leads to de-rating of power performances. - Bravo 10 - 48/230 - User manual - v1.2...
-
Page 14: Sub-Rack
Inview S is composed of multiple network ports and inbuilt free potential contacts. Digital Input 2 Digital Input 1 CE+T COM Output Relay 2 Output Relay 1 iso RS485 Power 12 Vdc - Bravo 10 - 48/230 - User manual - v1.2... -
Page 15: Inview S Slot
So the Inview S Slot controller should be placed only at the left side of the first slot in the shelf, while you are looking from the front. - Bravo 10 - 48/230 - User manual - v1.2... -
Page 16: Manual By-Pass
Warning: When the system is in by-pass, the load is subjected to AC main disturbances. Before engaging manual bypass, make sure the voltage difference between AC IN and AC OUT should be less than 5 Vac to limit the inrush current. - Bravo 10 - 48/230 - User manual - v1.2... -
Page 17: A La Carte
• Seamless transfer (0 ms) between primary and secondary source of supply. • No single point of failure. • Full modularity and redundancy. Optional • Manual by-pass • Monitoring device • AC output distribution. - Bravo 10 - 48/230 - User manual - v1.2... -
Page 18: Installation Of Bravo 10 - Shelf
Fix cage nuts (4) in the cabinet front and rear frame of the left and the right side. Fix the left and right slider of the cabinet with the supplied screws (3). - Bravo 10 - 48/230 - User manual - v1.2... -
Page 19: Electrical Installation For Bravo 10 - Shelf
• Input AC / Output AC / Input DC / Signal cables shall be separated. • Cable crossings shall be done in 90 deg angles. • Empty inverter positions shall be covered with dummy. - Bravo 10 - 48/230 - User manual - v1.2... -
Page 20: Terminations
Remove protection cover Cable entries 7.2.4 Grounding “PE Chassis Ground” PE Chassis ground should be wired to MET (Main Earth Terminal) or distributed earth bar connected to MET, according to local regulations. - Bravo 10 - 48/230 - User manual - v1.2... -
Page 21: Ac Input
Note: Icc value measured as 50 A per shelf with five modules. 7.2.7 AC Output Model MCB per Shelf Cable, min Connector Torque Insulated Ring Bravo 10 - 48/230 32 A 6 mm 5 Nm type - Bravo 10 - 48/230 - User manual - v1.2... -
Page 22: Inview S With Bravo 10 System - Connections
• The remote ON/OFF switch the output AC OFF. • Input AC and input DC is not affected by the remote ON/OFF. • The remote ON/OFF can be connected to any shelf. - Bravo 10 - 48/230 - User manual - v1.2... - Page 23 8 pin connector of each shelf should be connected in series with all shelf using CAN bus cables. • The internal bus connectors are sensitive and special caution should be taken during installation to keep them out of harms way. - Bravo 10 - 48/230 - User manual - v1.2...
-
Page 24: Interface
80 to 100% = <5% 100% Output Power (redundancy not counted) overload × × × × × Status output power LED × Behaviour (B - Blinking | P - Permanent ) - Bravo 10 - 48/230 - User manual - v1.2... -
Page 25: Inview S - Lcd Display
ƒ Alarms and Logs 8.2.1 LED indications Three LED’s are present at front side of the controller to indicate major alarm, minor alarm, and system status Major Alarm Minor Alarm System Status - Bravo 10 - 48/230 - User manual - v1.2... -
Page 26: Menu Structure
In some screens, up and down arrows appear at the top of the page, indicating more contents are present • [2] Status bar The status bar appears throughout the interface and illuminate the current page icon. - Bravo 10 - 48/230 - User manual - v1.2... -
Page 27: Led Indications
The web interface of both controller Inview S and Inview S Slot is same, and the user can access the controller on the laptop through ETH port. This section provides an overview of the web interface, refer Inview S user manual for detailed information. - Bravo 10 - 48/230 - User manual - v1.2... -
Page 28: Login
2 B readcrumbs: Provide navigation of the page. It trails all levels so that user can know where you are within the interface and can go to any previous menu. 3 Display the date, time and the site name of the system. - Bravo 10 - 48/230 - User manual - v1.2... - Page 29 5 Notifications: Display the current generated alarms and events. Note: To know more about Inview S and Inview S Slot operation, refer to the Inview manual and it is available on request. - Bravo 10 - 48/230 - User manual - v1.2...
-
Page 30: Replacement Procedures
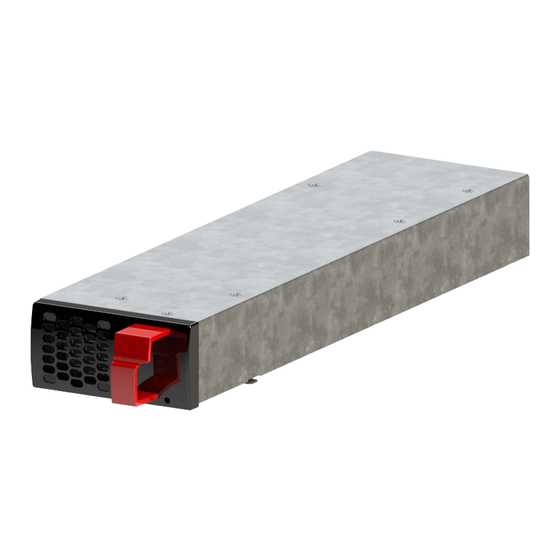
5. The module will start up and take the first address available on the bus. Place the module & slide into the shelf Push firmly until module is engaged Make sure the latch is locked in the shelf - Bravo 10 - 48/230 - User manual - v1.2... -
Page 31: Controller - Inview S Slot
4. The controller begins to start up and read the parameters from modules in the live system. Place the module & slide into the shelf Push firmly until unit is engaged Make sure the latch is locked in the shelf - Bravo 10 - 48/230 - User manual - v1.2... -
Page 32: Controller - Inview S
Fix it with four latches Fix the panel sheet with screws Connect wires and place the panel sheet in the cabinet Dimensions are in mm Panel sheet - cut-out details - Bravo 10 - 48/230 - User manual - v1.2... -
Page 33: Module Fan
Replace the new fan and Place the front cover with Fan Fix the screw at Fix the 10 screws at Fix the connector top of the module bottom sheet and rear - Bravo 10 - 48/230 - User manual - v1.2... -
Page 34: Manual By-Pass (Optional)
Manual By-Pass puts the module in OFF state but doesn’t disconnect the DC. Make sure DC is disconnected before any intervention inside the system. Warning: Risk of electric shock. Power will be available at AC Input terminal, AC Output terminal, DC Input terminal, and Surge Arresters. - Bravo 10 - 48/230 - User manual - v1.2... -
Page 35: By-Pass To Normal (Disengage Mbp)
From MBP REMOTE ON/OFF AUX CONTACT Module shelf rear MBP auxiliary connection in Inview S From REMOTE ON/OFF MBP AUX CONTACT Module shelf rear MBP auxiliary connection in Inview S Slot - Bravo 10 - 48/230 - User manual - v1.2... -
Page 36: Finishing
• Cover empty inverter positions with dummy cover. • Make sure that the Remote ON/OFF is appropriately wired according to local regulations. • Make sure that the point of AC supply meets local regulations. - Bravo 10 - 48/230 - User manual - v1.2... -
Page 37: Commissioning
Installation and commissioning must be done and conducted by trained people fully authorized to act on installation. It is prohibited to perform any isolation test without instruction from manufacturer. Equipments are not covered by warranty if procedures are not respected. - Bravo 10 - 48/230 - User manual - v1.2... -
Page 38: Check List
Switch OFF AC input (commercial power failure) and check the alarm according to the configuration Switch OFF DC input (DC power failure) and check that the alarm according to the configuration Check the different digital input according to the configuration (when used) - Bravo 10 - 48/230 - User manual - v1.2... -
Page 39: Trouble Shooting And Defective Situations Fixing
All OK but I have alarm: Check configuration file and correct No of modules Download/clear log file No output alarm: Mind the default time delay (UA: 60s, NUA: 30s) Check configuration file - Bravo 10 - 48/230 - User manual - v1.2... -
Page 40: Defective Modules
• The RMA number should be mentioned on all shipping documents related to the repair. • Be aware that products shipped back to CE+T Power without being registered first will not be treated with high priority!(Label shown here is only for representation) -
Page 41: Maintenance
• With an infrared camera check termination hot spots. - Tighten terminations. 14.4 Manual By-Pass • Make sure AC input source is available during MBP operation. Otherwise the LOAD will be affected. - Bravo 10 - 48/230 - User manual - v1.2... -
Page 42: Service
• If your vendor doesn’t provide such assistance (*) you may contact CE+T through email: customer.support@cet-power.com (*) CE+T will redirect your call to your vendor if he has such SLA in place. - Bravo 10 - 48/230 - User manual - v1.2...
Need help?
Do you have a question about the Bravo 10 - 48/230 and is the answer not in the manual?
Questions and answers