Table of Contents
Advertisement
Quick Links
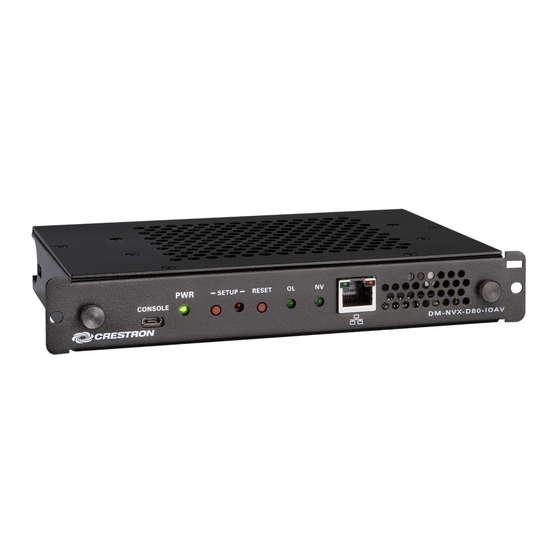
DM-NVX-D80-IOAV
DM NVX™ 4K60 4:4:4 HDR Network AV OPS Decoder
The Crestron® DM-NVX-D80-IOAV is a compact DM NVX™ decoder that is compatible with the
Intel® Open Pluggable Specification (OPS). Equipped with an OPS port, the DM-NVX-D80-IOAV
is designed for installation into the OPS slot of an OPS-supported display.
Check the Box
Item
DM-NVX-D80-IOAV
Install the Device
The OPS port of the DM-NVX-D80-IOAV is located on the rear panel of the device. When the
DM-NVX-D80-IOAV is installed into the OPS slot of a display, the OPS port of the
DM-NVX-D80-IOAV connects to the OPS port of the display.
OPS Port of DM-NVX-D80-IOAV (Rear Panel)
OPS port
To install the DM-NVX-D80-IOAV into an OPS slot of a display:
NOTE:
The display shown below is for illustrative purposes only. Your display may differ from
the one shown below. If desired, refer to the OPS device installation instructions in the display
documentation in addition to the instructions below.
1.
Disconnect mains power from the display. The DM-NVX-D80-IOAV is not hot-swappable.
2.
Remove the OPS slot cover on the display by loosening the two slot cover screws.
Retain the screws for use in step 4 below.
3.
With the fan of the DM-NVX-D80-IOAV facing you or the display (display dependent),
insert the DM-NVX-D80-IOAV into the OPS slot until the device clicks into place.
4.
Using the two screws removed in step 2 and the two mounting holes of the
DM-NVX-D80-IOAV, secure the DM-NVX-D80-IOAV in the slot.
5.
Reconnect mains power to the display.
6.
Verify that the input source of the display is set to use the DM-NVX-D80-IOAV in the
OPS slot.
Installation of DM-NVX-D80-IOAV into OPS Slot of Display
DM-NVX-D80-IOAV
(2) Mounting holes for attachment to
OPS slot of display (slot cover screws of
display not shown)
Connect the Device
No external HDMI®, USB, RS-232, and power cables are required to connect to the
DM-NVX-D80-IOAV. Console and Ethernet port connections are made to the front panel as
shown below.
Front Panel Connections
Qty
1
computer
LED Indicators
Refer to the following table for information about the LED indicators on the device.
LED Indicator
Color
PWR
Amber
Green
SETUP
Red
OL
Green
NV
Green
LAN
Green
Flashing amber
Configure the Device
Configure the device using the web interface. To access the web interface, open a web browser
and then go to the IP address of the device.
NOTE:
By default, the IP address of a DM NVX device is assigned by a DHCP server on the
network. If a DHCP server does not exist on the network, the IP address defaults to a link-local
address in the 169.254.xxx.xxx range. Refer to RFC 3927 for detailed information about link-local
addressing. To display the IP address on the connected display, press the SETUP button on the
front panel of the device.
To log in to the web interface, enter the user name and password. The default user name and
password are both admin.
Sample OPS display
To
SETUP
RESET
NV
:
button
button
LED
100BASE-TX/
and LED
1000BASE-T to
Ethernet switch
PWR
OL
or other
LED
LED
DM NVX™ device
Meaning
Power is being applied to the device via the OPS-
supported display. The device is booting.
Power is being applied to the device via the OPS-
supported display. The device is operational.
The SETUP button is pressed.
The device is online with a control system.
The device is receiving and decoding network video.
An Ethernet link is established.
Data activity is occurring on the Ethernet link.
Upgrade the Firmware
Before using the device, upgrade the firmware. The latest firmware can be downloaded from the
DM-NVX-D80-IOAV product page on the Crestron website (www.crestron.com).
Connect to the Crestron XiO Cloud Service
The Crestron XiO Cloud™ service allows supported Crestron devices across an enterprise to be
managed and configured from one central and secure location in the cloud. Supported devices
are preconfigured to connect to the service. Use of the service requires a registered Crestron
XiO Cloud account.
To connect the device to the Crestron XiO Cloud service:
1.
Record the MAC address and serial number that are labeled on the shipping box or front
panel of the device. The MAC address and serial number are required in order to add the
device to the Crestron XiO Cloud environment.
2.
Do either of the following:
•
If you have a Crestron XiO Cloud account, go to
https://portal.crestron.io
Crestron XiO Cloud service.
•
If you do not have a Crestron XiO Cloud account, go to
register for an account.
For detailed information about using the Crestron XiO Cloud service, refer to the Crestron XiO
Cloud Service User Guide (Doc. 8214) at www.crestron.com/manuals.
Additional Information
Scan or click the QR code for detailed product information.
DM-NVX-D80-IOAV
to access the
www.crestron.com/xiocloud
to
Advertisement
Table of Contents

Related Manuals for Crestron DM-NVX-D80-IOAV


Summary of Contents for Crestron DM-NVX-D80-IOAV
-
Page 1: Additional Information
To connect the device to the Crestron XiO Cloud service: Record the MAC address and serial number that are labeled on the shipping box or front The OPS port of the DM-NVX-D80-IOAV is located on the rear panel of the device. When the SETUP RESET panel of the device. - Page 2 Corporation in the United States and/or other countries. Other trademarks, registered trademarks, and trade names may be used in this document to refer to either the entities claiming the marks and names or their products. Crestron disclaims any CAUTION: Changes or modifications not expressly approved by the manufacturer responsible for compliance could void the proprietary interest in the marks and names of others.
Need help?
Do you have a question about the DM-NVX-D80-IOAV and is the answer not in the manual?
Questions and answers