Crestron DigitalMedia DM-NVX-352 Interface Manual
4k60 4:4:4 hdr network av encoder/decoder with dante audio
Hide thumbs
Also See for DigitalMedia DM-NVX-352:
- Design manual (42 pages) ,
- Quick start manual (9 pages) ,
- Product manual (96 pages)

Related Manuals for Crestron DigitalMedia DM-NVX-352


Summary of Contents for Crestron DigitalMedia DM-NVX-352
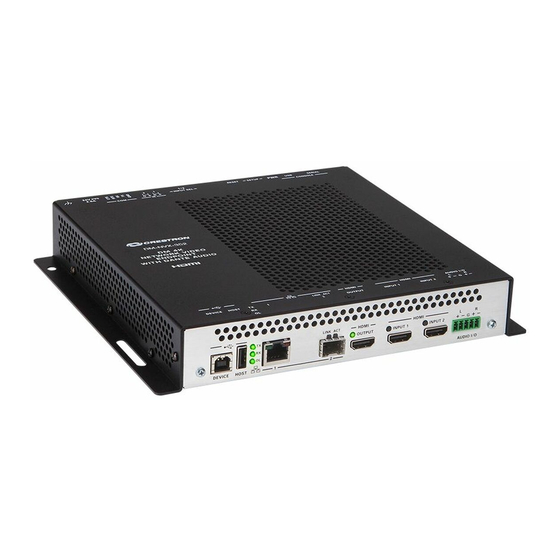
- Page 1 DM-NVX-352(C) DigitalMedia™ 4K60 4:4:4 HDR Network AV Encoder/Decoder with Dante ® Audio Web Interface Guide Crestron Electronics, Inc.
- Page 2 Crestron, the Crestron logo, .AV Framework, 3-Series, 3-Series Control System, Adagio, AirMedia, Auto-Locking, Cameo, Core 3, Core 3 UI, CresFiber, Cresnet, Crestron Avia, Crestron, the Crestron logo, Crestron Toolbox, and DigitalMedia are either trademarks or registered trademarks of Crestron Electronics, Inc. in the United States and/or other countries.
-
Page 3: Table Of Contents
Introduction Web-based Configuration Interface Accessing the Web-based Configuration Interface Access Web-based Configuration with a Web Browser Access Web-based Configuration With Crestron Toolbox™ Software Easy Configuration Guide How to Configure DM-NVX-352(C) as a Transmitter How to Configure DM-NVX-352(C) as a Receiver... - Page 4 Upload a Custom EDID File By Following the Steps Below: To Delete a Custom EDID File From the Select Drop-down List, Do the following: Input Signal Output Receiver Mode HDMI Output Settings Connected Display Output Signal Analog Settings Automatic Power Settings Transmitter Mode HDMI Output Setting Connected display...
- Page 5 IR Settings Web Interface Guide — Doc. Contents • iii...
- Page 6 iv • Contents Web Interface Guide — Doc.
-
Page 7: Introduction
Crestron control system or the Web-based Interface. Featuring simple web- based control and management, USB and KVM integration, built-in scaling and video wall processing, native Dante®... -
Page 8: Access Web-Based Configuration With Crestron Toolbox™ Software
For enhanced security, it is recommended that the default password is changed. 3. Click Sign In. Access Web-based Configuration With Crestron Toolbox™ Software To access the user interface by opening a web browser within the Crestron Toolbox™ application, do the following: 2 • DM-NVX-352(C) Web Interface Guide — Doc. - Page 9 If there is security software running on the computer, you might receive a security alert when the Crestron Toolbox application attempts to connect to the network. Make sure to allow the connection, so that the Device Discovery Tool can be used.
- Page 10 5. Click the Web Configuration button in the Configuration page displayed on the left hand side of the Device Discovery Tool. 4 • DM-NVX-352(C) Web Interface Guide — Doc.
-
Page 11: Easy Configuration Guide
Easy Configuration Guide A DM-NVX-352(C) device can be configured to function as a network AV transmitter (encoder) or receiver (decoder): As a transmitter, a DM-NVX-352(C) device allows a laptop computer, camera, or other media source to be connected via an HDMI cable and then transmitted over the network. As a receiver, a DM-NVX device receives the signal from a DM-NVX encoder and feeds the signal to a display device via the HDMI output. -
Page 12: How To Configure Dm-Nvx-352(C) As A Receiver
3. After the device has rebooted and you have logged in, navigate to the Stream page and enter a valid multicast address in the Multicast Address field. Once the stream has started, the Status read-only field will update accordingly to report the status of the device. -
Page 13: How To Configure Subscription-Based Routing On The Receiver
3. After the device has rebooted and you have logged in, navigate to the Stream page and enter the stream location of the transmitter in the Stream Location field. Once the stream has started, the Status field will update with the status of the device. How to Configure Subscription-based Routing on the Receiver 1. -
Page 14: How To Log In To Dm-Nvx-352(C) Using Active Directory Credentials
3. The stream(s) you have subscribed to will be displayed in the Subscribed Streams section. 4. To switch between the subscribed streams, navigate to the Xio-Routing section of the Routing page and click the radio button for the desired stream. How to Log in to DM-NVX-352(C) Using Active Directory Credentials There are two ways to login using Active Directory credentials: by using Active Directory user... - Page 15 3. Click on Create User button. 4. In Create User dialog, set the Active Directory User slider for Active Directory to ON. Web Interface Guide — Doc. DM-NVX-352(C) • 9...
-
Page 16: To Log In As Active Directory Group User
5. Enter the name of the user in the Name text field using the following format “Domain name\username”, for example “crestronlab.com\admin_1”. 6. Select Administrators in the Groups drop-down list, if you would like the Active Directory user to have administrator privileges. 7. - Page 17 1. Log in to the DM-NVX-352(C). 2. Navigate to the Device page, click on Authentication Management and select the Groups tab. 3. Click on the Create Group button. 4. In the Create Group dialog, set the Active Directory Group slider to ON. 5.
- Page 18 6. Select “Administrators” from the Access Level drop-down list if you want the Active Directory group to have administrator privileges. 7. Log in using the Active Directory Group User credentials. 12 • DM-NVX-352(C) Web Interface Guide — Doc.
-
Page 19: Status
Status The Status Information page is the first page that is visible when starting the web interface of DM-NVX-352(C). It displays general information about the DM-NVX-352(C) (such as model name, serial number, and firmware version), current network settings (such as host name and IP address, etc.), as well as information about the connection to the control system. - Page 20 Adapter 1: Displays DHCP Enabled, IP Address, Subnet Mask, Default Gateway, Link Active, and Mac Address of the DM-NVX-352(C). Control System Connections: Displays the following connection information. IP ID: IP ID of DM-NVX-352(C). Room ID: Room ID of the control system. IP Address/Hostname: Address of the control system. Type: Always set to Peer.
- Page 21 Encrypt Connection: Displays information whether the connection is encrypted (true) or not encrypted (false). Chassis Details (only applicable for card (C) varieties of DM-NVX-352(C)): Displays information about the card installed in the chassis. Serial Number: Serial number of the chassis. Slot in Parent: Displays the slot number of the chassis.
-
Page 22: Stream
Stream The Stream page provides means to switch between the two modes (Receiver or Transmitter) of the DM-NVX-352(C) and to set relevant stream parameters. The Stream page can be accessed at any time by simply clicking the STREAM tab in the navigation bar of the web-based user interface of the DM-NVX-352(C). -
Page 23: Stream
Stream Note that this section displays different parameters in varying order depending on the model and mode of the DM-NVX-352(C). The DM-NVX-352(C) can be configured as an transmitter or receiver by selecting the corresponding option (Receiver or Transmitter) from the Mode drop down list. Note that any mode change will reboot the DM-NVX-352(C) device and will reload the web-based interface. -
Page 24: Advanced Stream Options
Start button is pressed. Custom Ports: Select the Custom Ports check box if you wish to specify custom RTSP or TS port. Crestron recommends using a custom port value greater than 10000. 18 • DM-NVX-352(C) Web Interface Guide — Doc. - Page 25 -or- Bitrate: (Only applicable in Transmitter Mode). Select a bitrate from the Bitrate drop-down list to set the bitrate of the transmitted stream in Mbps. Crestron recommends using the default value. -or- Select Custom in the Bitrate drop-down list and type a custom value (in Mbps) in the Custom Bitrate text field below.
-
Page 26: Statistics
Note that if Automatic Initiation is enabled the DM-NVX-352(C) will restart the stream whenever any of the following parameters are changed. Otherwise the stream must be restarted manually. TS Port RTSP Port Stream Location Multicast Address (only applicable in Transmitter Mode) Bitrate Statistics Move the Statistics slider to the desired position (Enable or Disable) to specify whether statistics... -
Page 27: Dm Nax (Aes67) Audio
Audio Channels: Displays the number of channels in the stream. Audio Format: Displays the audio format of the stream. Aspect Ratio: Displays the aspect ratio of the stream. DM NAX (AES67) Audio This section allows you to set different parameters for the DM NAX Audio settings. The settings will vary based on whether the device is an Encoder (Transmitter) or a Decoder (Receiver). - Page 28 Advanced Under both DM NAX (AES67) Transmit and DM NAX (AES67) Receive, click + Advanced to view the following. Auto Initiation: Toggle Auto Initiation to either Enable or Disable it. If disabled, the Start and Stop buttons become available for use. Status: Displays the status of the stream.
-
Page 29: Decoder
Decoder DM NAX (AES67) Transmit Multicast Address: Sets the multicast address. Port: Sets the port number. DM NAX (AES67) Receive Mode: Sets the mode. By default the mode is set to “auto” which will add +1 to the incoming video stream multicast address. For example if the Video multicast address is 239.8.0.0, the DM NAX (AES67) Multicast address will be 239.8.0.1. - Page 30 Advanced Under both DM NAX (AES67) Transmit and DM NAX (AES67) Receive, click + Advanced to view the following. Auto Initiation: Toggle Auto Initiation to either Enable or Disable it. If disabled, the Start and Stop buttons become available for use. Status: Displays the status of the stream.
-
Page 31: Routing
Routing The Routing page can be used to enable or disable automatic routing between video inputs, to select and combine separate video and audio signals from two different inputs, or configure analog audio as either an input or an output. The Routing page can be accessed at any time by simply clicking the ROUTING tab in the navigation bar of the web-based user interface of the DM-NVX-352(C). - Page 32 Source drop-down list. Available options are as follows: Follows Audio Source, Input 1, Input 2, Analog Audio, Primary Stream Audio, Secondary Stream Audio, Dante/AES-67 Audio. NOTE: If a combination is not supported, the input selection will be ignored. For example, Input 1 will not be used when selected if Input 2 is used to route video.
-
Page 33: Subscriptions (Applicable Only When Dm-Nvx-352(C) Is In Receiver Mode)
Subscriptions (Applicable Only When DM-NVX-352(C) is in Receiver Mode) When a DM-NVX receiver subscribes to a DM-NVX transmitter, Real Time Streaming Protocol (RTSP) negotiation begins between the DM-NVX receiver and the DM-NVX transmitter. When a stream is routed, the DM-NVX receiver performs the Internet Group Management Protocol (IGMP) join, which causes the receiver to join the multicast group of the transmitter. - Page 34 Use the or buttons (if available) to browse the list of all Available Streams. Additionally, you can click on a specific page number or use or button to navigate to the last or first page of the list, respectively. Alternatively, entering a search string in the Search field will filter the list of available streams to display only the streams matching the search string.
-
Page 35: Subscribed Streams
By selecting from the list of available streams: Select a stream in the Available Streams table and click the corresponding Subscribe button. Select one or more streams in the Available Streams table by checking the corresponding check box of the Device Name and then click the + Subscribe Checked button. -
Page 36: Inputs
Inputs The Inputs page can be used to configure the settings of the HDMI inputs of DM-NVX-352(C) by renaming one or more inputs, changing and applying EDID to specific inputs or to all inputs at once (Global EDID), and enabling or disabling HDCP (High-bandwidth Digital Content Protection) on individual inputs. -
Page 37: Global Edid
Global EDID Applying/Sending Global EDID In the Send EDID to all inputs drop down list, select a built-in EDID file from a list of built-in predefined EDID files. Copy Output: Will apply the EDID of the display attached to the HDMI Output to the selected input. -
Page 38: Global Inputs
1. Click Load CEDID file. 2. In the Load CEDID file dialog click the + Browse button. 3. Locate and select the desired custom EDID file (*.cedid) and then click Open. 4. The name of selected custom EDID file is displayed in the Load CEDID file dialog. 5. - Page 39 The following information about the HDMI inputs can be viewed and/or configured in this section of the Inputs page. Sync (read-only): Indicates whether a valid video signal is detected at the HDMI input. Yes icon indicates that a source is detected. No icon indicates that a source is not detected. Name: Displays the name for the HDMI input.
-
Page 40: Hdmi Input 1 And Hdmi Input 2
HDMI Input 1 and HDMI Input 2 The HDMI Input 1 or HDMI Input 2 page can be accessed at any time by simply clicking the arrow next to the INPUTS tab and then clicking on the corresponding HDMI INPUT 1 or HDMI INPUT 2 in the navigation bar of the web-based user interface of the DM-NVX-352(C). -
Page 41: Edid
The non-editable Color Depth and Color Space fields display information about the color depth and color space, respectively. EDID In the Select drop-down list, select a built in EDID file from the list of built-in predefined EDID files. Predefined EDIDs are as follows: Copy Output: Will apply the EDID of the display attached to the HDMI Output to the selected input. -
Page 42: Upload A Custom Edid File By Following The Steps Below
Upload a Custom EDID File By Following the Steps Below: 1. In the Select drop-down list, select Custom and click Load CEDID file. 2. In the Load CEDID file dialog, click the +Browse button. 3. Locate and select the desired custom EDID file (*.cedid), and then click the Open button. The name of selected custom EDID file is displayed in the Load CEDID file dialog. -
Page 43: Input Signal
Input Signal The Input Signal section displays the following read-only information about the HDMI input signal. Sync Detected: Indicates if video sync levels are detected at the HDMI input. Resolution: Displays the resolution. HDCP: Indicates the presence of HDCP (High-bandwidth Digital Content Protection), which requires compatible players and displays. - Page 44 Interlaced: Indicates whether the scanning method used is interlaced or progressive scanning method. Horizontal Resolution: Reports the horizontal resolution of the HDMI Output. Reported values range from 0 to 4096 pixels. Vertical Resolution: Reports the vertical resolution of the HDMI Output in lines. Reported values range from 0d to 2160 lines.
-
Page 45: Output
Output Use the Output page to review information about the connected display and to adjust the analog audio volume. The Output page can be accessed at any time by simply clicking the OUTPUT tab in the navigation bar of the web-based user interface of the DM-NVX-352(C). The Output page displays different sections and parameters depending on the mode of the DM- NVX-352(C). - Page 46 Output page of DM-NVX-352(C) in Receiver mode. 40 • DM-NVX-352(C) Web Interface Guide — Doc.
-
Page 47: Hdmi Output Settings
HDMI Output Settings Disable Output: Move the Disable Output slider to the desired position (Yes or No) to enable or disable the output settings. By default, No (enable) is selected, allowing the output display to turn on. If Yes is selected, the output display will turn off. Blank Output: Move the Blank Output slider to the desired position (Yes or No) to specify whether the output will be blanked (which creates an output of a free-run black frame). - Page 48 720x480@60Hz 1792x1344@60Hz 720x576@50Hz 1856x1392@60Hz 800x600@60Hz 1920x1440@60Hz 848x480@60Hz 2048x1536@60Hz 1024x768@60Hz 2560x1080@60Hz PC 1280x720@50Hz 2560x1440@60Hz 1280x720@60Hz 2560x1600@60Hz RB 1280x768@60Hz 3840x2160@24Hz 1280x768@60Hz RB 3840x2160@25Hz 1280x800@60Hz 3840x2160@30Hz 1280x800@60Hz RB 4096x2160@24Hz 1280x960@60Hz 4096x2160@25Hz 1280x1024@60Hz 4096x2160@30Hz 1360x768@60Hz 3840x2160@50Hz 1400x1050@60Hz 3840x2160@60Hz 1400x1050@60Hz RB 4096x2160@50Hz 1440x900@60Hz 4096x2160@60Hz 1440x900@60Hz RB 1680x720@24Hz 1600x900@60Hz RB 1680x720@25Hz 1600x1200@60Hz 1680x720@30Hz...
-
Page 49: Connected Display
HDCP supported by the downstream device. Never: The HDMI output will blank if the input is HDCP encrypted. Aspect Ratio Mode: Select the aspect ratio mode. Max Color Depth: Select the applicable Max Color Depth (8-, 10-or 12-bit mode) from the Max Color Depth drop down list. -
Page 50: Output Signal
The Manufacturer, Name and Serial Number fields display additional information about the connected display's manufacturer, model and serial number, respectively. Click the Save CEDID button to save the CEDID file of the connected output. The saved CEDID file can be loaded later, if desired. Output Signal The Output Signal section of the Output page displays read-only information about the output resolution of the device and whether the device is transmitting or not. -
Page 51: Analog Settings
Audio Format: Reports the audio format. Audio Channels: Reports the number of detected audio channels accompanying the HDMI output. A value of 0 signifies that no audio is present or that the channel count could not be determined. Click –Less Details to hide this section from view. Analog Settings Adjust the volume of the analog audio by moving the Analog Audio Volume slider to the left or right or by entering a value in the text field below the Analog Audio Volume slider. -
Page 52: Hdmi Output Setting
Output page of DM-NVX-352(C) in Transmitter mode. HDMI Output Setting Disable Output: Move the Disable Output slider to the desired position (On or Off) to specify whether the output settings will be enabled or disabled. By default, On (enable) is selected, allowing the output display to turn on. -
Page 53: Connected Display
Follow Input (Default): Authenticates each time the input sync changes its state. The output will authenticate to the level reported at the Input. Always: Authenticates to the highest level HDCP supported by the downstream device and always maintain sync. Never: The HDMI output will blank if the input is HDCP encrypted. Max Color Depth: Select the applicable Max Color Depth (8-, 10-or 12-bit mode) from the Max Color Depth drop down list. -
Page 54: Analog Settings
Click the + More Details link to view additional information about the output settings. The + More Details section displays additional details about the HDCP state, horizontal and vertical resolution, aspect ratio, audio format and audio channels and more. Horizontal Resolution: Reports the horizontal resolution of the HDMI Output. Reported values range from 0 to 4096 pixels. -
Page 55: On-Screen Display
On-Screen Display The DM-NVX-352(C) provides the ability to display fixed text on the screen, which allows possibilities such as labeling the video source or displaying special instructions, schedules, announcements, alerts, and other messaging. The On-Screen Display page can be used to enable or disable text overlay and to specify the look and feel of the overlaid text. - Page 56 If a Custom location is selected, specify the coordinates of the first character of the text in the X and Y fields. Move the Background Transparency slider to adjust the background transparency. The exact transparency value (ranging from 0 to 100%) is displayed in the text field below the transparency slider.
-
Page 57: Usb
The USB configuration page can be used to configure USB routing from one DM-NVX-352(C) device to another DM-NVX-352(C) device. The USB page can be accessed at any time by simply clicking the USB tab in the navigation bar of the web-based user interface of the DM-NVX-352(C). DM-NVX-352(C) devices support the extension of USB signals, which can be routed from one or more DM-NVX-352(C) device(s) to one DM-NVX-352(C) device via the web interface or the control system. - Page 58 The other DM-NVX devices function as the remote extenders (Remote devices); that is, their HOST port connects to a USB mouse, keyboard, or other devices. 2. Set the USB Mode drop down field to the appropriate mode for each of the DM-NVX devices: Local or Remote.
- Page 59 8. If Automatic USB Pairing is disabled, pair the Local and Remote devices by clicking the Pair button on both DM-NVX devices (Local and Remote). To unpair paired devices, click the UnPair button on each DM-NVX device. The Pairing Status field displays the paired status of each device.
-
Page 60: Network
Network You can view and adjust network settings such as host name, domain name, and DHCP (Dynamic Host Configuration Protocol) mode on the Network page. The Network page can be accessed at any time by clicking the NETWORK tab in the navigation bar of the web-based user interface of the DM-NVX-352(C). -
Page 61: 802.1 X Configuration
Specify whether the IP address of the DM-NVX-352(C) is assigned by a DHCP (Dynamic Host Configuration Protocol) server by setting the DHCP slider to Enabled or Disabled. When DHCP is enabled: (Default setting) The IP address of the DM-NVX-352(C) will be automatically assigned by a DHCP server on the local area network (LAN) for a predetermined period of time. -
Page 62: To Configure Dm-Nvx-352(C) For 802.1X Authentication
allowing communication with the authentication server and access to protected corporate networks. To Configure DM-NVX-352(C) for 802.1X Authentication: 1. Move the IEEE 802.1X authentication slider to Enabled. This will enable all options on the 802.1X dialog. 2. Select the Authentication method: EAP-TLS Certificate or EAP-MSCHAP V2 Password according to the network administrator's requirement. -
Page 63: Network Interface
3. If you select EAP-TLS Certificate, click Manage Certificates to upload the required machine certificate. The machine certificate is an encrypted file that will be supplied by the network administrator, along with the certificate password. -or- If you select EAP-MSCHAP V2 Password, enter the Username and Password supplied by the network administrator into the Username and Password text fields. - Page 64 If Port Selection is toggled On, you can set ports as follows: NOTES: Connecting multiple interfaces to the same switch may cause a network loop. You can set up to two ports. Management: Select a port. NOTE: The Management port controls your connection to the web interface. Changing the port value will result in losing your connection to the device via the web interface.
-
Page 65: Device
Device The Device page can be used to configure and manage various functions of the DM-NVX-352(C), such as: Upgrading firmware. Restoring factory default settings. Rebooting the DM-NVX-352(C). Downloading device logs. Connecting the DM-NVX-352(C) to a control system. The Device page can be accessed at any time by simply clicking the DEVICE tab in the navigation bar of the web-based user interface of the DM-NVX-352(C). -
Page 66: Device Management
Device Management The Firmware section displays the following information about the DM-NVX-352(C). Main Firmware Version Model, which is DM-NVX-352(C). Serial Number Firmware Upgrade 60 • DM-NVX-352(C) Web Interface Guide — Doc. -
Page 67: To Upgrade The Firmware Of The Dm-Nvx-352(C)
To Upgrade the Firmware of the DM-NVX-352(C): 1. Click the Upload Firmware File radio button if you wish to upload a firmware file located on your PC. 2. Click Firmware Upgrade. 3. In the Firmware Upgrade dialog, click the Browse button. 4. -
Page 68: Rebooting The Dm-Nvx-352(C)
Rebooting the DM-NVX-352(C) 1. Click the Reboot button. The reboot confirmation message box appears. 2. Click Yes to reboot the device. The Reboot message box appears, indicating that the device is rebooting. To Download Device Logs: You can download logs for troubleshooting and other purposes in the Device Logs section of the Device page. -
Page 69: Auto Update
To Enable/Disable the Connection to the Cloud Server: Move the Cloud Configuration Service Connection slider to the Enabled (Disabled) position. Auto Update To automatically update the controls provided on the web interface of DM-NVX-352(C), do the following. 1. Move the Auto Update slider to the Enabled position. By default, the auto update functionality is set to Enabled. -
Page 70: Configure Date/Time
1. Select Encrypt and Validate, Encrypt, or OFF in the SSL Mode drop-down, to specify whether to use encryption. By default SSL Mode is set to OFF. Note that when encryption is enabled with either the Encrypt and Validate or Encrypt option, the Control System Username, Control System Password and Confirm Password text fields are displayed if necessary to provide login information. - Page 71 Time Synchronization 1. Move the Enable Time Synchronization slider to the desired position (On or Off) to specify whether time synchronization will be enabled (On) or disabled (Off). By default time synchronization is set to On. 2. In the Time Server field, enter the URL of the NTP or SNTP server. 3.
-
Page 72: Authentication Management
Authentication Management Click the Authentication Management tab to configure authentication management for users and groups and to allow different levels of access to the functions of DM-NVX-352(C). By default the authentication mode is enabled (set to On). Move the Enable Authentication slider to the desired position (On or Off) to specify whether authentication will be enabled or disabled. -
Page 73: Groups
Once authentication is turned on, only users with administrator rights can disable it. When authentication is enabled, click on the corresponding Current User, Users or Groups tabs to view, add, remove, and edit information local or Active Directory users and groups on DM-NVX-352(C) or to change password for current user. - Page 74 If groups listed in the Groups table span across multiple pages, navigate through the groups by clicking a page number or by using the left or right arrows at the bottom of the Groups pane to move forward or backward through the pages. Additionally, each page can be set to display 5, 10, or 20 groups by using the drop-down menu to the right of the navigation arrows.
- Page 75 Click on the Create Group button in the Groups tab to create new group. Create Local Group 1. Click Create Group button. 2. In Create Group dialog enter the following: Enter group name in the Name text field. Assign group access level by selecting a pre-defined access level (Administrator, Connect, Operator, Programmer, User) from the Access Level drop-down list.
-
Page 76: Users
When a group is deleted, users in the group are not removed from the device or Active Directory server. However, because a user’s access level is inherited from a group(s), users within the deleted group will lose the access rights associated with this group. When an Active Directory group is removed from DM-NVX-352(C), all members of that group will lose access to the DM-NVX device. - Page 77 Use the Search Users text field to enter search term(s) and display groups that match the search criteria. If users listed in the Users table span across multiple pages, navigate through the list of users by clicking a page number or by using the left or right arrows at the bottom of the Users pane to move forward or backward through the pages.
- Page 78 Click the corresponding button in the Actions column to view detailed group information delete group To create new group, click the Create User button. Create New Local User 1. Click Create User button in the User tab. 2. In Create User dialog enter the following. Enter user name in the Name text field.
- Page 79 1. Click the Create User button. 2. In the Create User dialog, enter the following. Enter user name in the Name text field in the format “Domain\UserName”, for example “crestronlabs.com\JohnSmith”. Valid user names can contain the alphanumeric characters (letters a-z, A-Z, numbers 0-9) and the underscore character.
-
Page 80: Current User
Click OK to close the User Details dialog and to return to the Authentication Management Users tab. Update User Details 1. Click the information button ( ) in the Actions column to update information for the selected user. 2. Enter a password in the Password text field; re-enter the same password in the Confirm Password text field. -
Page 81: Rs232 Settings
1. Click the Change Current User Password button to provide a new password for the current user. 2. In the Change Password dialog, enter the current password in the Current Password text field, the new password in the Password text field, then re-enter the same new password in the Confirm Password text field. - Page 82 Baud Rate: Select the baud rate from the drop-down menu. Data Bits: Select the data bits. Stop Bits: Select the stop bits. Parity: Select the parity. Hardware Flow Control: Select the hardware flow control. Software Flow Control: Select the software flow control. IR Settings Click the IR Settings tab to manage IR Settings for the DM-NVX-352(C).
- Page 83 File Name: When an IR file is loaded using the Load IR File button, the name of the file will be displayed here. To delete this file, click Delete IR File. Commands: Commands become available when an IR file is loaded. Web Interface Guide —...
- Page 84 This page is intentionally left blank. Web Interface Guide — Doc. DM-NVX-352(C) • 78...
- Page 85 Crestron Electronics, Inc. Web Interface Guide — Doc. 15 Volvo Drive, Rockleigh, NJ 07647 Tel: 888.CRESTRON 07/22/20 Fax: 201.767.7656 Specifications subject to www.crestron.com change without notice.
Need help?
Do you have a question about the DigitalMedia DM-NVX-352 and is the answer not in the manual?
Questions and answers