laerdal SimPad Directions For Use Manual
Hide thumbs
Also See for SimPad:
- User manual (17 pages) ,
- Quick start manual (9 pages) ,
- User manual (33 pages)
Table of Contents
Advertisement
Advertisement
Table of Contents

Subscribe to Our Youtube Channel
Related Manuals for laerdal SimPad


Summary of Contents for laerdal SimPad
- Page 1 Directions for Use SimPad L A E R D A L www.laerdal.com...
-
Page 3: Table Of Contents
SIMPAD RUN AUTOMATIC MODE RUN MANUAL MODE REGISTERING INTERVENTIONS ADJUSTING PARAMETERS MANUALLY VIEW LOG CONNECTING SIMPAD TO ANOTHER LINK BOX SYNCHRONIZING SIMPAD WITH SIMSTORE PATIENT MONITOR THEME EDITOR SIMDESIGNER TRANSFERRING LOGS, THEMES AND SCENARIOS TO / FROM A PC SOUND... -
Page 4: Simpad System Overview
The SimPad System is an easy-to-use, wireless tool that performs relevant medical simulation training, including debriefing, in various user settings. With its large, intuitive touch screen design, SimPad is virtually a “Pick up and Play” experience, allowing you to deliver simulation- based education, easily efficiently. -
Page 5: Simpad System Includes
• Battery: Battery power for Link Box Li-Ion • AC Adapter: Power and charger for SimPad and Link Box • Manikin adapter cable: Connects Link Box to patient simulators • Manikin Strap: Attaches Link Box and battery to patient simulator •... -
Page 6: Charge The Battery
1. CHARGE THE BATTERY • Connect SimPad to one of the AC adapters and plug into a wall outlet. The battery is fully charged when the LED on SimPad shows a steady yellow light. • Connect the Li-Ion battery to one of the DC adapters and plug into a wall outlet. - Page 7 5. CONNECTION BETWEEN SIMPAD AND LINK BOX SimPad communicates with the Link Box using WiFi. When the units are turned on for the first time they will set up an ad hoc network called SimLink. If no other Link Boxes are visible on the default SimLink network, the SimPad will pair with the Link Box, remember the pairing, and reconnect when units are turned on again.
-
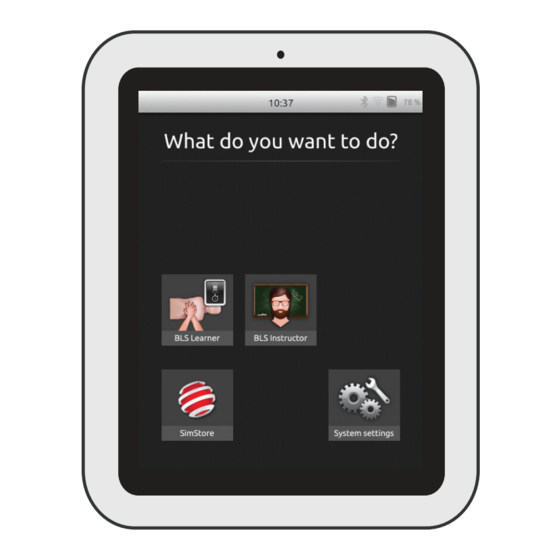
Page 8: Simpad
SIMPAD SimPad is the new remote control for your medical training simulator. Control simulation sessions directly from the touch screen by simply tapping the icons. Find details on battery status, connection and clock. Select a log to Run scenarios by... -
Page 9: Run Automatic Mode
RUN AUTOMATIC MODE When running a scenario in Automatic Mode, the only task required by the instructor is to log the participant’s actions. These events logged, as well as the events detected by the patient simulator, will drive the scenario forward. All events are registered in the log for post-event debriefing and analysis. - Page 10 Review instructor information and press OK to continue. Patient status information Categories of interventions The 4-bar icon indicates that registering the intervention Red button indicates will launch pop-up. a critical event Some interventions must Counter keeps track be performed within of how many times a specific time.
- Page 11 Touch anywhere on patient area to display more patient state information. Access to vital signs adjustments Current patient state Patient state information Abnormal parameter values are displayed in this area. Select other parameters to adjust.
- Page 12 To end a session go to Menu End session View Log option will open current session log using Log Viewer. Toggle on / off the amount of information displayed. Add comment...
-
Page 13: Run Manual Mode
RUN MANUAL MODE When running a scenario in Manual Mode, the instructor’s task is to control the clinical state of the patient simulator, as well as logging the participant’s actions. The instructor can plan scenarios using predefined themes that include various patient states. Folder of Themes. - Page 14 Waiting states Current state Time since current state was activated White arrow indicates last Overview of the current activated state. patient condition, vital signs of patient. Flag indicates start state Abnormal values displayed in this area Collapse mini-log Select other End or pause session parameters to adjust Toggle on / off...
-
Page 15: Registering Interventions
REGISTERING INTERVENTIONS Access to vital signs adjustments Categories of associated interventions Interventions always displayed Interventions of the open category Counts interventions logged Add comment Undo last registration... -
Page 16: Adjusting Parameters Manually
ADJUSTING PARAMETERS MANUALLY Tap the large coloured values in the main view, (e.g. respiration rate) to adjust the value. Hold finger over slider to access the fine-adjustment magnifying bubble. Move finger into the bubble and adjust the parameter in small increments. Create a new state with Activate the the adjusted parameter. -
Page 17: View Log
VIEW LOG Open Log Viewer from the home screen or when ending a session. To end a session, go to Menu and press End session. Toggle on / off the amount of information displayed. Go to Log Viewer Continue where you left off Restart with same scenario... -
Page 18: Connecting Simpad To Another Link Box
CONNECTING SIMPAD TO ANOTHER LINK BOX SimPad can only be connected to one Link Box at a time. A Link Box can only be connected to one SimPad at a time. SimPad will remember the Link Box it was last connected to, and try to re-establish this connection the next time it is turned on. - Page 19 REGISTERING SIMPAD ON SIMSTORE To register SimPad on SimStore, it needs to be connected to a network with internet, either via wired Ethernet or a WiFi network. • Touch the SimStore Icon on the start screen.
-
Page 20: Synchronizing Simpad With Simstore
SYNCHRONIZING SIMPAD WITH SIMSTORE After SimPad has been registered on SimStore, the SimStore Icon on the start screen becomes a Synchronize selection. Synchronize will download scenarios assigned to this SimPad on SimStore. Administration of the SimPad and purchasing of scenarios on SimStore must be done from a PC. -
Page 21: Theme Editor
THEME EDITOR The Theme Editor is a PC software tool for creating Themes for the SimPad system. The Theme Editor allows you to easily make new Themes with States and Interventions. The Theme Editor can be loaded from www.laerdal.com/simpad. SIMDESIGNER SimDesigner is a PC software tool for creating Scenarios for the SimPad System. -
Page 22: Sound
Plug an analogue headset (4 pin jack) into the SimPad. The microphone of the headset will now be routed to the manikin. If a microphone is connected to the Link Box as in alternative one, this microphone will now be routed to the headset. -
Page 23: Laerdal Li-Ion Battery
During charging, the LED indicator on the battery will show a steady yellow. When the battery is fully charged, the LED indicator shows steady green. Do not use the Laerdal Li-Ion Battery for other purposes than specified. WARNINGS: Use only the AC charger adapter supplied with the product. -
Page 24: Safety Instructions
USER ENVIRONMENT CAUTION Protection against dust and moisture ac- If the internal battery packs in SimPad is cording to IP 22. Do not use this product at mishandled, the battery pack can burst, altitudes higher than 3000m asl. Do not use cause a fire or even chemical burns. - Page 25 POWER CONNECTION AND HAZARDOUS FCC STATEMENT This device complies with part 15 of the FCC rules. VOLTAGE Operation is subject to the following two conditions: The product or its accessories may have a hazard- (1) This device may not cause harmful interference ous voltage inside.
- Page 26 Laerdal representative. requirements of the Canadian Interference- LIMITED WARRANTY Causing Equipment Regulations. Please refer to the Laerdal Global Warranty Cet appareil numérique de la classe B statement, and for more information see: respecte toutes les exigences du Règlement sur le matériel brouilleur du Canada.
-
Page 27: Specifications
-20°C to +60°C (-4°F to +140°F) IP Classification IP32 Cleaning Wipe units with a damp soft cloth with household soap water SIMPAD Size 158 x 126 x 25 mm (6,22” x 4,96”x 0,98”) Weight 450 g (1 lb) LCD display: High Resolution Color LCD display, 5.7”, 480 x 640 pixels... - Page 28 Audio out Manikin: Power and signals to manikin. Pulse, sounds etc. Audio in Battery #1: Connector for Laerdal Li-Ion Battery. Blood Pressure: Cuff pressure input: 0 – 300 mm Hg. USB: USB A input / output. Audio in: 3,5 mm jack with TRS input. Line in or microphone level.
- Page 29 LI-ION BATTERY Battery type Li-Ion, 4 cells Cell type LIC18650-22PC Voltage 7,2 V nominal Capacity 4,4 Ah typical (32 Wh) Size 98 x 78 x 28,1 mm (3,86” x 3,07” x 1,11”) Weight 270 g (0.6 lb) approximately. BATTERY CHARGING Charging voltage input 9 –...
- Page 30 SimPad System has the same ECG library as SimMan 3G and other Laerdal simulators. The available rhythms and rhythm parameters may vary from simulator to simulator. AVAILABLE ECG IN SIMPAD SYSTEM: BASIC RHYTMS RATES RATES EXTRA- ADULT AND CHILD INFANT...
- Page 31 BLOOD PRESSURE Pressure range 0 - 300 mmHg Accuracy +/- 4 mmHg Calibration Pressure sensor must be calibrated to sphygmomanometer. See Preferences menu. PULSE Available pulses Carotid, Brachial, Radial and Umbilical (SimNewB) Only 3 pulses can be palpated simultaneously. (Power considerations). Palpated BP Radial pulse turns off at systolic BP.
- Page 32 HEART SOUNDS: Heart sounds are synchronized to ECG. HEARTSOUNDS: ADULT CHILD INFANT MANIKIN MANIKIN MANIKIN • • • Normal • • • Aortic Stenosis • • • Austin Flint Murmur • Mitral Valve Prolapse • • • Systolic Murmur • Diastolic Murmur •...
- Page 33 BOWEL SOUNDS: BOWEL SOUNDS: ADULT ADULT CHILD INFANT MALE FEMALE MANIKIN MANIKIN • • • • Normal • • • • Borborygmus • • • • Hyperactive Hypoactive • • • • • Fetal Normal 140 BPM • Fetal Brady 100 BPM •...
- Page 36 © 2012 Laerdal Medical AS. All rights reserved 20-05299 Rev A...
Need help?
Do you have a question about the SimPad and is the answer not in the manual?
Questions and answers