Table of Contents
Advertisement
Quick Links
Enclosure Wall-Mount Instructions
1. Turn off power to building supply wires before beginning
installation.
2. Remove the four (4) screws from the sides of the
Enclosure and remove the Backplate.
3. Disconnect Transformer from LED Panel.
4. Mount Backplate directly to wall or junction box.
5. Make electrical connections in accordance with local
regulations (See Wiring Diagrams on back page) using
knockout provided in Backplate.
6. Re-connect Transformer to LED Panel and secure
Enclosure to Backplate using the four (4) screws.
7. USE A WATERPROOF CAULK TO SEAL THE BACK OF
THE ENCLOSURE TO THE WALL.
8. Make sure the two (2) 1/4" drain holes on the bottom of
the Enclosure are not obstructed.
Enclosure Ceiling-Mount Instructions (Fig A)
1. Turn off power to building supply wires before beginning
installation.
2. Remove the four (4) screws from the sides of the
Enclosure and remove the Backplate.
3. Disconnect Transformer from LED Panel.
IF USING OPTIONAL CANOPY
PLEASE SKIP TO STEP A BELOW
4. Mount Enclosure to ceiling, securing it with at least one
(1) screw every six (6) inches along the middle of the
top of the Enclosure. (See Fig A).
5. Make electrical connections in accordance with local
regulations. (See Wiring Diagrams on back page.)
6. Reconnect Transformer to LED Panel and secure
Enclosure to Backplate using the four (4) screws.
7. USE A WATERPROOF CAULK TO SEAL THE BACK OF
THE ENCLOSURE TO THE WALL.
8. Make sure the two (2) 1/4" drain holes on the bottom of
the Enclosure are not obstructed.
Enclosure Canopy-Mount Instructions (Fig B)
1. Turn off power to building supply wires before beginning
installation.
2. Mount Canopy to Enclosure.
a. Drill (2) 3/16" holes for mounting screws
b. Drill (1) 7/8" hole for conduit
3. Secure Mounting Plate to ceiling or junction box.
4. Make electrical connections in accordance with local
regulations. (See Wiring Diagrams on back page.)
5. Secure Canopy/Enclosure assembly to Mounting Plate
using the four (4) screws provided.
6. Reconnect Transformer to LED Panel and secure
Enclosure to Backplate using the four (4) screws.
7. USE A WATERPROOF CAULK TO SEAL THE CANOPY
TO THE ENCLOSURE AND THE CEILING, ADN TO
SEAL THE BACKPLATE TO THE ENCLOSURE.
8. Make sure the two (2) 1/4" drain holes on the bottom of
the Enclosure are not obstructed.
Recessed-Mount Installation Instructions
1. Use dimensions on back page to determine size of
opening needed to recess sign.
2. Remove the four (4) screws from the sides of the
Enclosure and remove the Backplate.
3. Disconnect Transformer from LED Panel.
4. Secure Flushmount Bezel to Enclosure using mounting
holes located in Bezel tabs. CAUTION: Use care to
avoid damaging internal components when drilling holes
in Enclosure.
5. Make electrical connections in accordance with local
regulations (See Wiring Diagrams on back page) using
knockout provided in Backplate.
6. Re-connect Transformer to LED Panel and secure
Enclosure to Backplate using the four (4) screws.
7. Secure recessed unit to exterior of wall using mounting
holes provided on Bezel. Additional holes can be drilled
into Bezel if needed.
8. USE A WATERPROOF CAULK TO SEAL THE
FLUSHMOUNT BEZEL TO THE WALL.
FIG A
FOR CEILIG MOUNT
FIG B
CANOPY CEILING MOUNTING
LED LANE CONTROL SIGNS
IMPORTANT SAFEGUARDS
SAVE THESE INSTRUCTIONS
Do not mount near gas or electric heaters.
Equipment should be mounted in locations and
at heights where it will not readily be subjected
to tampering by unauthorized personnel.
The use of accessory equipment is not
recommended by the manufacturer and may
cause an unsafe condition.
Do not use equipment for other than intended
use.
WARNING: Installation and
Servicing should be performed by
qualified service personnel only!
SCREW
PLACEMENT
EXITRONIX, a divsion of Barron Lighting Group,
will replace or repair any components, which fail
due to manufacturer's defects or workmanship,
for a period of 5 years. The warranty does
not cover physical damage or abuse, and
Barron Lighting Group reserves the right to
charge for such repairs if deemed necessary.
SIGNS MUST BE CAULKED ACCORDING TO
INSTALLATION INSTRUCTIONS IN ORDER
FOR WARRANTY TO BE HONORED.
7885 N Glen Harbor Blvd
Glendale, AZ 85307
10070046 REV 5
82 SERIES
WARRANTY
5 YEAR LIMITED
Advertisement
Table of Contents

Related Manuals for BARRON EXITRONIX 82 Series


Summary of Contents for BARRON EXITRONIX 82 Series
-
Page 1: Important Safeguards
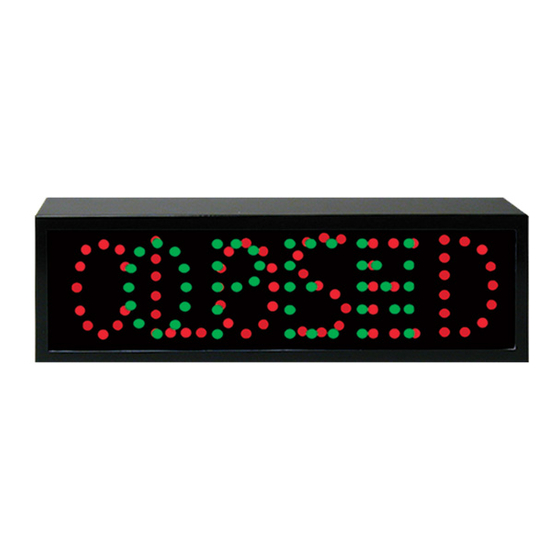
PLACEMENT 5 YEAR LIMITED Enclosure Canopy-Mount Instructions (Fig B) FOR CEILIG MOUNT EXITRONIX, a divsion of Barron Lighting Group, 1. Turn off power to building supply wires before beginning will replace or repair any components, which fail installation. due to manufacturer’s defects or workmanship, 2. - Page 2 BLUE LEAD 82-1, 82-2, 82-4, RED LEAD WIRING DIAGRAM BLUE LEAD CONNECTOR TRANSFORMER UNMARKED BLACK P1 P2 P3 BLACK "CLOSED 120VAC" LED SIGN BLACK "OPEN 120VAC" PRINTED CIRCUIT BOARD 120V GRN LED 120V RED LED SWITCHPLATE SWITCHPLATE INDICATOR INDICATOR (OPTIONAL) (OPTIONAL) DPDT TOGGLE SWITCH ON-OFF-ON...
Need help?
Do you have a question about the EXITRONIX 82 Series and is the answer not in the manual?
Questions and answers