Table of Contents
Advertisement
Quick Links
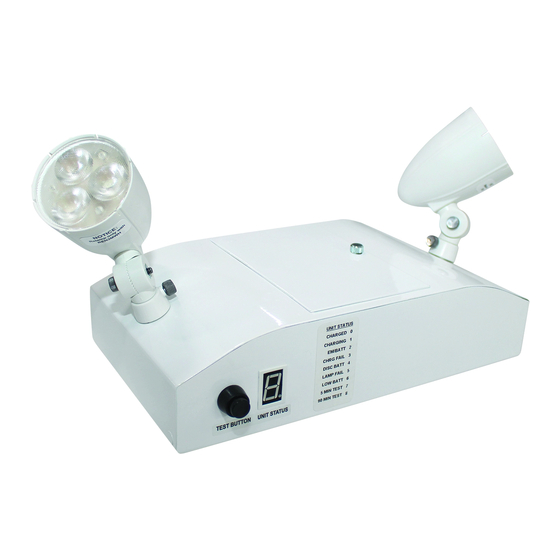
SCL Series
Installation Instructions
READ AND FOLLOW ALL SAFETY INSTRUCTIONS.
When using electrical equipment, basic safety precautions should always be followed including the following:
• DISCONNECT AC POWER SUPPLY BEFORE SERVICING.
• Installation and servicing of this equipment should be performed by qualified service personnel only.
• Ensure that the electrical wiring conforms to the National Electrical Code NEC® and local regulations
if applicable.
• Do not mount near gas or electrical heaters.
• Do not use outdoors.
• Equipment should be mounted in locations and at heights where it will not be readily subjected to tampering
by unauthorized personnel.
• The use of accessory equipment not recommended by the manufacturer may cause an unsafe condition.
• Any modification or use of non-original components will void the warranty and product liability.
• Do not use this equipment for other than intended use.
• Allow battery to charge for 24 hours before first use.
10070159 REV 5 - 09/19
IMPORTANT SAFEGUARDS
SAVE THESE INSTRUCTIONS!
Technical Support
■ (623) 580-8943 ■ technicalsupport@barronltg.com
1
800-533-3948 www.barronltg.com
Advertisement
Table of Contents

Summary of Contents for BARRON Exitronix SCL Series
-
Page 1: Installation Instructions
SCL Series Installation Instructions IMPORTANT SAFEGUARDS READ AND FOLLOW ALL SAFETY INSTRUCTIONS. When using electrical equipment, basic safety precautions should always be followed including the following: • DISCONNECT AC POWER SUPPLY BEFORE SERVICING. • Installation and servicing of this equipment should be performed by qualified service personnel only. •... - Page 2 SCL Series Installation Instructions 1. Remove (A) 6-32 X 1/4” screws securing cover and set aside (Fig. 1-1 ) 2. Slide front cover (B) forward and flip down. (Fig.1-2a, b) Fig. 1-1 Fig. 1-2a Fig. 1-2b 3. Stem mount option (Fig. 2-0a, b and 2-1a,b) a.
- Page 3 SCL Series Installation Instructions 6. Flip cover up and re-secure using (2) 6-32 X 1/4“ screws. 7. Open battery cover by turning thumb screw counter clockwise. 8. Connect battery as shown then secure connector at bottom left corner of compartment (Fig. 4-1 ). 9.
- Page 4 SCL Series Installation Instructions SELF-TEST/SELF-DIAGNOSTIC OPERATING INSTRUCTIONS KEEP THESE INSTRUCTIONS FOR FUTURE REFERENCE I M P O R T A N T: Once all emergency lamps have been connected to the unit equipment, apply normal AC power and charge for 24 hours. For units equipped with G2 and the tri-color LED indicator: Following installation and after AC power has been supplied, charge for 48 hours, then press and hold the test button until the LED indicator turns orange.


Need help?
Do you have a question about the Exitronix SCL Series and is the answer not in the manual?
Questions and answers