Table of Contents
Advertisement
Advertisement
Table of Contents

Subscribe to Our Youtube Channel
Related Manuals for Belling Fusion 136


Summary of Contents for Belling Fusion 136
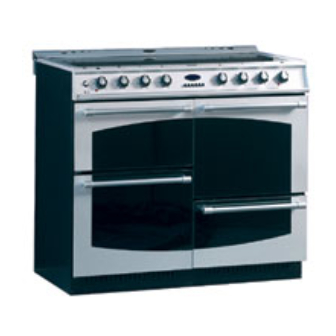
- Page 1 Belling Fusion Electric Cooker Installation & User’s Instructions Model No. 136...
-
Page 2: Table Of Contents
Contents Introduction........................3 Installation Instructions . -
Page 3: Introduction
Introduction Your Belling Thank you for purchasing a new Belling cooker. Its stylish and practical design will enhance your kitchen and make cooking a pleasure. It features a fan oven, a Cooker conventional oven,a separate grill and a one piece hob with five ceramic hotplates, a warming area and a storage area. -
Page 4: Installation Instructions
Installation Instructions The cooker can be close fitted below hotplate level. This requires a minimum distance of 1005mm between cupboard units of hotplate height. Follow the diagrams below for guidance on fitting. Take note of all dimensions. Fig. 1 Fig. 3 INSTALLATION WITH WALL CUPBOA R D S INSTALLATION ALONGSIDE TALL IN LINE WITH SIDES OF APPLIANCE... - Page 5 Installation Instructions Unpacking the Unpack the components from inside the grill and oven: Check that cooker the following parts are present. Grill pan, grid and handle Meat pan Fan oven shelves (2) Literature Conventional oven shelf (1) The front feet can be simply screwed in or out to lower or raise Levelling the front of the cooker.
- Page 6 This applies a thin protective film to the hob making it easier to clean, and prolongs its life. If you require further Belling Ceramic Hob Cleaner and Conditioner please contact Belling Spares Department on 01709 579907 and quote part number; 630811.
-
Page 7: Product Specification
Product Specification SUPPLY VOLTAGE 230V 240V SUPPLY FREQUENCY 50Hz 50Hz TOTAL WATTAGE 13.6kW 14.6kW FAN OV E N 2.3kW 2.5kW GRILL 1.83kW 2.0kW CONVENTIONAL OV E N 2.2kW 2.4kW H O B 0.175kW 0.190kW HOB W ARMING ZONE 1.66kW 1.80kW HOB FRONT LEFT 1.14kW 1.20kW... -
Page 8: For Your Safety Always
For Your Safety Please read the precautions below before using your cooker. Always.. Always take care when touching any part of the cooker which may be hot. Use dry oven gloves when removing or replacing food or dishes. Always stand back when opening the oven door to allow any build up of heat or steam to disperse. -
Page 9: For Your Safety Never
For Your Safety When used properly your Belling Cooker is completely safe, but as with any electrical appliance there are some precautions you must t a k e i n i t s u s e . NEVER. . Never allow anyone except an authorised Belling Service Agent to service or repair your cooker. -
Page 10: Know Your Cooker
Know Your Cooker W arming Zone Centre L e f t r e a r Rear right Timer element element element L e f t f r o n t Front right element element Control panel Hob hot neon W arming Zone Switch Grill pan with food Conventional... - Page 11 Control Panel Conventional Fan oven oven control control Centre Rear right L e f t f r o n t W arming G r i l l element control element control element control control Area Switch Clock Autotimer / Front right Fan oven L e f t r e a r Conventional...
-
Page 12: Know Your Timer
Oven Timer Operation The oven timer offers you the following features: 1 . Time of Day 2 . Automatic Cooking 3 . Minute Minder The main fan oven can be controlled automatically. Automatic Cooking 1 . Select foods which will take the same time to cook. Guidance on 2 . - Page 13 Timer Operation CLOCKFACE The timer incorporates a 24 hour clock. Ensure the correct time of day is always set, before using you cooker. PLEASE NOTE THAT THE DISPLAY WILL DIM BETWEEN 22.00 HOURS AND 06.00 HOURS TO PREVENT GLARE. However, should you operate the timer during these hours the display will return to normal brightness for a few seconds and then dim again.
- Page 14 Timer Operation SETTING THE TIME OF DAY Step 1 Make sure all oven controls are turned Off. Step 2 Check the electricity supply to the cooker is turned on. Step 3 When switched on the display will show 0.00 and Auto symbol will be flashing intermittently.
- Page 15 Timer Operation AUTO COOKING PROGRAMMES There are two Auto Cooking programmes that can be selected using your timer:– ( a ) T o set the timer to switch the oven On and Off Automatically T o set timer to switch on immediately and OFF automatically after a set cook period. a) TO SET THE TIMER TO SWITCH THE OVEN ON AND OFF AU T O M ATICALLY This allows you to cook at a specified time for a chosen period before the oven switches off Automatically.
- Page 16 Timer Operation Note 1 When cooking automatically the Cook Period can be checked at any time by simply pressing the Cook Period button. Note 2 When cooking automatically the End Time can be checked at any time by simply pressing the End Time button. b) TO SET TIMER TO SWITCH ON IMMEDIATELY AND OFF AU T O M ATICALLY AFTER A SET COOK PERIOD Step 1...
- Page 17 Timer Operation TO CANCEL AN AUTO COOKING PROGRAMME BEFORE THE COOK PERIOD HAS FINISHED. Step 1 Turn the oven control to the OFF position. Step 2 Press and hold in the “Cook Period” button. Step 3 With the “Cook Period” button still held in, return the display to 0.00 by pressing the “–”...
-
Page 18: Using The Hob
The warming area is rated at 190W. WARNING! If any crack should appear on the hob or griddle glass, isolate the cooker immediately from the mains supply. Never use any part of the cooker but contact your Belling Service Agent. Ceramic Hob Under no circumstances should the hob be used with aluminium foil in contact with the hob surface, as damage will occur. - Page 19 General Information Notes (Ceramic Hobs) Never Never Cook directly on the hob surface without a cooking utensil as this will result in damage to the surface of the hob. Never use the hob as a worktop surface as damage may occur to the smooth surface of the hob.
- Page 20 General Information Notes (Ceramic Hob) IMPORTA N T - As with any cooking appliance there could be some fire risk attached to the heating of oil, particularly for deep fat frying, cooking utensils containing oil must not be left unattended (eg to answer the telephone) on or in close proximity to the patterned cooking areas.
- Page 21 Choosing Your Utensils WARNING: Extreme caution should be taken to avoid steam burns and hot surfaces when cleaning up spillage to the hot h o b. 1 . Always clean up any spillage immediately with a clean cloth Important or a paper towel to avoid unnecessary damage to the hob. 2 .
-
Page 22: Oven Temperature Chart
Approximate Oven Temperature Conversion Chart Fan Oven Conventional (It is not Oven GAS MARK always necessary to preheat oven) -
Page 23: Grilling
Grilling NEVER allow young children near the appliance when the grill is in use as the surfaces get extremely hot. GRILLING SHOULD NEVER BE UNDERTAKEN WITH THE GRILL DOOR CLOSED. DO NOT LINE THE GRILL PAN WITH ALUMINIUM FOIL. The grill control is designed to provide variable heat control of the element. -
Page 24: Fan Oven Cookery Notes
Fan Oven Cookery Notes When operated the oven neon will immediately come O n, and will go Oven out when the desired temperature is reached, subsequently switching thermostat O n and Off at intervals to maintain the correct temperature. The fan will operate continuously whilst the oven is switched O n. - Page 25 Fan Oven Cookery Notes Temperature If three shelves are used to cook large quantities of food for for home freezing or parties, it may be necessary to increase the cooking times Time given in the charts by a few minutes, to allow for the loss of heat due to the extra time taken to load the oven, and the larger mass of food.
- Page 26 Fan Oven temperature chart - Baking Temperature Fo o d Time Pre-heat ˚C Scones 9-12 min. 210 - 220 approx Small cakes 15-20 min. 170 - 180 approx V i c t o r i a 20-25 min. 160 - 170 sandwich approx Sponge sandwich...
- Page 27 Fan Oven temperature chart - Meat Meat Pre-heat Temperature Time ˚C Beef 20-25 mins per 450g 160 -180 (1lb) + 20 mins extra Lamb 20-30 mins per 450g 160 - 180 (1lb) + 25 mins extra 25-30 mins per 450g Pork 160 - 180 (1lb) + 25 mins extra...
-
Page 28: Conventional Oven Cookery Notes
Conventional Oven Cookery Notes The charts are a guide only, giving approximate cooking temperatures and times. To suit personal taste and requirements, it may be necessary to increase or decrease temperatures by 10° C . The oven is fitted with ‘Cookclean’ liners and one rod shelf. The oven is heated by two tubular sheathed elements located behind the removable sides. - Page 29 Conventional Oven Cookery Notes Times and The secret of succulent, tender meat, is not to roast it too quickly Temperatures at too high a temperature. Best results are obtained when roasting for roasting is carried out at a low temperature. When a lower temperature is used, joint loses less weight, is more tender (too high a temperature causes meat to be tough and dry), and the splashing of fat onto oven interior is reduced to a minimum.
- Page 30 Conventional Oven Temperature Chart Meat Fo o d Pre- Position in oven Temperature and Time heat 190/200 C approx. 25-30 minutes Ye s Beef per 450g (1lb) + 25 minutes over 190/200 C approx. 25-30 minutes Lamb/Mutton Ye s per 450g (1lb) + 25 minutes over 190/200 C approx.
- Page 31 Conventional Oven Temperature Chart Baking Pre- Position in oven Temperature and Time Fo o d heat Scones Runners 1 and 4 220/230 C 9-12 minutes Ye s from bottom of oven Small Cakes 190/200 C approx 20-25 minutes 180/190 Victoria Ye s Runners 1 and 4 -7"...
-
Page 32: Care And Cleaning
Care and Cleaning In the interests of both safety and hygiene your Belling cooker needs to be kept clean. A build up of grease or fat from cooking could cause a fire hazard. WARNING ! For your own safety always switch off your cooker at the main switch and allow to cool before cleaning. - Page 33 Switch off the hob and use a metal spatula, palette knife or scraper to remove the spillage. TAKE CARE, as the spillage and the hob may be very hot. When the hob has cooled, clean as usual with Belling Ceramic Hob Cleaner & Conditioner.
-
Page 34: Care And Cleaning
Care and Cleaning Grill and Ovens Rod shelves and enamel parts of the oven or grill can be cleaned using household cream cleaner with a nylon pad or sponge. Heavier soiling may require the use of a proprietary oven cleaner or steel wool pad, but do not allow these to contact either the ‘Cookclean’... -
Page 35: Is There Something Wrong
Is there Something Wrong with your Cooker? Fault finding Before contacting your Belling Service Centre/Installer, check the guide problem guide below; there may be nothing wrong with your cooker. Problem Check Nothing works Is the main cooker wall switch turned on? If the timer is not working it is likely that there is no electricity supply to your cooker. - Page 36 Is there Something Wrong with your Cooker? Cooking results not satisfactory? Problem Check Grilling Uneven cooking Ensure that the grill pan is positioned centrally below the grill front and back element. Fat splattering Ensure that the grill is not set too high. Baking General Uneven rising of Ensure that the oven shelves are level by using a spirit level on the...
-
Page 40: Service
Model Number ____________________________________________ Serial Number_____________________________________________ Date of Purchase __________________________________________ Also note your Postcode ___________________________________ In order to provide a complete service history for your Belling appliance, please ask the service engineer to record the appropriate details in the chart below. Authorised Stamp...
Need help?
Do you have a question about the Fusion 136 and is the answer not in the manual?
Questions and answers