Table of Contents
Advertisement
Quick Links
Advertisement
Table of Contents

Related Manuals for Rogue Audio Pharaoh


Summary of Contents for Rogue Audio Pharaoh
-
Page 1: Table Of Contents
TABLE OF CONTENTS 1) Introduction 2) Unpacking the Pharaoh integrated amplifier 3) Installing the Pharaoh___________ 4) Operation of the Pharaoh 5) Troubleshooting 6) Registration card 7) Fuse values 8) Specifications 9) Warranty... -
Page 2: Introduction
We at Rogue Audio are extremely proud of our products and want you to enjoy them to their fullest potential. So please, take the time to read through this short manual so that you can be confident that you have set up your amplifier properly. -
Page 3: Installing The Pharaoh
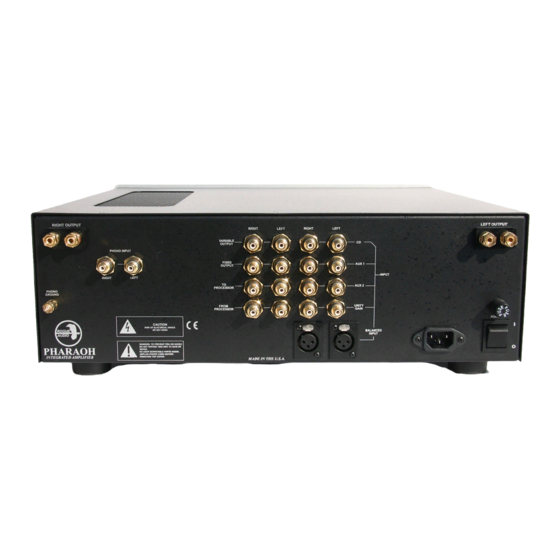
INSTALLING THE PHARAOH Amplifier Location: The Pharaoh runs exceptionally cool so it isn’t a problem to mount it in a rack or inside a cabinet as long as there is an inch or more clearance on the sides and top. - Page 4 This is to avoid creating a ground loop. Connecting a subwoofer to the Pharaoh: The Pharaoh has one pair of variable outputs that can be used to drive a subwoofer. The variable outputs are buffered in order to eliminate any interaction between the subwoofer circuitry and the Pharaoh.
-
Page 5: Operation Of The Pharaoh
Powering up the System - After all proper connections have been made, you are now ready to turn the Pharaoh on. The main power on/off switch is on the rear of the amp. This “vacation switch” can be left on at all times and keeps the solid state portion of the amplifier in a standby state. -
Page 6: Troubleshooting
(CD, phono, etc.. ) is operating and hooked up properly. Try a second source if possible. Turn off the standby switch on the rear of the Pharaoh, wait five minutes and turn the standby switch back on to reboot the electronics. -
Page 7: Fuse Values
FUSE VALUES Main fuse located on rear (1) – 5 Amp slow blow Power Supply Fuses on PCB (2) – 6 Amp slow blow SPECIFICATIONS output power 175WPC/8 ohms , 350WPC/4 ohms 5Hz – 20 kHz 1dB frequency response <... -
Page 8: Warranty
(hereinafter “Rogue Audio”) warrants this product against defects in material or workmanship as follows: With the exception of vacuum tubes, Rogue Audio warrants to the original purchaser of this product all parts of this product against defects in material and workmanship for a period of three years from the date of retail purchase.
Need help?
Do you have a question about the Pharaoh and is the answer not in the manual?
Questions and answers