Table of Contents
Advertisement
• Important operating
a n d m a i n t e n a n c e
instructions included.
1
Introduction
Table of Contents
A. Installation of PVV-SLP . . . . . . . . . . . . . . . . . . . . . . . . . . . 2
A. Installation of Vent Pipe . . . . . . . . . . . . . . . . . . . . . . . . . . . 3
B. Vent/Pipe Regulations . . . . . . . . . . . . . . . . . . . . . . . . . . . . 3
Requirements by Termination Type . . . . . . . . . . . . . . . . . . 5
D. Setting the PVV-SLP Flue Restictor . . . . . . . . . . . . . . . . . . 6
A. Framing and Clearances . . . . . . . . . . . . . . . . . . . . . . . . . . 7
B. Vent Termination Minimum Clearances . . . . . . . . . . . . . . . 7
C. Vent Cap Preparation. . . . . . . . . . . . . . . . . . . . . . . . . . . . . 9
D. PVV-SLEEVE Preparation . . . . . . . . . . . . . . . . . . . . . . . . 12
E. PVV-SLEEVE Installation . . . . . . . . . . . . . . . . . . . . . . . . . 13
Touch (IFT) Controls. . . . . . . . . . . . . . . . . . . . . . . . . . . . . 15
and IntelliFire™ Plus (IPI) Controls . . . . . . . . . . . . . . . . . 19
Control Module (IFT-ECM) . . . . . . . . . . . . . . . . . . . . . . . . 24
1
Hearth & Home Technologies • Vertical Power Vent (PVV-SLP) Instructions • 4071-900 Rev. C • 11/19
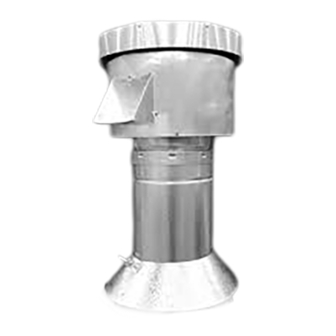
PVV-SLP
Power Vent Vertical
- Installation Instructions -
NOTICE
DO NOT DISCARD THIS MANUAL
• Read, understand and follow
these instructions for safe
installation and operation.
• Leave this manual with
party responsible for use
and operation.
A. Installation Inspection . . . . . . . . . . . . . . . . . . . . . . . . . . . . 25
B. Power Vent Operating Instructions. . . . . . . . . . . . . . . . . . 25
C. Maintenance . . . . . . . . . . . . . . . . . . . . . . . . . . . . . . . . . . 26
D. Replace Blower/Pressure Switch . . . . . . . . . . . . . . . . . . . 26
A. Components and Service Parts List . . . . . . . . . . . . . . . . . 29
Vent Troubleshooting . . . . . . . . . . . . . . . . . . . . . . . . . . . . 31
Installation of the PVV-SLP may be done by a qualified
service technician only. Installation MUST comply with
local, regional, state and national codes and regulations.
IMPORTANT:
Failure to read and follow these instruc-
tions may create a possible hazard and will void the fire-
place warranty.
These instructions must remain with the equipment.
CAUTION! Risk of Cuts or Abrasions. Wear protective
gloves and safety glasses during installation. Sheet metal
edges are sharp.
KIT COMPONENTS
• Vertical Power Vent
• Storm Collar
• Flue Restrictor
A minimum of one PVV-SLEEVE is required. Additional
sleeves may be needed based on installation. Order
separately.
Advertisement
Table of Contents

Related Manuals for Hearth & Home PVV-SLP


Summary of Contents for Hearth & Home PVV-SLP
-
Page 1: Table Of Contents
D. Replace Blower/Pressure Switch ....26 A. Installation of PVV-SLP ......2... -
Page 2: Introduction
For all appliances other than the premium linear models a PVLP-CK conversion kit is required. This kit includes all components to install NOTE: Wire Harness connecting PVV-SLP to appliance sold separately. The length of wire harness needed varies by in- the PVLP-SLP. -
Page 3: Vent Information And Diagrams
• Only outer pipes need to be sealed. All unit collar, pipe, slip section, elbow and cap outer flues shall be sealed in this manner, unless otherwise stated. Figure 2.1 Silicone Sealant Hearth & Home Technologies • Vertical Power Vent (PVV-SLP) Instructions • 4071-900 Rev. C • 11/19... - Page 4 B. Vent/Pipe Regulations (continued) WARNING! Risk of Fire! • A minimum length run of initial vent pipe is required between the appliance and the inlet of the PVV-SLP on some appliance models. • Some models require DVP Series pipe for the initial minimum vent section directly off the appliance.
-
Page 5: Venting Length - Model Categories And Length Requirements By Termination Type
ALL JADE42IN QUARTZ36I ODMEZG-36 ALL JADE 42IL QUARTZ42I PEARL36PRIN PEARL36STIN ALL ECHEL36IN ALL ECHEL36STIN ALL ECHEL48IN ALL ECHEL48STIN ALL ECHEL60IN ALL ECHEL72IN Table 2.2 Models Hearth & Home Technologies • Vertical Power Vent (PVV-SLP) Instructions • 4071-900 Rev. C • 11/19... -
Page 6: Setting The Pvv-Slp Flue Restictor
HOLES TO THE RIGHT 4 3 2 1 4 3 2 1 ALWAYS USED WITH THE FLUE RESTRICTOR SET TO 4-4 HOLES TO THE LEFT Figure 2.2 Hearth & Home Technologies • Vertical Power Vent (PVV-SLP) Instructions • 4071-900 Rev. C • 11/19... -
Page 7: Framing And Clearances
* H minimum may vary depending on regional snowfall. Refer to local codes. Figure 3.2 Minimum Height From Roof To Lowest Discharge Opening Against Pitch Hearth & Home Technologies • Vertical Power Vent (PVV-SLP) Instructions • 4071-900 Rev. C • 11/19... - Page 8 In a staggered installation with both gas and wood or fuel oil terminations, the wood or fuel oil termination cap must be higher than the gas termination cap. Figure 3.5 Staggered Termination Caps Hearth & Home Technologies • Vertical Power Vent (PVV-SLP) Instructions • 4071-900 Rev. C • 11/19...
-
Page 9: Vent Cap Preparation
See Figure 3.7. the 90° PVI wire harness fitting. See Figure 3.9. Figure 3.9 Sufficient Wire Extending Through Bracket Figure 3.7 Remove Shipping Support Foam Hearth & Home Technologies • Vertical Power Vent (PVV-SLP) Instructions • 4071-900 Rev. C • 11/19... - Page 10 7. Attach wire harness bracket to the bottom dish of the cap. See Figure 3.13. SEAL HERE Figure 3.11 Attach Starting Collar Figure 3.13 Attach Wire Harness Bracket to Bottom Dish Hearth & Home Technologies • Vertical Power Vent (PVV-SLP) Instructions • 4071-900 Rev. C • 11/19...
- Page 11 See Figure 3.14. Red or brown may be attached to either connector. RED & BROWN WIRES ATTACHED TO PRESSURE SWITCH GREEN GREEN& YELLOW BLACK BLACK BLACK WHITE Figure 3.15 Figure 3.14 Hearth & Home Technologies • Vertical Power Vent (PVV-SLP) Instructions • 4071-900 Rev. C • 11/19...
-
Page 12: Pvv-Sleeve Preparation
The PVV-SLP is now ready to install onto the SLP pipe. See Figure 3.17. Figure 3.18 Bolt and Nut Installed Figure 3.17 Hearth & Home Technologies • Vertical Power Vent (PVV-SLP) Instructions • 4071-900 Rev. C • 11/19... -
Page 13: Pvv-Sleeve Installation
See Figure 3.20. Figure 3.22. Figure 3.22 Attach PVV-SLEEVE to PVV-SLP Collar Figure 3.20 Storm Collar Resting on Flashing Hearth & Home Technologies • Vertical Power Vent (PVV-SLP) Instructions • 4071-900 Rev. C • 11/19... - Page 14 6. Using silicone sealant (300 °F minimum continuous exposure rating) seal the seams shown in Figure 3.24 SEAL HERE Figure 3.24 Figure 3.23 Secure Storm Collar in Position on Flashing Hearth & Home Technologies • Vertical Power Vent (PVV-SLP) Instructions • 4071-900 Rev. C • 11/19...
-
Page 15: Electrical Information
- DO NOT connect PVI-WH connector to IFT- ACM. - Disconnect 6V power to lock-out appliance. Failure to follow instructions could result in a fire or explosion. Hearth & Home Technologies • Vertical Power Vent (PVV-SLP) Instructions • 4071-900 Rev. C • 11/19... - Page 16 RED/BLK STEP 4 (OPTIONAL) 6V DC SPLITTER BATTERY PACK STEP 2 APPLIANCE ON/OFF CONTROL STEP 3 Figure 4.1 IFT-RC400 Wiring Diagram without Power Vent Hearth & Home Technologies • Vertical Power Vent (PVV-SLP) Instructions • 4071-900 Rev. C • 11/19...
- Page 17 WARNING! Risk of Shock! DO NOT touch male pins. Leave rubber cap on all ports unless port is being con- nected to a load. Hearth & Home Technologies • Vertical Power Vent (PVV-SLP) Instructions • 4071-900 Rev. C • 11/19...
- Page 18 See Figure 4.5. 15. Restore Power to the control module. 13. Plug connector plug on accessory cable into AUX port on IFT-ACM. See Figure 4.5. Hearth & Home Technologies • Vertical Power Vent (PVV-SLP) Instructions • 4071-900 Rev. C • 11/19...
-
Page 19: Wiring The Appliance For The Pvv-Slp With Intellifire™ And Intellifire™ Plus (Ipi) Controls
6V DC (AA X 4) THERMOSTAT WIRE ASSEMBLY / WALL SWITCH WIRE STEP 6 Figure 4.6 IntelliFire Plus™ (Black) IPI Module Wiring as Shipped from Factory Hearth & Home Technologies • Vertical Power Vent (PVV-SLP) Instructions • 4071-900 Rev. C • 11/19... - Page 20 WIRE HARNESS VALVE STEP 6 BROWN PVV-SLP ACCESSORY CABLE PVI WIRE HARNESS GROUND Figure 4.7 PVV-SLP Wiring for IntelliFire™ Plus RC100, RC200, RC300 Controls Hearth & Home Technologies • Vertical Power Vent (PVV-SLP) Instructions • 4071-900 Rev. C • 11/19...
- Page 21 ASSEMBLY VALVE TRANSFORMER 3 VAC STEP 2 STEP 6 REMOTE JUMPER WIRE PLUG-IN Figure 4.8 IntelliFire™ (Green) IPI Module Wiring as Shipped from Factory Hearth & Home Technologies • Vertical Power Vent (PVV-SLP) Instructions • 4071-900 Rev. C • 11/19...
- Page 22 WIRE HARNESS VALVE STEP 6 ORANGE BROWN (PILOT) PVV-SLP ACCESSORY CABLE PVI WIRE HARNESS GREEN GROUND (MAIN) Figure 4.9 PVV-SLP Wiring for Intellifire™ IPI Module Hearth & Home Technologies • Vertical Power Vent (PVV-SLP) Instructions • 4071-900 Rev. C • 11/19...
- Page 23 NOTE: Use threaded nut to secure accessory cable to GREEN GREEN & YELLOW power vent. BLACK BLACK WHITE BLACK Figure 4.10 Internal PVV Wiring Hearth & Home Technologies • Vertical Power Vent (PVV-SLP) Instructions • 4071-900 Rev. C • 11/19...
-
Page 24: Pairing Or Re-Pairing The Ift-Rc400 To The Electronic Control Module (Ift-Ecm)
Successful pairing will be indicated by a double beep from the IFT-ECM. 3. If the pairing is unsuccessful, repeat steps 1 & 2. Hearth & Home Technologies • Vertical Power Vent (PVV-SLP) Instructions • 4071-900 Rev. C • 11/19... -
Page 25: Operating Instructions
3. Turn the remote to "OFF" to turn off the burner. The power vent will continue to run for 20 minutes. Hearth & Home Technologies • Vertical Power Vent (PVV-SLP) Instructions • 4071-900 Rev. C • 11/19... -
Page 26: Maintenance
3. Remove the 2 wires from the pressure switch. See Figure 5.3. Figure 5.2 Remove Teflon Tubing Figure 5.3 Remove Wires from Pressure Switch Figure 5.1 Remove Top Cap Hearth & Home Technologies • Vertical Power Vent (PVV-SLP) Instructions • 4071-900 Rev. C • 11/19... - Page 27 Figure 5.4 Remove Screw and carefully lift it from the power vent. See Figure 5.7. Figure 5.5 Remove Teflon Tubing from Blower Figure 5.7 Remove Heat Shield Hearth & Home Technologies • Vertical Power Vent (PVV-SLP) Instructions • 4071-900 Rev. C • 11/19...
- Page 28 9. Slide the blower out of the blower extension and lift it out of the power vent housing See Figure 5.9. Figure 5.9 Remove Blower Assembly Hearth & Home Technologies • Vertical Power Vent (PVV-SLP) Instructions • 4071-900 Rev. C • 11/19...
-
Page 29: Reference Materials
Cable Bracket SRV4071-220 Gasket SRV4071-226 Bracket Assembly SRV4071-203 Cover Assembly SRV4071-234 Starting Collar Assembly SRV4071-235 Extension Assembly SRV4071-231 Heat Shield SRV4071-236 Heat Shield Fill SRV4071-237 Hearth & Home Technologies • Vertical Power Vent (PVV-SLP) Instructions • 4071-900 Rev. C • 11/19... -
Page 30: Ift-Controls And Pvv-Slp Power Vent Troubleshooting
2. Place ember material along the back side of the affected burner ports – that can reduce draft af- fect and promote ignition. Hearth & Home Technologies • Vertical Power Vent (PVV-SLP) Instructions • 4071-900 Rev. C • 11/19... -
Page 31: Intellifire™ Plus Controls And Pvv-Slp Power Vent Troubleshooting
For the location of your nearest Hearth & Home Technologies dealer, please visit www.hearthnhome.com. Hearth & Home Technologies 7571 215th Street West, Lakeville, MN 55044 www.hearthnhome.com Hearth & Home Technologies • Vertical Power Vent (PVV-SLP) Instructions • 4071-900 Rev. C • 11/19...
Need help?
Do you have a question about the PVV-SLP and is the answer not in the manual?
Questions and answers