
Subscribe to Our Youtube Channel
Related Manuals for Seeley BREEZAIR EXVQ


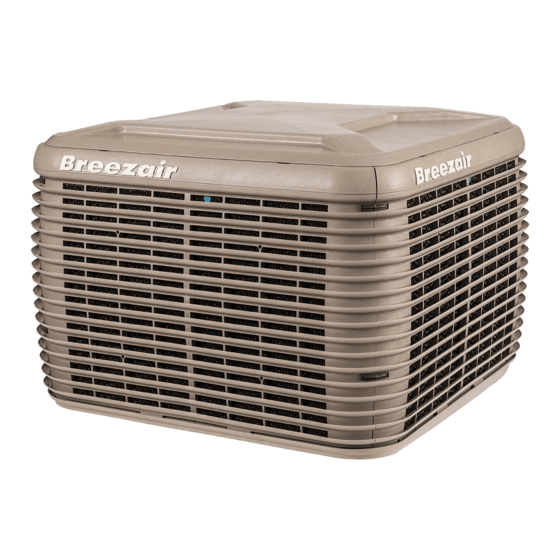
Summary of Contents for Seeley BREEZAIR EXVQ
- Page 1 INSTALLATION MANUAL EXVQ Evaporative Coolers (English) ILL1672-A Original English Instructions...
-
Page 2: Table Of Contents
TABLE OF CONTENTS IMPORTANT SAFETY INSTRUCTIONS Read and Save these Instructions for Future Reference Warnings Employer and Employee Responsibilities Installer and Maintenance Contractors - Risk Assessment Some Points to Consider Other Important Requirements QUICK GUIDE INSTALLATION Pack Out Kit Contents Cooler Location Access for Servicing and Maintenance Installing the Roof Jack... -
Page 3: Important Safety Instructions
Seeley International provides the following information as a • Are there any special conditions to consider i.e. excessive guide to contractors and employees to assist in minimising risk roof pitch, limited ground area, fragile roof, electrical power whilst working at height. -
Page 4: Quick Guide
QUICK GUIDE STEP 1 STEP 2 STEP 3 SAFETY COOLER LOCATION INSTALL ROOFJACK Read & understand the safety section. Check cooler location. Consider Install 24G metal roof jack and regulations. Discuss with customer. seal before mounting. page 1i page 4 page 5 ILL3363- STEP 9... - Page 5 Show customer how to operate the Clean up the site! checklist at the end of this document. cooler. Give them both the MagIQtouch Controller and cooler owner’s manual. Explain maintenance requirements. ILL3388-A page 15 page 15 page 15 BREEZAIR EXVQ EVAPORATIVE COOLER INSTALLATION MANUAL |...
-
Page 6: Installation
INSTALLATION PACK OUT KIT CONTENTS COOLER LOCATION Check the proposed cooler location to ensure it is structurally capable of supporting the weight of the cooler. If the roof is structurally inadequate, provide an alternate load bearing structure. The ideal location for the cooler is in a central position on the DRAIN VALVE roof (away from sleeping areas and where people spend most ASSEMBLY &... -
Page 7: Installing The Roof Jack
2 on the front. In exposed or high wind areas, seek advice from a structural engineer. Important! Screw length must be less than 1.5” (40mm) to avoid interfering with the weatherseal. ILL922-B BREEZAIR EXVQ EVAPORATIVE COOLER INSTALLATION MANUAL |... -
Page 8: Securing The Leg Supports
INSTALLATION SECURING THE LEG SUPPORTS WEATHERSEAL AND LATCH (Model dependant, refer to Dealer.) The telescopic leg supports (with feet attached) slide up and Where fitted, the Weatherseal latch performs two functions. down inside the four corner posts. By removing the screw from In the locked position it acts as a latch, preventing movement the lower end of the corner post you enable the leg support to during transport. -
Page 9: Electrical Requirements
Installation of the cooler must conform to local electrical rules, INSTALLING THE CONTROLLER CABLE regulations and standards. Important! It is a requirement of Seeley International that Seeley International recommends: all Breezair coolers be connected to a dedicated circuit to •... -
Page 10: Water Requirements
INSTALLATION INSTALLING THE CONTROLLER CABLE INSTALLING THE INLET SOLENOID Run the cable to the roof space and then to the controller via For coolers fitted with a drain and solenoid valve, it is a the mains power cable entry point and plug in to the rear of the requirement to fit the new detachable hose set as supplied. -
Page 11: Fitting The Solenoid Cover
Make sure that you use the correct drain adaptor. Make sure the drain water discharge flows freely away from the cooler. Important! Do not over-tighten plastic fittings. Connect the drain valve cable to the cooler electronics box. BREEZAIR EXVQ EVAPORATIVE COOLER INSTALLATION MANUAL |... -
Page 12: Motor Power (Amps)
INSTALLATION MOTOR POWER (AMPS) PULLEY ADJUSTMENT Important: Install all the pad frames except the one on the The motor pulley is adjustable in order to set the motor amperes motor side. at the correct (nameplate) level, and thus provide the owner with full machine cooling capacity. -
Page 13: Belt Tension
Continue to tighten until it runs cool. ILL3386-A A = Motor B = Deflection 5/8” - 13/16” (15-20mm) with moderate finger pressure C = Blower Housing D = Fan Pulley ILL3386-A E = Belt Tension Adjustment Bolts ILL034-J BREEZAIR EXVQ EVAPORATIVE COOLER INSTALLATION MANUAL |... -
Page 14: Commissioning
COMMISSIONING TEST OPERATION SALINITY LED The bottom LED is red only and displays salinity setting Check that the green light on the electronics module is on and information. double flashing every 2 seconds. This indicates that power is connected to the electronics module. Important! Ensure the flexible splash protection cover is put back in place. -
Page 15: Fault Codes
(Directional arrow can be found on the bottom of the solenoid valve body). • Debris interfering with water sensor probes. • Probes not clipped onto mounting brackets correctly. • Check cooler is level and water drains quickly. ILL1370-B BREEZAIR EXVQ EVAPORATIVE COOLER INSTALLATION MANUAL |... -
Page 16: Testing The Drain Valve
COMMISSIONING ADJUSTING COOLER SETTINGS It is advisable to check the water level again after the float valve washer has “bedded in”.Once the water level is correct, isolate the control box and connect the pump plug. Within the SETTINGS menu of the MagIQtouch Controller is the COOLER sub-heading. -
Page 17: Commissioning Completion Checklist
□ QUIET - Check that the cooler runs quietly and with an even distribution of air to all outlets. □ AIR BALANCE - The air balance for all outlets has been adjusted to the customer’s satisfaction. BREEZAIR EXVQ EVAPORATIVE COOLER INSTALLATION MANUAL |... -
Page 18: Trouble Shooting
COMMISSIONING TROUBLE SHOOTING Symptom Cause Action Inadequate cooling Under-sized cooler. Replace with larger cooler. Under-sized ducts. Carry out cooling load design to determine correct size unit, ducting and outlets required. Clogged or dirty cooling pads. Clean or replace pads. Dry pads or lack of water while cooler is operating. Check water distribution system for possible obstruction in hoses. - Page 20 6 WITTON ROAD, FOUNDERSVIEW SOUTH, MODDERFONTEIN 1609, GAUTENG, SOUTH AFRICA It is the policy of Seeley International to introduce continuous product improvement. Accordingly, specifications are subject to change without notice. Please consult with your dealer to confirm the specifications of the model selected.
Need help?
Do you have a question about the BREEZAIR EXVQ and is the answer not in the manual?
Questions and answers