
Related Manuals for Tally Dascom 1140


Summary of Contents for Tally Dascom 1140
- Page 1 Tally Dascom 1140 Mantenimiento Periféricos Informáticos SL C/Canteras, 15 28860 Paracuellos de Jarama Tel: 00 34 917481604 WEB: https://mpi.com.es...
- Page 2 Tally Dascom 1140 Mantenimiento Periféricos Informáticos SL C/Canteras, 15 28860 Paracuellos de Jarama Tel: 00 34 917481604 WEB: https://mpi.com.es...
- Page 3 Tally Dascom 1140 Important Safety Instructions (English) Read the following instructions thoroughly before starting up your printer. Never carry out maintenance or repair work yourself. Always contact a qualified service technician. Keep this Operator’s Manual in a place which is easily accessible at all times.
- Page 4 Tally Dascom 1140 Wichtige Sicherheitshinweise (German) Lesen Sie bitte diese Sicherheitshinweise durch, bevor sie den Drucker in Betrieb nehmen. Führen Sie Wartungsarbeiten und Reparaturen keinesfalls selbst aus, sondern verständigen Sie immer einen qualifizierten Servicetechniker. Bewahren Sie diese Dokumentation an einem jederzeit zugänglichen Ort auf.
- Page 5 Tally Dascom 1140 Consignes importantes de sécurité (French) Lire attentivement les instructions suivantes avant de mettre l’imprimante en service. Ne jamais effectuer soi-même les travaux d’entretien et de réparations. Contacter toujours un dépanneur qualifié. Placer l’imprimante sur un support stable de façon à ce qu’elle ne puisse pas tomber.
- Page 6 Tally Dascom 1140 Indicazioni di sicurezza importanti (Italian) Prima di mettere in funzione la stampante, leggere attentamente le seguenti indicazioni. Non eseguire mai da sé gli interventi di manutenzione e riparazione, ma rivolgersi sempre a un tecnico di assistenza qualificato.
- Page 7 Tally Dascom 1140 Instrucciones de seguridad importantes (Spanish) Lea las siguientes instrucciones con esmero antes de poner la impresora en servicio. Nunca lleve a cabo trabajos de mantenimiento o reparación Ud. mismo, sino consulte a un técnico de servicio calificado.
- Page 8 Tally Dascom 1140 Правила по технике безопасности. (Russian) Прочитайте, пожалуйста, инструкцию по технике безопасности перед включением в работу принтера. Не выполняйте технические работы и ремонт техники самостоятельно, но сообщайте о неисправностях квалифицированным сервисным техникам. Данная инструкция должна быть всегда доступна каждому пользователю.
- Page 9 Tally Dascom 1140 Instruções Importantes sobre Segurança (Portuguese) Leia as instruções de segurança antes de usar a impressora. Consulte sempre um técnico qualificado para executar uma reparação . Coloque a impressora sobre uma base sólida e nivelada, para que ela não sofra quedas.
- Page 10 Tally Dascom 1140 Önemli Güvenlik Talimatları (Turkish) Lütfen, yazıcıyı işletime geçirmeden önce bu güvenlik talimatlarını bütünüyle dikkatle okuyun. Bakım ve tamir çalışmalarını kesinlikle ve hiçbir surette kendi başınıza yapmayın; her zaman kalifiyebir uzman servis-teknisyenine haber verin. Yazıcıyı, üzerinden yere düşmesi mümkün olmayacak sabit ve düz bir zemine yerleştirin.
-
Page 11: Trademark Acknowledgements
Tally Dascom 1140 TRADEMARK ACKNOWLEDGEMENTS “IBM” is a trademark of International Business Machines Corporation. “EPSON” is a trademark of Epson America Incorporated. “DEC” is a trademark of Digital Equipment Corporation. “Centronics” is a trademark of Centronics Data Computer Corporation. “DOS” is a trademark of Microsoft Corporation. - Page 12 Tally Dascom 1140 Mantenimiento Periféricos Informáticos SL C/Canteras, 15 28860 Paracuellos de Jarama Tel: 00 34 917481604 WEB: https://mpi.com.es...
-
Page 13: Table Of Contents
Tally Dascom 1140 TABLE OF CONTENTS 1 Unpacking Guide ............................1 1.1 Unpacking the Printer ............................1 1.2 Placing the Printer ............................2 1.3 Printer Components ............................3 2 Setting Up Printer ............................4 2.1 Install Ribbon ..............................4 2.2 Install the Single Sheet Feeder ........................5 2.3 Connecting the Interface Cable ........................ - Page 14 Tally Dascom 1140 6.4 Customize Cut Sheet Left Margin ........................ 47 6.5 Customize Fanfold Page Formatting Parameters ..................48 7 Maintenance ............................. 49 7.1 Cleaning ................................49 7.2 Cleaning and Vacuuming the Printer ......................49 7.3 Cleaning the Paper Rollers ........................... 50 8 Troubleshooting ............................
- Page 15 Tally Dascom 1140 Symbols used Important information is highlighted in this manual by two symbols. CAUTION highlights information which must be observed in order to prevent injuries to user and damage to the printer. NOTE highlights general or additional information about a specific topic.
-
Page 16: Unpacking Guide
Tally Dascom 1140 1 Unpacking Guide 1.1 Unpacking the Printer 1. Place your packaged printer on a solid base. 2. Make sure that the “Up” symbols point in the correct direction. 3. Open the packaging, lift the printer out of the cardboard box and remove the remaining packaging material. -
Page 17: Placing The Printer
Tally Dascom 1140 2. Remove the shipping cardboard from around the print head. 3. Install the paper feed knob. Rotate the paper feed knob to make it fix with the latch. And then press it to lock. (Step ④ of above picture) 1.2 Placing the Printer... -
Page 18: Printer Components
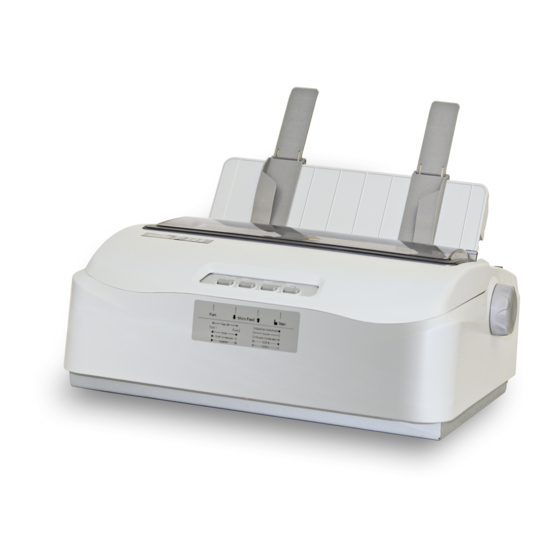
Tally Dascom 1140 1.3 Printer Components Component Function Gap Lever Adjusts the print gap lever according to the thickness of paper Paper Guides Adjusts positioning of single sheet paper Print Head 9-pin printing mechanism Cover Protects print head and other components inside, and reduce noise... -
Page 19: Setting Up Printer
Tally Dascom 1140 2 Setting Up Printer 2.1 Install Ribbon Take special caution: The print head may be hot! 1. Ensure the power to the printer is off and the print gap lever “A” is set to the furthest open position. Move the carriage to the center of the print platen. -
Page 20: Install The Single Sheet Feeder
Tally Dascom 1140 2.2 Install the Single Sheet Feeder Install the single sheet feeder into the rear of the printer. If you intend to use this paper way, assure having removed the fanfold paper out of the rear tractor paper way by pressing Eject way. -
Page 21: Connecting The Interface Cable
Tally Dascom 1140 2.3 Connecting the Interface Cable The USB port is located at the rear of the printer. IMPORTANT: Make sure the printer and the computer are switched off before connecting or disconnecting the interface cable to prevent electrical damage to the interface ports. -
Page 22: Connecting The Power Supply
Tally Dascom 1140 2.4 Connecting the Power Supply Checking the printer voltage Make sure that the device has been set according to your country’s power supply voltage. To do this, check the rating plate at the back of the printer. Contact your dealer if the setting is incorrect. -
Page 23: Installing The Windows Driver
Tally Dascom 1140 2.5 Installing the Windows Driver (Windows 2000 / XP / Vista / 7 / 8 / 8.1 and 2003 / 2008 / 2012 / 2012R2 Server) 1. Your printer CDROM comes with Windows drivers. Go to the Drivers folder and run the Installer “DriverSetup.exe”. - Page 24 Tally Dascom 1140 3. As shown in the picture on the right side, click “OK” to select automatical installation and click “Cancel” to select manual installation. If you have selected automatical installation in the third step, please refer to following three steps:...
- Page 25 Tally Dascom 1140 2) If automatical installation is selected and the printer is connected with USB cable and power on, the printer model will be detected automatically. As shown in picture on the right side, click “Next” to continue. 3) As shown in picture on right the side, USB port will be detected automatically.
- Page 26 Tally Dascom 1140 If you have selected manual installation in the third step, please refer to following two steps: 1) If manual installation is selected, picture on right side will appear after you click “Cancel”. Select the desired printer model and click “Next”...
- Page 27 Tally Dascom 1140 4. Here you can choose whether to set the driver as the system default driver, and whether you want to print the Test Page after installation is completed. Click “Next” to continue. 5. As shown in the picture on right side, click “Finish”.
- Page 28 Tally Dascom 1140 For XP system, the following situation may appear after you click “Finish” in above step: 1) If the driver is not yet Microsoft Certified, the message on the right would appear. Click “Continue Anyway”. (As we continue to...
-
Page 29: Paper Installation Guide
Tally Dascom 1140 3 Paper Installation Guide The printer can handle either single sheets or continuous forms. Single sheets, also called cut sheets, include envelopes and non-continuous, multipart forms. Continuous forms include labels and multipart forms fed into the printer using the forms tractors. The printer is able to print 1~5 plies multipart paper. -
Page 30: Tractor Feed Handling
Tally Dascom 1140 5. Adjust the right paper guide to the width of the paper used. 6. Insert a sheet of paper. Make sure that the bottom edge of the paper engages snugly with the platen. Please push the paper in manually if the paper does not feed in while the friction roller is running. -
Page 31: Continuous Paper Placement
Tally Dascom 1140 3.4 Continuous Paper Placement 1. Place the printer on a solid base. The minimum suitable height of the solid base is 75 cm. 2. Left and right positioning: The direction of continuous paper should be parallel with the paper guide. -
Page 32: Control Panel Operation
Tally Dascom 1140 4 Control Panel Operation Note: A black filled circle means LED off; A white circle means LED on. There are 4 switches S1~S4 and 4 LEDs L1~L4. The meaning and application of each switch and LED are described below: 4.1 LED Indicators... -
Page 33: Control Panel Keys
Tally Dascom 1140 4.2 Control Panel Keys “Tear Off” Key: When online, this key will move any loaded continuous paper to the tear-off position. When in setup state, this key is used to select the desired font. “LF/FF” Key: Pressing this key will feed paper one line forward. By holding down this key, the printer will initially feed a few lines, then perform a form feed (continuous paper mode) or eject the form (single sheet mode). -
Page 34: Panel Operation
Tally Dascom 1140 Table 4.3 Function Power/Paper Out Font1 Font2 Online 4.3 Panel Operation There are 3 states of operation: Online, Setup and Power On. In the Online state, the keys provide the following functions: Go to Tear Off position, Line Feed/Form Feed, Load/Eject, Clear Buffer and switch to offline state for accessing to Setup state. -
Page 35: Online State
Tally Dascom 1140 4.4 Online State Function Switch Function Description Name Operation This is valid for tractor mode only. It feeds the form to the tear-off position. After tearing off the form, L2, L3 flash Tear Off {S1} printing starts on the next TOF by pressing any key or receiving print data from the host. -
Page 36: Setup State
Tally Dascom 1140 4.5 Setup State Function Switch Function Description Name Operation Toggling to the Online state will cause the printer to go into a ready-to-print state. Any changes made in Online state {S4} Setup state will be saved permanently. Lighting up L4 indicates the Online state. - Page 37 Tally Dascom 1140 Function Switch Function Description Name Operation Beeps once to indicate going into hex dump mode: ● Prints data from host in hexadecimal representation. ● Pressing S4 suspends the printing. Hex Dump [S3] ● When the hex dump has finished, pressing S4...
-
Page 38: Printer Setting Changes
Tally Dascom 1140 5 Printer Setting Changes In order to meet specific print requirements, the printer configurations may be changed as follows: Hold down the Load/Eject key while powering on the printer and then release the key when the print head starts to move. The printer will enter Main Menu setup state. Follow the instructions printed on how to make setting changes. -
Page 39: Paper Setup
Tally Dascom 1140 System setup Valid Settings Function Defines the idle period before the printer gets into Save-energy Mode. OFF, 1min, 2min, 5min, Power-Saving 10min OFF: The printer never goes into Save-energy Mode. Normal: The print speed is faster causing head hot easily and the impact force is weaker. - Page 40 Tally Dascom 1140 Paper Setup Valid Settings Function Skips printing on perforation area. Only valid to fanfold. Skip No, Yes Yes: Blank lines between 2 pages. No: No blank lines between 2 pages. Auto: No incoming print data in 1~2 seconds after printing completed, the printer advances the form to the tear-off position.
-
Page 41: Interface Setup
Tally Dascom 1140 Paper Setup Valid Settings Function The pressure lever presses the paper against the print platen during printing, but it is released for paper loading. Invalid: If you uninstall the lever or want to disable the function, set this setting to “invalid”. -
Page 42: Character Setup
Tally Dascom 1140 5.4 Character Setup Character setup Valid Settings Function Italic, Graphic Italic: Selects standard character sets. Please refer to UG for details. Character Table Graphic: Selects IBM character sets. Please refer to UG for details. Group 1, Group 2... -
Page 43: Other Setup
Tally Dascom 1140 5.5 Other Setup Other setup Valid Settings Function No, Yes Form Length Ctrl No: Form length commands are invalid in neither of the emulation. Yes: Form length commands are valid in either of the emulations. Print Speed Ctrl... - Page 44 Tally Dascom 1140 Papier Setup Gültige Werte 2.5, 11/4, 3, 3.5, 11/3, 4, 5, 5.5, 6, 7, 8, 9, 10, 11, 12, 14, A4, B4, Einzel Länge Definiert 0, 1/6, 1/4, 1/3, 1/2, 2/3, 3/4, 1, Definiert Einzel Ob Rand...
-
Page 45: Russian (Россия)
Tally Dascom 1140 Erweitertes Setup Gültige Werte Formularlänge Strg Nein, Ja Geschwindigkeit Strg Nein, Ja Laufweite Strg Nein, Ja Nein, Ja Font Strg Uni-dir Strg Nein, Ja 5.5.2 Russian (Россия) обновление системы Правильные значения English, Deutsch, Poccия, Italiano, Français, Español, Türkçe, Яэык... - Page 46 Tally Dascom 1140 Настройка бумаги Правильные значения Отрыв бумаги Авто, ручной, короткий, Auto@FF Звук НET, Да черной метки Нет, Да Недопустимо, Cтандарт, Специально Мод. прижимн. скоба Настройка интерфейс Правильные значения НET, Да Нет, Да USB ID Настройка символов Правильные значения...
-
Page 47: Italian (Italiano)
Tally Dascom 1140 5.5.3 Italian (Italiano) Setup sistema Impostazioni Valide English, Deutsch, Poccия, Italiano, Français, Español, Türkçe, Linguaggio Português Emulazione ESC/P2, IBM 2380+ Auto CR (ESC/P2) No, Si No, Si Auto CR (IBM) Auto LF No, Si Direz. Stampa Bi-Dir, Uni-Dir Zero 0, Ø... -
Page 48: French (Français)
Tally Dascom 1140 Imposta caratteri Impostazioni Valide Italico, Grafica Tabella Caratteri Groupo 1, Groupo 2 Gruppo Carattere USA, Francia, Germania, Regno Unito, Danimarca I, Svezia, Set Carat. Int. Italia, Spagna I, Giappone, Norvegia, Danimarca II, Spagna II, Sudamerica, Danimarca/Norvegia, Porcellana... - Page 49 Tally Dascom 1140 Réglage papier Paramètres Valides 2.5, 11/4, 3, 3.5, 11/3, 4, 5, 5.5, 6, 7, 8, 9, 10, 11, 12, 14, A4, B4, Feuille LongPage Définie Bord Sup. Feuille 0, 1/6, 1/4, 1/3, 1/2, 2/3, 3/4, 1, Définie 0, 1/6, 1/4, 1/3, 1/2, 2/3, 3/4, 1, Définie...
-
Page 50: Spanish (Español)
Tally Dascom 1140 Autre réglage Paramètres Valides Ctrl LongPage Non, Oui Non, Oui Ctrl Vitesse Impr. Ctrl Espacement Non, Oui Ctrl Fonte Non, Oui Ctrl Impr. Uni-Dir Non, Oui 5.5.5 Spanish (Español) Config. Sistema Ajustes validos Lenguage English, Deutsch, Poccия, Italiano, Français, Español, Türkçe, Português... - Page 51 Tally Dascom 1140 Config. Papel Ajustes validos Modo Marca Negra No, Si Modo de barra de Inválido, Estándar, Especial presión Conf. Interface Ajustes validos No, Si ID USB No, Si Config. Carácter Ajustes validos Tabla de Caracteres Italic, Grafica Grupo 1, Grupo 2...
-
Page 52: Turkish (Türkce)
Tally Dascom 1140 5.5.6 Turkish (Türkce) Sistem Ayarı Geçerli ölçüler English, Deutsch, Poccия, Italiano, Français, Español, Lisan Türkçe, Português Emülation ESC/P2, IBM 2380+ Otom. Satırbaşı Hayır, Evet (ESC/P2) Hayır, Evet Otom. Satırbaşı (IBM) Otom. Satır besleme Hayır, Evet Yazdırma yön ü... -
Page 53: Portuguese (Português)
Tally Dascom 1140 Karakter ayarı Geçerli ölçüler Karakter tablosu ÿ t alik , Grafik Karakter Grubu Grup 1, Grup 2 Amerika, Fransa, Almanya, İngiltere, Danimarka I, İsveç, İtalya, Karakter setleri İspanya, Japonya, Norveç, Danimarka II, İspanya II, Ltn Amerika, Danimarka, Çin Draft, DraftCond, Quadrato, QuadratoCond, Courier, Yazı... - Page 54 Tally Dascom 1140 Config. Papel Valores válidos 2.5, 11/4, 3, 3.5, 11/3, 4, 5, 5.5, 6, 7, 8, 9, 10, 11, 12, 14, A4, B4, Tam. Folha Solta Definido Margem Topo Folha 0, 1/6, 1/4, 1/3, 1/2, 2/3, 3/4, 1, Definido Margem Inf.
- Page 55 Tally Dascom 1140 Config. Outros Valores válidos Cmd. Tam. de Folha Não, Sim Não, Sim Cmd. Vel. Impresso Cmd. Passo Não, Sim Cmd. Fonte Não, Sim Cmd. Imp. Uni-dir Não, Sim Mantenimiento Periféricos Informáticos SL C/Canteras, 15 28860 Paracuellos de Jarama Tel: 00 34 917481604 WEB: https://mpi.com.es...
-
Page 56: Black Mark Parameters
Tally Dascom 1140 5.6 Black Mark Parameters This printer uses tractors to load fanfold forms with pre-printed black marks. The printer requires 3 parameters to print on paper with black marks: 1. Horizontal offset of black mark from the edge of page (called Black Mark Physical Horizontal Position);... - Page 57 Tally Dascom 1140 position. Then press the Load/Eject key to load the 5. Ensure to place the lever at black marked form. The top edge of the form will then align with the printer’s tear-off blade. Press Next or Back until you see the black mark marginally exposed out of the tear-off blade.
-
Page 58: Bidirectional Alignment
Tally Dascom 1140 8. When you respond with OK to set the tear-off position, the printer prompts you to reload a black marked fanfold form: Press any key to eject the paper, and load paper with black mark in the Fanfold Path. -
Page 59: Restore Factory Default
Tally Dascom 1140 5. Repeat the adjustment till two grid lines align satisfactory as “|”. Press “OK” again. The printer asks if you want to save the correction: Save the parameter settings ([LOAD/EJECT] or [ONLINE] = OK, [LF] = Next)? At this stage, you have the options to save or give up the correction by pressing OK or Next, respectively. -
Page 60: Customized Form
Tally Dascom 1140 6 Customized Form This printer allows the customization on the form length, TOF, bottom margin and left margin for single sheets and fanfold. Restore Factory Defaults can recover these default values. Selecting the Define value(s) in section 5.2 (Paper Setup menu) allows the printer to take up the customized page formatting value(s). - Page 61 Tally Dascom 1140 3. You may skip to other customized settings by pressing “Next” or “Back”. Once you press “OK” to continue with form length measurement, the printer prompts: 1.Press any key to clear the Setup Instructions Page from the printer. Insert the Customized Page into the corresponding paper path.
-
Page 62: Customize Cut Sheet Tof
Tally Dascom 1140 5. At this stage: If Load/Eject is pressed, an asterisk “*” is appended to “Yes” and you should repeat the procedures for form length measurement as mentioned. Or, If you input “Exit”, the printer saves the measurement value and proceeds with the next customized setting. -
Page 63: Customize Fanfold Page Formatting Parameters
Tally Dascom 1140 6.5 Customize Fanfold Page Formatting Parameters The customizations of the form length, TOF, bottom and left margins for fanfold are exactly the same as describe. All you need is to bypass the Single Sheet menu under Customize Form. -
Page 64: Maintenance
Tally Dascom 1140 7 Maintenance Your printer requires very little care. Occasional cleaning and replacement of the ribbon cartridge are all that is required. Cleaning is recommended approximately every 6 months or 300 hours of operation, whichever is sooner. Lubrication of the printer is not usually necessary. -
Page 65: Cleaning The Paper Rollers
Tally Dascom 1140 7.3 Cleaning the Paper Rollers Clean the platen and paper bail rollers occasionally or when stains or smudges appear on the paper. Use a mild detergent as appropriate. Do not use alcohol to clean the platen or the rollers. -
Page 66: Troubleshooting
Tally Dascom 1140 8 Troubleshooting Your printer is extremely reliable, but occasionally problems may occur. This chapter provides information on some of the common problems you may encounter and how you may solve them. If you encounter problems that you cannot resolve, contact your dealer or service partner for assistance. -
Page 67: Paper Handling Problems And Solutions
Tally Dascom 1140 Problem Solution The next print line starts Change the Auto CR setting in the System Setup menu where the previous line ended to Yes. instead of at the left margin. 8.2 Paper Handling Problems and Solutions... -
Page 68: Operating Problems And Solutions
Tally Dascom 1140 8.3 Operating Problems and Solutions Problem Solution Check whether the mains voltage is correct. Make sure that the power cord is securely connected to both the printer and the mains power outlet. The power does not turn Make sure that the power outlet is functional. -
Page 69: Error Indications On Leds
Tally Dascom 1140 8.5 Error Indications on LEDs Online Error Description Power LED Font1 LED Font2 LED Buzzer Sound Print head too hot Flashing No change No change Flashing None Paper path Flashing No change No change Flashing Continuous switching problem... -
Page 70: Firmware Update
Tally Dascom 1140 8.7 Firmware Update Sometimes it is necessary to update the firmware to solve a problem. The latest firmware file may be obtained from your dealer or downloaded from our website www.dascom.com. Before updating firmware, it is strongly recommended to print the Main Menu page to keep a record of the old settings. - Page 71 Tally Dascom 1140 4. Enter download process and it is shown as below picture. In this process, L1 and L2 are on; And L3 and L4 are blinking. 5. When download is completed, the carriage returns to home position. Printer initializes normally.
-
Page 72: General Specifications
Tally Dascom 1140 9 General Specifications Print System Mono-chrome serial impact dot matrix Print Technology Uni-/bi-directional logic seeking for text and graphics Draft HS Draft(CPS/DPI) Pitch 300/120H 400/90H 10 CPI 75/240H 360/120H 360/120H 12 CPI 90/240H Print Speed 300/180H 300/180H... - Page 73 Tally Dascom 1140 CP 437, CP 737, CP 850, CP 851, CP 852, CP 857, CP 858, CP 860, CP 861, CP 863, CP 1252, CP 1253, CP 1254, 8859-1, 8859-1 (SAP), Code Pages 8859-2, 8859-5, 8859-7, 8859-9, 8859-15, Kamenicky , Mazovia,...
- Page 74 Tally Dascom 1140 Temperature Operating : +5 to +35 ° C Ambient Stand-by : -20 to + 55° C Conditions Humidity Operating : 10 to 80% RH ( No condensation) Stand-by : 5 to 85% RH Dimensions 369 mm (width) × 283.3 mm (depth) × 130 mm (height) Weight approx.
-
Page 75: Interfaces
Tally Dascom 1140 10 Interfaces 10.1 Parallel Interface Parallel Interface Pin Assignment Signal Name Signal Transmission STROBE ¯ ¯¯ ¯ ¯¯ Printer Computer DATA Printer Computer ¯ ¯¯ Printer Computer BUSY Printer Computer Printer Computer SELECT Printer ... -
Page 76: Usb Interface
Tally Dascom 1140 10.2 USB Interface The USB interface conforms to the Universal Serial Bus 2.0 Specifications. It supports the Full Speed mode at 12 Mbps. It uses the “B” type USB connector. 10.3 Serial interface Serial interface pin assignment... - Page 77 Tally Dascom 1140 Note: 1. The serial cable length should not exceed 15 meters. 2. Make sure the “Interface Setup” selects serial interface and the settings are the same as PC communication port settings. Shown as below: Mantenimiento Periféricos Informáticos SL C/Canteras, 15 28860 Paracuellos de Jarama Tel: 00 34 917481604 WEB: https://mpi.com.es...
-
Page 78: Character Sets & Code
Tally Dascom 1140 11 Character sets & Code Pages 11.1 Character Sets Standard character set 1 Standard character set 2 Mantenimiento Periféricos Informáticos SL C/Canteras, 15 28860 Paracuellos de Jarama Tel: 00 34 917481604 WEB: https://mpi.com.es... - Page 79 Tally Dascom 1140 IBM character set 1 IBM character set 2 Mantenimiento Periféricos Informáticos SL C/Canteras, 15 28860 Paracuellos de Jarama Tel: 00 34 917481604 WEB: https://mpi.com.es...
- Page 80 Tally Dascom 1140 OCR-A character set 1 OCR-A character set 2 Mantenimiento Periféricos Informáticos SL C/Canteras, 15 28860 Paracuellos de Jarama Tel: 00 34 917481604 WEB: https://mpi.com.es...
- Page 81 Tally Dascom 1140 OCR-B character set 1 OCR-B character set 2 Mantenimiento Periféricos Informáticos SL C/Canteras, 15 28860 Paracuellos de Jarama Tel: 00 34 917481604 WEB: https://mpi.com.es...
- Page 82 Tally Dascom 1140 International Character Set Commands Country Basic Command <ESC>“R”CHR$(0) FRANCE <ESC>“R”CHR$(1) GERMANY <ESC>“R”CHR$(2) <ESC>“R”CHR$(3) DENMARK 1 <ESC>“R”CHR$(4) SWEDEN <ESC>“R”CHR$(5) ITALY <ESC>“R”CHR$(6) SPAIN 1 <ESC>“R”CHR$(7) JAPAN <ESC>“R”CHR$(8) NORWAY <ESC>“R”CHR$(9) DENMARK 2 <ESC>“R”CHR$(10) SPAIN 2 <ESC>“R”CHR$(11) LATINAMERICA <ESC>“R”CHR$(12) DENMARK/NORWAY <ESC>“R”CHR$(13) CHINA <ESC>“R”CHR$(16)
-
Page 83: Code
Tally Dascom 1140 11.2 Code Page Commands Code Page ESC R Parameter CP 437 CP 737 CP 850 CP 851 CP 852 CP 857 CP 858 CP 860 CP 861 CP 863 CP 1252 CP 1253 CP 1254 8859-1 8859-1 (SAP) -
Page 84: Code
Tally Dascom 1140 11.3 Code Page Tables CP 437 CP 737 Mantenimiento Periféricos Informáticos SL C/Canteras, 15 28860 Paracuellos de Jarama Tel: 00 34 917481604 WEB: https://mpi.com.es... - Page 85 Tally Dascom 1140 CP 850 CP 851 Mantenimiento Periféricos Informáticos SL C/Canteras, 15 28860 Paracuellos de Jarama Tel: 00 34 917481604 WEB: https://mpi.com.es...
- Page 86 Tally Dascom 1140 CP 852 CP 857 Mantenimiento Periféricos Informáticos SL C/Canteras, 15 28860 Paracuellos de Jarama Tel: 00 34 917481604 WEB: https://mpi.com.es...
- Page 87 Tally Dascom 1140 CP 858 CP 860 Mantenimiento Periféricos Informáticos SL C/Canteras, 15 28860 Paracuellos de Jarama Tel: 00 34 917481604 WEB: https://mpi.com.es...
- Page 88 Tally Dascom 1140 CP 861 CP 863 Mantenimiento Periféricos Informáticos SL C/Canteras, 15 28860 Paracuellos de Jarama Tel: 00 34 917481604 WEB: https://mpi.com.es...
- Page 89 Tally Dascom 1140 CP 1252 CP 1253 Mantenimiento Periféricos Informáticos SL C/Canteras, 15 28860 Paracuellos de Jarama Tel: 00 34 917481604 WEB: https://mpi.com.es...
- Page 90 Tally Dascom 1140 CP 1254 8859-1 Mantenimiento Periféricos Informáticos SL C/Canteras, 15 28860 Paracuellos de Jarama Tel: 00 34 917481604 WEB: https://mpi.com.es...
- Page 91 Tally Dascom 1140 8859-1 (SAP) 8859-2 Mantenimiento Periféricos Informáticos SL C/Canteras, 15 28860 Paracuellos de Jarama Tel: 00 34 917481604 WEB: https://mpi.com.es...
- Page 92 Tally Dascom 1140 8859-5 8859-7 Mantenimiento Periféricos Informáticos SL C/Canteras, 15 28860 Paracuellos de Jarama Tel: 00 34 917481604 WEB: https://mpi.com.es...
- Page 93 Tally Dascom 1140 8859-9 8859-15 Mantenimiento Periféricos Informáticos SL C/Canteras, 15 28860 Paracuellos de Jarama Tel: 00 34 917481604 WEB: https://mpi.com.es...
- Page 94 Tally Dascom 1140 Kamenicky Mazovia Mantenimiento Periféricos Informáticos SL C/Canteras, 15 28860 Paracuellos de Jarama Tel: 00 34 917481604 WEB: https://mpi.com.es...
- Page 95 Tally Dascom 1140 866 Bulgaria CP 1250 Mantenimiento Periféricos Informáticos SL C/Canteras, 15 28860 Paracuellos de Jarama Tel: 00 34 917481604 WEB: https://mpi.com.es...
- Page 96 Tally Dascom 1140 CP 1251 BRASCII Mantenimiento Periféricos Informáticos SL C/Canteras, 15 28860 Paracuellos de Jarama Tel: 00 34 917481604 WEB: https://mpi.com.es...
- Page 97 Tally Dascom 1140 Abicomp CP 865 Mantenimiento Periféricos Informáticos SL C/Canteras, 15 28860 Paracuellos de Jarama Tel: 00 34 917481604 WEB: https://mpi.com.es...
- Page 98 Tally Dascom 1140 CP 866 CRO-ASCII Mantenimiento Periféricos Informáticos SL C/Canteras, 15 28860 Paracuellos de Jarama Tel: 00 34 917481604 WEB: https://mpi.com.es...
-
Page 99: Control Codes Summary
Tally Dascom 1140 12 Control Codes Summary 12.1 ESC/P2 Emulation Command List Command Function Beeper Backspace Horizontal Tab Line Feed Vertical Tab Form Feed Carriage Return Double-Wide Printing 1 Line Select Condensed Mode Cancel Condensed Mode Cancel Double-Wide Printing 1 Line... - Page 100 Tally Dascom 1140 Command Function ESC : Copy ROM to RAM ESC < Select Unidirectional Mode 1 Line ESC = Set MSB to 0 ESC > Set MSB to 1 ESC ? Reassign Graphics Mode ESC @ Initialize Printer ESC A Set n/60”...
-
Page 101: Ibm Emulation Command List
Tally Dascom 1140 12.2 IBM Emulation Command List Command Function Backspace Horizontal tab Carriage return ESC BS Backspace ESC HT Horizontal tab ESC CR Carriage return ESC D Set horizontal tabs ESC X Set horizontal margins ESC d Relative mode inline forward... - Page 102 Tally Dascom 1140 Command Function ESC H Cancel double strike mode ESC I Set print mode ESC P Proportional space mode ESC S Start subscript or superscript printing ESC T Cancel subscript or superscript printing ESC W Continuous double-wide printing...
- Page 103 Tally Dascom 1140 Mantenimiento Periféricos Informáticos SL C/Canteras, 15 28860 Paracuellos de Jarama Tel: 00 34 917481604 WEB: https://mpi.com.es...
-
Page 104: Fcc Statement
Tally Dascom 1140 FCC STATEMENT Changes or modifications not expressly approved by the responsible for compliance could void the user’s authority to operate the equipment. NOTE: This equipment has been tested and found to comply with the limits for a class B digital device, pursuant to Part 15 of the FCC Rules. - Page 105 Tally Dascom 1140 Mantenimiento Periféricos Informáticos SL C/Canteras, 15 28860 Paracuellos de Jarama Tel: 00 34 917481604 WEB: https://mpi.com.es...
- Page 106 Tally Dascom 1140 Mantenimiento Periféricos Informáticos SL C/Canteras, 15 28860 Paracuellos de Jarama Tel: 00 34 917481604 WEB: https://mpi.com.es...
- Page 107 Tally Dascom 1140 DASCOM REPRESENTATIVES GERMANY UNITED KINGDOM DASCOM Europe GmbH DASCOM GB Ltd Heuweg 3 Hart House,Priestley Road, D-89079 Ulm Basingstoke, Hampshire Deutschland RG24 9PU, England T el.: +49 (0) 731 2075 0 Phone: +44 (0) 1256 355130 Fax: +49 (0) 731 2075 100 Fax: +44 (0) 1256 481400 www.dascom.com...
Need help?
Do you have a question about the 1140 and is the answer not in the manual?
Questions and answers