Table of Contents
Advertisement
Advertisement
Table of Contents

Related Manuals for Tally Dascom DP-230L


Summary of Contents for Tally Dascom DP-230L
- Page 1 DP-230L Thermal Printer...
- Page 2 This device fulfills the European standards requirements by complying with the Directive relating to electromagnetic compatibility and relating to low-voltage electrical equipment. Furthermore it fulfills the requirements for RoHS and R&TTE if applicable. Conformity with the above mentioned Directives is indicated by the CE symbol attached to the device.
- Page 3 Dieses Gerät erfüllt die Anforderungen der Europäischen Normen durch Einhaltung der Richtlinien bezüglich der Elektromagnetischen Verträglichkeit sowie bezüglich Elektrischer Betriebsmittel mit Niederspannung. Des Weiteren werden die Anforderungen bezüglich RoHS und falls anwendbar R&TTE erfüllt. Die Konformität zu den oben angeführten Richtlinien ist durch das am Gerät angebrachte CE-Zeichen gekennzeichnet.
- Page 4 FCC Part 15 Class B 1. This device complies with Part 15 of the FCC Rules. Operation is subject to the following two conditions: 1) This device may not cause harmful interference. 2) This device must accept any interference received, including interference that may cause undesired operation.
- Page 5 However, there is no guarantee that interference will not occur in a particular installation. If this equipment does cause harmful interference to radio or television reception, which can be determined by turning the equipment off and on, the user is encouraged to try to correct the interference by one or more of the following measures: Re-orientate or relocate the receiving antenna.
- Page 6 Canadian Department of Communications Radio Interference Statement This device complies with Industry Canada license‐exempt RSS standard(s). Operation is subject to the following two conditions: 1) this device may not cause interference; 2) this device must accept any interference, including interference that may cause undesired operation of the device. Under Industry Canada regulations, this radio transmitter may only operate using an antenna of a type and maximum (or lesser) gain approved for the transmitter by Industry Canada. To reduce potential radio interference to other users, the antenna type and its gain should be so chosen that the equivalent isotropically radiated ...
- Page 7 brouillage, et (2) l'utilisateur de l'appareil doit accepter tout brouillage radioélectrique subi, même si le brouillage est susceptible d'en compromettre le fonctionnement. Conformément à la réglementation d'Industrie Canada, le présent émetteur radio peut fonctionner avec une antenne d'un type et d'un gain maximal (ou inférieur) approuvé pour l'émetteur par Industrie Canada. Dans le but de réduire les risques de brouillage radioélectrique à l'intention des autres utilisateurs, il faut choisir le type d'antenne et son gain de sorte que la puissance isotrope rayonnée équivalente (p.i.r.e.) ne dépasse pas l'intensité nécessaire à l'établissement d'une communication satisfaisante. La puissance de 2 sortie maximale plus gain d'antenne maximal du EUT est : 4.5W/m Limite est 10W/m Battery Disposal...
- Page 8 Only disposes of used batteries according instructions and/or your local regulations. Acknowledgments: DASCOM is a registered trademark of DASCOM Europe GmbH Bluetooth is a registered trademark of Bluetooth SIG, Inc. Zebra, CPCL and ZPL are registered trademarks of Zebra Technologies Wi-Fi is a registered trademark of the Wi-Fi Alliance Windows is a registered trademark of Microsoft Corporation All other trademarks are the property of their respective owners.
- Page 9 Read all set up and operating instructions before proceeding with operation. Do not operate in an enclosure unless properly ventilated. Do not operate near a heat source. Lesen Sie vor der Inbetriebnahme die Aufbau- und Bedienungsanleitung Betreiben Sie den Drucker nicht in einem kleinen, geschlossenen Raum, es sei denn dieser wird ordnungsgemäß...
- Page 10 cool before touching them. Make certain the printer is disconnected from AC power before removing any covers or performing any required cleaning or maintenance. Connecting this printer to an ungrounded receptacle can result in electrical shock. Never place the printer near inflammable or explosive substances.
- Page 11 ist, bevor Sie Abdeckungen abnehmen oder das Gerät reinigen bzw. warten. Schließen Sie diesen Drucker nicht an eine ungeerdete Steckdose an; dies kann zum Elektroschock führen. Setzen Sie den Drucker niemals in die Nähe von feuer- oder explosionsgefährlichen Stoffen. Betreiben Sie den Drucker nicht in der Nähe von Flüssigkeiten und lassen Sie keine Flüssigkeiten in den Drucker gelangen.
-
Page 12: Table Of Contents
Content 4.3 Paper feeding ........ 8 Ⅰ.Packaging list ........ 1 4.4 Control panel ........ 8 .Printer parts list Ⅱ ........ 2 4.5 Hexadecimal ....... 10 .Preparation before using Ⅲ .... 3 4.6 Self-test ........ 11 3.1 Battery installation(disassembly) 4.7 Self-test page ...... 12 ... - Page 13 Ⅵ ommunication ...... 2 5 7.2 Use and storage of printing paper28 6.1 USB .......... 2 5 .Troubleshooting Ⅷ ...... 29 6.2 Bluetooth ........ 2 6 Ⅸ .Appendix ......... 32 Ⅶ .Maintenance 9.1 Parameters ........ 32 ......... 2 7 7.1 Daily maintenance of printers .. 2 7 9.2DASCOM representative .... 35 ...
-
Page 15: Ⅰ.packaging List
Packaging list Ⅰ. Standard accessories Type-C power Printer(1 pcs) Battery(1 pcs) cord(1pcs) - Page 17 Power adapter(1pcs) Test paper roll(1 pcs) User guide(1pcs)...
-
Page 18: Ⅱ .Printer Parts List
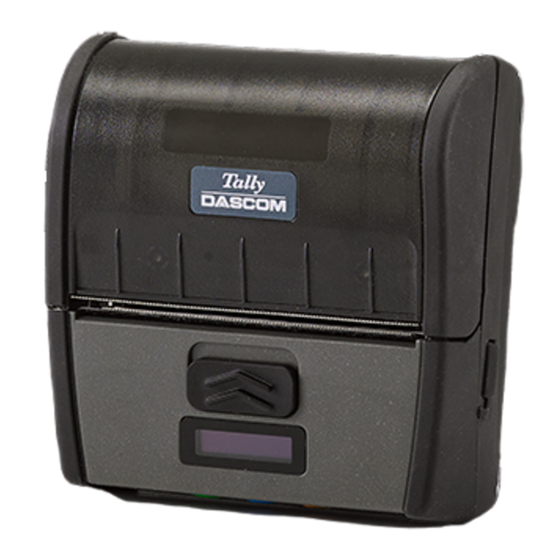
.Printer parts list Ⅱ Front view Rear view paper door display screen open button battery clip control panel battery charging port/USB lower case port... -
Page 19: Ⅲ .Preparation Before Using
.Preparation before using Ⅲ 3.1 Battery installation(disassembly) Install the battery before shipping out the printer. The first use of the battery needs to be fully charged. After long-term storage, battery also need to be fully charged before using, so that the battery can achieve the best use performance. -
Page 20: Media
3.2 Media Before printing,please check the media type for printing.Our printer print labels by default,if you want to print continuous paper,please contact your sales or manufacturer. Please pay attention to the direction of the paper roll. If paper roll is in the wrong direction, it will result in a failure to print. - Page 21 Install the paper roll. Please note to the direction of the paper. This is a wrong case.
-
Page 22: Charging The Battery
3.3 Charging the battery Check the power adapter voltage before connecting the power adapter. If the voltage you use does not match the device, it will damage the adapter and printer.If you use a power adapter that is not provided or approved by our company, the printer may be damaged. Connect adapter to Type-C power cable ,then connect adapter to socket ,finally connect ①... -
Page 23: Quick Start Instructions
The printer power is divided into 4 levels for display: Empty:less than 15% 1level:15%~40% 2levels:40%~70% 3levels:70%~100% (3) Do not remove battery during charging。 Ⅳ .Quick Start Instructions 4.1 Power on When the printer is turned off, you can press for 2seconds to turn on the printer. 4.2 Power off When the printer is turned on, you can press for 2seconds to turn off the printer. -
Page 24: Paper Feeding
4.3 Paper feeding When printing continuous paper, you press ,printer will perform a line feed. When printing black mark paper or labels, you press ,printer will perform a form feed.If you press the button for 3 seconds, printer will print the self test page. If you press the and power on the printer at the same time, printer will enter the download mode. - Page 25 Printer status definition Status Display Buzzer Buffer has data. Working Buffer is empty. Print Ready Cover opens Head Up Buzz/2s Paper run out Paper Out Buzz/2s Abnormal label Calibrate Error No label gap detected Out Tear Error Print head overheats Head Hot Energy saving mode Zzz...
-
Page 26: Hexadecimal
4.5 Hexadecimal The ways to enter hexadecimal are as follows: In the boot state, press power key twice quickly,the printer which has paper will print [hexadecimal mode], which indicates that it has entered hexadecimal mode. Restart the printer can exit hexadecimal mode. -
Page 27: Self-Test
4.6 Self-test Before connecting the printer to the computer, you have to ensure that the printer can work properly. You can print a self-test page to confirm it. Ensure that the paper is properly installed and the cover of paper case is closed. You power on the printer and press the feed button for 3 seconds,it will print the self-test page. -
Page 28: Self-Test Page
4.7 Self-test page... - Page 29 Production information Printing config information Character printing...
-
Page 30: Ⅴ .Configuration
Ⅴ .Configuration 5.1 Install Config Tool ① Click to install“ Tally Dascom Printer ② Click Next: Config Tool 1.0.02.exe", and the Select installation path. - Page 31 Click Next: Click Next, then click Install: ③ ④...
- Page 32 After progress bar is full, you can see the following interface ,click the "Finish" to complete ⑤ the installation.
-
Page 33: Configuration Setup
5.2 Configuration Setup (1)Open the “ Tally Dascom Printer Config Tool 1.0.02.exe". (2)Click “Connect configuration”, drop-down and choose current connection port in the upper-right corner,and set up the relevant interface parameters. - Page 34 (3)Click “Connect”,interface will shown as below, left red box displays the current printer information. Click the“ Setting”button to make changes to the printer configuration. (4) Click “setting”,you can change the configurations as follow.
- Page 35 Click on the item you want to modify, select the parameter value, and then click the Save button to complete the settings. Setting items Descriptions Printing speed The max. printing speed is 3inch/second. If printer has no print job and no communication with other Energy-saving mode devices, it will enter the energy-saving mode.
- Page 36 Black mark Black marks: valid / invalid Continuous paper:Continuous paper Label/Black mark Paper type paper:label paper and black mark paper The distance between the upper edge of the paper and the Top margin upper edge of the first line of printing content. Left margin Set the left border distance of the paper.
-
Page 37: Reset Factory Settings
5.3 Reset Factory Settings After online connection, you can click the the "reset" button on the lower left side of settings page, you will see the pop-up confirmation dialog box, click OK to reset factory settings. -
Page 38: Software Upgrade
5.4 Software upgrade ① In standby, connect printer to the computer with a USB cable.Open the“Tally Dascom Printer Config Tool”, after the connection,you will see the interface as shown in the following figure.Click the “Upgrade”. - Page 39 ② Click “Browse”to select the version file you want to update, as shown in the following figure After selecting the update file, click the “start” ③ button, the update prompt window will pop up, just click OK. The update process is shown below.
- Page 40 After the update, the printer automatically restarts, and the Tally Dascom Printer Config Tool ④ pops up a window to tell you that the update is done.
-
Page 41: Usb
.Communication Ⅵ There are three communication modes for high reliable portable thermal printer: Wire:USB Wireless:Bluetooth 6.1 USB This printer standard configuration interface is USB interface. ① Plug one end of the USB cable into the printer's USB port. Plug the other end of USB cable ②... -
Page 42: Bluetooth
6.2 Bluetooth The high reliability portable thermal Bluetooth printer has a Bluetooth 4.0/CLASS 2 (10m) communication interface. Device name:DP-230L-XXXX... -
Page 43: Ⅶ .Maintenance
.Maintenance Ⅶ 7.1 Daily maintenance of printers Cleaning of Printer outer case and paper bin : gently wipe the printer surface and the inside ① of the paper bin with a wet cloth. Be sure to fully dry the wet cloth. ②... -
Page 44: Use And Storage Of Printing Paper28
The cleaning method :Gently wipe the mechanism (in the right dotted frame) with a degreasing cotton with anhydrous alcohol until it is wiped clean. ③ If water is found inside the printer,please turn off the printer and remove the battery immediately,then have the printer dry. -
Page 45: Ⅷ .Troubleshooting
Ⅷ .Troubleshooting Problem Possible Cause Solution The battery has not been Install the battery correctly. Press the power button installed correctly. and the printer does not The battery has run out of Please charge immediately. work. power. The battery has ran out of Please charge or replace the Printer automatically power. - Page 46 Problem Possible Cause Solution The printer does not clean up Clean the mechanism. for a long time, causing the Poor print quality or ink mechanism to be contaminated with dirt. fades. Quality problems of printing Please purchase approved Media. Paper There is a jam in the paper Check the paper path and install path, or the media is loaded in...
- Page 47 Problem Possible Cause Solution stable,Or print all the Use the media with sliding Reduce maximum print speed content together. layer. The lid of the paper bin is not Cover the paper bin cover. closed. Emulation language or data Setup the correct emulation The printout is garbled.
-
Page 48: Appendix
.Appendix Ⅸ 9.1 Parameters Printing mode Directly thermal Printing Print width 72mm parameters Resolution 203dpi OLED Standard 128×32dot matrix Speed 3inch/s Emulation ESC/POS、JPL、ZIC、ZPLII、CPCL Character GB18030 Speed Barcode One dimensional code : UPC-A 、 UPC-E 、 EAN-8、EAN-13、Codabar、Code39、ITF、 QR code:QRCode、PDF417、DataMatrix Type Thermal paper / thermal label Media Thickness 60-150μm... - Page 49 Maximum outer 45mm diameter Open sensor Sensor Paper end sensor Label sensor Optional SDRAM 32Mbyte(Integrated into the SOC) Memory Flash 8+32Mbyte(2 PCS) Standard Port Bluetooth Standard Android,IOS Software DEMO'S Android,IOS Battery Within 7.2V/2200mAH Life Cycle charge more than 500 times Battery Adapter output...
- Page 50 Weight Within 300g(do not include battery) MTBF 10000 hours Level of protection IP54 Buzzer AC adapter Standard DC to Type-C Standard Accessories power cable Provide the setup tool which can be used under WINXP,7,8 system Setup tool and Bluetooth mode.
-
Page 51: Dascom Representative
9.2DASCOM representative GERMANY #05-42, IMM Building DASCOM Europe GmbH Singapore 609601 Heuweg 3 Phone: +65 6760 8833 D-89079 Ulm Fax: +65 6760 1066 Deutschland www.dascom.com Tel.: +49 (0) 731 2075 0 Fax: +49 (0) 731 2075 100 www.dascom.com FRANCE DASCOM Europe GmbH SINGAPORE (ASIA PACIFIC) 117 Avenue Victor Hugo DASCOM AP Pte Ltd... - Page 52 Phone: +33 (1) 73 02 51 98 34 Lakeview Court www.dascom.com Verona, VA 24482 UNITED KINGDOM Phone: +1 (877) 434 1377 DASCOM GB Ltd Fax: +1 (540) 242 7221 Hart House, Priestley Road, www.dascom.com Basingstoke, Hampshire RG24 9PU, England Phone: +44 (0) 1256 355130 CHINA Fax: +44 (0) 1256 481400 JIANGMEN DASCOM COMPUTER...
Need help?
Do you have a question about the DP-230L and is the answer not in the manual?
Questions and answers