
Related Manuals for CHIEF LDB1U


Summary of Contents for CHIEF LDB1U
- Page 1 I N S T A L L A T I O N I N S T R U C T I O N S Large Bolt Down Table Stand Spanish Product Description German Product Description Portuguese Product Description Italian Product Description Dutch Product Description French Product Description LDB1U...
-
Page 2: Important Safety Instructions
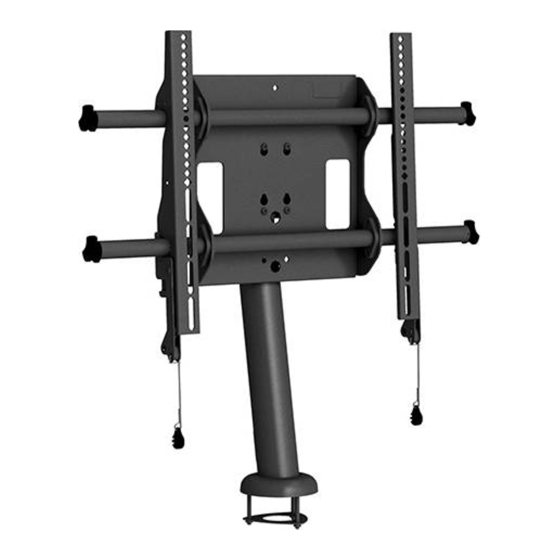
The LDB1U mount has no user serviceable parts. ACCESSORY: AN ACCESSORY is the secondary Chief product which is attached to a primary Chief product, and may have a component attached or setting on it. IMPORTANT ! : The LDB1U mounting system is designed to be mounted to a desk with a maximum thickness of 1 1/2". - Page 3 Installation Instructions LDB1U DIMENSIONS...
-
Page 4: Installation Instructions
LDB1U Installation Instructions LEGEND Tighten Fastener Pencil Mark Apretar elemento de fijación Marcar con lápiz Befestigungsteil festziehen Stiftmarkierung Apertar fixador Marcar com lápis Serrare il fissaggio Segno a matita Bevestiging vastdraaien Potloodmerkteken Serrez les fixations Marquage au crayon Loosen Fastener Drill Hole Aflojar elemento de fijación... -
Page 5: Tools Required For Installation
Installation Instructions LDB1U TOOLS REQUIRED FOR INSTALLATION 3/16 x 10" (included) 5/32" (included) 3/16" (included) 5/16" (7.9mm) PARTS Universal Hardware Kit F (4) G (4) E (4) A (4) H (4) B (4) C (4) D (4) M5x25mm M5x12mm M5x20mm... - Page 6 If mounting to another type of surface, make sure surface can hold up to four times the combined weight of all equipment prior to mounting the LDB1U to surface! Drill three 5/16" holes at locations marked in Step 3. (See...
- Page 7 Installation Instructions LDB1U 11. Use #10-24 x 1/2" security screw (V) to secure table stand NOTE: The diamond-shape holes in the bracket correspond to cover to table stand (R). (See Figure 4) the center of the mount. WARNING: IMPROPER INSTALLATION CAN LEAD TO...
- Page 8 LDB1U Installation Instructions Attaching Screen to Mount IMPORTANT ! : Position screen in a centered position on rails. Hook NOTE: NEVER place both interface brackets (T and U) to one side of the wall mount center line! (See Figure 8)
- Page 9 Installation Instructions LDB1U Locking Mount (Optional) Add padlock (not included) to interface bracket to complete security. (See Figure 11) NOTE: The padlock maximum shackle diameter is 5/16" (7.9 mm). Padlock shackle maximum diameter: - 5/16" (7.9mm) Figure 11 Additional Mount Safety...
- Page 10 LDB1U Installation Instructions...
- Page 11 Installation Instructions LDB1U...
- Page 12 Europe A Franklinstraat 14, 6003 DK Weert, Netherlands P +31 (0) 495 580 852 F +31 (0) 495 580 845 Chief, a products division of Asia Pacific A Office No. 918 on 9/F, Shatin Galleria Milestone AV Technologies 18-24 Shan Mei Street...
Need help?
Do you have a question about the LDB1U and is the answer not in the manual?
Questions and answers