
Related Manuals for CHIEF LCD2C


Summary of Contents for CHIEF LCD2C
- Page 1 I N S T A L L A T I O N I N S T R U C T I O N S Multiple Projector Stacking System - Ceiling Mount LCD2C...
-
Page 2: Important Warnings And Cautions
LCD2C DISCLAIMER CSAV, Inc., and its affiliated corporations and subsidiaries (collectively, "CSAV"), intend to make this manual accurate and complete. However, CSAV makes no claim that the information contained herein covers all details, conditions or variations, nor does it provide for every possible contingency in connection with the installation or use of this product. - Page 3 Chiave esagonale Zeskantsleutel Zeskantsleutel Zeskantsleutel Zeskantsleutel Clé à tête hexagonale Clé à tête hexagonale Clé à tête hexagonale Clé à tête hexagonale LCD2C Pencil Mark Marcar con lápiz Stiftmarkierung Marcar com lápis Segno a matita Potloodmerkteken Marquage au crayon Drill Hole...
-
Page 4: Tools Required For Installation
LCD2C Installation Instructions TOOLS REQUIRED FOR INSTALLATION 7/32" (5.5mm) 1/2" (12.7mm) PARTS A (2) B (1) D (4) F (1) C (1) E (1) G (8) I (5) K (8) H (8) L (8) J (16) M (8) 1/4-20X1-1/2" 5/16-18X3/8"... -
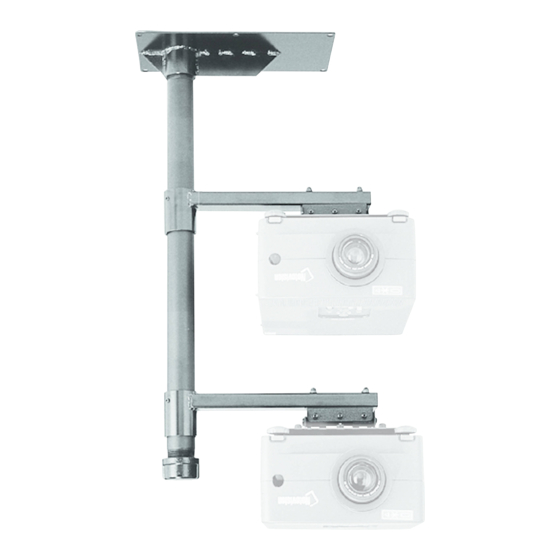
Page 5: Assembly And Installation
Insert four 1/4"-20x1-1/2" (L) button head cap screws into the bottom of the RPM. (See Figure 3) NOTE: The RPM base is not shown in Figure 3 for clarity only. It should NOT be removed for this installation process. LCD2C (I) x 2 Figure 2... - Page 6 LCD2C Interface Brackets (D) 4 screw holes (L)x4 Figure 3 Place four nylon spacers (M) onto the screws as shown in Figure 3. Tighten the screws through the nylon spacers and into the two interface brackets (D). (See Figure 3) Insert four 1/4"-20x1-1/4"...
- Page 7 Installation Instructions LCD2C...
- Page 8 LCD2C 8804-000052 RevB 2006 Chief Manufacturing www.chiefmfg.com 11/06 USA/International A 8401 Eagle Creek Parkway, Savage, MN 55378 P 800.582.6480 / 952.894.6280 F 877.894.6918 / 952.894.6918 Europe A Fellenoord 130 5611 ZB EINDHOVEN, The Netherlands P +31 (0)40 2668620 F +31 (0)40 2668615...
Need help?
Do you have a question about the LCD2C and is the answer not in the manual?
Questions and answers