Table of Contents
Advertisement
Quick Links
Advertisement
Table of Contents

Related Manuals for Planet Networking & Communication HAC-1000


Summary of Contents for Planet Networking & Communication HAC-1000
- Page 1 Z-Wave Home Automation Control Gateway HAC-1000...
- Page 2 Z-Wave Home Automation Control Gateway HAC-1000 Copyright Copyright © 2015 by PLANET Technology Corp. All rights reserved. No part of this publication may be reproduced, transmitted, transcribed, stored in a retrieval system, or translated into any language or computer language, in any form or by any means, electronic, mechanical, magnetic, optical, chemical, manual or otherwise, without the prior written permission of PLANET.
- Page 3 Do not dispose of WEEE as unsorted municipal waste and have to collect such WEEE separately. Revision User’s Manual of PLANET Z-Wave Home Automation Control Gateway Model: HAC-1000 Rev: 1.00 (August, 2015) Part No. EM-HAC-1000_v1.0...
-
Page 4: Table Of Contents
Z-Wave Home Automation Control Gateway HAC-1000 Table of Contents Chapter 1. Product Introduction ..............5 1.1 Package Contents................5 1.2 Overview.....................5 1.3 Specifications..................8 Chapter 2. Hardware Interface................9 2.1 Physical Descriptions................9 2.2 Hardware Installation ................ 10 2.3 Initial Utility Installation..............11 Chapter 3. Web-based Management ............14 3.1 Introduction .................. -
Page 5: Chapter 1. Product Introduction
Z-Wave technology. Since most users would like to control their devices via the internet, the HAC-1000 is required to turn your home into a smart and secure one where lighting control, window blinds, security... - Page 6 Z-Wave Home Automation Control Gateway HAC-1000 Real-time Monitoring IP cameras can be linked to PLANET HAC-1000 and Cloud Home app for remote monitoring. Users can keep an eye on their home on mobile phones over a secure connection to the Home Automation Control Gateway.
- Page 7 Energy and Cost Saving on Every Room You can also check the current energy consumption in your home within the configuration interface of the HAC-1000. Manage these energy-saving devices such as power meter switches, power switches and dimmer switches to help you reduce energy consumption and...
-
Page 8: Specifications
Z-Wave Home Automation Control Gateway HAC-1000 Important Alerts Alerts like use of electricity, home alarms and more can be brought to your notice without delays by way of cloud hosting. From now on, you can have all these alerts no matter where you are, making your home a smart and secure one. -
Page 9: Chapter 2. Hardware Interface
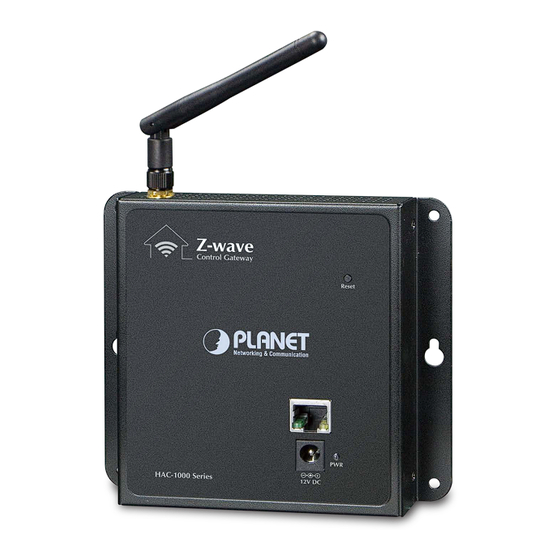
Z-Wave Home Automation Control Gateway HAC-1000 Chapter 2. Hardware Interface 2.1 Physical Descriptions Dimensions (W x D x H) 148 x 25 x 134 mm Weight 441g (gross weight) -
Page 10: Hardware Installation
Install a conductor pipe inside the board hole and flush the edge of the conductor pipe Step 2: with the wall surface. Screw the bolts into the conductor pipe. The HAC-1000 is between bolts and conductor Step 3: pipe, as shown below. -
Page 11: Initial Utility Installation
Z-Wave Home Automation Control Gateway HAC-1000 B. Magnet Installation To install the HAC-1000 on a magnetic surface, simply follow the following picture: C. Ethernet Connection There is a LAN port on the HAC-1000. Please connect to your router/switch. 2.3 Initial Utility Installation... - Page 12 Z-Wave Home Automation Control Gateway HAC-1000 The window below will show the network information of control gateway. Step 3: Before searching the IP, please make sure your PC is in the same IP segment as control gateway. Modify the information in the red box and then click “Update Device”.
- Page 13 Z-Wave Home Automation Control Gateway HAC-1000 Enter the password “admin”. After clicking “OK”, the information will change. Step 5:...
-
Page 14: Chapter 3. Web-Based Management
Z-Wave Home Automation Control Gateway HAC-1000 Chapter 3. Web-based Management Your control gateway is ready to put you in control of your home. Please take a few minutes to read through this guide to familiarize yourself with the steps required to set up your Z-Wave... -
Page 15: System Log
Z-Wave Home Automation Control Gateway HAC-1000 The current Network information of control gateway. 3.2.2 System Log This section provides the system log of recorded files. 3.3 System Configuration This chapter will cover the configuration of Administration, Time Synchronization, Firmware Update and Reboot. -
Page 16: Time Synchronization
Z-Wave Home Automation Control Gateway HAC-1000 3.3.3 Time Synchronization Synchronizing the system time. 3.3.4 Backup/Flash Firmware Parameters Description To have a backup of all of the parameters, click this button. If necessary, it will then be possible to return to the previous settings if settings are changed and there is unexpected behavior. -
Page 17: Network Configuration
Smart Discovery Utility of the control gateway. Even though the control gateway cannot be found, you can still connect your computer straight to the HAC-1000. And set the same IP segment with control gateway in TCP/IP of your computer. Then use default IP of control gateway: http://192.168.0.253... -
Page 18: Dhcp Client
Z-Wave Home Automation Control Gateway HAC-1000 We suggest to use Static IP for HAC-1000 due to control pad need to set the IP of HAC-1000. If IP of HAC-1000 be changed, control pad can not connect with HAC-1000. 3.4.2 DHCP Client If you choose this connection type, please make sure your IP won’t be changed. -
Page 19: Chapter 4. Z-Wave Setting
Z-Wave Home Automation Control Gateway HAC-1000 Chapter 4. Z-Wave Setting Control gateway has three platforms available -- Web platform, iOS/Android platform and control pad platform. There is a menu of items like Room, Device, Camera, Scene, etc. where you can select to get the function you want done by clicking on the item. -
Page 20: Inclusion Of Z-Wave Device
Z-Wave Home Automation Control Gateway HAC-1000 4.2 Inclusion of Z-Wave Device The Devices tab enables you to manage devices included in the Home Automation System. Devices are plane system compatible sensors, IP cameras and door phone devices. To add a Z-Wave device, click Add. Once the system sets itself into learning mode, perform the tasks described in the manuals (see Appendix A and B). -
Page 21: Inclusion Of Ip Camera
Z-Wave Home Automation Control Gateway HAC-1000 Parameters Description Here different Z-Wave devices in a group can be connected. Z-Wave device without battery can use this button to check the status of devices. When Z-Wave device is dead, use this button to remove forcibly. -
Page 22: Scenes
Z-Wave Home Automation Control Gateway HAC-1000 You can create and modify your camera list, based on the ICA-W7100 720P Wireless IR PT IP Camera to explain the application. 4.4 Scenes The Scenes tab lets the user create a scene by entering a scene name. - Page 23 Z-Wave Home Automation Control Gateway HAC-1000 To open the new scene window, click Add. The new scene must be named and assigned to certain room for easier configuration after general parameters have been set. A Scene is a group of commands sent to user defined group of devices.
-
Page 24: Trigger
Z-Wave Home Automation Control Gateway HAC-1000 4.5 Trigger The Trigger tab lets the user create a trigger by entering its name, and then select a device, a mode and a scene. You can create a trigger when your device is selected, and set the mode and scene to “alarm”... -
Page 25: Z-Wave
Z-Wave Home Automation Control Gateway HAC-1000 4.7 Z-Wave You can view logs, topology and included/excluded devices. Z-Wave Logs Topology of Z-Wave devices This tab gives an overview of the network status and the availability of each device. Green block means connected. - Page 26 Z-Wave Home Automation Control Gateway HAC-1000 Removing a Device Already Connected Your Hub will enter exclude mode automatically when you remove a Z-Wave device from the Things page. This means you can delete the device from there as you normally would, just be sure to execute the required button press or exclusion process as outlined by the device's user guide.
-
Page 27: Appendix A: Configuring Z-Wave Device Via Web
Z-Wave Home Automation Control Gateway HAC-1000 Appendix A: Configuring Z-Wave Device via Web Please refer to the following steps to add Z-Wave device via web. Step 1. Include a Z-Wave device via web. a) Go to "Z-Wave" and click "Device Configuration". - Page 28 Z-Wave Home Automation Control Gateway HAC-1000 Set up the location and room for Z-Wave device via web. Step 2. a. Create rooms in your environment. b. Edit device. Create a scene via web. Step 3. a. Click “Create Scene” and name new scene.
- Page 29 Z-Wave Home Automation Control Gateway HAC-1000 c. Select ON or OFF from this scene. d. You can click “RUN” to run this scene. Create trigger via web Step 4. a. Click “Create a Trigger” and name new trigger. b. Select a Z-Wave device for this trigger.
- Page 30 Z-Wave Home Automation Control Gateway HAC-1000 After entering the time selected for the scene to trigger, tick “Save and send alarm notification”. Tick “Active” to enable this trigger.
-
Page 31: Appendix B: Configuring Z-Wave Via Smart Phone
Z-Wave Home Automation Control Gateway HAC-1000 Appendix B: Configuring Z-Wave via Smart Phone The HAC-1100 can be used on iOS and Android operating system. Cloud Home can be downloaded at Google Play store or app store. Please refer to the following steps to install Cloud Home app and add Z-Wave device via smart phone. - Page 32 Z-Wave Home Automation Control Gateway HAC-1000 Set up the location and room for Z-Wave device. Step 2. b. Click “No Room” and will show the a. Create rooms in your environment. device. And place the new devices in a room.
- Page 33 Z-Wave Home Automation Control Gateway HAC-1000 Done successfully. e. Click “Back” to save.
- Page 34 Z-Wave Home Automation Control Gateway HAC-1000 Create a scene via smart phone. Step 3. a. Click “Add” and name a new scene. b. Click “Add” to add a Z-Wave device. c. Select a Z-Wave device. d. Click ON or OFF for the device you select.
- Page 35 Z-Wave Home Automation Control Gateway HAC-1000 Create Trigger via smart phone. Step 4. b. Name this new Trigger. a. Click “Add”. d. Select a mode for a Z-Wave device. c. Select the Z-Wave device and click e. Select a scene.
-
Page 36: Appendix C: Configuring The Schedule Of Z-Wave Device
Z-Wave Home Automation Control Gateway HAC-1000 Appendix C: Configuring the Schedule of Z-Wave Device A. Create schedule via web Click “Create Schedule” and name a new schedule. Step 1. Select the day of a week and time of a day. -
Page 37: Appendix D: Troubleshooting & Frequently Asked Questions
Z-Wave Home Automation Control Gateway HAC-1000 Appendix D: Troubleshooting & Frequently Asked Questions Features No, the antenna of control gateway is for Z-Wave device and cannot Control gateway connects to router via wireless connect to router via wireless. The frequency is different between Z-Wave and ZigBee. ZigBee is 2.4GHz and Z-Wave is about 900MHz. - Page 38 Z-Wave Home Automation Control Gateway HAC-1000 Please install the control gateway at the center of Z-Wave devices. There is detection in control gateway. When Z-Wave device goes to sleep or gets disconnected with control gateway, you can press the Z-Wave device is dead...
Need help?
Do you have a question about the HAC-1000 and is the answer not in the manual?
Questions and answers