Table of Contents
Advertisement
Quick Links
Advertisement
Table of Contents

Related Manuals for Planet Networking & Communication WIPG-300H


Summary of Contents for Planet Networking & Communication WIPG-300H
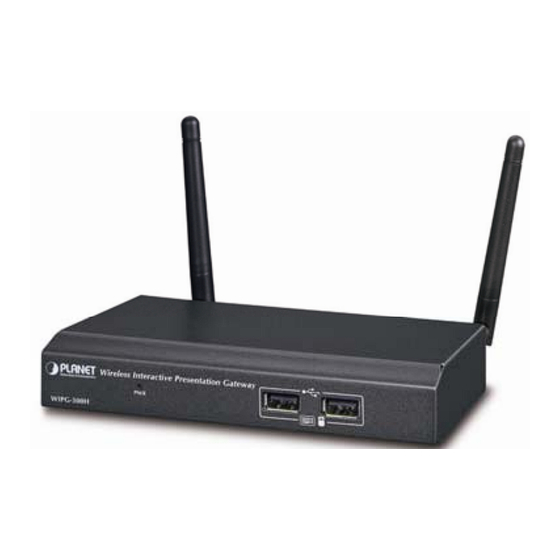
- Page 1 PLANET 802.11n Wireless Interactive Presentation Gateway WIPG-300H...
-
Page 2: Federal Communication Commission Interference Statement
PLANET 802.11n Wireless Interactive Presentation Gateway WIPG-300H Copyright Copyright 2015 by PLANET Technology Corp. All rights reserved. No part of this publication may be reproduced, transmitted, transcribed, stored in a retrieval system, or translated into any language or computer language, in any form or by any means, electronic, mechanical, magnetic, optical, chemical, manual or otherwise, without the prior written permission of PLANET. - Page 3 Do not dispose of WEEE as unsorted municipal waste and have to collect such WEEE separately. Revision User Manual of PLANET 802.11n Wireless Interactive Presentation Gateway with 1080p Full HD Model: WIPG-300H Rev: 1.0 (Jan., 2015) Part No. EM-WIPG-300H_v1.0 (2081-E60070-000)
-
Page 4: Table Of Contents
PLANET 802.11n Wireless Interactive Presentation Gateway WIPG-300H Contents Chapter 1. PRODUCT INTRODUCTION ................6 Package Contents ....................6 Product Description ....................6 Product Features..................... 9 Product Specifications ..................10 Chapter 2. HARDWARE INSTALLATION ................12 Hardware Description ................... 12 2.1.1 The Front Panel .................... - Page 5 PLANET 802.11n Wireless Interactive Presentation Gateway WIPG-300H Chapter 5. WEB UI MANAGEMENT ..................56 5.1. WIPG-300H Homepage..................56 5.2. Download ....................... 57 5.3. Conference Control....................58 5.4. Admin ........................59 5.4.1. System Status....................59 5.4.2. Device Setup ....................61 5.4.3.
-
Page 6: Chapter 1. Product Introduction
1080p Full HD Resolution, and High-quality Video and Audio Projection The WIPG-300H supports 1080p Full HD resolution which is suitable for both office presentation and home entertainment. Home users can easily share the multimedia on the big monitor / screen with friends without... - Page 7 WIPG-300H web UI or simply execute the utility from the created USB token. It offers the most convenient way for the new user to access the presentation in seconds. Just link the PC / laptop to the WIPG-300H through wireless or Ethernet and the wireless projection can be performed via the connected projector easily.
- Page 8 Internet / Intranet Connectivity through AP Client Mode The WIPG-300H is also a Wireless Access Point. The 10/100Mbps LAN port and 11n wireless performance ensures the participants in the meeting are able to access the Internet and Intranet all the time, even while wireless presentations are projecting.
-
Page 9: Product Features
Plug standard USB keyboard or mouse into the USB port on the front panel of the WIPG-300H and you can control your PC remotely. You don’t have to stand still by the side of a PC or the WIPG-300H, thus making your presentation easily and freely. -
Page 10: Product Specifications
PLANET 802.11n Wireless Interactive Presentation Gateway WIPG-300H 1.4 Product Specifications Product WIPG-300H Hardware Specification Video VGA Port: D-Sub 15-pin female port HDMI 1.4b Audio Out 2.5mm stereo jack Interfaces 10/100BASE-TX RJ45 Wireless LAN IEEE 802.11n 300Mbps USB Port 3 x USB 2.0, Type-A, 5VDC / 0.5A output... - Page 11 PLANET 802.11n Wireless Interactive Presentation Gateway WIPG-300H Protocol TCP/IP IP Configuration Automatic: DHCP Manual: Static IP address Management Web-Based configuration Supported Windows Account Administrators Right Limited User Guest Supported Operation System Windows XP / Vista / 7 / 8 Mac OS X 10.7 and above Android 2.4 and above...
-
Page 12: Chapter 2. Hardware Installation
PLANET 802.11n Wireless Interactive Presentation Gateway WIPG-300H Chapter 2. HARDWARE INSTALLATION Please follow the instructions below to build the wireless network connection between the WIPG-300H, display equipment and your computers. 2.1 Hardware Description 2.1.1 The Front Panel The front panel provides a simple interface monitoring the wireless presentation gateway. -
Page 13: The Rear Panel
Figure 2-2 the WIPG-300H Rear Panel 2.2 Hardware Connection Step 1. Please turn off your projector first, and connect HDMI or D-sub cable of the projector to the WIPG-300H. Then you can power on the WIPG-300H. Figure 2-3 VGA / HDMI interface connection... - Page 14 PLANET 802.11n Wireless Interactive Presentation Gateway WIPG-300H Step 2. When the projector shows the default screen as shown below, it indicates the WIPG-300H is ready now. Figure 2-4 Projector default screen Step 3. Use your laptop or desktop for site surveying the wireless signal of the WIPG-300H, and connect your PC with it wirelessly.
- Page 15 Figure 2-6 WIPG-300H Web UI screenshot Now you can configure the WIPG-300H and download the client utility (WIPG) of XP / Vista / Windows 7 / 8 via web UI. For further information of the configurations, please refer to the following chapters.
-
Page 16: Chapter 3. Windows Client Utility - Wipg
WIPG will start to search the available access points automatically if you have not connected your PC to the WIPG-300H manually. When the WIPG-300H is displayed in the list, please click it to connect and then enter the Login Code shown on the projector screen. -
Page 17: Control Panel
PLANET 802.11n Wireless Interactive Presentation Gateway WIPG-300H Step 3. Click the button to start projection Figure 3-3 WIPG Utility – Control Panel 3.2. Control Panel Figure 3-4 WIPG Utility – Control Panel Function Introduction Button Description Button Description Start Full Screen Projection Project to Split No. -
Page 18: Web Admin
PLANET 802.11n Wireless Interactive Presentation Gateway WIPG-300H Figure 3-5 WIPG Utility – Show Receiver Information 3.2.2. Web Admin Click “Web Admin” to open the web UI page of WIPG-300H. With regard to the web management UI page, please refer to the next chapter. -
Page 19: Search Receiver Device
PLANET 802.11n Wireless Interactive Presentation Gateway WIPG-300H Figure 3-6 WIPG Utility – Web Admin 3.2.3. Search Receiver Device Click “Search Receiver Device” to disconnect from current receiver and search the receiver again. -
Page 20: Launch Sidepad
3.2.4. Launch SidePad SidePad is an application to allow the user to connect Pad/Smartphone (Android and iOS), PC and display/projector via the WIPG-300H. User can then control the projecting PC via Pad/Smartphone. Please refer to the image below for more information. - Page 21 PLANET 802.11n Wireless Interactive Presentation Gateway WIPG-300H Figure 3-8 WIPG Utility –Launch SidePad...
- Page 22 PLANET 802.11n Wireless Interactive Presentation Gateway WIPG-300H SidePad Control for Android /I OS device Android: Download “SidePad Receiver” from Google Play Store iOS: Download “SidePad Receiver” from Apple Store. 1. Connect your Android/iOS device to WIPG device through Wi-Fi and launch “SidePad Receiver”...
-
Page 23: Launch Webslides
PLANET 802.11n Wireless Interactive Presentation Gateway WIPG-300H 3.2.5. Launch WebSlides WebSlides is an application to allow the user/presenter to broadcast the projecting screen/slides to allow multiple login users to receive the slides during a presentation and save the slides for note taking later. - Page 24 PLANET 802.11n Wireless Interactive Presentation Gateway WIPG-300H Figure 3-9 WIPG Utility –Launch WebSlides...
- Page 25 PLANET 802.11n Wireless Interactive Presentation Gateway WIPG-300H Webslides is not available when Quad view is in use. Presenter: Make sure your PC/Mac is connected to WIPG box and click on “Launch Webslides”. When the function is on, the item will be checked on the main menu.
-
Page 26: Select Projection Source
Click the “Select Projection Source” to project the main screen of desktop or the virtual extended screen. Object Description Main Desktop When “Main Desktop” is selected, the WIPG-300H will project out the main desktop screen. Extended Desktop When “Extended Desktop” is selected, the WIPG-300H will project out the virtual screen. - Page 27 PLANET 802.11n Wireless Interactive Presentation Gateway WIPG-300H Figure 3-10 WIPG Utility – Select Projection Desktop For Windows XP system, before starting the Extended Desktop screen projection, please install the “VDD.exe” (Virtual Display Driver) first on your computer. Please find the software in the USB Token.
-
Page 28: Projection Quality
PLANET 802.11n Wireless Interactive Presentation Gateway WIPG-300H display card can’t support the extended screen function. This typically can be verified by checking whether it can enable the extended screen through physical VGA cable; if yes, then it should work with WIPG software. -
Page 29: Resolution Setting
PLANET 802.11n Wireless Interactive Presentation Gateway WIPG-300H Figure 3-12 WIPG Utility – Projection Mode 3.2.9. Resolution Setting Click on “Resolution Setting” and choose “Never Change” to keep original desktop resolution. “Always Change” means to change resolution automatically according to application’s recommendation, or “Always... -
Page 30: Projection Aspect Ratio
PLANET 802.11n Wireless Interactive Presentation Gateway WIPG-300H Figure 3-13 WIPG Utility – Projection Mode 3.2.10. Projection Aspect Ratio Click on “Projection Aspect Ratio” and choose “Keep aspect ratio” to keep the original aspect ratio if the desktop resolution is different from WIPG output resolution, or choose “Fit full screen” to project the screen... -
Page 31: Enable Iwb Usb Bridge
PLANET 802.11n Wireless Interactive Presentation Gateway WIPG-300H Figure 3-14 WIPG Utility -- Projection Aspect Ratio 3.2.11. Enable IWB USB Bridge Click on “Enable USB IWB Bridge” to enable the USB IWB Bridge feature. When you start the full screen projection, it will bridge the IWB device to your PC wirelessly. -
Page 32: Advanced Screen Capture
PLANET 802.11n Wireless Interactive Presentation Gateway WIPG-300H Figure 3-15 WIPG Utility – Enable IWB USB Bridge You have to install the USBoIP driver first. You can find the driver from USB token. 3.2.12. Advanced Screen Capture If you enable “Advanced Screen Capture”, all the tip windows and other layered windows (including the main UI) will be projected to the projector screen. - Page 33 PLANET 802.11n Wireless Interactive Presentation Gateway WIPG-300H Figure 3-16 WIPG Utility – Advanced Screen Capture The Source Screen with Tip Window...
-
Page 34: Send Audio To Display
PLANET 802.11n Wireless Interactive Presentation Gateway WIPG-300H The Projector Screen without Tip Window 3.2.13. Send Audio to Display Click on “Send Audio to Display” to start the audio projection feature. It will mute your local speaker during the projection and restore it when it closes the application. The audio will be bridged to your display device. -
Page 35: Auto Power Management
PLANET 802.11n Wireless Interactive Presentation Gateway WIPG-300H Figure 3-17 WIPG Utility – Send Audio to Display For Windows XP system, if you can’t hear the audio, please install the Audio driver (“VAC.exe”, Virtual Audio Control Driver) on your computer first. You can find the software from USB Token. -
Page 36: Auto Wifi Connect
PLANET 802.11n Wireless Interactive Presentation Gateway WIPG-300H Figure 3-18 WIPG Utility – Auto Power Management 3.2.15. Auto Wi-Fi Connect Click “Auto Wi-Fi Connect” to enable the auto Wi-Fi discovery and connection function for quick establishment of wireless connection. -
Page 37: Make Usb Pns Token
PLANET 802.11n Wireless Interactive Presentation Gateway WIPG-300H Figure 3-19 WIPG Utility – Auto Wi-Fi Connect 3.2.16. Make USB PnS Token Click “Make USB PnS Token” to make a USB WPS Token; you can insert a USB and follow the wizard to make the Token. - Page 38 PLANET 802.11n Wireless Interactive Presentation Gateway WIPG-300H Figure 3-20 WIPG Utility – Make USB PnS Token Figure 3-21 USB Auto Setup Wizard...
-
Page 39: Copy Application To Desktop
PLANET 802.11n Wireless Interactive Presentation Gateway WIPG-300H Figure 3-22 USB Auto Setup Wizard Figure 3-23 USB Auto Setup Wizard 3.2.17. Copy Application to Desktop Click the “Copy Application to desktop” to copy the application to your desktop immediately even you don’t... -
Page 40: Hot Key
PLANET 802.11n Wireless Interactive Presentation Gateway WIPG-300H Figure 3-24 WIPG Utility – Copy Application to Desktop 3.2.18. Hot Key Click on “Hot Key” to display the available Hot Key definitions. Figure 3-25 WIPG Utility – Hot Key... -
Page 41: About
PLANET 802.11n Wireless Interactive Presentation Gateway WIPG-300H 3.2.19. About Click on “About” to show the system information. It includes the client version, server IP address, and login code. Figure 3-26 WIPG Utility - About... -
Page 42: Exit
PLANET 802.11n Wireless Interactive Presentation Gateway WIPG-300H 3.2.20. Exit Click “Exit” to exit the WIPG utility. It will stop the current projection and close the application immediately. Figure 3-27 WIPG Utility - Exit... -
Page 43: Chapter 4. Mac Os X Client Utility
Step 2: Highlight and select the wireless network (SSID) to connect (1) Select and SSID [WIPG-300H] (2) Double-click on the selected SSID Figure 4-2 Step 3: Enter the encryption key of the WIPG-300H (1) Enter the encryption key that configured in section 5.4.3 (1) Click the [Join] button... - Page 44 Step 4: Check if the AirPort is connected to the selected wireless network. If “Yes”, then there will be a “check” symbol in the front of the SSID. Step 5: Open the web browser and it will redirect to WIPG-300H home page automatically. Or you can enter the default IP address http://192.168.1.1...
-
Page 45: Download Mac Os X Client Utility
PLANET 802.11n Wireless Interactive Presentation Gateway WIPG-300H Figure 4-5 4.2. Download Mac OS X Client Utility Step 1. : Click “Download”. Step 2. : Choose the utility for “MAC” and then click Download button and execute the installation program. - Page 46 PLANET 802.11n Wireless Interactive Presentation Gateway WIPG-300H Figure 4-6 Figure 4-7...
- Page 47 PLANET 802.11n Wireless Interactive Presentation Gateway WIPG-300H Step 3. : Follow Installation Wizard instructions to proceed till the installation process is completed. Figure 4-8 Step 4. Click “WIPG” icon to execute the program.
- Page 48 WIPG will start to search the available access points automatically if you have not connected your MAC to WIPG-300H manually. When the WIPG-300H is displayed in the list, please click it to connect and then enter the Login Code shown on the projector screen.
-
Page 49: Main User Interface
PLANET 802.11n Wireless Interactive Presentation Gateway WIPG-300H 4.3. Main User Interface Figure 4-11 4.4. Screen Projection Click the “Play” button for full or split screen and you can project the main screen on to the display immediately. Click the “Pause” button and you can freeze you projection screen, and click the “Stop” button to stop projecting your screen. - Page 50 PLANET 802.11n Wireless Interactive Presentation Gateway WIPG-300H Pause projecting Enable the Magnifier function ...
-
Page 51: Mac Audio Projection
PLANET 802.11n Wireless Interactive Presentation Gateway WIPG-300H 4.5. MAC Audio Projection Before starting Audio Projection, please install the “Soundflower.mpkg” (MAC system extension for audio using) on your computer. Please find the software in USB Token. 1) Execute the “Soundflower.pkg” in the Mac OS. - Page 52 PLANET 802.11n Wireless Interactive Presentation Gateway WIPG-300H 3) After reading the important information, please click “Continue” to go to the next step. Figure 4-14 4) Select the language and click “Continue”. Figure 4-15...
- Page 53 PLANET 802.11n Wireless Interactive Presentation Gateway WIPG-300H 5) Click “Agree” and then click “Continue”. Figure 4-16 6) Click “Install”. Figure 4-17...
- Page 54 PLANET 802.11n Wireless Interactive Presentation Gateway WIPG-300H 7) Enter your Username and Password of the System. Then, click “Install Software”. Figure 4-18 8) A notice will pop up to remind you that computer will restart after finishing the installation. Please click “Continue Installation”.
- Page 55 10) After restarting the computer, you will see there is a sunflower icon displayed in the system taskbar. Then, you can configure your audio output per your preference. ※ If the icon is not displayed, please execute the program of WIPG-300H first. Figure 4-21...
-
Page 56: Chapter 5. Web Ui Management
Please follow the steps below to enter the web UI of WIPG-300H. Step 1. First, please connect your PC to WIPG-300H (via wired or wireless). Step 2. Open the web browser and it will redirect to WIPG-300H home page automatically. Or you can enter the default IP address http://192.168.1.1... -
Page 57: Download
PLANET 802.11n Wireless Interactive Presentation Gateway WIPG-300H 5.2. Download Please follow the steps below to download and execute the WIPG installation program. Step 1. Click “Download”. Step 2. Choose the WIPG utility for “XP / Vista / Windows 7 / 8” or “Mac OS X” and then click Download button and execute the installation program. -
Page 58: Conference Control
PLANET 802.11n Wireless Interactive Presentation Gateway WIPG-300H 5.3. Conference Control This function allows you to host a meeting without the projector cable swapping, and each participant is able to show their own presentation easily. Please follow the steps below to execute Conference Control. -
Page 59: Admin
WIPG-300H 5.4. Admin This function allows you to login web management UI of WIPG-300H. Click “Admin”, and enter the password. The default value is “admin”. Then click the Login button or press the Enter key. Please refer to the following sections for further configuration of the web management UI. - Page 60 Description Model Name Product model name Firmware Version Product firmware version number Network Status IP Address The IP address of WIPG-300H Subnet Mask The subnet mask Default Gateway The default gateway Wireless MAC Address The wireless MAC address The wired MAC address...
-
Page 61: Device Setup
“Mouse/Keyboard” device. The default setting of project output port is VGA. However, The HDMI cable will still work if you plug it before powering on the WIPG-300H. Click the Apply button to make the changes to take effect. -
Page 62: Network Setup
Obtain IP address automatically network environment automatically. When WIPG-300H is connected to a LAN that has DHCP server, the clients of WIPG-300H will assign an IP by that server and the built-in DHCP server of WIPG-300H will be disabled. - Page 63 DHCP Server Setup Object Description Auto Select “Auto” to enable the built-in DHCP server of WIPG-300H. (Default Settings) Start IP The default value is 192.168.1.100 End IP The default value is 192.168.1.200 Subnet Mask The default value is 255.255.255.0 Default Gateway The default value is 192.168.1.10...
- Page 64 Bandwidth AP Client Setup Check “Enable” radio button to switch WIPG-300H to AP client mode. It can join other access points wirelessly. Besides, the clients can also login WIPG-300H for presentation and surf the Internet via other AP simultaneously.
- Page 65 Click the Apply button to make the changes to take effect. To enable the WIPG-300H to run as an AP Client to connect to other existing APs wirelessly, please set the encryption security type to “WPA AES” or “WPA2 AES”.
- Page 66 PLANET 802.11n Wireless Interactive Presentation Gateway WIPG-300H LAN function will be disabled during AP client mode.
-
Page 67: Osd Setup
PLANET 802.11n Wireless Interactive Presentation Gateway WIPG-300H 5.4.4. OSD Setup Users can customize their own OSD (on-screen display) standby image. Figure 5-9 The web page includes the following fields: Object Description Restore to default Restore to the default OSD standby image. -
Page 68: Change Passwords
PLANET 802.11n Wireless Interactive Presentation Gateway WIPG-300H 5.4.5. Change Passwords Users can change the login password. The length of password is up to 8 characters. Figure 5-10 Click the Apply button to make the changes to take effect. 5.4.6. Reset to Default This page allows you to reset the current configuration to factory default. -
Page 69: Firmware Upgrade
Click the Apply button to restore the WIPG-300H to the factory default settings. 5.4.7. Firmware Upgrade This page allows you to upgrade the WIPG-300H firmware to new version. Please note: Do NOT power off the device during the upload because it may crash the system. -
Page 70: Webslides Setup
When you upgrade its firmware, you may lose its current configurations. Do not turn off the WIPG-300H while the firmware is being upgraded; otherwise, the WIPG-300H may be damaged. 5.4.8. Webslides Setup Click on “WebSlides Setup” option, you can: “Adjust Auto Refresh Interval”, or activate “Access Password Control”... -
Page 71: Reboot System
PLANET 802.11n Wireless Interactive Presentation Gateway WIPG-300H 5.4.9. Reboot System Press Reboot to reboot system. Please wait for a few minutes and reload web page again. Figure 5-14 Click Reboot button to restart the WIPG-300H. -
Page 72: Appendix A: Configuring The Pcs
PLANET 802.11n Wireless Interactive Presentation Gateway WIPG-300H Appendix A: Configuring the PCs In this section, we’ll introduce how to install and configure the TCP/IP correctly in Windows XP. First make sure your Ethernet Adapter is working, refer to the adapter’s manual if needed. - Page 73 PLANET 802.11n Wireless Interactive Presentation Gateway WIPG-300H Figure A-2 The following TCP/IP Properties window will display and the IP Address tab is open on this window by default. Now you have two ways to configure the TCP/IP protocol below: Setting IP address automatically...
- Page 74 PLANET 802.11n Wireless Interactive Presentation Gateway WIPG-300H Figure A-3 Setting IP address manually Select Use the following IP address radio button. If the device's LAN IP address is 192.168.1.1, type in IP address 192.168.1.x (x is from 2 to 254), and Subnet mask 255.255.255.0.
- Page 75 PLANET 802.11n Wireless Interactive Presentation Gateway WIPG-300H Figure A-4 Now click OK to keep your settings.
-
Page 76: Appendix B: Faq
(1) Plug the HDMI connector and turn on the projector or LCD first. (2) Then just power on the WIPG-300H to achieve it. FAQ 3: With the Windows XP client, how to output the audio via the audio jack of the WIPG-300H when the video is projected [ANSWERS] (1) First of all, please install “VAC.exe”... - Page 77 PLANET 802.11n Wireless Interactive Presentation Gateway WIPG-300H EC Declaration of Conformity Hereby, PLANET Technology Corporation, Šiuo PLANET Technology Corporation,, English Lietuviškai declares that this 802.11n Wireless Presentation skelbia, kad 802.11n Wireless Presentation Gateway is in compliance with the essential Gateway tenkina visus svarbiausius 1999/5/EC...
Need help?
Do you have a question about the WIPG-300H and is the answer not in the manual?
Questions and answers