Akuvox R29 Series Admin Manual
Hide thumbs
Also See for R29 Series:
- Administrator's manual (187 pages) ,
- Admin manual (80 pages) ,
- User manual (16 pages)
Table of Contents
Advertisement
Quick Links
Advertisement
Table of Contents

Related Manuals for Akuvox R29 Series


Summary of Contents for Akuvox R29 Series
- Page 1 R29 Series Door Phone Admin Guide...
- Page 2 About This Manual Thank you for choosing Akuvox’s R29S/F door phone. This manual is intended for end users, who need to properly configure the door phone. It provides all functions and configuration of R29S/F, the information detailed in this user manual applicable to firmware version 29.1.1.116.zip or lower version.
- Page 3 FCC Caution: Any Changes or modifications not expressly approved by the party responsible for compliance could void the user's authority to operate the equipment. This device complies with part 15 of the FCC Rules. Operation is subject to the following two conditions : (1) This device may not cause harmful interference, and (2) this device must accept any interference received, including interference that may cause undesired operation.
- Page 4 in all tested frequency bands, although the SAR is determined at the highest certified power level, the actual SAR level of the device while operating can be well below the maximum value. Before a new product is a available for sale to the public, it must be tested and certified to the FCC that it does not exceed the exposure limit established by the FCC, tests for each phone are performed in positions and locations as required by the FCC.
-
Page 5: Table Of Contents
Content 1. Product Overview....................................... 4 1.1. Instruction........................................4 1.2. Connector Introduction....................................5 2. Phone Setting........................................6 2.1. Access the system setting..................................7 2.2. Account......................................... 7 2.3. Contact......................................... 8 2.3.1. Create a Group....................................8 2.3.2. Edit a Group...................................... 8 2.3.3. Create a contact....................................8 2.3.4. - Page 6 2.9. Unlock by face(optional)..................................13 2.10. Replace rule......................................14 2.11. Device........................................15 2.12. Quick Dial........................................ 15 2.13. Monitor........................................16 2.14. Antialarm........................................16 2.15. LEDS........................................17 2.16. Restore........................................17 3. Website Basic........................................18 3.1. Access the device website..................................18 3.2. Intercom-Basic......................................18 3.2.1. Door setting general..................................18 3.2.2.
- Page 7 3.4.1. Relay........................................ 22 3.4.2. Open Relay via HTTP..................................23 3.5. Intercom-Input......................................23 3.6. Intercom-Face(Optional)..................................24 3.7. Account-Basic......................................25 3.8. Network Setting......................................26 3.8.1. DHCP....................................... 26 3.8.2. Static IP......................................27 3.9. Phone-Time/Language.................................... 27 3.10. Phone-Call feature....................................27 3.10.1. DND........................................27 3.10.2. Call Waiting....................................28 3.10.3. Intercom......................................29 3.10.4. No Answer Call..................................... 29 3.10.5.
- Page 8 3.13. PhoneBook......................................31 3.14. Call Log........................................32 4. Website- Advance......................................33 4.1. Intercom-Advance....................................33 4.1.1. Standby......................................33 4.1.2. LED........................................34 4.1.3. Tamper Alarm....................................34 4.1.4. Wiegand......................................35 4.1.5. RFID......................................... 36 4.1.6. Mjpeg Service....................................36 4.2. Intercom-RTSP......................................37 4.3. Intercom-ONVIF......................................37 4.4. Intercom-Motion......................................38 4.5.
- Page 9 4.6.1. Audio Codec....................................40 4.6.2. Video Codec....................................41 4.6.3. Subsribe......................................41 4.6.4. DTMF....................................... 42 4.6.5. Call........................................42 4.6.6. Session timer....................................43 4.6.7. NAT........................................43 4.6.8. User Agent.......................................44 4.7. Import/Export......................................44 4.7.1. Config&Contact....................................44 4.7.2. Private key.......................................45 4.7.3. RF key......................................45 4.7.4. Upload ScreenSaver..................................45 4.7.5. Open Door Tone..................................... 46 4.7.6.
-
Page 10: Product Overview
4.9.1. Manual Autop....................................48 4.9.2. Automatic Autop....................................49 4.9.3. System Log..................................... 49 4.9.4. PCAP........................................50 4.9.5. Others.......................................50 4.10. Security-Basic......................................50 4.10.1. Web Password Modify.................................50 1. Product Overview... -
Page 11: Instruction
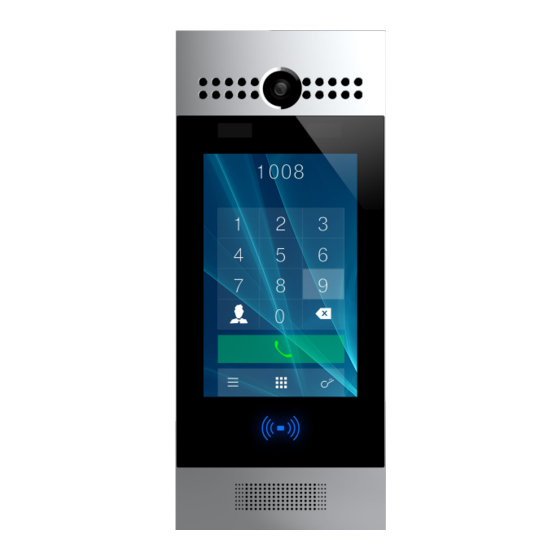
1.1. Instruction R29S/F is an Android-based IP video door phone with a touch screen. It incorporates audio and video communications, access control and video surveillance. Its finely-tuned Android OS allows for feature customization to better suit the habit of usage of local people. Powered by it, R29S’s multiple ports, such as RS485 and Wiegand ports, can be used to easily integrate external digital systems, such as elevator controller and fire alarm detector, helping to create a holistic control of building entrance and its... -
Page 12: Connector Introduction
1.2. Connector Introduction Connector Ethernet(POE) Ethernet(POE) connector which can provide both power and network connection. 12V/GND External power supply terminal if POE is not available. WG_D0/1 Wiegand terminal for wiegand access control RS485A/B RS485 terminal automation system control(e.g. Elevator control). DOORA/B/C Trigger signal input terminal(e.g. -
Page 13: Phone Setting
2. Phone Setting 2.1. Access the system setting In the Dial interface, press 9999 + Dial key, then input 3888 to enter the system setting. System setting is easy to configure most basic phone functions. 2.2. Account R29S/F supports 2 accounts. According to your needs, register one or two accounts and users can switch them by yourselves. -
Page 14: Contact
2.3. Contact 2.3.1. Create a Group Choose group, click Add to enter the new group name. Press OK to save. 2.3.2. Edit a Group Choose the existed group to modify or delete. 2.3.3. Create a contact Click Add to enter the contact’s information. Choose a suitable Group and contact’s name and Phone number,press OK to save. -
Page 15: Lock
2.4. Lock Press “Lock” to configure door lock and door sensor. Lock Type: Door lock can be configure as “Positive” or “Negative”,it depends on the connection of the wire to corresponding interface on the back. There are three terminal of relay: NO, NC and COM. NO stands for normally open contact while NC stands for normally closed contact. -
Page 16: Lockpasswd
2.5. LockPasswd In the system interface-LockPasswd, enter the owner name, 8 digits private keys and Device(optional). Setup the valid day and time for the password. For example: Owner name is room 101, private key is 11111111, device name is 1. and I set up the valid day from Mon to Sun, click to save. -
Page 17: Reboot
Modify Press “Del Card”, when you see “Please scan RFCard to Delete”, put the exited card near the card sensor, click Del to delete in the modify prompt. Or you can just choose the exited card from the list, select directly. Put the registered card near the card reader, the door will be opened. -
Page 18: Motion
2.8. Motion By enabling the motion detection function, the door phone will detect and record any change in the surrounding, such as suspicious people loitering around, and send notification message to a monitor unit. Timing setting If user only enable time mode and setup the interval . R29S/F will take the picture in every interval time;... -
Page 19: Unlock By Face(Optional)
2.9. Unlock by face(optional) Add: Close your face to the camera, amied at the green box in the screen. According the tip on the screen. Click Next once and the device will record one angle of your face, users need to put four different angles of your face into the device. -
Page 20: Replace Rule
2.10. Replace rule Replace rule is using some simple number or symbol to replace a complicated phone number or IP address. It is more suitable for some one who want to hide the real phone number or simplify the long number. This is more convenient for user. -
Page 21: Device
2.11. Device User can setup the device name to limit the unlock permissions. 2.12. Quick Dial Quick Dial is calling predefined important number quickly in main interface. This number is often set as emergency number. Enter system setting - Quick Dial, switch the type as Quick Dial, enter the quick dial name and number, click Save to confirm. -
Page 22: Monitor
RTSP: Real Time Streaming Protocol, this protocol is used to transmit the media data via TCP or UDP mode in Network.R29S/F can be monitored by indoor phone, Akuvox Vbell or the third party software via RTSP protocol. RTSP Stream: rtsp:// R29S/F IP add/live/ch00_0 Just need to enable RTSP function in RTSP setting 2.14. -
Page 23: Leds
Tamper Proof Switch: The smaller the value, the more sensitive the gravity sensor is. 2.15. LEDS Setup the LED, the device will automatic enable Infrared LED in the insufficient light environment. It can supports three modes - OFF, ON, AUTO. Click the Threshold key, it will automatic show the current intensity. -
Page 24: Website Basic
3. Website Basic 3.1. Access the device website Users can also choose configure in website. Enter the phone system setting interface, click Info to check the current IP address. Then enter the IP address into your browser. Input the username and password (admin by default) to login. -
Page 25: Home View Visible Control
Number of Show Contacts: User can setup 0 to 8 top contacts under Only -Contact mode. The top contacts are some important or commonly used numbers. Open Door Tone: Switch whether you will hear the “the door is opened” announcement. Item Touch: This function is convenient for user to press anywhere in the contact line to call out, don't need to touch through the call button. -
Page 26: Password
3.2.3. Password Users can configure project key and public key with this function.Public key is a 8-digit password used by all occupants in a building. Project key is used by administrators for some basic settings. Public Enable: The default status is on. PublicKey Bits Limit: Setup the key digits. -
Page 27: Call&Dial Time
3.2.4. Call&Dial Time Max Call Time: To configure the max call time. Dial In Time: To configure the max incoming dial time, available when auto answer is disabled. Dial Out Time:To configure the max no answer call time. 3.3. Intercom-LED Setting Card LED Enable: To control the LED of the card reader area. -
Page 28: Intercom-Relay
3.4. Intercom-Relay Go to Intercom->Relay, to configure relay. 3.4.1. Relay There are three terminal of relay: NO, NC and COM. NO stands for normally open contact while NC stands for normally closed contact. Relay ID: R29S/F supports three relays, user can configure them respectively. -
Page 29: Open Relay Via Http
means that COM is connecting to NO 3.4.2. Open Relay via HTTP User can use a URL to remote unlock the door. It is more convenient for user too open the door if he is not beside the devices Switch: Enable this function. Disable by default. Username &... -
Page 30: Intercom-Face(Optional)
Low means that connection between Door terminal and GND is closed, while High means the connection is opened. Action Delay: To setup the delay time to trigger the corresponding relay or sending the notification to the email/server. Open relay: To configure relay to open. Door status: To show the status of input signal. -
Page 31: Account-Basic
share the same face data in multiple devices. 3.7. Account-Basic Go to Account->Basic to configure sip account and sip server. Status: To display register result. Display Label: To configure label displayed on the phone’s LCD screen. Display Name: To configure name sent to the other call party for displaying. -
Page 32: Network Setting
server settings.An outbound proxy server is used to receive all initiating request messages and route them to the designated SIP server. Transport Type: To display and configure Transport type for SIP message UDP:UDP is an unreliable but very efficient transport layer protocol. ... -
Page 33: Static Ip
Gateway and DNS server. The figure below shows static IP setting. 3.9. Phone-Time/Language Now R29S/F can support multiple web language. User can choose manually. Akuvox uses English by default. 3.10. Phone-Call feature 3.10.1. DND DND (Do Not Disturb) allows IP phones to ignore any incoming calls. -
Page 34: Call Waiting
on server side if user press DND when DND is off. DND Off Code: The Code used to turn off DND on server’s side, if configured, IP phone will send a SIP message to server to turn off DND on server side if user press DND when DND is on. 3.10.2. -
Page 35: Intercom
3.10.3. Intercom Intercom allows user to establish a call directly with the callee. Active: To enable or disable Intercom feature. Intercom Mute: If enabled, once the call established, the callee will be muted. 3.10.4. No Answer Call This feature is used to transfer the call to the target number in order if the calling is no answered with timeout. -
Page 36: Dial Plan
automatically answered. Direct IP: To call someone with dialing IP address directly. Call volume: To show the volume adjustment in the talking interface. 3.11. Dial plan Allow user to modify selected rules information. Once user dial prefix value, it will call out Replace number. ... -
Page 37: Phonebook
3.13. PhoneBook To display and select local contact type. Contact: To display or edit all local contacts. Search: To search designated contacts from local phonebook. Dial: To dial out a call or hangup an ongoing call from Web UI. Contact Setting ... -
Page 38: Call Log
3.14. Call Log Go to Phone->Call Log, user can see a list of call which have dialed, received or missed. And user can delete calls from list. -
Page 39: Website- Advance
4. Website- Advance 4.1. Intercom-Advance 4.1.1. Standby Go to Phone-Door Setting-StandBy to setup StandBy Mode: There are 3- type modes - Image、 Black and None. The default is Image. StandBy Time: The default is 60sec. The maximum is 180sec. Unlocked Mode: Auto or Manual. Auto means the screensaver will be wake up automatically in a short distance. -
Page 40: Led
4.1.2. LED The setting is for night vision, when the surrounding of R29S/F is very dark, infrared LED will turn on and R29S/F will turn to night mode to let the househost see video clearly from the R29S/F. LED Type: Three types OFF ,ON or Auto. Only choose Auto mode,You need to setup photorsistor setting. -
Page 41: Wiegand
the phone will alarm. Gravity Sensor Threshold stands for sensitivity of sensor. 4.1.4. Wiegand Wiegand Type: support Wiegand 26,34,58. The different number means different bits. Wiegand Mode: Input or Output. Typically, when you select input, we generally connect the wiegand input device, such as the wiegand card reader. -
Page 42: Rfid
4.1.5. RFID Display mode: To be compatible different card number formats in different systems. The default 8HIN means hexadecimal. Open Door Warning: Disable it, you will not hear the prompt voice when the door is opened. 4.1.6. Mjpeg Service Mjpeg Service Enable: Use to capture from the URL. It is convenient to check the capture remotely. -
Page 43: Intercom-Rtsp
4.2. Intercom-RTSP R29S/F supports RTSP stream, go to Intercom->RTSP, to enable or disable RTSP server. The URL for RTSP stream is: rtsp://IP_address/live/ch00_0 4.3. Intercom-ONVIF R29S/F supports ONVIF protocol, which means R29S/F’s camera can be searched by other devices, like NVR, which supports ONVIF protocol as well. -
Page 44: Intercom-Motion
4.4. Intercom-Motion Motion Detection: To enable or disable Motion Detection Timing: If user only enable time mode and setup the interval . R29S/F will take the picture in every interval time; Notification: It supports two types FTP and EMAIL. Timing: If user only enable time mode and setup the interval . R29S/F will take the picture in every interval time;... -
Page 45: Intercom-Action
4.5. Intercom-Action 4.5.1. Email Notification The capture will be send to the predefined email address or FTP path. It is useful for users to check the capture picture for security. Sender’s email address: To configure email address of sender. Receiver’s email address: To configure email address of receiver. SMTP server address: To configure SMTP server address of sender. -
Page 46: Ftp Notification
4.5.2. FTP Notification FTP Server: To configure URL of FTP server. FTP User Name: To configure user name of FTP server. FTP Password: To configure password of FTP server. FTP Path: Enter the folder name you created in FTP server. 4.6. -
Page 47: Video Codec
4.6.2. Video Codec R29S/F supports H264 standard, which provides better video quality at substantially lower bit rates than previous standards. Codec Resolution: R29S/F supports four resolutions: QCIF, CIF, VGA, 4CIF and 720P. Codec Bitrate: To configure bit rates of video stream. Codec Payload: To configure RTP audio video profile 4.6.3. -
Page 48: Dtmf
server about expire time of ACD subscription. 4.6.4. DTMF To configure RTP audio video profile for DTMF and its payload type. 4.6.5. Call Max Local SIP Port: To configure maximum local sip port for designated SIP account. Min Local SIP Port: To configure maximum local sip port for designated SIP account. -
Page 49: Session Timer
log. Prevent Hacking: If enabled, it will prevent sip message from hacking 4.6.6. Session timer If enabled, the on going call will be disconnected automatically once the session expired unless it’s been refreshed by UAC or UAS. 4.6.7. NAT UDP Keep Alive Messages: The phone will send UDP keep-alive message periodically to router to keep NAT port alive. -
Page 50: User Agent
4.6.8. User Agent User agent: To customize User Agent field in the SIP message; If user agent is set to specific value, user could see the information from network package If user agent is not set by default, user could see the company name, model number and firmware version from network package. -
Page 51: Private Key
4.7.2. Private key Export the existed private key information or import the private key from local side. It can only support “.xml” format. The maximum is 1000. 4.7.3. RF key RF Key: Export the existed RF Card information or import the new RF Card information. -
Page 52: Open Door Tone
is 0, it won’t be displayed. if you need to upload many pictures ,please choose the ID order of the picture. For example, i need to upload the first picture as ID 1 which will be first screensaver to display , i will choose Image 1. Then i will upload the second one ,i need to choose Image 2 and so on. -
Page 53: Upgrade-Basic
Dial ,Unlock and Contact interface. Choose: Select a image. Import: The image must be “.png” format, and the most suitable size is 1280*800 . Reset : Reset the background as default. 4.8. Upgrade-Basic Go to Upgrade->Basic, user can upgrade firmware; Reset to factory setting and reboot. -
Page 54: Manual Autop
4.9.1. Manual Autop Autop (Auto-Provisioning) is a centralized and unified upgrade of IP telephone. It is a simple and time-saving configuration for IP phone. It is mainly used by the device to download corresponding configuration document from the server using TFTP / FTP / HTTP / HTTPS network protocol. -
Page 55: Automatic Autop
provisioning configuration file(for example, file name could be 0c1105888888.cfg if IP phone’s MAC address is 0c1105888888). 4.9.2. Automatic Autop To display and configure Auto Provisioning mode settings. This Auto Provisioning mode is actually self-explanatory. For example, mode “Power on” means IP phone will go to do Provisioning every time it powers on. -
Page 56: Pcap
4.9.4. PCAP To start,stop packets capturing or to export captured Packet file. Start:To start capturing all the packets file sent or received from IP phone. Stop:To stop capturing packets. 4.9.5. Others To export current config file or import new config file. 4.10.
Need help?
Do you have a question about the R29 Series and is the answer not in the manual?
Questions and answers