
Related Manuals for Regulus SRS3 E


Summary of Contents for Regulus SRS3 E
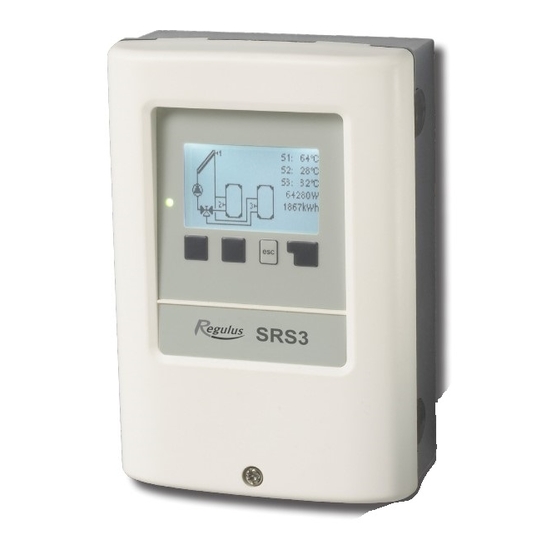
- Page 1 Installation, Wiring and Operation Instructions REGULUS SRS3 E Controller v. 1.2...
-
Page 2: Table Of Contents
CONTENTS A. - Safety Instructions 6.2. - Pump settings V1 EC Declaration of Conformity 6.2.1. - Type of pump General information 6.2.2. - Pump Explanation of symbols 6.2.3. - Output signal Changes to the unit 6.2.4. - 0-10V / PWM Off 6.2.5. - Page 3 This Instruction Manual applies to the following hardware version: SRS3 E v. 5, September 2015 SRS3 E 2 output mechanical relays 230VAC 1 PWM/0-10V output for high efficiency pumps 4 inputs for Pt1000 temperature sensors...
-
Page 4: Safety Instructions
Safety Instructions EC Declaration of Conformity The manufacturer declares that a Declaration of Conformity has been issued for the SRS3 T Solar Controller, it is marked with the CE mark and conforms to the following relevant safety regulations: - Directive 2014/35/EU - EC low voltage directive - Directive 2014/30/EU - EC electromagnetic compatibility directive General information - please read carefully! -
Page 5: Changes To The Unit
Safety Instructions Changes to the unit • Changes, additions to or conversion of the unit are not permitted without a written permission from the Manufacturer. • It is forbidden to install any additional components into the controller that has not been tested together with the controller. -
Page 6: Description
IP rating IP40 El. protection class Overvoltage category Pollution degree SRS3 E Mechanical relay, 460VA (AC1), 460W /AC3) 2 (R1/R2) 0-10V output, 10% tolerance, 10 kΩ, or PWM output, 1kHz, 10V 1 (V1) Pt1000 sensors, from -40 °C to +300 °C... -
Page 7: Description
- further measurement and switching applications using a temperature difference and a thermostat function Scope of supply SRS3 E Controller 3 screws 3.5 × 35 mm and 3 dowels 6 mm diam. for wall installation 6 strain relief clips with 12 screws... -
Page 8: Installation
Installation Wall installation Install the controller in dry areas only. Warning Installation instructions: C.1.1 1. Unscrew cover screw completely. 2. Carefully pull the upper part of housing from the lower part, cee Fig. C.1.1. 3. Set the upper part of the housing aside, being sure not to touch the electronics when doing so. -
Page 9: Electrical Wiring
Installation Electrical Wiring Before working on the unit, switch off the power supply and secure it against being switched on again! Check for the absence of power! Electric wiring may only be done by a specialist in compliance with valid Danger rules. -
Page 10: Installing The Temperature Sensors
Installation C 2. 1 Wiring instructions: C.2.1 1. Select the necessary hydraulic variant (D.1 - Hydraulic variants). 2. Open the controller as described in C.1. 3. Strip the cable by 55 mm max., insert and fit the cable strain relief. Strip the last 8-9 mm of all the wires (Fig. -
Page 11: Terminal Block Wiring
Installation D. - Terminal block wiring Mains voltage Sensor connection 230V – max. 12V Danger Warning CAN CAN VFS2 VFS1 PELV On the controller board: CAN1 CAN Bus connection CAN2 CAN Bus connection Mains voltage Sensor connection 230V – max. 12V Danger Warning Extra low voltage, max. -
Page 12: Hydraulic Variants
Description Hydraulic variants The following illustrations should be viewed only as schematic diagrams showing the respective hydraulic systems, and do not claim to be complete. The controller does not replace safety devices under any circumstances. Depending on the specific application, additional system components and safety components may be mandatory, such as check valves, safety Warning temperature limiters, scalding protectors etc., and must therefore be provided. - Page 13 Description Hydraulic variants R1(V1) R1(V1) R1(V1) 2 East/West solar arrays and 3-way valve Solar with bypass Solar with heat exchanger R1(V1) R1(V1) R1(V1) 2 East/West solar arrays and 2 pumps Solar with 2 hot water storage tanks and Solar with 2 hot water storage tanks and 2 3-way valve pumps R1(V1)
-
Page 14: Operation
Description Hydraulic variants R1(V1) R1(V1) R1(V1) Solar with hot water storage tank and solid fuel 2 East/West solar arrays Solar with cooling 3 (collector cooling) boiler and S4 auxiliary heat solid 3-way collector heating pump hot water exchanger valve R2 on fuel storage flow... -
Page 15: Commissioning Help
Operation Commissioning help – Setup wizard The first time the controller is turned on, language and clock need to be set. After that a query appears as to whether you want to parameterize the controller using the Setup wizard or not. -
Page 16: Menu Sequence And Menu Structure
Operation Menu sequence and menu structure The graphics or overview mode appears when no key has been pressed for 2 minutes, or when the main menu is exited by pressing “esc“. Pressing any key (4) in graphics or overview mode takes you directly to the main menu. -
Page 17: Statistics
Statistics 2. - Statistics Menu “2. Statistics” is used for function control and long-term monitoring of the system. The menu is closed by pressing “esc” or selecting “Exit statistics”. For analysis of the system data it is essential that time is set accurately on the controller. -
Page 18: Operating Modes
Operating modes 3. - Operating modes In menu “3. Operating modes” the controller can either be placed in automatic mode, switched off, or placed in a manual operating mode. The menu is closed by pressing “esc” or selecting “Exit operating modes”. 3.1. -
Page 19: Settings
Settings 4. - Settings The system parameters are set in menu “4. Settings”. This does not under any circum- stances replace the safety elements to be provided by the customer! Warning The menu is closed by pressing “esc” or selec- ting “Exit settings”. -
Page 20: Tmax S2
Danger Regulus solar thermal systems are safe for heating water up to 95 °C. 4.6. - Priority Storage 2 Priority of Storages S2 This determines the order, in which the storages are charged. -
Page 21: Tmax Pool He
Settings 4.14. - Tmax pool HE Switch-off temperature at heat exchanger sensor If this value is exceeded at the applicable sensor, the controller switches the associat- ed pump and/or valve off. If the temperature falls below this value again and the other conditions are also met, then the controller switches the pump and/or valve on again. -
Page 22: System Protection
Protective functions 5. - Protective functions Menu “5. Protections” can be used to acti- vate and set various protective functions. This does not under any circum- stances replace the safety facilities to be provided by the customer! Warning The menu is closed by pressing “esc” or selecting “Exit protections“. -
Page 23: Recooling
Protective functions Protective functions 5.3. - Recooling At the end of a sunny day the temperature in a storage tank may easily reach high values. In order to prevent further temperature increase the next day, excess energy can be released into the air via collectors under cloudy conditions or after sunset. If the temperature in the storage tank exceeds the value “Recool Tsetpoint”... -
Page 24: Special Functions
Special functions 6. - Special functions Menu “6. Special functions” is used to set basic items and expanded functions. Time and Date is the only function to be set by the user. Other functions may be set by a specialist only. Warning The menu is closed by pressing “esc”... -
Page 25: Output Signal
Special functions 6.2.3. - Output Signal This menu determines the type of pump used: Solar pumps perform at their highest power when the signal is also at its maximum, heating pump on the other hand are set to highest power when the control signal is at its minimum. Solar = normal, heating = Inverted. -
Page 26: Speed Control
Special functions 6.3. - Speed control With speed control the SRS3 E makes it possible to vary the speed of connected pumps. This function should only be activated by a specialist. Depending on the pump and pump stage used, the minimum speed should not be set too low, because otherwise the pump or the system may be damaged. -
Page 27: Purging Time
Special functions 6.3.2. - Purging time During this time the pump runs at its full speed (100 %) to ensure reliable starting. Only after this purging time does the pump run with speed control and switches to the max. or min. speed, depending on the variant set (M1-M4). Purging is not used for PWM/ 0-10V output. -
Page 28: Relay Functions
Special functions 6.5. - Relay functions The here explained additional functions can be assigned to unused relays. Every addi- tional function can only be used once. Pay special attention to the technical data of the relays („B.1. - Specification“). Example Solar + Solar Solar +... -
Page 29: Thermostat
Special functions 6.5.2. - Thermostat Thermostat is used for time- and temperature controlled auxiliary heating. Temperature values which are set too high can lead to scalding or damage to the system. Scalding protection must be provided by the Warning customer! In Energy savings mode, different settings may apply, see e.g. -
Page 30: Cooling
Special functions 6.5.2.8. - Energy saving mode Energy saving mode switches the heating on when T eco is not reached and heats up to T eco + hysteresis when solar charge is active. 6.5.2.9. - Periods Thermostat activity times Set the desired periods of time when the thermostat should be active. 3 periods can be set per day, settings can also be copied to other days. -
Page 31: Collector Cooling
Special functions 6.5.4.3. - ∆T return flow Switch-on temperature difference: When this difference is exceeded between return flow sensor and storage sen- sor, the relay is switched on. Switch-off temperature difference: When this difference is exceeded between return flow sensor and storage sen- sor, the relay is switched off. -
Page 32: Anti Legionella
Special functions 6.5.6. - Anti Legionella This function is used to heat up the system during selected periods to eliminate legionella bacteria. 6.5.6.2. - Anti Legionella set temperature (AL T set) This temperature has to be detected for the time set in AL residence time at the AL sensors for a successful heat up. -
Page 33: Heat Transfer
Special functions 6.5.7. - Heat transfer This is used to transfer energy from one storage to another with a pump. 6.5.7.2. - Min. temperature (Shift Tmin) Minimum temperature in source storage to enable the heat transfer. 6.5.7.3. - Temperature difference for heat transfer (Δ T Heat transfer) Temperature difference for heat transfer function. -
Page 34: Difference
Special functions 6.5.8. - Difference The relay is switched on when a specific temperature difference (Δ T) is reached. 6.5.8.2. - Diff Tmin Minimum temperature at source sensor to enable the difference relay. When the temperature at the source sensor is below this level, the difference function is disabled. -
Page 35: Solid Fuel Boiler
Special functions 6.5.9. - Solid fuel boiler The relay is used to control an additional solid fuel boiler. 6.5.9.2. - Min. solid fuel boiler temperature (SF Tmin) Minimum temperature in the solid fuel boiler to switch on the pump. If the tem- perature at the boiler sensor is below this temperature, the relay is disabled. -
Page 36: Parallel Operation R (X)
Special functions 6.5.12. - SParallel operation R (X) The relay is switched on at the same time as the set relay R1 or R2. 6.5.12.2. - Delay This menu determines how long after the start of R1 or R2 the parallel relay is switched on. -
Page 37: Heat Quantity
Special functions 6.6. - Heat quantity 6.6.1. - Flow rate When the heat meter mode „Flow rate“ is selected, an approximate heat quantity is calculated using the values the user has to enter. These are type of glycol/AntiFreeze, glycol portion and flow rate. These values are put into correlation with the temperature data of collector sensor and storage sensor. -
Page 38: Sensor Calibration
Special functions 6.7. - Sensor calibration Deviations in the temperature values displayed, for example due to cables which are to long or sensors which are not positioned optimally, can be compensated for manually here. The settings can be made for each individual sensor in steps of 0.8 °C (tempera- ture) resp. -
Page 39: Time And Date
Special functions 6.11. - Time and date This menu is used to set the current time and date. For analysis of the system data it is essential for the time to be set accurate- ly on the controller. Please note that the clock does not continue to run if the mains voltage is interrupted, and must therefore be reset. -
Page 40: Menu Lock
Menu lock 7. - Menu lock Menu “7. Menu lock” can be used to secure the controller against unintentional changing of the set values. The menu is closed by pressing “esc” or selecting “Exit menu lock”. The menus listed below remain completely accessible despite the menu lock being activated, and can be used to make adjustments if necessary: Measurements Statistics... -
Page 41: Service Values
Service values 8. - Service values The menu “8. Service values” can be used for remote diagnosis by a specialist or the manufacturer in the event of an error, etc. Enter the values at the time when the error occured e.g. in the table. Caution The menu can be closed at any time by pressing “esc”. -
Page 42: Language
Language 9. - Language Menu “9. Language” can be used to select the language for the menu guidance. This is queried automatically during initial commis- sioning. -
Page 43: Malfunctions, Additional Info
Malfunctions, additional info Z.1. Malfunctions with error messages If the controller detects a malfunction, the red light flashes and the warning symbol also appears in the display. If the error (LED flashes + warning is no longer present, the warning symbol symbol) changes to an info symbol and the red light no longer flashes. -
Page 44: Replacing The Fuse
Malfunctions, additional info Replacing the fuse Repairs and maintenance may only be performed by a specialist. Before working on the unit, switch off the power supply and secure it against Danger being switched on again! Check for the absence of power! Only use the supplied spare fuse or a fuse of the same design with the following specifications: T2A 250V. -
Page 45: Maintenance
Malfunctions, additional info Maintenance In the course of the general annual maintenance of your heating system you should also have the functions of the controller checked by a speci- alist and have the settings optimised if necessary. Caution Performing maintenance: - Assess/check plausibility of analyses (see Chap. -
Page 46: Can Bus
Malfunctions, additional info CAN Bus The CAN bus can be used to connect two or more controllers with each other or with the datalogger to exchange data. Controller 1 Controller 2 Controller 3 Controller n Datalogger (optional) 1. The controllers are connected in series with the CAN bus cable (1). 2. -
Page 47: Tips & Tricks
Tips & Tricks Instead of setting the flow rate for the system using a flow rate limiter, it is better to adjust the flow rate using the switch on the pump and by means of the “max. speed” setting on the controller (see 6.3.4). This saves electricity! The service values (see 8.) include not only current measurement values and operating states, but also all of the settings for the controller. - Page 48 04/2017 REGULUS spol. s r.o. Do Koutů 1897/3 http://www.regulus.eu 143 00 Praha 4 E-mail: sales@regulus.eu...
Need help?
Do you have a question about the SRS3 E and is the answer not in the manual?
Questions and answers