Table of Contents
Advertisement
Quick Links
INSTALLATION INSTRUCTIONS
FLIP
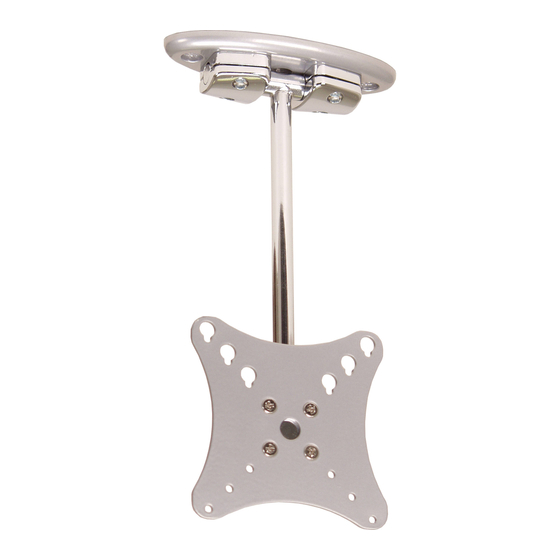
Flip-Down LCD Mount
EUROPE
NORTH AMERICA
3130 East Miraloma Avenue
Swallow House,
Anaheim, CA 92806 USA
Shilton Industrial Estate,
USA and Canada –
Shilton, Coventry, England CV79JY
Phone: 800-368-9700
Phone: +44 (0) 2476 614700
Fax: 800-832-4888
Fax: +44 (0) 2476 614710
Other Locations – Phone: (001)-714-632-7100; Fax: (001)-714-632-1044
©Premier Mounts 2009
9531-017-011-00
Advertisement
Table of Contents

Subscribe to Our Youtube Channel
Related Manuals for Premier Mounts FLIP


Summary of Contents for Premier Mounts FLIP
-
Page 1: Installation Instructions
INSTALLATION INSTRUCTIONS FLIP Flip-Down LCD Mount EUROPE NORTH AMERICA 3130 East Miraloma Avenue Swallow House, Anaheim, CA 92806 USA Shilton Industrial Estate, USA and Canada – Shilton, Coventry, England CV79JY Phone: 800-368-9700 Phone: +44 (0) 2476 614700 Fax: 800-832-4888 Fax: +44 (0) 2476 614710 Other Locations –... -
Page 2: Table Of Contents
PROPERTY DAMAGE. KEEP THESE INSTALLATION INSTRUCTIONS IN AN EASILY ACCESSIBLE LOCATION FOR FUTURE REFERENCE. PREMIER MOUNTS DOES NOT WARRANT AGAINST DAMAGE CAUSED BY THE USE OF ANY PREMIER MOUNTS PRODUCT FOR PURPOSES OTHER THAN THOSE FOR WHICH IT WAS DESIGNED OR DAMAGE CAUSED BY UNAUTHORIZED... -
Page 3: Parts List
FLIP Mount Parts List Congratulations on the purchase of your new Premier Mounts FLIP fl at panel mount. This mount is shipped with all proper installation hardware and components. Make sure that none of these parts are missing and/or damaged before beginning installation. -
Page 4: Flip Mount Location
Step 3. Place the FLIP mount base fl ush on the underside of the cupboard. Step 4. Slide fl at panel and FLIP mount to the rear of the cupboard surface until the bottom edge of the fl at panel is a minimum 1” from the wall. -
Page 5: Hardwood Cabinet Installation
FLIP Mount Hardwood Cabinet Installations Wood screws are recommended when mounting the FLIP mount onto hardwood surfaces. Cupboard FLIP Mount This distance was determined in the FLIP Mount Location section. Step 1. Place the FLIP Mount base on the mounting location and mark (using a pencil) where the FLIP will be mounted. -
Page 6: Softwood Cabinet Installation
Step 3. Line the FLIP Mount up with the two pre-drilled mounting holes. Step 4. Using a screwdriver, insert and tighten two (2) 1/4 - 20 x 5/8” screws and attach the FLIP Mount to the underside of the cabinet. -
Page 7: Mount Installation - Wall Surface (Optional)
Screw driver Before drilling the pilot holes, line up the mounting holes with the pencil marks and level the FLIP mount, if needed. Step 4. Using a 1/8” drill bit, pre-drill both pilot Step 5. Using a portable drill, insert and tighten two (2) holes at the marked locations. -
Page 8: Attaching The Flat Panel
Attaching the Flat Panel If you chose not to use the 360° feature of the FLIP mount, please insert and tighten one (1) M5 x 10mm fl at head screw into any one of the four mounting point locations (please see below for mounting points). The M5 x 10mm fl at head screw will prevent the FLIP mount from rotating 360°. -
Page 9: Flip Mount Adjustments
Pivot Point Screw to the steps below to tighten the pivot point screws. 5/32” Allen Step 1. Make sure the FLIP mount has Wrench been adjusted to the determined viewing angle. Step 2. Locate each pivot point. Step 3. Use the 5/32” Allen wrench 5/32”... -
Page 10: Technical Specifi Cations
FLIP Mount Technical Specifi cation All measurements are in inches [mm]. Page 10 Installation Instructions... -
Page 11: Warranty
What Premier Mounts Will Do At the sole option of Premier Mounts, Premier Mounts will repair or replace any product or product part that is defective. If Premier Mounts chooses to replace a defective product or part, a replacement product or part will be shipped to you at no charge, but you must pay any labor costs.
Need help?
Do you have a question about the FLIP and is the answer not in the manual?
Questions and answers