Table of Contents
Advertisement
Operations and Settings
Operating Instructions
AV0619MY0 -PS
Operating Instruction
This "Operations and Settings" describes how to operate the unit and how to
establish its settings.
For more information on how to perform basic operation and installation, refer to
the Operating Instructions "Basics".
Operations and Settings
4K Integrated Camera
AW-UE4KG
Model No.
AW-UE4WG
Model No.
ENGLISH
DVQP2109ZA
Advertisement
Table of Contents

Related Manuals for Panasonic AW-UE4 Series


Summary of Contents for Panasonic AW-UE4 Series
- Page 1 Operating Instruction Operations and Settings 4K Integrated Camera AW-UE4KG Model No. AW-UE4WG Model No. This "Operations and Settings" describes how to operate the unit and how to Operations and Settings establish its settings. Operating Instructions For more information on how to perform basic operation and installation, refer to the Operating Instructions "Basics".
- Page 2 Trademarks and Registered Trademarks ® ® ® ® Internet Explorer ® are either registered Microsoft , Windows , Windows 7, Windows 10, Microsoft Edge, trademarks or trademarks of Microsoft Corporation in the United States and other countries. Apple, Mac, macOS, OS X and Safari are registered trademarks of Apple Inc., in the United States and other countries.
- Page 3 Disclaimer of Warranty IN NO EVENT SHALL Panasonic Corporation BE LIABLE TO ANY PARTY OR ANY PERSON, EXCEPT FOR REPLACEMENT OR REASONABLE MAINTENANCE OF THE PRODUCT, FOR THE CASES, INCLUDING BUT NOT LIMITED TO BELOW: 1. ANY DAMAGE AND LOSS, INCLUDING WITHOUT LIMITATION, DIRECT OR INDIRECT, SPECIAL, CONSEQUENTIAL OR EXEMPLARY, ARISING OUT OF OR RELATING TO THE PRODUCT;...
-
Page 4: Table Of Contents
Contents Getting Started ............................8 Required Personal Computer Environment ..................8 Network security ..........................9 Characteristics ............................10 Accessories ..............................11 Optional Accessories .......................... 11 Operating Precautions ..........................12 Names and Functions of Parts ........................14 Tilting the Camera Up and Down ....................... 15 Panning the Camera Right and Left ...................... - Page 5 Switching the Direction or Zoom Speed ..................... 28 What to do when Encountering Problems in the Basic Shooting Operations ..........29 Advanced Operations ..........................30 Preset Memories ..........................30 Adjust the White Balance ........................31 Automatic Adjustment (AWB: AWB A or AWB B) ................ 31 Auto Tracking White Balance Adjustment (ATW) ................
- Page 6 System Menu ............................ 40 Priority Mode ..........................40 Frequency ..........................41 Format ............................42 Install Position ..........................42 Mirror ............................43 Digital Zoom ..........................43 Tally ............................43 IR ID ............................43 OSD of with Tally ........................44 OSD Status ..........................44 Color Bar ...........................
- Page 7 Basic Settings ............................ 54 Selecting Priority Mode ......................54 Live Page (Camera Title) ......................55 Image/Audio Settings......................... 56 Video over IP ..........................56 Image Settings ........................... 58 System Settings ......................... 62 User Mng.(User Management) ......................65 User auth.( User authentication) ....................65 Network Settings ..........................
-
Page 8: Getting Started
[Note] Depending on the software version of the unit, an update may be necessary. For the latest information on compatible operating systems, and web browsers, visit the support site at the website: https://pro-av.panasonic.net/... -
Page 9: Network Security
Network security As you will use the unit connected to a network, your attention is called to the following security risks. 1) Leakage or theft of information through the unit 2) Use of the unit for illegal operations by persons with malicious intent 3) Interference with or stoppage of the unit by persons with malicious intent It is your responsibility to take precautions such as those described below to protect yourself against the above network security risks. -
Page 10: Characteristics
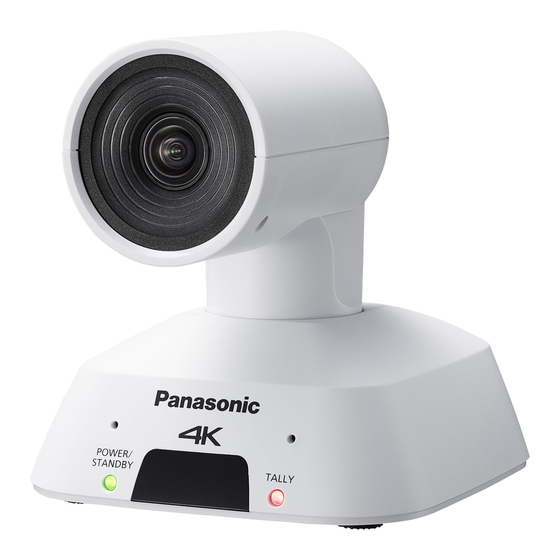
Characteristics Overview This 4K camera features single focus, ultra-wide angle 111 ° lens, and uses a 1/2.5” type MOS sensor and supports wider video output in various formats including 4K / 30p output. A single cable solution with one Ethernet cable is enabled, and compatibility with remote cameras is enhanced by protocol support such as RTMP. -
Page 11: Accessories
Accessories Check that the following accessories are present and accounted for. After removing the product from its container, dispose of packing materials in an appropriate manner. USB Cable Tripod screw (I-head type, 1/4 x 20 UNC) Drop-prevention wire M4 screw 10 mm length (4 screws) M4 screw Mount kit... -
Page 12: Operating Precautions
Operating Precautions Shoot under the proper lighting conditions. To produce pictures with eye-pleasing colors, shoot Operating temperature range under the proper lighting conditions. The pictures may Avoid using the unit in cold locations where the not appear with their proper colors when shooting temperature drops below 0 C (32 °F) or hot locations under fluorescent lights. - Page 13 PURPOSE. Please refer to the detailed terms and conditions that can be downloaded from the web screen At least three (3) years from delivery of this product, Panasonic will give to any third party who contacts us at the contact information provided below, for a charge no more than our cost of physically performing source code distribution, a complete machine-readable copy of the corresponding source code covered under GPL V2.0, LGPL...
-
Page 14: Names And Functions Of Parts
Names and Functions of Parts 8 9 10 1. Lens 7. LAN indicator(LINK/ACT) 2. Camera head Lights up when data is transmitted/received via LAN. 3. Internal microphone 8. LAN connector 4. Power status indicator Use a category 5e or above LAN cable with a - Orange light: Standby mode maximum length of 100 m (328 ft.) - Green light: The unit is turned on... -
Page 15: Tilting The Camera Up And Down
Names and Functions of Parts (continued) 12 13 12. Perpendicular fixing screw 15. Mount hole 13. Horizontal fixing screw [Screw: I-head type, 1/4 x 20 UNC 14. Drop-prevention wire mounting portion Clamping torque: 1.47 N · m(15kgf · cm)] Tilting the Camera Up and Down When the perpendicular fixing screw is loosened, the camera can be tilted approximately 25 °up or down. -
Page 16: Wireless Remote Control(Optional Accessory)
Wireless Remote Control(optional accessory) You can operate the unit with the optional wireless remote control (AW-RM50G). Consult your dealer concerning the purchase of a wireless remote control. Buttons used for operating this unit are described. Signal transmission window ON/STANDBY button Each time this is pressed for 2 seconds, operation switches between turning on the unit‘s power and establishing the standby status. - Page 17 HOME button If you press and hold the button for 2 seconds, the zoom level of the unit is changed to x1. ZOOM button These are used to adjust the digital zoom. The zoom is adjusted in the wide-angle using the [W] button and in the telephoto using the [T] button FAST button Changes the pan/tilt or zoom speed to high speed.
-
Page 18: Network Settings
The settings related to the unit’s network can be established using the Easy IP Setup Software. You can obtain Easy IP Setup Software (EasyIPSetup.exe) by downloading it from the following website. https://pro-av.panasonic.net/ To establish the settings for a multiple number of units, the settings must be selected for each camera involved. - Page 19 4. Input the network items, and click the [Save] button. [Note] When a DHCP server is being used, [DNS] of the Easy IP Setup Software can be set to [Auto]. After the [Save] button is clicked, it takes about 1 minute for the settings in the unit to be completed. If the USB terminal power supply or LAN cable is disconnected before the settings are completed, the settings will be canceled.
-
Page 20: Setting The Initial Account
Setting the Initial Account Set the initial account. In the initial state, the initial account setting screen is displayed when the web screen is displayed. Set a user name and password. [Note] The usable symbols for user name is following (# % + = , - _ ^ / @ . ~) ... -
Page 21: Basic Shooting Operation
Basic Shooting Operation With the basic operations, it is assumed that the white balance will be adjusted automatically (as per the factory settings). Due to the characteristics of the lens, the edge of the image is distorted. 1. Make sure the subject brightness is in the appropriate level. 2. -
Page 22: Power On And Power Off The Camera Unit
Power on and Power Off the Camera Unit Power on the Camera Unit When performing the operations using the wireless remote control. 1. Set all the power switches of the units and devices connected in the system to ON. The unit does not have a power switch. When power is supplied to it, the status indicator LED will light up orange. 2. -
Page 23: Priority Mode
Priority Mode Changing the priority mode enables the unit to perform operation for various applications. HDMI(4K): 4K video is output to an external monitor connected via an HDMI cable. IP(4K): Enables IP image transmission. IP image transmission of 4K images uses the H.264/H.265 video coding format. - Page 24 Output terminal Power Priority Mode Supply HDMI RTSP/RTMP Web(HTTP) H264or H.265: [50 Hz] 1080/50 fps、25 fps、10 fps、 5 fps [50 Hz] 720/50 fps、25 fps、10 fps、 MJPEG : 1080/25p 5 fps [50 Hz] [59.94 Hz] 360/50 fps、25 fps、10 fps、 - 720/10 fps、360/25 fps 1080/29.97p 5 fps [59.94 Hz/60 Hz]...
- Page 25 Output terminal Power Priority Mode Supply HDMI RTSP/RTMP Web(HTTP) H264 or H.265: [50Hz] 1080/50 fps、25 fps、10 fps、 5 fps [50Hz] 720/50 fps、25 fps、10 fps、 MJPEG : 1080/25p 5 fps [50Hz] (AC adapter) [59.94Hz] 360/50 fps、25 fps、10 fps、 - 720/10 fps、360/25 fps 1080/29.97p 5 fps 5 V/1 A or...
-
Page 26: Selecting The Camera Unit
Selecting the Camera Unit When performing the operations using the wireless remote control Press the [CAM1], [CAM2], [CAM3] or [CAM4] button. The camera unit’s status indicator LED blinks green when a signal matched by the remote control ID has been received, and it blinks orange when a signal that is not matched by the remote control ID has been received. - Page 27 4 Press the [ ] button. The “CAMERA” sub-menu is displayed on the monitor. 5 Press the [ ▲ ] or [ ▼ ] button to bring the highlight to “Scene”. 6 Press the [ ] button. 7 Press the [ ▲ ] or [ ▼ ] button to select the scene mode (Full Auto, Shutter priority, or Manual) and press the ] button to confirm the selection.
-
Page 28: Operating The Camera Unit
Operating the Camera unit When performing the operations using the wireless remote control Control the Camera’s Direction Moving the camera toward the left or right (panning): Press the [◄] or [►] button. Moving the camera up or down (tilting): Press the [▲] or [▼] button. ... -
Page 29: What To Do When Encountering Problems In The Basic Shooting Operations
What to do when Encountering Problems in the Basic Shooting Operations If the trouble is not resolved by taking the action suggested below, refer to “Troubleshooting” section. When performing the operations using the wireless remote control The unit does not move. Press the [CAM1], [CAM2], [CAM3] or [CAM4] button to select the unit which is to be operated. -
Page 30: Advanced Operations
Advanced Operations In the following will description more operations and setting of the camera unit. Preset Memories The camera unit enables up to 100 settings for the camera direction (panning and tilting), zoom to be registered in its preset memories, and called. However, the number of settings that can be registered and called depends on the type of wireless remote control that is used for operation. -
Page 31: Adjust The White Balance
Adjust the White Balance In order for the white to be reproduced accurately, the ratio between the three primary colors (RGB) is adjusted. If the white balance has shifted out of adjustment, not only will the white be reproduced poorly but the color tones of the entire screen will also be degraded. -
Page 32: Auto Tracking White Balance Adjustment (Atw)
Press the [MENU] button for 2 seconds to exit from menu. 6. Press the <SET> button. The auto white balance adjustment (AWB) is performed, and the white balance setting is entered. [Note] The white balance cannot be adjusted when color bars are displayed. Press the [MODE] button to switch to the camera picture. -
Page 33: Menu Operation
Menu Operation Menus are displayed on the monitor when the unit’s settings are to be selected. The monitor is connected to the video signal output connector. The basic camera menu operations involve displaying sub-menus from the main menu items, and selecting settings on the sub-menus. - Page 34 6. Press the [ ] button. The value of the item to be selected or comfirmed. 7. Press the [▲] or [▼] button to change the setting. The setting can be changed in the same way using the [◄] and [►] buttons. 8.
-
Page 35: Menu Items
Menu Items Setting the menu items When the unit’s settings are to be selected, the camera menus are displayed on the monitor. The monitor is connected to the video signal output connector. The basic camera menu operations involve displaying sub-menus from the Top Menu items, and selecting settings on the sub-menus. -
Page 36: Scene
Scene There are three scene modes – Full Auto, Shutter priority, and Manual. Full Auto: In this mode, the optimum settings and adjustments for the shooting conditions at hand are automatically established. But user still can adjust the value of Picture Level, AGC MaxGain, Slow Shutter, Chroma Level, and White Balance Mode. -
Page 37: Picture Level
Picture Level Adjust the brightness level (0, 1, 2, 3, 4, -1, -2, -3, -4). AGC Max Gain Set up the maximum gain-up amount value. Slow Shutter Set slow shutter function to “On” or “Off”. This can only be configured when “Scene” is set to “Full Auto”. Shutter Speed Adjust the shutter speed. -
Page 38: Gain
Gain In locations which are too dark, adjust the gain upward; conversely, in locations which are too bright, adjust it downward. When “Full Auto” mode is set, the light quantity is adjusted automatically. The noise increases when the gain is increased. Chroma Level Set the color intensity (Chroma level) of the images. -
Page 39: Contrast
Contrast Adjust the contrast level (0, 1, 2, 3, 4) of the image. Set here is the DRS function which provides just the right amount of compensation when images with significant light/dark differences are displayed. Depending on the shooting conditions, however, the picture quality may drop with increased noise. -
Page 40: System Menu
System Menu The following will describe the each function in System menu. Priority Mode Configure the setting for the priority output of video. HDMI(4K): 4K video is output to an external monitor connected via an HDMI cable. USB(4K): You can use this unit as a 4K Web camera. The camera can also be controlled from a personal computer. -
Page 41: Frequency
Frequency Set the frame frequency – 50Hz, 59.94Hz, or 60Hz. When the frequency is switched, “Format” is set as following: Frequency 50Hz 59.94Hz 60Hz 2160/25p 2160/29.97p 2160/30p 1080/50p 1080/59.94p 1080/60p Format 1080/25p 1080/29.97p 1080/30p 720/50p 720/59.94p 720/60p When changing the frequency, select “OK” to confirm the changing. -
Page 42: Format
Format Change the image format. The image format can different by the frequency. Frequency 50Hz 59.94Hz 60Hz 2160/25p 2160/29.97p 2160/30p 1080/50p 1080/59.94p 1080/60p Format 1080/25p 1080/29.97p 1080/30p 720/50p 720/59.94p 720/60p When changing the format, select “OK” to confirm the changing. Finally, select “Yes” to accept the changes. Install Position “Desktop”... -
Page 43: Mirror
Mirror Set the mirror the image to On or Off. Digital Zoom Set the digital zoom to “On” or “Off”. Picture quality degrades as zoom increases with digital zoom. Tally “Enable” or “Disable” is set here for the function which turns on or turns off the tally lamp using the tally control signal. -
Page 44: Osd Of With Tally
OSD of with Tally “Off” or “On” the function that turns off menu, status, and other displays when red tally signals are received via commands or contacts. When the red tally signal releases, the menu display will return OSD Status Error display when an error occurs Color Bar Switch between camera images and color bars. -
Page 45: Maintenance Menu
Maintenance Menu Language The system supports three language – English, Japanese, and Simple Chinese. FW Version Display the current firmware version of the unit. IP Address Display the IP address of the unit. -
Page 46: Subnet Mask
Subnet Mask Display the subnet mask of the unit. Default Gateway Display the default gateway which has been set for the unit. MAC Address Display the MAC address of the unit. Initialize Reset the unit back to the factory default. -
Page 47: Menu Table
Menu Table Main menu Sub menu Value Default CAMERA Scene Full Auto, Shutter Priority, Manual Full Auto Brightness Picture Level -4, -3, -2, -1, 0, 1, 2, 3, 4 AGC Max Gain 24dB, 30dB, 36dB, 42dB 24dB Slow Shutter Off, On Shutter Speed 1/1, 1/2, 1/5, 1/10, 1/20, 1/30, 1/60, [50Hz]... -
Page 48: Web Screen Start-Up
Web Screen Start-up With a personal computer connected to the unit, it is possible to view the camera’s IP videos or select various settings from the web browser. The LAN crossover cable is used when connecting a personal computer directly to the unit’s LAN connector for IP control, and the LAN straight cable is used when making the connection through a switching hub. -
Page 49: Connecting To Web Screen By Using A Pc
Connecting to Web Screen by Using a PC The procedure is explained here using Windows screens (Internet Explorer). When using other browsers, some screen displays will be different, but the procedure is similar. 1. Start the web browser of the personal computer. Use one of the web browsers below depending on the operating system installed in the personal computer. -
Page 50: Switching Between Live And Setup Screen
Switching between Live and Setup Screen When the live screen is displayed, click the [Setup] button. For details on the web setup screen, see “Web Screen Configuration” section. When the web setup screen is displayed, click the [Live] button to switch to live screen. For details on the live screen, see “Web Live Screen Operation”... -
Page 51: Web Live Screen Operation
Web Live Screen Operation You can display images from the camera on a personal computer and perform camera operations, such as pan, tilt, zoom, and focus control. Name Function (1) Live/Setup Click [Live] to switch to live screen. Click [Setup] to switch to setup screen. (2) RTMP Setup for uploading the camera’s live view to the broadcasting platform (ex: YouTube). - Page 52 Name Function (5) Zoom Use this to adjust the zoom (magnification) to 1.0x Use this to adjust the zoom (magnification) in the “Tele” direction. Use this to adjust the zoom (magnification) in the “Wide” direction. Select the speed at which zoom operations are to be performed.
-
Page 53: Web Screen Configuration
Web Screen Configuration Select the Setup Screen In live screen, click the [Setup] button to switch to setup screen. Setup menu Functions settings area Power ON/Standby mode switching... -
Page 54: Basic Settings
Basic Settings From the Setup menu click [Basic] button to display the Basic settings page. In basic settings, user can select [Priority mode] and setup name of [Live page]. Selecting Priority Mode Configure the setting for the priority output of video. Click [Setup] >... -
Page 55: Live Page (Camera Title)
Live Page (Camera Title) Input the name of the camera here. Click [Setup] > [Basic] > [Priority Mode] When the [Set] button is clicked, the input name appears in the camera title display area. [Note] The factory default setting is the model number of the unit. ... -
Page 56: Image/Audio Settings
Image/Audio Settings Video over IP The JPEG image and H.264/H.265 image settings as well as the settings related to image quality are selected in here. Click [Setup] > [Image/Audio] > [Video over IP] [Note] IP control can be performed but if you do not want to perform IP image transmission, set [H.264/H.265 transmission] to [Off]. - Page 57 H.264/H.265 (continued) Frame rate Set the frame rate for H.264 /H.265 images. 50Hz 5fps, 10fps, 25fps, 50fps* *not support in IP(4K)Priority mode 59.94Hz/60Hz 5fps, 15fps, 30fps, 60fps* *not support in IP(4K) Priority mode Max bit rate (per client) Specify the H.264/H.265 bit rate per client (1024kbps, 1536kbps, 2048kbps, 3072kbps, 4096kbps, 6144kbps, 8192kbps, 10240kbps, 12288kbps, 14336kbps, 16384kbps, 20480kbps, 24576kbps, and 32768kbps).
-
Page 58: Image Settings
Image Settings Image adjustment and preset position setup. Click [Setup] > [Image/Audio] > [Image] Image Adjust Click [Setup] button to call out image adjust dialog. Click [Close] button to exit from image adjust dialog. The image mode has three types – Full Auto, Shutter priority, and Manual. [Note] Setting data which changed are reflected immediately. - Page 59 Slow Shutter Set slow shutter function to “Off” or “On”. This can only be configured when “Scene” is set to “Full Auto”. Shutter Speed Adjust the shutter speed. When a higher shutter speed is selected, fast-moving subjects do not become blurred easily but the images will be darker.
- Page 60 Detail Adjust the sharpness (0, 1, 2, 3) of the image. Move the scroll bar to adjust the value. The default is 2. Contrast Adjust the Contrast level (0,1,2,3,4). The default is 2. Set here is the DRS function which provides just the right amount of compensation when images with significant light/dark differences are displayed.
- Page 61 Preset Position Click [Setup] button to call out preset position dialog. Click [Close] button to exit from image adjust dialog. Select the preset number or home position from drop-down list. Click [Move] to go to the pre-set position. Using to adjust the unit position and click [Set] to register the preset position.
-
Page 62: System Settings
System Settings Click [Setup] > [Image/Audio] > [System] Output Click [Set] button to save the configuration Format Change the image format. The image format can different by the frequency. Frequency 50Hz 59.94Hz 60Hz 2160/25p 2160/29.97p 2160/30p 1080/50p 1080/59.94p 1080/60p Format 1080/25p 1080/29.97p... - Page 63 Frequency Set the frame frequency – 50Hz, 59.94Hz, or 60Hz. When the frequency is switched, “Format” is set as following: Frequency 50Hz 59.94Hz 60Hz 2160/25p 2160/29.97p 2160/30p 1080/50p 1080/59.94p 1080/60p Format 1080/25p 1080/29.97p 1080/30p 720/50p 720/59.94p 720/60p Others Click [Set] button to save the configuration Install Position “Desktop”...
- Page 64 OSD Status Turn the status display during preset operation, or error display when an error occurs. The default is off. Color Bar Switch between camera images and color bars. The default is camera. [Note] Only HDMI can output color bar. IP and USB cannot output color bar.
-
Page 65: User Mng.(User Management)
User Mng.(User Management) Click [Setup] > [User Mng.] User auth.( User authentication) Configure the user authentication settings for the personal computers and mobile terminals that can access the unit. Up to 24 users can be registered. [Note] If user authentication fails more than 8 times within a 30-second period from the same IP address (personal computer), access to the unit will be disabled for a certain period. - Page 66 User name: Enter the user name here (1 to 32 characters). Click [Set] button to save the configuration. The following characters can be displayed. Numeric characters 0123456789 Alphabetical characters ABCDEFGHIJKLMNOPQRSTUVWXYZ (upper and lower cases) abcdefghijklmnopqrstuvwxyz Symbols #%+=,-_^/@: Password/Retype password: Enter the password here (4 to 32 characters). Re-enter the password to confirm. ...
-
Page 67: Network Settings
Network Settings Configure network and RTMP setting in the Network setup screen. Click [Setup] > [Network]. Network Setup IPv4 and IPv6 network. Click [Setup] > [Network] > [Network]. IPv4 network Click [Set] button to save the configuration. DHCP Select the method in which the IP address is configured. The default is off. IP Address Input the unit’s IP address here when the DHCP function is not going to be used. - Page 68 Default Gateway Input the unit’s default gateway if the DHCP function is not going to be used. The default is 192.168.0.1. [Note] Multiple IP addresses cannot be used for the default gateway even when the DHCP function is used. For details on the DHCP server settings, consult your network administrator. Whether the DNS server address is to be acquired automatically (Auto) or manually (Manual) is input here.
-
Page 69: Rtmp Setting
RTMP Setting Make RTMP transmission settings. Click [Setup] > [Network] > [RTMP]. Click [Set] button to save the configuration. [Note] Switch to the appropriate method of registering RTMP transmission server information suited to the setting information notified from the RTMP transmission server you are using. ... -
Page 70: Maintenance Settings
Maintenance Settings Among the various maintenance operations performed on this screen are language, system version upgrading and initialization of the unit. The Maintenance screen consists of four settings: [Language], [Product info.], and [Default reset]. Click [Setup] > [Maintenance]. Language Set the unit system’s language. Click [Setup] >... -
Page 71: Product Info
Product Info. Click [Setup] > [Maintenance] > [Product Info.]. The versions of the unit’s software can be checked on this screen. The [Model no.], [MAC address], [Serial no.], [Firmware version] and [Operation Time] of the unit is displayed. Model no. Display the unit’s model number. -
Page 72: Upgrading The Firmware (Firmware File)
Use the files specified by Panasonic Corporation as the software used for version upgrading. Do not turn off the unit’s power while a software version is being upgraded. (Message will appear to indicate that the process is complete.) -
Page 73: Default Reset
Default Reset The unit’s setting data is initialized and the unit is restarted in here. Reset to the default (Except the network settings) When the [Execute] button is clicked, the unit’s settings are returned to their defaults. When the initialization operation is started, the unit is restarted so no operations can be undertaken for about 2 minutes. -
Page 74: Web Camera Functions
Web Camera Functions The unit can be used as a Web camera if you connect the unit and a personal computer or other device with a commercially available USB cable. The unit is compliant with USB Video Class and USB Audio Class. The video and audio of the unit can be transmitted to a personal computer or other device by using communication software or other software. -
Page 75: Troubleshooting
Troubleshooting Operation Symptom Cause and solution Is the network cable for the PoE (IEEE802.3af) compatible power supply device No power and the unit connected properly? Power may not be supplied if the total power limit is exceeded on power supply devices that allow connections to multiple PoE terminals. -
Page 76: Video
Symptom Cause and solution Cannot access from a web Does the subnet mask setting match the network subnet of the connection browser destination? → Check out the subnet mask settings of the unit and access devices, and then consult with the network administrator. Has the “Use a proxy server”... -
Page 77: Ip Images
IP images Symptom Cause and solution Images are not displayed For Windows: If [Check for newer versions of stored pages] is not set to [Every time I visit the webpage] in the temporary Internet file settings, IP images may not appear in the live screen [Live]. -
Page 78: Specification
Specification The symbols on this product (including the Power requirements: accessories) represent the following: DC 5 V (4.75 V-5.25 V ) DC 37 to 57 V (PoE power supply) Current consumption: 1.0 A (USB terminal power supply) 0.2 A (PoE power supply) Indicates safety information. - Page 79 [Camera unit] (Continue) Shutter speed: Full Auto mode Slow Shutter ON/Shutter Priority mode/Manual mode [60 Hz/59.94 Hz] 1/1, 1/2, 1/5, 1/10, 1/20, 1/30, 1/60, 1/120, 1/240, 1/480, 1/1000, 1/2000, 1/4000, 1/8000, 1/16000 [50 Hz] 1/1, 1/2, 1/5, 1/10, 1/20, 1/25, 1/50, 1/100, 1/250, 1/500, 1/1000, 1/2000, 1/4000, 1/8000, 1/16000 ...
- Page 80 [IP streaming] Video compression format: Motion JPEG, H.264, H.265. Transfer mode Frame rate Image Resolution System frequency System frequency 59.94 Hz/60 Hz 50 Hz 1280x720 10 fps 10 fps Motion JPEG 30 fps 25 fps 640x360 10 fps 10 fps 30 fps 25 fps 3840x2160...
-
Page 81: Index
Index Color Bar ............44, 64, 79 Contrast ............39, 47, 60 1/2.5” ................10 Default gateway ..........46, 47, 68 3200K ................. 59 Default reset ............... 73 Detail ..............38, 47, 60 DHCP ................. 67 5600K ..............32, 59 Digital zoom ...........43, 47, 63 Dimensions .............. - Page 82 Install Position ..........42, 47, 63 Network ..............67, 80 Internal microphone ........... 14 Network security ............9 IP ................ 23, 40 Network Setting ............ 18, 67 IP address ..........45, 47, 67, 68 IP control ..............10 Operating precautions..........12 IP image ..............
- Page 83 Reboot ............... 73 URL ................69 Remote control ID ............14 Usage restrictions ............9 Resolution ............79, 80 USB ..............77, 78 RTMP .............51, 69, 80 USB cable ............10, 11, 14 RTMPS ............... 80 USB connection ............79 USB terminal ..............
- Page 84 Web Site: http://www.panasonic.com © Panasonic Corporation 2019...
Need help?
Do you have a question about the AW-UE4 Series and is the answer not in the manual?
Questions and answers