Advertisement
Advertisement
Table of Contents

Related Manuals for OAKWORKS DTPM300


Summary of Contents for OAKWORKS DTPM300
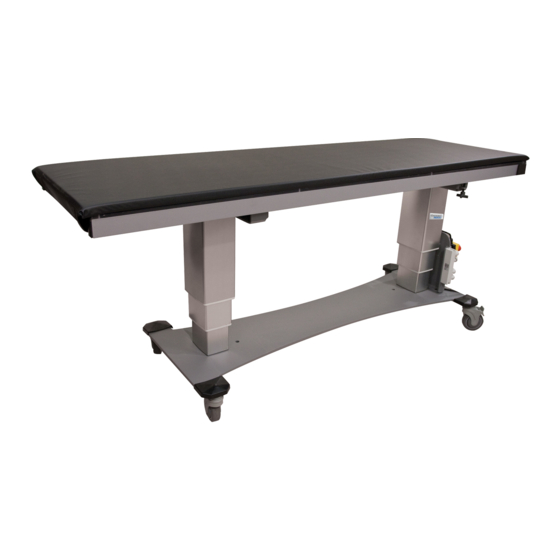
- Page 1 Service MANUAL - DTPM300 TAbLeS Part No.: MMMNSM0002 revisioN LeveL: F...
-
Page 2: Table Of Contents
Please see and fill out a Service Replacement Form for any replacement/repair performed. You will not receive a payment for work completed until a form is filled out and returned to Oakworks ®... -
Page 3: Model Number & Serial Number
US 120 V 60 Hz 4 A Class 1 Equipment Duty Cycle: MAX 2 minutes ON / 18 minutes OFF 16796025 FLDTRT242478MGTTZZ Ser#: FLR561910 European Authorized Representative: www.oakworks.com DTPM RT 24 x 24-40 x 78 MG/TT Emergo Europe Molenstraat 15 923 East Wellspring Rd. -
Page 4: Inspections & Maintenance
MAINTENANCE • No specific maintenance tasks are required. • Oakworks medical tables/chairs are designed and built to provide many years of dependable service. Please follow local regulations and laws when disposing of the electrical components used in this chair. For all Customer Service related problems refer to the Service Manual •... -
Page 5: Troubleshooting
TroUbLeSHooTiNG TroUbLeSHooTiNG Cause aCtioN ProbLem 1. see No Power or Loose Connection 1. Loose Connection 2a. see table reset: table manufactured before 03/15/12 if the table electric func- 2. reset needed 2b. see table reset: table manufactured 03/15/12-02/25/13 tions are not working: 2c. -
Page 6: No Power Or Loose Connection
rePAir ProceDUreS No PoWer or LooSe coNNecTioN 1. Check the outlet to be sure that it has power and that the power cable is plugged in. 2. Be sure the red knob is pulled out on the emergency stop. ((See photo below.) Turn knob clockwise to release from off position.)) -
Page 7: Table Reset: Tables Manufactured Before 03/15/12
STOP! Increasing the tilt will result in permanent damage to the table. Down button 3. Test table to insure all functions are working properly. Contact Oakworks for further assistance if your table does not reset - (717) 235-6807. table of Contents... -
Page 8: Table Reset: Tables Manufactured 03/15/12-02/25/13
rePAir ProceDUreS TAbLe reSeT: TAbLe MANUFAcTUreD 03/15/12-02/25/13 1. Press and hold the Top row of 2 buttons simultaneously on the hand control (sometimes it takes sev- eral attempts to press them “simultaneously”). The control box will beep approximately 10 times. Release the buttons when the beeping stops. - Page 9 Increase, STOP! Increasing the tilt will result in permanent damage to the table. Down button 4. Test table to insure all functions are working properly. Contact Oakworks for further assistance if your table does not reset - (717) 235-6807. table of Contents...
-
Page 10: Contact Oakworks For Further Assistance If Your Table Does Not Reset - (717)
Increase, STOP! Increasing the tilt will result in permanent damage to the table. Down button 3. Test table to insure all functions are working properly. Contact Oakworks for further assistance if your table does not reset - (717) 235-6807. table of Contents... - Page 11 rePAir ProceDUreS coNTroL box rePLAceMeNT Tools Needed: Time Needed: ~30 minutes Level of Difficulty: Easy /Medium/Hard Parts Needed: See Replacement Part’s List Precautions: Please be sure that the table is clear of all people and materials before attempting to repair. Remove the power cable from its power source. Lastly, give yourself adequate room around the table to make the task more comfortable and safe.
- Page 12 rePAir ProceDUreS 2. Emergency Stop Button: Photo 1 below show the button activated, photo 2 below shows button depressed / tripped. (Rotate the button clockwise to release.) Do this to insure control box has power. Photo 1 (Activated) Photo 2 (Depressed) 3.
- Page 13 rePAir ProceDUreS 5. Reassemble in reverse order. 6. Plug table into power and test all operations of the table. 7. Tuck and secure extra cable wire up out of the way. Make sure all cables are not in a pinch area. 8.
- Page 14 rePAir ProceDUreS HAND coNTroL / FooT coNTroL rePLAceMeNT Tools Needed: Time Needed: ~30-45 minutes per control Level of Difficulty: Easy /Medium/Hard Parts Needed: See Replacement Part’s List Precautions: Please be sure that the table is clear of all people and materials before attempting to repair.
- Page 15 rePAir ProceDUreS 3. It may be necessary to reset the control box. See table resetting: a. TABLE RESET: TABLES MANUFACTURED BEFORE 03/15/12 b. TABLE RESET: TABLES MANUFACTURED 03/15/12-02/25/13 c. TABLE RESET: TABLES MANUFACTURED AFTER 02/25/13 4. Please fill out and return a Service Replacement Form. table of Contents...
- Page 16 rePAir ProceDUreS LiFT coLUMN rePLAceMeNT Tools Needed: Time Needed: ~1-1.5 hour per column Level of Difficulty: Easy/ Medium /Hard 2 people needed for some steps Parts Needed: See Replacement Part’s List Precautions: Please be sure that the table is clear of all people and materials before attempting to repair.
- Page 17 rePAir ProceDUreS 2. Remove rubber bumpers both sides of the end of the malfunctioning column end of the table. 3. 2 people required… Carefully roll the top and lift off of the main bearings, then roll the rest of the way till the top lifts off completely.
- Page 18 rePAir ProceDUreS 5. Remove cable ties and obtain slack in the columns power cable under the table. Remove the 4 bolts on the bottom of malfunctioning column. (Some models have a strain relief; remove (2 screws), then unplugging on the bottom of the columns power cord from the column above base.) (There is enough room under the table to do this task without lifting the base from the floor and above the base for the strain relief and power cord removal.) 6.
- Page 19 rePAir ProceDUreS cASTer rePLAceMeNT Tools Needed: Time Needed: ~30 minutes per caster Level of Difficulty: Easy /Medium/Hard Parts Needed: See Replacement Part’s List Precautions: Please be sure that the table is clear of all people and materials before attempting to repair. Remove the power cable from its power source. Lastly, give your- self adequate room around the table to make the task more comfortable and safe.
- Page 20 rePAir ProceDUreS reMovAL oF oLD / brokeN cASTer 1. Remove the black rubber plastic cover (this can be pried off by hand). Push the caster tab down to lock the caster. If the tab has broken, then just insert a screwdriver between the gray and white plastic, and push the white plastic against the wheel.
- Page 21 rePAir ProceDUreS 7. Install lock nut to screw. (Hold screw from turning with an Allen wrench and tighten with a socket wrench ¼ turn past flush.) 8. Using a general purpose cement, glue down the black rubber plastic cover. (We use Loctite super glue gel) Do not get gel on the screw threads…...
-
Page 22: Schematic
ScHeMATic table of Contents... -
Page 23: Wiring Diagram
WiriNG DiAGrAM table of Contents... -
Page 24: Replacement Part's List
rePLAceMeNT PArT’S LiST ReplacemenT paRT’s lisT Replacement Quantity paRt numbeR DescRiption contRol box - 120V systems 57916-1 Control Box-CB16, 110V Openbus contRol box - 230V systems 57916-2 Control Box-CB16, 220V Openbus 57920 Hand Control-4 Button HanD contRol 1 EaCH 57920-1 Hand Control-Overlay 4 Button DTPM Foot contRol 4027... -
Page 25: New Freedom, Pa
Service MANUAL - DTPM300 TAbLeS Part No.: MMMNSM0002 revisioN LeveL: F coNTAcT iNForMATioN: Fax: 717 235-6798 Attention customer Service email: kthomas@oakworks.com Inc. ® akworks 923 East Wellspring Road New Freedom, PA 17349 Phone: 717-235-6807 www.oakworksmed.com 3034177 CONFORMS TO: ANSI/AAMI STD ES60601-1...
Need help?
Do you have a question about the DTPM300 and is the answer not in the manual?
Questions and answers