
Related Manuals for Viega Prevista Dry 8570.31


Summary of Contents for Viega Prevista Dry 8570.31
- Page 1 Prevista Dry fixing element for 1120 mm support hinged handles Instructions for Use for support hinged handles, barrier-free pre-wall installation Model Year built: 8570.31 from 10/2018 en_INT...
- Page 2 Prevista Dry fixing element for 1120 mm support hinged handles 2 from 15...
-
Page 3: Table Of Contents
Table of contents Table of contents About these instructions for use Target groups Labelling of notes About this translated version Product information Intended use 2.1.1 Areas of use Product description 2.2.1 Overview Handling Assembly information 3.1.1 Installation dimensions Assembly 3.2.1 Mounting to a masonry wall 3.2.2 Mounting in Prevista Dry Plus... -
Page 4: About These Instructions For Use
This restriction does not extend to possible operating instructions. The installation of Viega products must take place in accordance with the general rules of engineering and the Viega instructions for use. -
Page 5: About This Translated Version
About these instructions for use About this translated version This instruction for use contains important information about the choice of product or system, assembly and commissioning as well as intended use and, if required, maintenance measures. The information about the products, their properties and application technology are based on the current standards in Europe (e.g. -
Page 6: Product Information
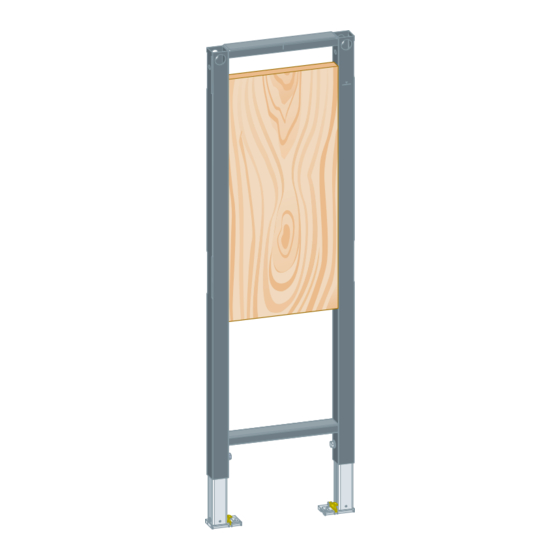
Product information 2 Product information Intended use 2.1.1 Areas of use The Prevista Dry fixing element is used for fixing equipment in the bar‐ rier-free pre-wall installations. The construction height of the fixing ele‐ ment is 1120 mm. The Prevista Dry fixing element is used for fixing supporting handles onto the Prevista Dry WC elements. -
Page 7: Handling
Handling 3 Handling Assembly information 3.1.1 Installation dimensions Fig. 2: Dimensions model 8570.31 Assembly 3.2.1 Mounting to a masonry wall Mounting without WC element Determine and mark the fixing points. X2: 310 mm Drill the holes. Insert the dowels. Prevista Dry fixing element for 1120 mm support hinged handles 7 from 15... - Page 8 Handling Determine and mark the fixing points on the floor. X3: 225 mm Drill the holes. Insert the dowels. INFO! Mount the Prevista Dry fixing set pursuant to the instruc‐ tions for use for the fixing set. Adjust the construction height of the element in accordance with the on-site marking of the upper edge of the finished floor.
- Page 9 Handling Mounting at the WC element The following steps describe mounting from the right-hand side of the WC element. If required, repeat the same steps from the left-hand side. Push the fixing element as far as it will go against the WC element. Mount the wall fixing.
-
Page 10: Mounting In Prevista Dry Plus
Handling Use the fixing screw to connect the WC element and the fixing ele‐ ment. Screw in the fixing screw and tighten it. Repeat the mounting steps on the left-hand side. 3.2.2 Mounting in Prevista Dry Plus Mount the Prevista Dry Plus pre-wall construction pursuant to the instructions for use of the Prevista Dry Plus system. - Page 11 Handling Set the height of the element by means of the feet. Fix the element with the Prevista Dry Plus Steptec rail connectors. ð The element is fixed in the Prevista Dry Plus pre-wall construc‐ tion. Prevista Dry fixing element for 1120 mm support hinged handles 11 from 15...
-
Page 12: Mounting In Metal Support Profile
Handling 3.2.3 Mounting in metal support profile Mounting with WC element Position the element on the floor rail. If necessary, adjust the foot depth from 50 mm (pre-mounted) to 75 Pull the foot out and turn by 90°. Screw the feet together with the support profile. Adjust the construction height of the element in accordance with the on-site marking of the upper edge of the finished floor. - Page 13 Handling If applicable, connect further elements to the element via the sup‐ port profile. Prevista Dry fixing element for 1120 mm support hinged handles 13 from 15...
- Page 14 Handling Mounting in metal support profile Position the element on the floor rail. If necessary, adjust the foot depth from 50 mm (pre-mounted) to 75 Pull the foot out and turn by 90°. Screw the feet together with the support profile. Adjust the construction height of the element in accordance with the on-site marking of the upper edge of the finished floor.
-
Page 15: Disposal
Handling If applicable, connect further elements to the element via the sup‐ port profile. Disposal Separate the product and packaging materials (e. g. paper, metal, plastic or non-ferrous metals) and dispose of in accordance with valid national legal requirements. Prevista Dry fixing element for 1120 mm support hinged handles 15 from 15...
Need help?
Do you have a question about the Prevista Dry 8570.31 and is the answer not in the manual?
Questions and answers