Table of Contents
Advertisement
Quick Links
Download this manual
See also:
Use and Care Manual
Advertisement
Table of Contents

Subscribe to Our Youtube Channel
Related Manuals for Gaggenau BL 253


Summary of Contents for Gaggenau BL 253
- Page 1 Gaggenau Instruction manual Wall oven BL 253...
-
Page 3: Table Of Contents
Table of contents Important information for use Rapid heating Before installation Setting For your safety Causes of damage Childproof lock Setting The wall oven The ceramic Automatic time limiter The lift up floor Automatic programming Opening and closing Ovenware Preparing the meal The control panel Programmes Operating buttons and displays... - Page 4 Setting values and tips Cakes and pastries Baking tips Meat, poultry, fish Tips for roasting and grilling Braising Tips for braising Bakes, gratins, toasts, vegetables Drying Preserving Frozen ready made meals Defrosting Keeping warm and melting Tips for saving energy Acrylamide in foodstuffs Test dishes...
-
Page 5: Important Information For Use
Important information for use Read this instruction manual carefully to make sure that Never place combustible items in the oven. Do not place you always use and maintain your oven safely and greaseproof paper on the ceramic. Risk of fire. correctly. -
Page 6: Causes Of Damage
Causes of damage Many causes of damage can be avoided. Observe the following notes. Caution: Oven Do not splash water into a hot oven. This could damage the enamel. Do not place cookware up to the edge of the ceramic. It must not protrude over the accessory holders. -
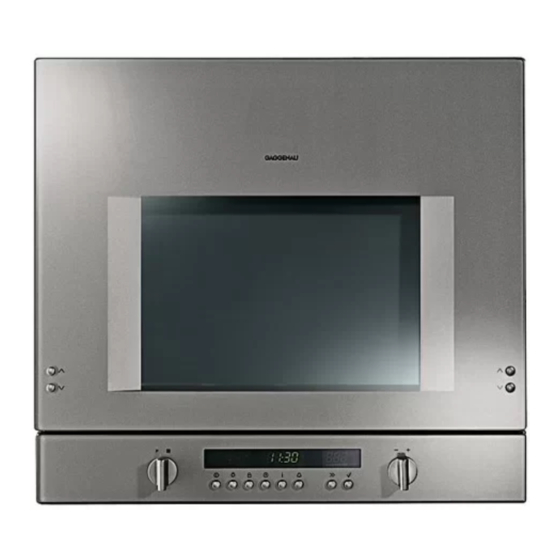
Page 7: The Wall Oven
The wall oven Use this section to familiarise yourself with your new oven. The lift up floor, control panel and its switches and indicators are explained. The types of heating available and the accessories included with your oven will be explained here. Ventilation slot Lift up floor Lift up floor... -
Page 8: The Lift Up Floor
The lift up floor With the lift up floor function, you can open your oven to attach the accessories and prepare your meals. This type of opening is very ergonomic and enables you to work comfortably with the oven. You no longer have to reach into the oven and can determine the optimum countertop level yourself. - Page 9 Anti trap guard: If the lift up floor meets resistance, it stops and moves back a little. In order for the lift up floor and anti trap guard to function again correctly, you must close the oven. To avoid injury and damage in any case, make sure that hands do not become trapped.
-
Page 10: The Control Panel
The control panel You can use the control panel to make settings for your oven. The different operational controls will be explained here. Operating buttons and displays Type of heating Clock Temperature You can use the operating buttons to start the oven and display display display... -
Page 11: Function Selector
Function selector Use the function selector to set the type of heating. The relevant symbol appears in the type of heating display. The default value for each type of heating appears in the temperature display. Type of heating Top/bottom for cakes in tins, cakes on heating trays, bakes and lean roasts Special baking*... -
Page 12: Rotary Knob
Rotary knob The set values can be altered using the rotary knob. Ranges Meaning 30 ºC 300 ºC Temperature for the types of heating Exceptions: > 3D hot air 30 ºC to 275 ºC Defrost Y at 20 ºC and 30 ºC to 60 ºC Preheat ñ30 ºC to 60 ºC Keep warm qV 65 ºC to 100 ºC... -
Page 13: Oven And Accessories
Oven and accessories Here you will find information about the oven and accessories. We will explain how to attach the accessories and use the ceramic. Oven The oven has a cooling fan. During operation, it switches on and off automatically as necessary. So that the oven cools down more quickly, it remains on for a fixed time after oven operation. -
Page 14: Accessories
Lift-up floor function: Only the ceiling light lights up when the oven is open. The oven is switched off: If the lights are switched off, the ceiling light comes on when the oven is opened. It switches off as soon as the oven is closed. -
Page 15: Accessory Holder
Accessory holder Before attaching the accessories for the first time, you must insert the accessory holders. Make sure that the attachment slits for the accessories point outwards. Place each accessory holder on the holder. Turn the accessory holder slightly outwards so that the pivots engage in the stop in the notch. -
Page 16: Before Using For The First Time
Before using for the first time Your oven has many different functions. Here we will start at the beginning and show you how to operate it correctly. You will find examples for setting the oven, e.g. the clock, timer and basic settings. Before using your oven for the first time, read the safety precautions in the "Important information for use"... -
Page 17: Switching The Oven On And Off
Switching the oven on and off There is a main switch to ensure that the oven is not switched on accidentally. This can only be set when the oven is on. Main switch Switch the oven on and off using the @ main switch. Switching on: Press the @ main switch until the symbol appears in... -
Page 18: Setting The Oven
Setting the oven In the "Setting values and tips" section, you will find suitable settings for many dishes. There are various ways in which you can make settings. Switching off the oven manually: You can switch the oven off yourself when the meal is ready. -
Page 19: Switching Off Automatically
Press the button to start the oven. The time appears in the clock display. Switching off: Switch the oven off with the @ main switch when the meal is ready. Changing the settings: You may change the type of heating or temperature at any time. -
Page 20: Switching On And Off Automatically
Changing the cooking time: Press the j clock button repeatedly until the Cooking time symbol flashes in the clock display. Change the cooking time using the rotary knob. Press the button to confirm the change. Clearing the cooking time: Press the j clock button repeatedly until the Cooking time symbol flashes in the clock display. - Page 21 & End time symbol lights up in the clock display and the end time is displayed. When the oven starts, the Cooking time symbol lights up and you will see the cooking time counting down. The oven light is switched off until the start. The end time is reached: A signal sounds.
-
Page 22: Temperature Control
Temperature control The temperature control shows the temperature increase or the residual heat in the oven. Temperature increase: When you start the oven, the temperature control shows the temperature increase. When you preheat the oven, place your meal into the oven as soon as all five fields are filled. -
Page 23: Time
Time When the oven is first connected or after a power failure, four zeros and the = clock symbol flash in the clock display. Set the time. Setting The oven must be switched off and the timer must not be set. -
Page 24: Timer
Timer You can use the timer as a kitchen timer. It runs independently of the oven and has its own acoustic signal. Setting You can set the timer at any time. Example: 20 minutes. Press the timer button. 0:00 appears in the clock display and the timer symbol flashes. -
Page 25: Basic Settings
Basic settings Your oven has many different basic settings. You can adjust these settings to meet your own requirements. Basic setting In 1 Resetting all values In 2 Displaying the time Only Always* when in In 3 Signal duration after Short Medium* Long... -
Page 26: Rapid Heating
Rapid heating During rapid heating, the oven reaches the required temperature particularly quickly. For an even cooking result, do not put your meal into the oven until rapid heating has ended. You can use rapid heating for the following types of heating: Top/bottom heating Special baking setting... -
Page 27: Childproof Lock
Childproof lock Your oven has a childproof lock. This prevents children from switching the oven on accidentally or changing a setting. The operating buttons do not function when the childproof lock is active, except for a few exceptions: Childproof lock when the oven is switched on: The acoustic signal for the timer or an elapsed cooking time can be switched off. -
Page 28: Automatic Time Limiter
Automatic time limiter The automatic time limiter of your oven is active when the oven heats up over a long period of time and no settings are changed. The length of the time period depends on the set temperature or grill setting. The oven lights switch off after approximately 2 hours. -
Page 29: Automatic Programming
Automatic programming Preparing the meal With automatic programming, elaborate pot roasts, tender roasts and delicious casseroles are quite easy. You do not have to turn, baste and stir. As the lid is not The cooking result is dependent on the quality of the removed from the ovenware, the oven remains clean. -
Page 30: Programmes
Programmes Place the ovenware on the ceramic. Don't preheat the oven. Programme Suitable Weight range Add liquid fresh meal Beef joint Prime ribs, shoulder, roulade, marinated beef 0,5 3,0 kg Roast beef, medium Roast beef, prime ribs 0,5 2,5 kg English roast beef Roast beef, prime ribs 0,5 2,5 kg... -
Page 31: Setting
Setting When you have prepared your dish, select a suitable programme from the programme table. Switch on the oven using the @ main switch and make the settings. Example: medium roast beef, 1.2 kg, it is 9:45. Programme 2, the dish takes 65 minutes. Use the function selector to choose the automatic programme. -
Page 32: Switching On And Off Automatically
Cancelling the programme: Change the type of heating or switch off the oven with the @ main switch. The programme number cannot be changed. Calling up settings: & To call up the End time or = Time: Press the j clock button repeatedly until the relevant symbol appears in the clock display. -
Page 33: Tips For Automatic Programming
Clearing the end time: Calling up settings: & & Press the j clock button repeatedly until the To call up the Cooking time, End time or time symbol flashes in the clock display. = Time: Reset the end time using the rotary knob until the Press the j clock button repeatedly until the relevant current time is set at which the programme ends. -
Page 34: Pyrolysis
Pyrolysis Cleaning accessories at the same time Pyrolysis is a convenient way to keep your oven free from dirt. The oven is heated to approximately 500 ºC. Any food The grill tray or the enamel baking tray can be cleaned in residues from roasting, grilling and baking are burnt to the oven at level 3 at the same time. -
Page 35: Setting
Setting Switch on the oven with the @ main switch. Then you can make the settings. Example: cleaning level 2, it is 9:35. Use the function selector to select pyrolysis. So that pyrolysis cannot be started accidentally, level 0 flashes in the temperature display. Set the cleaning level required using the rotary knob. -
Page 36: Switching On And Off Automatically
Switching on and off automatically Make the settings as described in steps 1 to 3. Set a later end time before you start the oven. Example: pyrolysis is to be finished by 11:45. Use the rotary knob to set a later end time. Press the button to confirm. -
Page 37: After Pyrolysis
After pyrolysis Care Allow the oven to cool down fully. If you always look after your oven, it will remain clean for a Then wipe away any remaining ash from inside the oven long time and you will not have to clean it thoroughly so using a moist cloth. -
Page 38: Cleaning
Cleaning Even if you look after your oven well, it will need to be Area Cleaning thoroughly cleaned. Please observe the information in the Accessory Hot soapy water: table, so that you do not damage the various surfaces by holders Clean with a sponge. -
Page 39: Removing And Refitting The Glass Panels
Removing and refitting the glass panels The two outer glass panels on the front of the oven can be removed to assist cleaning. Slide the front glass panel upwards and remove it to the front. Caution: the front glass panel is loose as soon as it is unhooked. - Page 40 Refit the two panels. To do this, insert the lower small mounting bracket into the horizontal slot. Fold the panel upwards and press the lower large mounting bracket into the vertical slot. Insert the upper large mounting bracket into the vertical slot and press the small mounting bracket into the horizontal slot.
-
Page 41: Rectifying Minor Faults Yourself
Rectifying minor faults yourself Malfunctions often have simple explanations. Before you call the after sales service, try to solve the problem yourself using the table. Problem Possible cause Remedy/notes The oven cannot be The fuse is faulty. Look in the fuse box to make sure that the switched on. - Page 42 You can clear any fault message with the j clock button. This resets the oven to its basic settings. You must reset the time. If a fault message cannot be cleared or occurs repeatedly, call the after sales service. Fault message in the clock Possible cause Remedy/notes display...
-
Page 43: Replacing The Oven Lights
Replacing the oven lights If an oven light fails, it must be replaced. Heat resistant replacement bulbs can be obtained from the after sales service or specialist shops. Only use these bulbs. Warning: Only replace the oven lights when the oven is cold. -
Page 44: Glass Covers
Pull out the bulb, rather than unscrewing it, (fig. B) and replace with a bulb of the same type. Make sure that the pins are in the correct position. Push the bulb in firmly. Refit the glass cover. Make sure that the curve in the glass is on the side on which the bulb is located. -
Page 45: Opening The Oven By Hand
Opening the oven by hand If the lift function fails, you can open the oven manually. For example, if there is a power cut and you still have a meal in the oven. You need one of these 9 V E block batteries to do so: - Alkaline 6LR61, 6LF22 or 6AM6 - Carbon zinc 6F22 Warning: Allow the oven to cool down fully. -
Page 46: After Sales Service
After sales service Packaging and old appliances Our after sales service is there for you if your oven should Unpack the appliance and dispose of the packaging in need to be repaired. You will find the address and an environmentally responsible manner. telephone number of your nearest after sales service ó... -
Page 47: Setting Values And Tips
Setting values and tips Accessories: Use the accessories provided. You can buy accessories and special accessories from the after sales service or specialist retailers. Here you will find a selection of meals and the ideal settings for them. Baking trays and tins made from dark metal are the The setting values apply to meals placed in a cold oven. -
Page 48: Baking Tips
Bread and rolls Accessories Level Type of Temperature Cooking time heating in ºC in minutes Bread rolls Baking tray 220 240 25 35 Crispy rolls, pretzels Baking tray 200 220 10 25 Baking tray + grill tray** 3 + 1 180 200 15 25 Never pour water directly on the ceramic. -
Page 49: Meat, Poultry, Fish
Meat, poultry, fish Grilling: The pieces of food you are grilling should be of equal thickness. Ovenware: They should be at least 2 to 3 cm thick. This will allow You may use any heat resistant ovenware. The grill them to grill evenly and prevent them from drying out. tray is suitable for large roasts. -
Page 50: Tips For Roasting And Grilling
Poultry Poultry will turn out particularly crispy and brown if you baste it towards the end of the roasting time with butter, The weights indicated in the table are for unstuffed salted water or orange juice. poultry that is ready for roasting. Turn whole poultry after two thirds of the time. -
Page 51: Braising
Braising Note: Only use fresh meat. Sear the meat at a very hot temperature and for a Braising is the ideal cooking method for all tender pieces sufficiently long time. of meat which are to be cooked medium rare or medium. Meat remains very succulent and extremely tender. -
Page 52: Bakes, Gratins, Toasts, Vegetables
Bakes, gratins, toasts, vegetables Gratins are bakes made from raw ingredients and grilled. Meal Ovenware Level Type of Temperature Cooking time heating in ºC, grill in minutes Sweet bake (e.g. quark soufflé with fruit) Ovenproof dish 170 190 45 55 Savoury bake made from cooked Ovenproof dish or 180 200... -
Page 53: Preserving
Preserving Setting procedure Insert the grill tray at level 1. Only use undamaged fruit and vegetables. Wash them Place the jars in the grill tray so that they are not thoroughly. touching. Do not preserve more than six jars of fruit or vegetables at Pour half a litre of hot water (approximately 80 ºC) into the same time. -
Page 54: Frozen Ready Made Meals
Frozen ready made meals The setting values in the table are valid for prebaked frozen ready made meals. Place your frozen ready made meal directly on the Warning: Never place greaseproof paper directly ceramic or on a baking tray which is placed directly on the ceramic. -
Page 55: Keeping Warm And Melting
Keeping warm and melting The open oven is best used for keeping meals in cookware with a lid on warm. The gentle heating will prevent the meal from overheating or drying out. When the oven is open, you can keep food warm, melt chocolate or butter or dissolve gelatine on the heated Melting times depend on the type and amount of food. -
Page 56: Acrylamide In Foodstuffs
Acrylamide in foodstuffs Experts are currently discussing how harmful acrylamide is in food. We have compiled this information for you, based on the results of current research. Which foods are affected? Acrylamide is mainly produced in grain and potato products heated at high temperatures, such as potato crisps, chips, toast, rolls, bread, baked goods made from shortcrust pastry (biscuits, gingerbread, cookies). -
Page 57: Test Dishes
Test dishes These tables were drawn up for the various institutes to Baking facilitate the testing of different ovens. The setting values apply to dishes placed in a cold oven. In accordance with DIN 44547 and EN 60350. Meal Accessories/tin Level Type of Tempera... - Page 58 Notes...
- Page 60 Gaggenau Hausgeräte GmbH Carl Wery Str. 34 81739 MÜNCHEN GERMANY www.gaggenau.com...
Need help?
Do you have a question about the BL 253 and is the answer not in the manual?
Questions and answers