Table of Contents
Advertisement
Quick Links
Advertisement
Table of Contents

Related Manuals for Gaggenau BOP 220/221 1.2


Summary of Contents for Gaggenau BOP 220/221 1.2
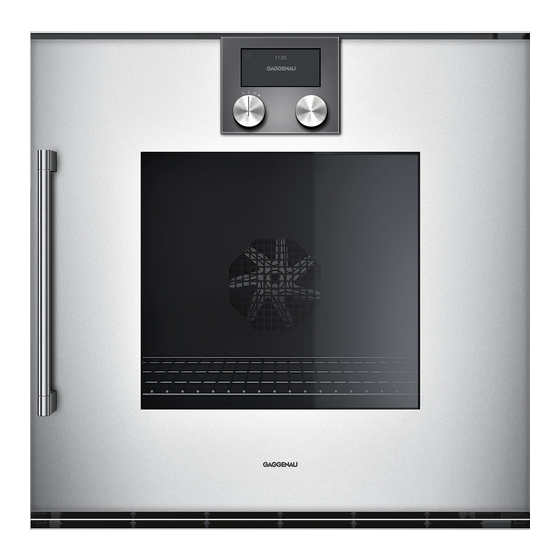
- Page 1 Instruction manual BOP 220/221 1.2 Oven...
-
Page 2: Table Of Contents
Acrylamide in foodstuffs L ong-term timer Setting the long-term timer Additional information on products, accessories, I ndividual recipes Ž replacement parts and services can be found at Recording a recipe www.gaggenau.com and in the online shop Programming a recipe www.gaggenau.com/zz/store Entering names... -
Page 3: I Ntended Use
Intended use I ntended use Always slide accessories into the cooking compartment correctly. See description of accessories in the instruction manual. R ead these instructions carefully. Only then I n t e n d e d u s e will you be able to operate your appliance safely and correctly. -
Page 4: I Mportant Safety Information
Important safety information I mportant safety information Warning – Risk of fire! Risk of burns! I m p o r t a n t s a f e t y i n f o r m a t i o n Bulbs become very hot when switched on. - Page 5 Important safety information Risk of electric shock! Warning – Risk of serious damage to Do not use any high-pressure cleaners or ▯ health! steam cleaners, which can result in an electric shock. The appliance will become very hot during the Risk of electric shock! pyrolytic cleaning cycle.
-
Page 6: C Auses Of Damage
Causes of damage C auses of damage E nvironmental protection C aution! T he sections below list a number of energy-saving tips C a u s e s o f d a m a g e E n v i r o n m e n t a l p r o t e c t i o n and provide information on disposing of your appliance. -
Page 7: F Amiliarising Yourself With Your Appliance
Familiarising yourself with your appliance F amiliarising yourself with your appliance U se this section to familiarise yourself with your new F a m i l i a r i s i n g y o u r s e l f w i t h y o u r a p p l i a n c e appliance. -
Page 8: Display And Operating Controls
Familiarising yourself with your appliance Display and operating controls Edit settings Enter name These instructions are valid for different versions of the Delete letters appliance. There may be minor differences depending on the appliance model. Child lock Call up timer menu All versions of the appliance are operated in an identical Call up long-term timer manner. -
Page 9: Standby
– Different things can be displayed in standby mode. be left ajar, as adjoining kitchen furniture may be The default setting is the GAGGENAU logo and the damaged. The cooling fan continues to run for a certain time. time after operation and then switches off automatically. -
Page 10: Function Selector Positions
Familiarising yourself with your appliance Function selector positions Position Function/type of heating Temperature Application "Off" position ž Light 50–300 °C Hot air: For cakes, biscuits and bakes on more than one level. Hot air Default temperature 170 °C The fan in the back wall of the oven distributes the heat evenly throughout the cooking compartment. -
Page 11: Accessories
Familiarising yourself with your appliance Accessories Special accessories Use only the accessories supplied with the product or You can order the following special accessories from available from the after-sales service. They are specially your specialist dealer: designed for your appliance. Ensure that you always BA 016 105 Pull-out system insert the accessories into the cooking compartment... -
Page 12: B Efore Using The Appliance For The First Time
Once the appliance has been connected to a power Setting the temperature unit supply, the GAGGENAU logo will appear first for approximately 30 seconds. The "Initial settings" The two possible units °C and °F will appear on the menu will then appear automatically. -
Page 13: O Perating The Appliance
Operating the appliance Switching on O perating the appliance Set the required heating mode using the function selector. The chosen heating mode and the default C ooking compartment temperature are displayed. O p e r a t i n g t h e a p p l i a n c e If you want to change the default temperature: Warning –... -
Page 14: T Imer Functions
Timer functions The timer menu closes and the time begins to count T imer functions down. The Š symbol and the countdown appear in the display. Y ou use the timer menu to make the following settings: T i m e r f u n c t i o n s Š... -
Page 15: Cooking Time
Timer functions The timer menu is closed and the timing begins. The Set the desired cooking time using the rotary symbol and the elapsed time are shown in the display. selector. Press I to start. Pausing and restarting the stopwatch The appliance starts. -
Page 16: End Of Cooking Time
Timer functions End of cooking time To change the cooking time end: Call up the timer menu. Use C to select the 5 "Cooking You can delay the cooking time end to a later time. time end" function. Set the desired cooking time end using the rotary selector. -
Page 17: L Ong-Term Timer
Long-term timer L ong-term timer I ndividual recipes Ž W ith the appliance in hot air mode, this function keeps I t is possible to save up to 50 individual recipes. You L o n g - t e r m t i m e r I n d i v i d u a l r e c i p e s the temperature between 50 and 230 °C. -
Page 18: Programming A Recipe
Individual recipes Programming a recipe Rotary selec- Select letters You can programme and save up to 5 preparation A new word always begins with a capital let- phases. ter. Press briefly: moves the cursor right Turn the function selector to the required type of heating. -
Page 19: Change Recipe
Childproof lock Change recipe C hildproof lock You can change the settings of a recorded or programmed recipe. T he appliance has a childproof lock to prevent children C h i l d p r o o f l o c k Turn the function selector to the any type of heating. -
Page 20: H Ome Connect
Home Connect Select the Home Connect app and install it on your H ome Connect mobile device. Launch the app and set up Home Connect access. The app will guide you through the registration T his appliance can be networked and controlled H o m e C o n n e c t process. -
Page 21: Remote Start
Home Connect Remote Start If the display shows "Network connection successful", the connection process is complete. Follow the Remote start must be activated in order to start and instructions in the app. operate your appliance via the Home Connect app. If remote start is deactivated, the Home Connect app will Connecting the appliance to the app only show the operating modes of the appliance and let... -
Page 22: Remote Diagnostics
A detailed RED Declaration of Conformity can be found Note: For further information and details about the online at www.gaggenau.com on the product page for availability of Remote Diagnostics in your country, appliance in the additional documents. -
Page 23: B Asic Settings
- Date + GAGGENAU logo desired display. - Clock + date The selection is displayed. - Clock + date + GAGGENAU logo Display Reduced*/Standard If the 'Reduced' setting has been selected, only the most important information will be shown on the display after a short time. - Page 24 Basic settings Date Current date Sets the date. You can switch between year/ month/day using the symbol C. Temperature unit °C* / °F Setting the temperature unit Weight unit kg*/oz. Set the weight unit Language German* / French [...] / English Select the language for the text display Note: The system will restart if the language is...
-
Page 25: C Leaning And Maintenance
Cleaning and maintenance Area Cleaning products C leaning and maintenance Stainless steel Hot soapy water: Clean using a dishcloth and then dry with a soft cloth. Remove splashes and patches of limescale, W ith thorough care and cleaning your appliance will C l e a n i n g a n d m a i n t e n a n c e grease, starch and albumin (e.g. -
Page 26: Removing The Insert Grids
Pyrolytic self-cleaning Removing the insert grids P yrolytic self-cleaning The insert grids can be removed for cleaning. Removing the insert grids Warning – Risk of fire! P y r o l y t i c s e l f - c l e a n i n g Place a dishcloth in the cooking compartment to Loose food residues, grease and meat juices may catch protect the enamel from scratches. -
Page 27: Starting The Pyrolytic Self-Cleaning Function
Pyrolytic self-cleaning Starting the pyrolytic self-cleaning Cleaning accessories with pyrolytic function self-cleaning Gaggenau baking trays and grill trays are coated with a Set the function selector to S. pyrolysis-resistant enamel. However, for an optimum œ ™ symbol is displayed. Press to confirm. -
Page 28: W Hat To Do In The Event Of A Fault
What to do in the event of a fault Warning – Risk of electric shock! W hat to do in the event of a fault Incorrect repairs are dangerous. Repairs may only be carried out and damaged power cables replaced by one of our trained after-sales technicians. -
Page 29: Replacing The Oven Light Bulb
After-sales service Replacing the oven light bulb A fter-sales service It is possible to replace the oven light. Heat-resistant halogen bulbs (60 W/230 V/G9) can be obtained from the after-sales service or from a specialist retailer. Only O ur after-sales service is there for you if your appliance A f t e r - s a l e s s e r v i c e use halogen bulbs of the same type. -
Page 30: T Ables And Tips
Tables and tips – Eco hot air: T ables and tips Energy-saving hot air mode for cakes, meat, bakes and gratins. Optimal use is made of the residual heat. Convenience functions remain switched off N otes (e.g. the interior lighting). The interior temperature T a b l e s a n d t i p s can only be displayed while the appliance is heating –... -
Page 31: Vegetables
Tables and tips Vegetables ▯ ▯ Oven-roasted or oven-baked vegetables are a good Mix them thoroughly at least once during the alternative to pan-fried vegetables. The different cooking process. Once they are cooked, season flavours become more concentrated and, because them and sprinkle them with fresh herbs to taste. -
Page 32: Side Dishes And Meals
Tables and tips Meal Accessory/ Level Tempera- Type of Cooking Comments ture heating time in °C (mins) Vegetable bake Ovenproof 2 (3) 20 - 30 Pre-cook/blanch vegetables and other dish ingredients. Veggie burgers, Baking tray 2 (3) 12 - 15* frozen + grease- proof paper Turn the food halfway through cooking. - Page 33 Tables and tips Meal Accessory/ Level Tempera- Type of Cooking Comments ture heating time in °C (mins) Goat's cheese Glass dish/ 2 (3) 8 - 10 Either goat's cream cheese or goat's cam- wrapped in bacon baking tray embert can be used. 3 (4) 8 - 10 Goat's cheese with...
-
Page 34: Fish
Tables and tips Meal Accessory/ Level Tempera- Type of Cooking Comments ture heating time in °C (mins) Pizza, pre-baked Baking tray 2 (3) 6 - 8 2 (3) 6 - 8 greaseproof paper Pizza, frozen Wire rack 2 (3) 11 - 13 2 (3) 11 - 13 American pizza Baking tray 2 (3) 20 - 24... -
Page 35: Meat
Tables and tips Meal Accessory/ Level Tempera- Type of Cooking Comments ture heating time in °C (mins) Tuna steak Baking tray 3 (4) 8 - 10 Recipe tip: Season Asian-style with soy sauce, sesame oil, ginger, honey, garlic, chilli and coriander seeds. Fish fingers, Baking tray 2 (3) - Page 36 Tables and tips Meal Accessory/ Level Tempera- Type of Cooking Comments ture heating time in °C (mins) Pork medallions Glass dish/ 2 (3) 12 - 15* Recipe tip: Just before you take them out grill tray the oven, add a knob of butter and a sprig of rosemary to the glass dish/grill tray and cook all together for a little longer in the oven.
- Page 37 Tables and tips Meal Accessory/ Level Tempera- Type of Cooking Comments ture heating time in °C (mins) Leg of lamb Glass dish/ 2 (3) 180 - 190 100* Recipe tip: Marinate overnight in a mixture – medium rare grill tray, of olive oil, garlic, rosemary and sliced roaster lemon.
-
Page 38: Poultry
Tables and tips Poultry ▯ ▯ Poultry will turn out particularly crispy and brown if Use a roasting dish or another heat-resistant baking you baste it towards the end of the roasting time dish or tin for dishes that involve adding a lot of with butter, salted water, drained fat or orange liquid to the roast. -
Page 39: Grilling And Roasting
Tables and tips Grilling and roasting ▯ ▯ Do not grill food with the oven door open. If you use wooden skewers, they may char. To prevent this, shorten them as far as possible, leave ▯ For grilling, use the grill tray with the wire insert them to soak in water overnight before skewering (depending on the model, this may be an accessory the ingredients or use metal skewers. -
Page 40: Baked Items
Tables and tips Dish Accessories Level Recom- Type of Cooking Comments mended heating time tempera- (mins) ture in °C Croutons Baking tray 2 (3) Recipe tip: Mix fresh white bread with olive oil, garlic and rosemary leaves. Avoid using too much oil and wait until you are ready to serve before pouring it on;... - Page 41 Tables and tips Dish Accessories Level Tempera- Type of Cooking Comments ture heating time in °C (mins) Cakes Cheesecake Springform 1 (2) 160–165 70–75 cake tin 1 (2) 160–165 70–75 1 (2) 160–165 85–90 1 (2) 160–165 80–90 1 (2) 160–165 40–45 Low-cheese cheesecake with 50% quark mixture.
- Page 42 Tables and tips Dish Accessories Level Tempera- Type of Cooking Comments ture heating time in °C (mins) Water sponge cake 26 cm 160** 22–30 Preheat springform (in accordance with cake tin EN60350-1) 26 cm 160** 20–30 Preheat (Appliance width: springform 60 cm) cake tin Water sponge cake...
- Page 43 Tables and tips Dish Accessories Level Tempera- Type of Cooking Comments ture heating time in °C (mins) Brownies Baking tray 2 (3) Cut into squares or rectangles once baked. The low temperature means that the brown- greaseproof ies will stay gooey in the middle. paper 2 (3) 40–45...
- Page 44 Tables and tips Dish Accessories Level Tempera- Type of Cooking Comments ture heating time in °C (mins) Foccacia Baking tray 2 (3) 15–20 Top with various ingredients, e.g. herbs, sea salt, olives, anchovies, onion, ham, tomatoes greaseproof or cheese. paper Garlic/herb Baking tray 2 (3) 8–10...
-
Page 45: Desserts
Tables and tips Desserts ▯ ▯ Oven-cooked desserts are very easy to prepare – Oven-cooked desserts are generally eaten warm, you just have to put it in the oven. This preparation and are particularly enjoyable during the cooler method is useful for relatively large quantities, for months. -
Page 46: Disinfecting
Tables and tips Dish Accessories Level Temperature Heating Cooking Comments in °C function time in min. Fruit Wire rack 1 (2) 150 - 160 35 - 40 In sealed jars Vegetables Wire rack 1 (2) 190 - 200 60 - 120 In sealed jars Disinfecting ▯ ▯... -
Page 47: Acrylamide In Foodstuffs
Tables and tips Meal Accessory/ Level Tempera- Type of Cooking Comments ture heating time in °C (mins) Bread rolls, fresh Baking 250 / 200* 15 - 20 (50 g each) stone Flatbread Baking The cooking time depends on the size and stone thickness of the flatbread Foccacia Baking Top with various ingredients, e.g.
Need help?
Do you have a question about the BOP 220/221 1.2 and is the answer not in the manual?
Questions and answers