Table of Contents
Advertisement
Quick Links
Advertisement
Table of Contents

Subscribe to Our Youtube Channel
Related Manuals for Gaggenau BSP 250 610


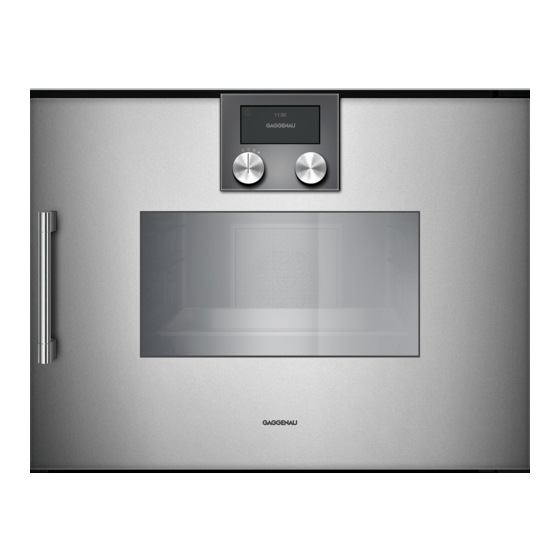
Summary of Contents for Gaggenau BSP 250 610
- Page 1 Gaggenau Use and care manual BSP 250 610 BSP 251 610 Combi-steam oven...
-
Page 2: Table Of Contents
Table of Contents U s e a n d c a r e m a n u a l Timer functions Safety Definitions Launching the timer menu Timer IMPORTANT SAFETY INSTRUCTIONS Stopwatch Proper Installation and Maintenance Cooking time Fire Safety End of cooking time Burn Prevention Child Safety... -
Page 3: Safety Definitions
Acrylamide in foodstuffs with this advisory. Note: This alerts you to important information and/or tips. Additional information on products, accessories, replacement parts and services can be found at and in the online shop www.gaggenau.com www.gaggenau.com/zz/store... -
Page 4: Important Safety Instructions
IMPORTANT SAFETY INSTRUCTIONS READ AND SAVE THESE INSTRUCTIONS IMPORTANT SAFEGUARDS I M P O R T A N T S A F E T Y I N S T R U C T I O N S R E A D A N D S A V E TH E S E I N S TR U C TI O N S WARNING Risk of burns To avoid risk of injury, turn off the interior light before... -
Page 5: Burn Prevention
IMPORTANT SAFETY INSTRUCTIONS READ AND SAVE THESE INSTRUCTIONS surfaces are oven vent openings, surfaces near these WARNING openings and oven doors. Use this appliance only for its intended use as Exercise caution when opening the appliance. Standing described in this manual. NEVER use this appliance as to the side, open the door (or drawer) slowly and slightly a space heater to heat or warm the room. -
Page 6: Child Safety
IMPORTANT SAFETY INSTRUCTIONS READ AND SAVE THESE INSTRUCTIONS WARNING CAUTION Risk of scalding Items of interest to children should not be stored in an Hot liquid may spill over the sides of cooking appliance, in cabinets above an appliance or on the accessories when they are removed from the oven backsplash. -
Page 7: Proposition 65 Warning
IMPORTANT SAFETY INSTRUCTIONS READ AND SAVE THESE INSTRUCTIONS When using Steam mode with a perforated cooking pan, always slide the baking pan underneath it. The pan will catch any drippings. The oven bottom and the evaporator dish must always remain clear. Always place ovenware on the rack or in the perforated cooking pan. -
Page 8: Causes Of Damage
▯ Do not hold or carry the appliance by the door Causes of Damage handle. The door handle cannot carry the weight of the device and could break off. NOTICES: ▯ Do not place anything directly on the oven floor. Do not line it with aluminum foil. -
Page 9: Getting To Know The Appliance
Getting to know the appliance You will get to know your new appliance here. We you. You are informed about the oven interior and explain the control panel and the individual controls to accessories. Combi-steam oven These instructions apply to different versions of the Operation is identical for all appliance versions. -
Page 10: Displays And Controls
Displays and controls “ Preheating with status display Launching personal recipes These instructions apply to different versions of the appliance. Slight deviations are possible depending on Recording a menu the appliance type. Edit settings Enter a name Operation is identical for all appliance versions. Delete letters Child lock Launching the timer menu... -
Page 11: Additional Information ( And )
Cooling fan Additional information Your appliance has a cooling fan. The cooling fan By touching the symbol, you can call up additional switches on during operation. Depending on the information. For example, information on the heating appliance version, the warm air escapes above or under function set or on the current temperature of the the door. -
Page 12: Accessories
Position Function/heating function Temperature Application 85 - 120° F (30 - 50°C) Raising: for yeast and sour dough. Default temperature 100° F The dough rises much faster than at room tempera- Dough proofing (38°C) ture. Hot air and steam are combined to ensure the dough surface does not dry out. -
Page 13: Special Accessories
Use the accessories only as indicated. The After connecting the power, first the GAGGENAU manufacturer assumes no liability for incorrect usage of logo appears for approx. 30 seconds, then the the accessories. -
Page 14: Setting The Time Format
Setting the time format Setting the date the two possible formats 24h and AM/PM appear in the The default date appears in the display. The day setting display. The default format is 24h. is already active. Set the required format with the rotary selector. Set the required day with the rotary selector. -
Page 15: Completing Initial Set-Up
™ Set the measured water hardness with the rotary Touch the symbol. selector. The value 12 is set by default. Select "Calibration" with the rotary selector. ™ Confirm with Touch the symbol. ™ Fill the water tank with cold water and touch the symbol. -
Page 16: Grease Filter
Notes ‒ There are various displays for the standby mode. The GAGGENAU logo and the time are set by default. Refer to the section entitled “Factory setting” if you would like to change the display. ‒... -
Page 17: Operating The Appliance
Oven interior Operating the appliance The oven interior has four insertion levels. These are counted from the bottom up. Filling the water tank Note: When steaming, thawing, fermenting and regenerating, you can use up to three insertion levels at When you open the appliance door, you see the water the same time (levels 2, 3 and 4). -
Page 18: Inserting Accessories
Inserting accessories After every use The rack and the perforated cooking receptacle feature a latching function. The latching function prevents tilting Empty water tank of accessories when pulling them out. You must insert Open the appliance door carefully. accessories in the cooking interior correctly so that tilt Hot steam can escape! protection will work. -
Page 19: Timer Functions
Start with Timer functions T i m e r f u n c t i o n s The timer menu closes and the time begins to count Š down. The symbol and the countdown appear in the In the timer menu, set: display. -
Page 20: Cooking Time
Cooking time Start it with The timer menu is closed and the time runs. The If you set a cooking time for your meal, the appliance symbol and the elapsing timer are shown in the display. switches off heating automatically after this time has elapsed. -
Page 21: End Of Cooking Time
The appliance switches off after expiration of the Start with cooking time. The pulsates and a signal sounds. It ™ goes off prematurely if you touch the symbol, open the appliance door or set the program selection to Changing the cooking time: Launch the timer menu. -
Page 22: Sabbath Mode And Yom Tov Mode
Start with Sabbath mode and Yom Tov mode The appliance starts. and the temperature appear in the display. The Sabbath screen will appear as shown. Sabbath mode With this function, the appliance maintains a temperature between 120 and 450°F (50 and 230°C) with the convection heating function. -
Page 23: Personal Recipes
The suggested value of 24h at 185° F (85°C) Personal recipes appears in the display. You can save up to 50 individual recipes. You can record a recipe. You can assign these recipes a name so that you can fall back on them quickly and conveniently if you need them. -
Page 24: Programming A Recipe
Entering a name Enter the core temperature for a phase: Insert the core temperature probe in the socket in the oven interior. Set the heating function and temperature. Enter the recipe's name under "ABC". Touch the symbol. With the rotary selector, enter the required temperature and confirm it with Programming a recipe You have the option of programming and saving up to... -
Page 25: Change Recipe
Notes Core temperature probe ‒ The cooking time does not start counting down until the appliance has reached the set temperature. ‒ You can use the rotary selector to change the The core temperature probe enables exact cooking to temperature while the recipe is in progress. This the spot. -
Page 26: Setting The Core Temperature
In the case of poultry, make sure that the tip of the core Notes temperature probe is not in the cavity in the center, but ‒ The measurable range is 59 to 210° F (15 to 99°C). in the meat between the belly and upper leg. Outside the measurable range, "--°F"... - Page 27 Food Core temperature Food Core temperature guideline guideline Meat loaf 185°F (85 °C) Saddle of lamb Fillet of pork 149 - 158°F medium 131 - 140°F (65 - 70 °C) (55 - 60 °C) well-done 149 - 167°F Veal (65 - 75 °C) Veal roast, well-done 167 - 176°F (75 - 80 °C) Mutton...
-
Page 28: Childproof Lock
Childproof lock C h i ld p r o o f lo c k The appliance has a panel lock to make sure children cannot operate it inadvertently. Notes ‒ You must set the child lock in the factory setting to "Available"... -
Page 29: Factory Setting
- Date + GAGGENAU logo rotary selector. - Clock + date The selection is displayed. - Clock + date + GAGGENAU logo Display screen Minimized*/Standard When ‘Minimized’ is set, only the most important details are displayed after a short time. - Page 30 Daylight savings Manual*/Automatic Automatic time changeover when changing day- light savings time. If automatic: setting of the month, day and week when the time is to be changed. To be set separately for summer and winter time. Date format D.M.Y* Setting the date format D/M/Y M/D/Y...
-
Page 31: Cleaning And Maintenance
▯ metal or glass scrapers to clean the glass on the Cleaning and maintenance appliance door. ▯ metal or glass scrapers to clean the door seal. If taken care of and cleaned conscientiously, your ▯ hard abrasive pads or cleaning sponges. appliance will stay beautiful and intact for a long time. -
Page 32: Cleaning Aid
Cleaning aid Area Cleaning agent Extremely soiled Oven cleaner gel (order number The cleaning aid loosens stubborn grime from the oven stainless steel or 00311860 from after-sales service or in interior and makes cleaning easy. enamel oven inte- the online shop). rior The cleaning aid consists of the steps of once cleaning Please note:... -
Page 33: Drying Program
A signal sounds after 20 minutes. A message 10 The second rinsing operation appears. Start with ™ appears in the display. Confirm with The appliance rinses. The rinsing time elapses on the display. The drying program has ended. Allow the appliance to A signal sounds after 1 minute. -
Page 34: Removing Slide-In Racks
Empty the evaporator tray with the cleaning sponge. Removing slide-in racks ™ Fill the water tank with cold water. Confirm with You can remove the slide-in racks for cleaning. The first rinsing operation appears. Start with The appliance rinses. The rinsing time elapses on Removing slide-in racks the display. -
Page 35: Troubleshooting
Troubleshooting You can often easily eliminate problems that may occur WARNING on your own. Before calling customer service, take into account the following information. Risk of electric shock Improper repairs are dangerous. Only an authorized servicer may perform repairs and may replace damaged plug and connections. -
Page 36: Power Cut
This could result in a service call For technical reasons, the lamp cover is not detachable. that instead of fixing a mechanical issue is only needed Only Gaggenau after-sales service may replace the for customer education. Such calls are not covered by lamp. -
Page 37: Tables And Tips
Tables and tips Notes perforated cooking insert in the first level from the bottom in order to avoid soiling the bottom of the ‒ The cooking times specified are intended as a cooking compartment and steamer tray more than guide. The actual cooking time depends on the necessary. -
Page 38: Fish
Foodstuff Cooking Temperature Humidity Cooking Remarks receptacle in ° F (°C) in % time in min. Vegetable terrine Perforated/ 212 (100) 50 - 60 In a terrine form rack Carrots, in slices Perforated 212 (100) 10 - 15 Potatoes, peeled and quar- Perforated 212 (100) 20 - 35 tered Kohlrabi, in slices... -
Page 39: Fish - Low-Temperature Steaming
Food Cooking Temperature Humidity Cooking Observations container in °F (°C) in % time in min. Atlantic salmon, whole perforated 195 - 212 18 - 20 (800 g / 1 lb 12 oz) (90 - 100) Monkfish filet Glass pan/ 355 - 390 8 - 10 In stock (300 g / 11 oz each) wire rack (180 - 200) -
Page 40: Meat - Cooking At Higher Temperatures
Meat – cooking at higher temperatures ▯ ▯ The combination of steam and hot air is the optimal If you are using the perforated cooking inserts or cooking process for many types of meat. The the wire rack, insert an unperforated cooking cooking compartment is hermetically sealed in this container underneath. -
Page 41: Meat/Poultry - Low-Temperature Cooking
Meat/poultry – low-temperature cooking ▯ ▯ Meat browned crisp needs to rest for a longer With game and horse meat, the flavor is stronger period at low temperature. This way, the meat gets with low-temperature cooking than with a classic evenly pink and extremely juicy but for a very thin preparation. -
Page 42: Poultry
Poultry ▯ ▯ The humidity for combination operation prevents The cooking times specified should be regarded as the drying out, which is essential with poultry. At guidelines and depend heavily on the initial the same time, thanks to the high temperature, the temperature of the food and the food cooked. -
Page 43: Desserts
Food Cooking Temperature Humidity Cooking Observations container in °F (°C) in % time in min. Lentils unperforated 212 (100) 25 - 35 (250 g + 500 ml of water/ 9 oz + 1 pint of water) White beans, pre-softened unperforated 212 (100) 55 - 65 (250 g + 1 l of water / 9 oz + 2 pint of water) Desserts... -
Page 44: Baked Goods
Baked goods ▯ Using the steam oven, you can always prepare your ‒ | Hot air + 60 - 100% humidity: baked items with the optimum humidity: Puff pastry and yeast-risen pastries become looser on the inside and crispy on the outside ‒... -
Page 45: Refreshing (Warming Up)
Foodstuff Cooking Temperature Humidity Cooking Remarks receptacle in °F (°C) in % time in min. Mixed cake Cake tin/ 320 - 345 50 - 60 springform, (160 - 175) rack Small cakes Unperforated 300 - 320 35 - 45 (150 - 160) Cookies Unperforated 300 - 320 25 - 30 (150 - 160) Tart... -
Page 46: Defrosting
Defrosting berries or bits of meat. Fish need not thaw fully. It suffices if the surface is soft enough to absorb the spices. ▯ In the steam oven you can gently and evenly thaw deep frozen foods faster than at room temperature. WARNING ▯... -
Page 47: Extracting Juice (Soft Fruits)
Food Cooking container Temperature Humidity Cooking Observations in °F (°C) in % time in min. Fruit, vegetables perforated 212 (100) 35 - 40 (in closed 0.75 l / ½ pint canning jars) Beans, peas perforated 212 (100) (in closed 0.75 l/ ½ pint canning jars) Extracting juice (soft fruits) ▯... -
Page 48: Preparing Bulky Food
Preparing bulky food ▯ For the preparation of bulky foods, you can also remove the side slide-in tray. ▯ To do this, loosen the knurled screws at the front of the slide-in tray and pull the tray out toward the front. - Page 52 Gaggenau BSH Home Appliance Corporation 1901 Main Street, Suite 600 Irvine, CA 92614 +1-877-442-4436 www.gaggenau.com/us © 2018 BSH Home Appliances Gaggenau Hausgeräte GmbH Carl-Wery-Straße 34 81739 München GERMANY...
Need help?
Do you have a question about the BSP 250 610 and is the answer not in the manual?
Questions and answers