Table of Contents
Advertisement
Quick Links
Advertisement
Table of Contents

Subscribe to Our Youtube Channel
Related Manuals for Gaggenau BO 270


Summary of Contents for Gaggenau BO 270
- Page 1 Gaggenau Instruction Manual Oven BO 270/271 BO 280/281...
-
Page 3: Table Of Contents
Table of Contents Safety Notes Tips and Tricks Before Use Baking Intended Use Further Tips for Baking Safety while Baking Rising Dough (Fermenting) Pyrolysis (Self Cleaning) Tips for Roasting and Grilling Damage to the Appliance Defrosting Operating for the First Time Timer Calling up the Timer Menu Avoiding Damage to the Appliance and the... -
Page 4: Safety Notes
Safety Notes Warning! Hot steam can escape when opening the Before Use oven door. The appliance is only guaranteed safe to use if Warning, risk of burns! The inside of the door gets installed by a specialist in accordance with the very hot during operation;... -
Page 5: Operating For The First Time
Operating for the First Time Avoiding Damage to the Appliance and the Cabinet Remove the packaging from the appliance and Oven dispose of it according to local regulations. Remove fruit acids such as the juice of lemons or Be careful to remove all accessories from the plums etc. -
Page 6: Features Of Your New Oven
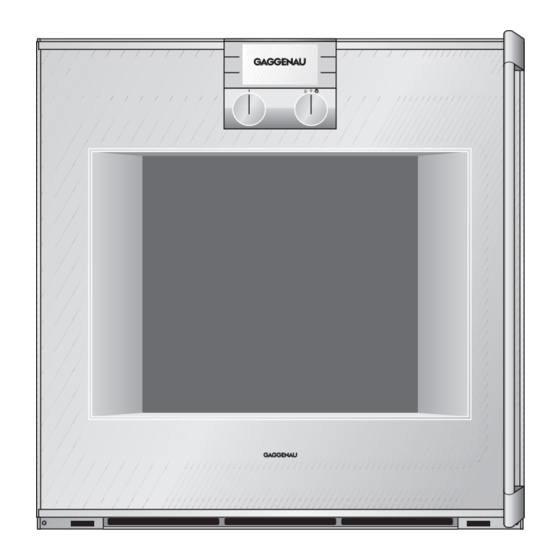
Features of your New Oven Oven Display and controls This manual applies to different models. The pictures show the model BO 270/271. The operation is identical for all models. Ventilation openings Rotary spit Door seal connector Socket for heating element... -
Page 7: Display And Controls
Display and Controls Display Touch keys In the top part of the display The keys on the left and is the status bar or a call up right beside the display menu. The lower part shows are touch sensitive. The the different settings. -
Page 8: Accessories
• Baking tray for cakes, biscuits and pastries • Grilling tray for roasts or as a grease collecting tray • Models BO 270/271 only: Glass tray for gratins and fruit cake • Meat probe • Rotary spit with support frame You can order the following special accessories: •... -
Page 9: Heating Modes
Heating Modes Display Heating mode Hot air For cakes, biscuits and puff pastry on several levels Economy Energy saving hot air mode for cakes, (the oven light is off) small pastries or gratins Hot air and 1/3 bottom heat Additional reduced heat from beneath. Hot air and bottom heat Additional heat from beneath for moist cakes, for example fruit cakes... -
Page 10: First Settings After Installation
First Settings after Installation When your new oven has been connected, the first settings menu appears on the display. You can set the • time format, • language, • clock, • date, • temperature unit. Note The first settings menu appears only after the appliance has been connected or if the appliance is without electricity for several days. -
Page 11: Setting The Date
Setting the Date Using the menu key select the date function 26.10.07 appears on the screen. Using the keys enter day, month, year. 10 07 Use the arrow key bottom right to change from day/month/year. Temperature Unit °C or °F Using the menu key select the temperature unit function... -
Page 12: Activating The Oven
The keys are not activated. The display is not lit. Note: 13:30 You can choose between different standby screens. GAGGENAU and the clock is pre-selected. Refer to the chapter basic settings if you want to change the standby screen. Note: The display contrast depends on the vertical viewing angle. -
Page 13: Setting The Oven
Setting the Oven The main operations of your oven are easily set using the knobs. Using the right knob you can set the temperature. To switch on the light in the oven, turn the temperature knob one position to the right. The temperature range is 50 - 300 °C. -
Page 14: Meat Probe
Meat Probe The meat probe enables you to cook your meat exactly as you want it. Using the meat probe, during the cooking process you can measure the core temperature of the interior of the food you are preparing exactly between 1 °C and 99 °C. -
Page 15: Note
Note Recommended Temperature Values Pull the meat probe from the socket if you want to Beef end the programming. Roast beef / fillet of beef / entrecôte blood rare 45-47 °C If you program meat probe and timer simultaneously, rare 50-52 °C the program that reaches the entered value first will medium-rare... -
Page 16: Rotary Spit
Rotary Spit Use the rotary spit to grill large roasts or poultry. Grilling with the rotary spit produces a crispy crust and even browning all-round. You can use the rotary spit in all heating modes. You get the best results in the grill or top heat modes. -
Page 17: Switching Off The Rotary Spit
Switching off the Rotary Spit Touch the key until the symbol goes off. Switch off the oven by the temperature selector. Warning, risk of burns! Use an oven glove to take out the grilling tray with the rotary spit. Place it on a stable, heat-resistant surface. Screw the handle on to the side of the spit to take it off. -
Page 18: Baking Table
Baking Table Cakes and biscuits Level from Hot air Economy Hot air and Top and Baking below bottom heat bottom heat time Temp. °C Temp. °C Temp. °C Temp. °C Min. Swiss roll Flan base 165-175 30-35 Fruit flan on yeast dough 165-175 40-45 Fruit flan on short-crust pastry 2... -
Page 19: Roasting Table
Roasting Table Dish Level from Hot air Grill and Top and Cooking Meat below hot air bottom heat time probe Temp. °C Temp. °C Temp. °C Minutes temp. °C Beef Roast beef 1,5 kg* 60-90 Roast beef rare 1,5 kg** 230/180 230/180 45-50... - Page 20 Roasting Table Dish Level from Hot air Grill and Top and Cooking Meat below hot air bottom heat time probe Temp. °C Temp. °C Temp. °C Minutes temp. °C Venison Roast boar* 170-180 60-90 Leg of venison* 170-180 60-80 75-80 Saddle of venison 165-175 170-180...
-
Page 21: Grilling Table
Grilling Table Dish Level from No Temp. Grill Grill and hot air Cooking below pre- °C Minutes Minutes Time heat 1.side 2.side 1.side 2.side Minutes Sliced pork belly 180-200 Kebab Fried sausage Merguez (grilled sausage) Roast chicken* Leg of chicken 30-40 Spare Ribs 180-200... -
Page 22: Tips And Tricks
Tips and Tricks Baking What to do if… The solution …a cake baked in a tray is too light at the bottom? Insert the tray on a lower level and remove all other trays from the oven. …a cake baked in a form is too light at the bottom? Do not insert the baking form in the oven on the tray, but on the wire rack. -
Page 23: Further Tips For Baking
Poultry becomes particularly crispy brown if you Further Tips for Baking coat it with butter, salt water, dripped-off fat or You are advised to use dark metal baking forms. orange juice. You may also use light baking forms in the hot air For roasting use the wire rack that fits the grilling mode. -
Page 24: Timer
Timer Using the timer menu you can set the following: timer stopwatch cooking time duration (not during stand-by) cooking time end (not during stand-by) Calling up the Timer Menu Touch the key beside the symbol to call up the timer menu. If the appliance is on standby, touch any key. -
Page 25: Stopwatch
Stopwatch The stopwatch will count the elapsed time up to 90 minutes. The pause function pauses the stopwatch. The stopwatch runs independently of all other settings of the appliance. Starting the Stopwatch Call up the timer menu. Using select the stopwatch function Start using the key. -
Page 26: Cooking Time Duration
Cooking Time Duration If you set a cooking time duration for your meal, the appliance switches off automatically after the selected time. This enables you to leave the kitchen while the meal is being prepared. You can select a cooking time between 1 minute and 23 hours 59 minutes. -
Page 27: Cooking Time End
Cooking Time End You can program a cooking time end. Example: it is 13:30. The meal will take 40 minutes to cook and must be ready at 15:30. Set the cooking time duration and set the cooking time end to 15:30. The electronics will calculate the start time. -
Page 28: Extended Timer
Extended Timer This function keeps the oven at a temperature of 85 °C in the top and bottom heat mode. You can keep food warm 24 to 74 hours, without switching the oven on or off. Please note that food which can easily go off should not stay in the oven too long. -
Page 29: Memory Recipes
Memory Recipes Using the memory recipes, you can store the settings for a meal and call them up at any time. It is possible to store six memory recipes. You may set and store a total of five different steps for a meal. -
Page 30: Starting A Memory Recipe
Starting a Memory Recipe Turn the temperature knob one position to the left. Turn the function knob two positions to the left 02:30 00:30 00:30 02:30 00:30 to “memory recipes”. 200 c 80 c 180 c 200 c 80 c Use the menu keys to select the desired recipe slot. -
Page 31: Child Lock
Child Lock The oven has a child lock. It prevents the oven being turned on unintentionally. Supposition: You have to make the child lock available in the basic settings. See chapter basic settings. Activating the Child Lock Supposition: The temperature knob is in the OFF position. Touch any key. -
Page 32: Additional Functions
Additional Functions Safety Deactivation For your protection the appliance has a safety deactivation. The safety deactivation switches off 13:30 the heat if the oven is left on for more than 12 hours without the controls being touched. Three dashes appear on the display. Switch the temperature knob off. -
Page 33: Changing The Basic Settings
Changing the Basic Settings Your appliance has several basic settings. You can customize these settings: Turn the temperature knob one position to the right to the light position. • Call up the basic settings menu with the key. • Use the top keys to move between the settings. -
Page 34: The Following Settings Can Be Changed
• In 8 levels The display contrast depends on the viewing angle. Standby screen • Gaggenau / Gaggenau with clock / clock and date / clock / empty display The selected screen appears briefly. Extended timer • Extended timer key not available / available Reset all parameters to the factory setting •... - Page 35 Exhibition mode The setting “exhibition mode not active” must be selected and must not be changed. The appliance does not heat up during exhibition mode You can only change this setting 3 minutes after the appliance has been connected to the electricity. Temperature unit •...
-
Page 36: Care And Manual Cleaning
Care and Manual Cleaning Safety Notes Cleaning the Door Seal Warning! Do not clean the hob using high Always keep the door seal clean and free of food pressure cleaners or steam jets. remains. Warning, risk of burns! Before cleaning, wait Do not use aggressive cleaning agents (e.g. -
Page 37: Pyrolysis
Pyrolysis Warning, risk of burns! Very high temperatures occur during the pyrolysis! Keep chidren away! During the pyrolytic self cleaning the oven is heated to 485 °C. Any food residues from baking, roasting and grilling are reduced to ash. The duration of the pyrolysis is 3 hours. For your safety the oven door remains locked. -
Page 38: Delaying The Switch-Off Time
Delaying the Switch-off Time If you want the pyrolysis to run at a later time (for example during the night), you can change the switch-off time. In this way you can use your oven during the day as usual. 16:30 Make the settings as described in 1 and 2. -
Page 39: Cleaning Accessories With Pyrolysis
Cleaning Accessories with Pyrolysis Gaggenau baking trays and grilling trays are coated with pyrolysis-proof enamel. To arrive at an optimum cleaning result, you are advised to remove all accessories from the oven before the pyrolytic cleaning process. Only this will ensure optimum heat distribution. -
Page 40: Trouble Shooting
Trouble Shooting In case of a malfunction first check the household fuses. If the power supply is functioning correctly contact your dealer or Gaggenau after-sales service. Please specify the E number and FD number of the appliance when calling our after-sales service. You find these numbers on the rating plate of the appliance. -
Page 41: Power Cut
Power Cut The appliance bridges a power cut of up to 5 minutes. The operation continues. 13:30 After a longer power cut the appliance will switch off the operation. The symbol appears on the display and three dashes instead of the temperature. -
Page 42: Replacing The Oven Lights
Make sure that the pins are in the correct position. Note: Only use a heat-resistant halogen bulb of the same type (BO 270: 60 W, BO 280: 75 W / 230 V / G9). Do not touch the halogen lamp with your hands. Use a dry cloth. - Page 44 Gaggenau Hausgeräte GmbH Carl-Wery-Straße 34 D-81739 München www.gaggenau.com...
Need help?
Do you have a question about the BO 270 and is the answer not in the manual?
Questions and answers