Table of Contents
Advertisement
Quick Links
Advertisement
Table of Contents

Related Manuals for Biosan BioMagPure 12 Plus


Summary of Contents for Biosan BioMagPure 12 Plus
- Page 1 Edition v1.6.3...
- Page 2 Page 2 V1.6.3...
-
Page 3: Table Of Contents
Getting started ......................12 Cleaning and maintainance ..................16 Troubleshooting ......................17 Specifications ......................19 Replacement/Optional Parts ..................19 Product Guarantees ....................20 About services ......................20 Notes for Transporting/Shipping .................. 20 Instrument transportation insert before transport ............21 www.biosan.lv Page 3 V1.6.3... -
Page 4: Introduction
Introduction Thank you for purchase of the BioMagPure 12 Plus system, which is a fully automated, standalone robot that can purify nucleic acids within 30-45 minutes. With advanced magnetic bead separation technology, it enables you to have high quality extraction results. Moreover, the most user- friendly interface makes users free from troublesome parameter settings and maintenance. -
Page 5: Safety Information
Doing so may cause fire or electric shock. Do not place or drop objects on the BioMagPure 12 Plus system. Also, refrain from bumping or knocking it, as doing so may cause a failure or malfunction of the BioMagPure 12 Plus sys- tem. - Page 6 If any liquid materials are left inside the device, wipe it up a soft paper tissue, etc. Otherwise, the BioMagPure 12 Plus system may be damaged. Repairs to the BioMagPure 12 Plus system should only be performed by such agencies as are specifically authorized by the ZINEXTS LIFE SCIENCE CORPORATION.
-
Page 7: Installation
Installation 3.1. Composition of the BioMagPure 12 Plus system. Check that the following are included in the package. Contact your local representative if you notice any missing part(s). A. BioMagPure Instrument..................... 1 B. Power Cable ......................1 C. Sample Tube Rack ....................2 D. - Page 8 3.4. Operating Environment / Condition. Use the BioMagPure 12 Plus system in a location that meets the following conditions: The space for the allocation of the BioMagPure 12 Plus system must be remained 5-10 cm from instrument to sidewalls.
- Page 9 Improper handling of the movement of the BioMagPure 12 Plus system will lead to instrument damages. 3.6.2. For correct and safe use of the BioMagPure 12 Plus, install it in a location that is close to electrical outlet and has enough space for installation and operation of the mains switch.
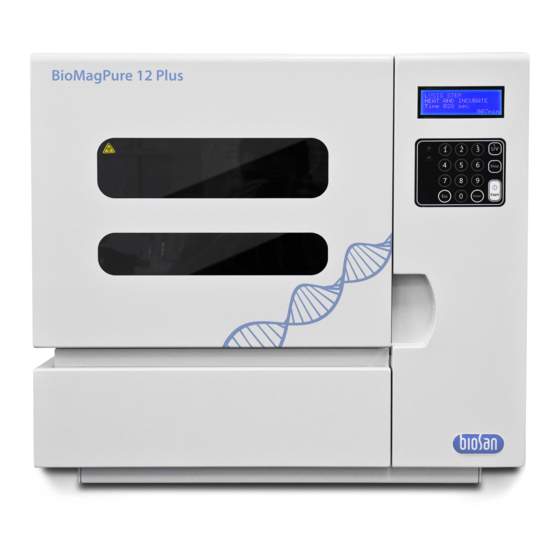
- Page 10 3.6.5.2 Turn the power switch on. 3.6.5.3 Press “START” button. The piston module will going up, and you can release the transportation insert. 3.7. Overall View Front view with Door closed Front view with Door opened www.biosan.lv Page 10 V1.6.3...
- Page 11 LCM Panel and Control Pad Control pad, close view LCM displays information of operation instruction guide and program process status. Control pad is used for selection of functions and input of program and test codes. Rear panel www.biosan.lv Page 11 V1.6.3...
-
Page 12: Getting Started
4.3.4. Load Reagent Cartridges, and all plastics disposables (Reaction Chamber, Tip Holder, Pierc- ing Pin, Filtered Tip and Sample Tube and Elute Tube. (Optionally supplied with some kit types). To pull apart reagent cartridges, slash open the dotted line with cutter. Divide the cartridges Insert the cartridges www.biosan.lv Page 12 V1.6.3... - Page 13 Make sure that Cartridges are inserted in to the Cartridge Tray tightly. You can load 1-12 cartridges on the tray depending on the number of samples that you wish to process. www.biosan.lv Page 13 V1.6.3...
- Page 14 LCM screen after pro- tocol barcode is scanned. 4.3.10. Follow the instructions displayed on LCM screen to double check the operating steps being completed before program running. www.biosan.lv Page 14 V1.6.3...
- Page 15 4.4.1. Take out the Elute Tubes (The extraction yields in them). Note. You can apply quality checking or do downstream study or storage them as what you expect. 4.4.2. Remove the Cartridges and plastic disposables from the instrument and then dispose of them. www.biosan.lv Page 15 V1.6.3...
-
Page 16: Cleaning And Maintainance
Clean the instrument body by removing dust gently with a dry, soft cloth. If the outside of the BioMagPure 12 Plus system is heavily soiled, or if any samples that may cause infection are adhered to the outside of the BioMagPure 12 Plus system, wipe with a soft paper tissue, soaked with 0.5% sodium hypochlorite solution or ethanol. -
Page 17: Troubleshooting
Sample Tube, Elute Tube) incorrectly Protocol stops after an manual. loaded on the BioMagPure 12 Plus Note. You could not resume the protocol after stop and initial start system you may lose your samples. - Page 18 Aliquot purified DNA and store at 4°C (short-term) or - Purified DNA repeatedly frozen and graded 20°C (long-term). Avoid repeated freezing and thawing. thawed Maintain a sterile environment while working (i.e. wear DNA contaminated with DNases gloves and use Dnase-free reagents). www.biosan.lv Page 18 V1.6.3...
-
Page 19: Specifications
+15°C to +40°C in a non-condensing atmosphere and maximum relative humidity 80% for temperatures up to 31°C decreasing linearly to 50% relative humidity at 40°C. Biosan is committed to a continuous programme of improvement and reserves the right to alter design and specifications of the equipment without additional notice. -
Page 20: Product Guarantees
Notes for Transporting/Shipping 11.1. Before carrying the BioMagPure 12 Plus system, disconnect the plug from the outlet. If the power cable is damaged, this may cause a device failure, fire, injury, or electric shock. 11.2. -
Page 21: Instrument Transportation Insert Before Transport
Press 3 to choose FIXING 12.4. Open the front door of the unit. Put the transportation insert on the cartridge plate and close the door. 12.5. Lock the X-axis with 4 mm hex tool as shown below www.biosan.lv Page 21 V1.6.3... - Page 22 Biosan SIA Ratsupites 7, build.2, Riga, LV-1067, Latvia Phone: +371 67426137 Fax: +371 67428101 http://www.biosan.lv...
Need help?
Do you have a question about the BioMagPure 12 Plus and is the answer not in the manual?
Questions and answers