Table of Contents
Advertisement
Quick Links
Advertisement
Table of Contents

Related Manuals for Atmos Multi Series


Summary of Contents for Atmos Multi Series
- Page 1 ATMOS MULTI version 2002 Page 1...
- Page 2 ATMOS MULTI version 2002 Page 2...
-
Page 3: Table Of Contents
Connecting the c/heating § Connecting the mains water § Connecting the discharge pipes § Connecting the domestic hot water § Connecting the gas supply § Connecting the condensate siphon § Connecting the electrical supply ATMOS MULTI version 2002 Page 3... -
Page 4: Introduction
Introduction The Atmos Multi gas fired storage combination boiler The Atmos Multi must be installed in accordance with that meets the requirements of Statutory Instrument these instructions and the regulations currently in 'The Boiler (Efficiency) Regulations' and is deemed to force. -
Page 5: Installation Regulation
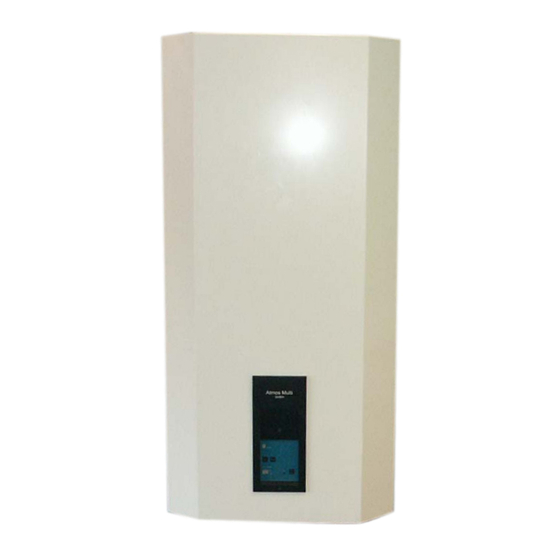
2. General Information. 1. Installation Regulations. 2.1 The Atmos Multi is a wall mounted, fully automatic gas 1.1 A qualified registered installer in accordance with fired condensing combination boiler designed to provide the Gas Safety (Installation and Use) Regulations; 'unvented' domestic hot water at mains pressure via an October 1994 must only install this appliance. -
Page 7: Technical Data
Condensate discharge drain connection 32 mm Underfloor heating flow connection ½" BSPF DIMENSIONS AND WEIGHT Height 1080 mm Width 525 mm Depth 495 mm Minimum distance above floor 600 mm Weight empty 70 kg Weight full 150kg ATMOS MULTI version 2002 Page 7... - Page 8 ATMOS MULTI version 2002 Page 8...
- Page 9 ATMOS MULTI version 2002 Page 9...
-
Page 10: Operation And
5. Operation and construction The Atmos Multi is a fully automatic, gas fired, high efficiency central heating boiler providing unvented domestic hot water at mains pressure via an integral 80 litre copper hot water storage tank. -
Page 11: Operating Principle
180 minute period with no heat demand, cycling period may be changed via the control the burner will operate on a low heat input for 3 panel to 6 minutes or alternatively, switched minutes, thereafter it is self adjusting. off. ATMOS MULTI version 2002 Page 11... -
Page 12: Controls And Function
The procedure to seconds before activation occurs. Further follow is given in Section 12 of these instructions information on this subject can be found in the separately available Atmos Multi Service Manual. ATMOS MULTI version 2002 Page 12... -
Page 13: User's Programme
Further information on setting operation perimeters hot water temperature may be desirable. is given in the Atmos Multi Service Manual. The Atmos Multi in-built user's programme 6. Installation Requirements. allows the user or installer to tailor suit certain... -
Page 14: Flue System
BS5440:1. Depending upon the boiler location and flue configuration required, two Horizontal flue gas discharge pipe different flue systems are available for use with the Atmos Multi boiler: runs must always be installed with a minimum 0·5% incline 125/80mm concentric system for use on vertical roof systems up to towards the point of termination. -
Page 15: Condensate Disposal
6.5 Condensate disposal. Provisions must be made for the safe disposal of condensate produced when the Atmos Multi is in operation. The condensate drainage pipework must be run in an acid resistant material such as plastic waste pipe. Copper or steel pipe must not be used. -
Page 16: Discharge Pipes
Atmos Multi boiler must be located in to detect any occurrence of discharge. the same space. The tundish must also be within 500mm of the combined temperature &... - Page 17 = 4m Therefore the maximum permitted Subtract the resistance for 4 No. 22mm elbows at length equates to 14m.As the actual length is 7m a 0.8m each =3.2m 28mm (D2) copper pipe will be satisfactory. ATMOS MULTI version 2002 Page 17...
-
Page 18: Existing Systems
Where a cleaning agent is used for this purpose only Sentinel X400 is recommended. Atmos Heating Systems do not recommend the any other cleaning agent. The use of non-recommended cleaning agents will invalidate the boiler's guarantee. -
Page 19: Minimum Clearances
750mm below and 100mm to either side of the boiler case is required. (fig. 9 & fig 10) 7.3 Boiler location. The Atmos Multi is not suitable for external installations. While the appliance itself is provided with integral frost protection it must however, be installed in a Figure 9: Dimensions &... -
Page 20: Wall Mounting The Boiler
Warning : The fixings supplied are suitable only for brick or solid block walls. When full the Atmos Multi weighs 150kg and must not be fitted directly onto walls with low load bearing capacities. ATMOS MULTI version 2002... -
Page 21: Connecting The Flue System
6.3 & 6.4 of these instructions. Figure 12: Twin pipe joint The flue and air duct supplied by Atmos Heating Systems are an integral part of the boiler and care must be taken on their installation to ensure that all joints are airtight and correctly made. - Page 22 Connection of the Atmos Multi to a heating system containing non-diffusion barrier oxygen permeable Figure 14: Boiler flow & return connections. plastic pipe or class 'H' plastic pipe will invalidate the boilers guarantee.
- Page 23 A sealed system 'Robokit' is supplied with each Atmos Multi boiler. Expansion vessels are available in 8,12 or 18 litre sizes with the Robokit, and are coloured RED. Table 5 provides guidance to the size of expansion vessel required for systems fitted with steel panel radiators in a two-storey house.
-
Page 24: Connecting The Mains Water
If this facility is 7.7.Connecting the mains cold water. not required, the branch may be blanked off using Each Atmos Multi boiler is supplied with a mains the blanking plug provided. pressure kit comprising the following components: Locate and fit the supplied ¼"... -
Page 25: Connecting The Discharge Pipes
Figure 20: Hot water connections. Connect the boiler's integral temperature & pressure relief valve discharge outlet and the discharge outlet of the 6 bar pressure relief valve fitted to the UV3 manifold, by means of a 15mm ATMOS MULTI version 2002 Page 25... -
Page 26: Connecting The Gas Supply
If the secondary return loop has a volume in excess of 1 litre, a larger potable expansion vessel Figure 21: Gas inlet connection should be used. Contact Atmos Heating Systems for further advice. A non-return valve must be fitted to the return loop to prevent the back flow of cold water to the hot water taps. -
Page 27: Connecting The Condensate Siphon
Figure 22: Condensate connection. 7.12. Connecting the mains electricity. Warning! The electrical wiring of the Atmos Multi is complete and must not be changed or adapted in any All electrical connections to the mains supply must be made in full accordance with the current I.E.E. - Page 28 Where a 'wireless' room thermostat is employed consult the thermostat's manufacturer instructions for installation. Important Note! A wiring diagram of the Atmos Multi is given as Under no circumstances must any electrical figure 24. power be input to the room thermostat terminals.
-
Page 29: Commissioning
8. Commissioning. the commissioning procedure. Note: We include Benchmark Logbooks with ATMOS MULTI version 2002 Page 29... -
Page 30: Filling The Heating System
8.1 Filling the heating system. Warning! The Atmos Multi must not be operated in a waterless condition. On completion of the boiler installation and ensuring that all water connections are correctly made and tight, the boiler may be filled with clean water by fitting the supplied filling hose and opening the two Robokit manual filling valves. -
Page 31: Filling The Domestic Hot Water
'Auto' position. Where required Sentinal X100 may be added to the system water in accordance to its manufacturer instructions. Atmos Heating Systems do not recommend the use of any other inhibitor or additive. The use of a non-recommended inhibitor or additive will invalidate the boiler's guarantee. -
Page 32: System Balancing
• 15ºC (status report Code 3 the separately available Atmos Multi Service Manual or contact Atmos Heating Systems. Note! If air is still present in the gas supply, the boiler's burner may attempt to ignite once or several Set the room thermostat to its minimum setting. -
Page 33: System Shutdown
The required water flow rate through the appliance frost. The boiler's built-in frost protection facility is 0·8 m³/h and 1·2 m³/h for the Atmos Multi 24 and will only safeguard the appliance itself. 32 models respectively. The maximum permis sible system resistance to enable the boiler pump to achieve these flow rates is 3·1m and 2·1m... -
Page 34: Boiler Pre-Service Inspection
If the differences between the If the flame picture is correct there is no need to two values are considerable, consult the Atmos measure the O or CO concentration of the flue gas Multi Service Manual or contact Atmos Heating and point 2 of the inspection can be left aside. -
Page 35: Auxiliary Equipment
The ionisation flow of the burner can be read off via manifold. Check the gauze filter and clean or replace the Service Programme of the control unit. Consult as necessary. the Atmos Multi Service Manual for the access procedure Service Programme. -
Page 36: Servicing The Boiler
Figure 33: Removing burner assembly. condensate trap. (fig 31) Remove the flue baffle by turning its base locking 'T' bar through 90º. Inspect the outlet casting and baffle, cleaning where necessary. ATMOS MULTI version 2002 Page 36... - Page 37 A purpose made heat exchanger cleaning brush (article number 93.98.12.410) is available on request from Atmos Heating Systems. Re-assemble the boiler, fitting the burner assembly, flue baffle and outlet casting in reverse order to dismantling. Ensure all components are correctly sealed and located.
-
Page 38: Completion
38) Fit replacement gas valve in reverse order. connection. Figure 36 Release the four nuts securing the fan to the burner manifold using a 7mm socket. (fig 39) Fit replacement fan in reverse order. Figure 39. Figure 37 ATMOS MULTI version 2002 Page 38... - Page 39 Ignition electrode. Detach the ignition electrode from burner manifold by releasing the two cross- headed fixing screws. (fig 41) Fit the new electrode in reverse order checking that the electrode's ATMOS MULTI version 2002 Page 39...
- Page 40 11.7 Hot water temperature sensor. Figure 45 Disconnect the sensor's electrical connections and unscrew the hot water temperature sensor from its fitting using an 8mm spanner .(fig 44). Fit the replacement sensor in reverse order. ATMOS MULTI version 2002 Page 40...
- Page 41 Fit replacement valve in reverse order using a sealant suitable for potable water. Figure 49 Figure 47 11.13. Hot water tank. Disconnect and remove the following boiler components: Gas valve Fan/burner assembly High limit thermostat ATMOS MULTI version 2002 Page 41...
-
Page 42: Malfunctions
Figure 50 A malfunction can be caused by the failure of the central heating installation or appliance to function correctly. The Atmos Multi has three types of malfunctions that can be reported via the diagnostic display, being.: § Warning report §... - Page 43 On resolving a malfunction press the reset button once. If the appliance does not unlock, press the reset button again after approximately 15 seconds. If the malfunction persists, consult the Atmo s Multi Service Manual ATMOS MULTI version 2002 Page 43...
Need help?
Do you have a question about the Multi Series and is the answer not in the manual?
Questions and answers